1. Introduction et plusview
This manual provides instructions for the assembly, operation, and maintenance of your Garvee Kitchen Island with Power Outlet and two accompanying Bar Stools. This versatile furniture piece is designed to enhance your kitchen, dining room, living room, or apartment space, functioning as a kitchen island, bakers rack, microwave stand, or coffee bar table.
The unit features a spacious tabletop, a drawer basket, three open shelves, and five S-shaped hooks for organized storage. It also includes a built-in power hub with AC outlets and USB ports for convenient device charging and appliance use.
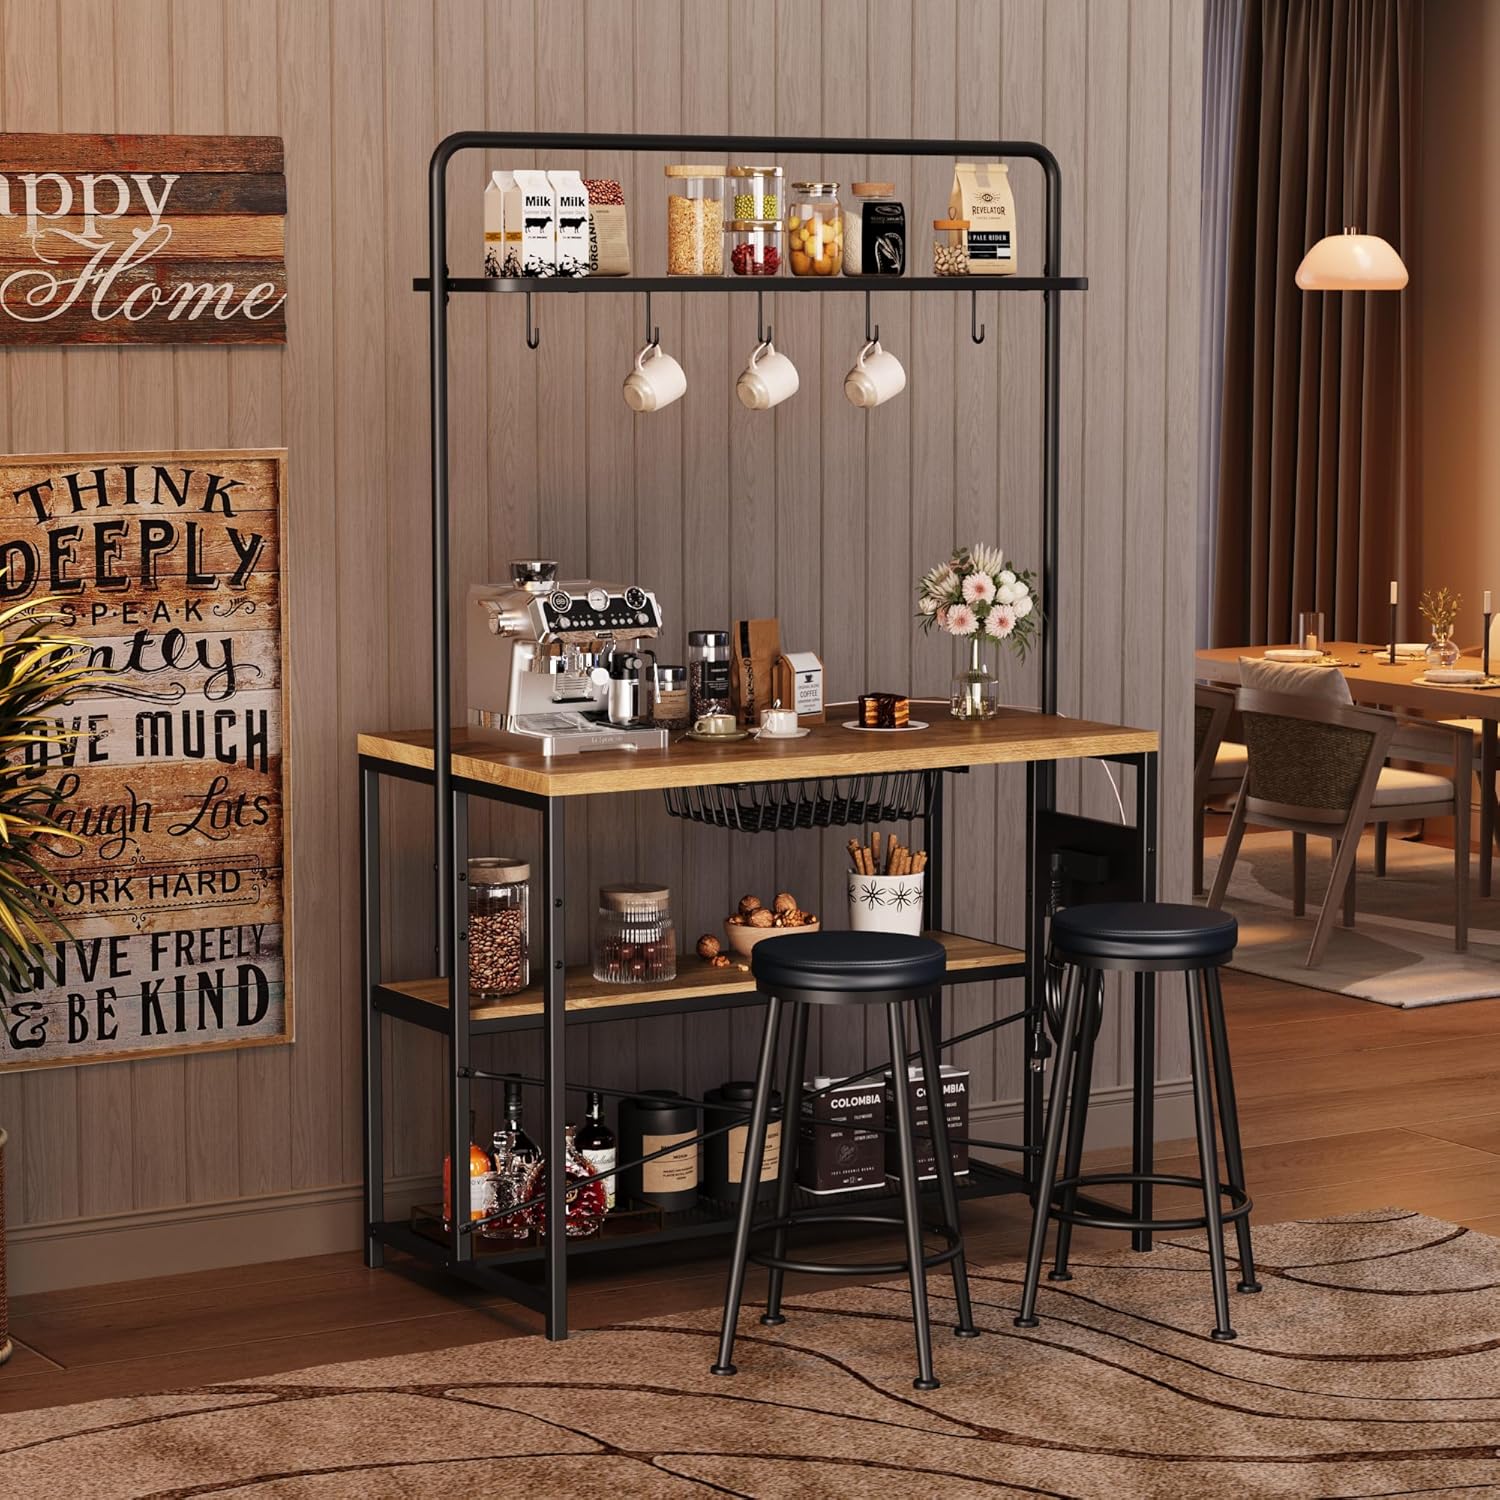
Image 1.1: The Garvee Kitchen Island with Power Outlet and 2 Bar Stools in a home setting.
2. Consignes de sécurité
- Lisez attentivement toutes les instructions avant le montage et l'utilisation.
- Conservez toutes les petites pièces et les matériaux d'emballage hors de portée des enfants et des animaux domestiques afin de prévenir tout risque d'étouffement.
- Ensure all screws and bolts are securely tightened before use. Do not overtighten to avoid damaging the material.
- Placez l'îlot de cuisine sur une surface plane et stable pour éviter qu'il ne bascule.
- Do not overload shelves or the tabletop. Refer to the specifications for weight capacity.
- For electrical safety, ensure the power cord is not pinched or damaged. Do not plug in appliances that exceed the rated capacity of the outlets.
- Unplug the unit from the power source before cleaning or moving.
3. Contenu du colis
Avant de commencer l'assemblage, vérifiez que tous les composants sont présents et en bon état. Si des pièces sont manquantes ou endommagées, contactez le service client.
- Composants du cadre d'un îlot de cuisine
- Wooden Shelves and Tabletop
- Power Outlet Unit with Cord
- Drawer Basket
- S-shaped Hooks (5 pieces)
- Bar Stools (2 pieces)
- Quincaillerie de montage (vis, boulons, clé Allen)
- Manuel d'instructions (ce document)
4. Instructions de montage (installation)
Assembly of the Garvee Kitchen Island is designed to be straightforward. A detailed step-by-step assembly guide with diagrams is included in your package. Please follow those instructions carefully.
- Déballer et identifier les pièces : Lay out all components on a clean, soft surface to prevent scratches. Compare each part to the parts list in the separate assembly guide.
- Assemblez le cadre : Begin by connecting the main metal frame components as instructed. Ensure all connections are finger-tight before final tightening.
- Attach Shelves and Tabletop: Secure the wooden shelves and tabletop to the frame using the provided hardware.
- Installer une prise de courant : Mount the power outlet unit to the designated area on the frame.
- Assembler les tabourets de bar : Suivez les instructions séparées pour l'assemblage des deux tabourets de bar.
- Serrage final : Une fois tous les composants en place, serrez méthodiquement toutes les vis et tous les boulons à l'aide de la clé Allen fournie. Ne serrez pas trop fort.
- Attach Hooks and Basket: Install the S-shaped hooks on the upper rail and place the drawer basket.
- Réglage des pieds de nivellement : The island is equipped with adjustable feet. Turn them to ensure the unit is stable and level on uneven floors.
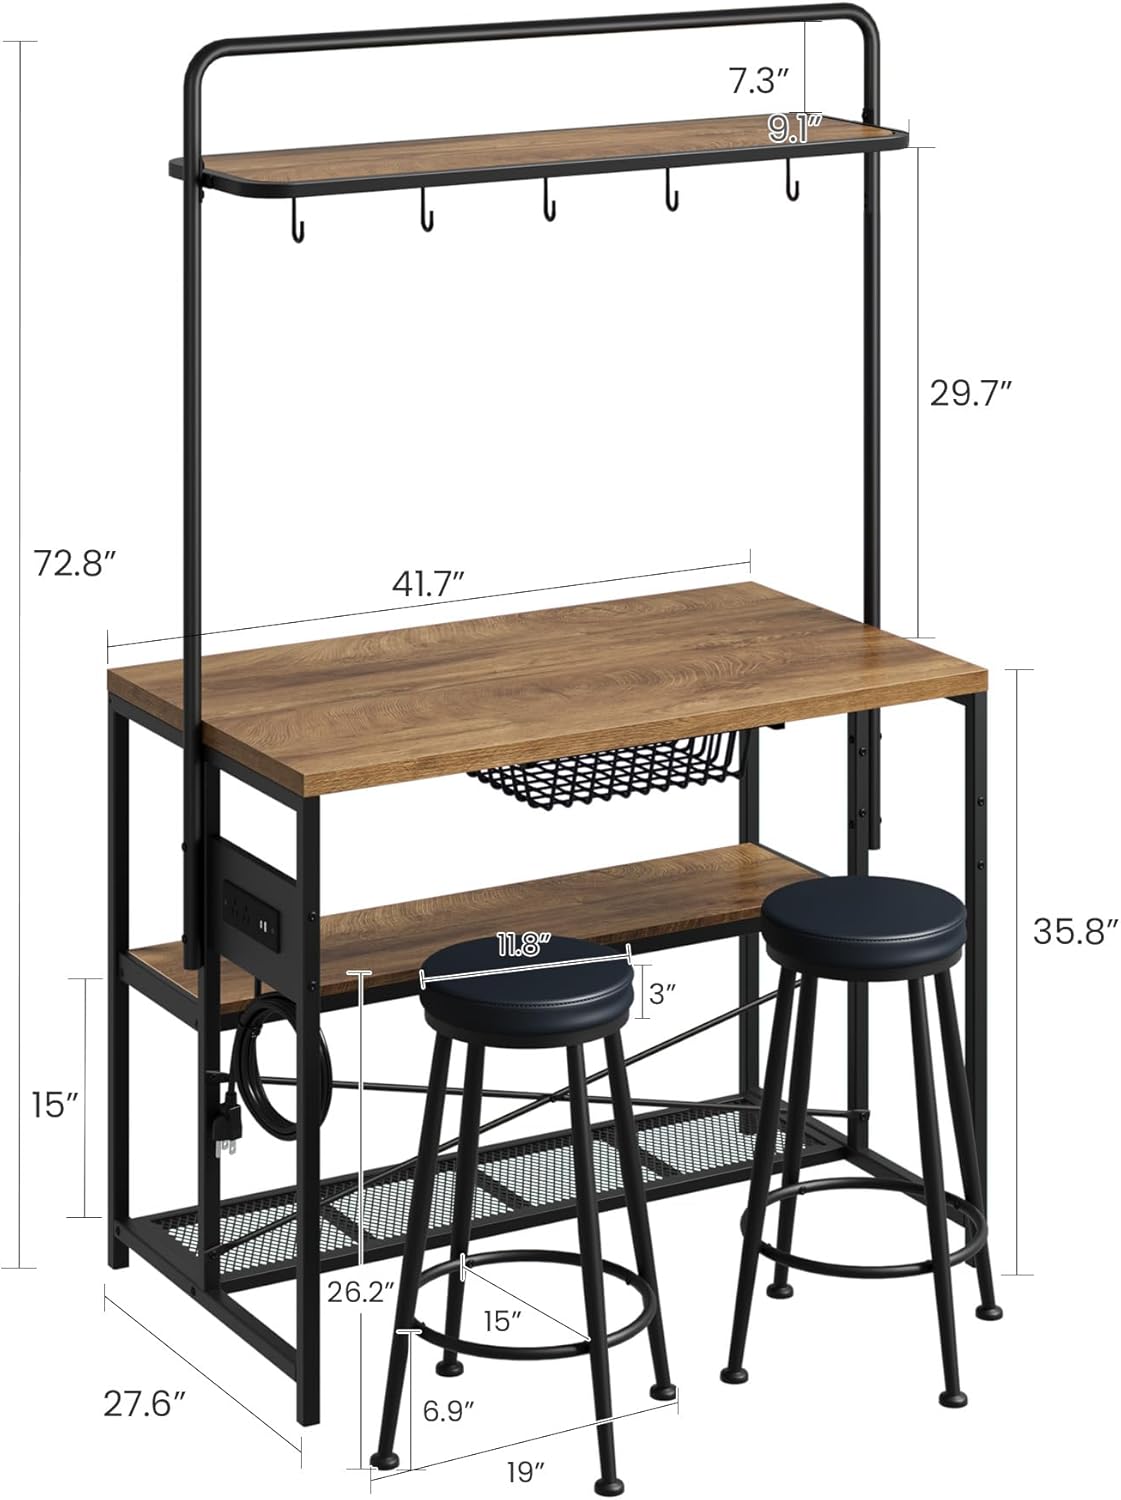
Image 4.1 : Dimensions du produit pour la planification de son emplacement.

Image 4.2: Detail of adjustable feet, sturdy X-shaped structure, and robot vacuum-friendly base.
5. Mode d'emploi
5.1 Utilisation de la prise de courant
The integrated power hub provides convenient access to electricity for your kitchen appliances and electronic devices.
- Plug the island's main power cord (4.92 ft) into a standard wall outlet.
- The unit features 2 AC outlets (120V/12A) and 2 USB ports (5V/2A).
- Connect blenders, coffee makers, laptops, or mobile devices directly to the available outlets.
- Always ensure the total power draw of connected devices does not exceed the unit's maximum capacity.

Image 5.1: Close-up of the integrated power outlet with AC and USB ports.
5.2 Utilisation des fonctions de stockage
The kitchen island offers various storage solutions:
- Plateau de table : Use as a primary work surface, dining area, or coffee bar. It supports up to 400 lbs.
- Drawer Basket: Ideal for storing smaller items, fruits, or vegetables.
- Open Shelves (3-tier): Suitable for microwaves, toasters, pots, pans, cookbooks, or decorative items.
- Crochets en forme de S : Hang utensils, towels, mugs, or other kitchen tools for easy access.
5.3 Using the Bar Stools
The two included bar stools provide comfortable seating for dining or working at the island.
- Position the stools beneath the island when not in use to save space.
- Ensure stools are placed on a stable surface before sitting.

Image 5.2: The kitchen island with its two matching bar stools.
6. Maintenance et entretien
- Nettoyage: Essuyez les surfaces avec un chiffon doux, damp Utilisez un chiffon. Évitez d'utiliser des produits chimiques agressifs, des nettoyants abrasifs ou des produits de polissage qui pourraient endommager la finition.
- Déversements : Nettoyez immédiatement les liquides renversés afin d'éviter les taches ou les dommages au bois d'ingénierie.
- Matériel: Vérifiez régulièrement le serrage de toutes les vis et boulons. Resserrer si nécessaire pour maintenir la stabilité.
- Composants électriques : Keep the power outlet unit dry. Do not immerse in water. Inspect the power cord for any signs of damage regularly.
- Placement: Avoid placing the unit in direct sunlight or near heat sources to prevent warping or discoloration of the wood.
7. Dépannage
- Problème: The island feels wobbly or unstable.
Solution: Check that all assembly screws and bolts are securely tightened. Adjust the leveling feet on the bottom of the frame to compensate for uneven flooring. - Problème: Les prises électriques ne fonctionnent pas.
Solution: Ensure the main power cord is securely plugged into a functional wall outlet. Verify that the wall outlet itself has power by testing it with another device. Check if the total power draw of connected devices exceeds the unit's capacity. - Problème: Pièces manquantes ou endommagées lors de l'assemblage.
Solution: Do not proceed with assembly. Contact Garvee customer support immediately for assistance and replacement parts.
8. Spécifications
| Dimensions du produit | 44.09"P x 27.56"L x 70.87"H |
| Poids de l'article | 79.8 livres |
| Matériel | Bois d'ingénierie, métal |
| Prises de courant | 2 prises secteur (120 V/12 A), 2 ports USB (5 V/2 A) |
| Longueur du cordon d'alimentation | 4.92 pieds |
| Capacité de poids de la table | Jusqu'à 400 XNUMX lb |
| Numéro de modèle | yzcA2ORU4IyLcKHrn2O1dA5V |
| Code UPC | 822200100812 |
9. Vidéo produit
Regardez cette vidéo pour un aperçu visuel.view of the Garvee Kitchen Island and its features.
Vidéo 9.1 : Présentation vidéo officielle du produitasing the Garvee Kitchen Island with Stools.
10. Garantie et assistance
For warranty information, please refer to the documentation included with your purchase or visit the official Garvee website. If you encounter any issues or have questions regarding your product, please contact Garvee customer support. Ensure you have your model number (yzcA2ORU4IyLcKHrn2O1dA5V) and purchase details available when contacting support.


