Introduction
This manual provides detailed instructions for setting up, operating, and maintaining your Gamrombo Wireless Gaming Controller, Model RH-102A. Please read this manual thoroughly before use to ensure proper functionality and to maximize your gaming experience. This controller is designed for use with Xbox One, Xbox Series X/S, PC, Android, and iOS devices.

Image : Avant view of the Gamrombo Wireless Gaming Controller, showcasing its black design with vibrant RGB lighting on the joysticks, buttons, and grip areas.
Installation
Contenu du colis
- Gamrombo Wireless Gaming Controller (Model RH-102A)
- USB Charging/Data Cable (assumed)
- Manuel de l'utilisateur (ce document)
Installation de la batterie
The controller requires deux (2) piles AA (not included) for wireless operation. Locate the battery compartment on the back of the controller, open the cover, insert the batteries according to the polarity indicators, and close the cover securely.
Connexion du contrôleur
The Gamrombo controller supports multiple connection methods: Wireless (for Xbox), Bluetooth (for PC, Android, iOS), and Wired (for PC).

Image : Terminéview of the controller highlighting its compatibility with various platforms including PC, Mac, Android, iOS, and Steam.
1. Wireless Connection (Xbox Consoles)
- Ensure your Xbox console (Xbox Series X, Xbox Series S, Xbox One S, Xbox One X) is powered on.
- Appuyez et maintenez enfoncé le Bouton d'accueil on the controller until the LED indicator begins to flash, indicating pairing mode.
- Sur votre console Xbox, appuyez sur Bouton d'appairage (généralement situé à l'avant ou sur le côté de la console).
- The controller's LED will become solid when successfully paired.
- Remarque importante : Due to Xbox system updates, third-party controllers may require a software update to maintain compatibility. If you experience pairing issues, please visit the Gamrombo support website for the latest software updates and instructions.
2. Bluetooth Connection (PC, Android, iOS)
- Ensure the controller has sufficient battery power.
- Activate Bluetooth on your device (PC, Android, iOS).
- Appuyez et maintenez enfoncé le Bouton d'appairage Bluetooth (refer to controller diagram for exact location, often a small button near the top) until the LED indicator flashes rapidly.
- On your device, search for new Bluetooth devices and select "Gamrombo Controller" (or similar name) from the list.
- The controller's LED will become solid when successfully paired.
3. Connexion filaire (PC)
- Connect one end of the USB cable to the controller's USB port.
- Connect the other end of the USB cable to an available USB port on your PC.
- The controller should be automatically recognized by your PC. Drivers may install automatically.
Mode d'emploi
Disposition des boutons
Familiarize yourself with the controller's button layout for optimal use.

Image: Diagram illustrating the front and back button layout of the Gamrombo controller, labeling joysticks, D-pad, A/B/X/Y buttons, triggers, bumpers, Home, View, Menu, Share, Turbo, Light keys, 3.5mm stereo port, and programmable back paddles (PR/PL).
Fonctions spéciales
1. Fonction TURBO
The TURBO function allows for rapid-fire action by repeatedly pressing a button as long as it is held down. This can provide a competitive edge in certain games.

Image: Close-up of the controller with an overlay explaining the TURBO function, showing different rapid-fire rates (5/s, 12/s, 20/s) and the 'T' button icon.
- Activer: Appuyez et maintenez enfoncé le TURBO button (T), then press the desired action button (e.g., A, B, X, Y, LB, RB, LT, RT). The button will now have TURBO functionality.
- Pour régler la vitesse : While holding the TURBO button, move the Joystick analogique droit vers le haut ou vers le bas to cycle through different TURBO speeds (e.g., 5/s, 12/s, 20/s).
- Pour désactiver : Appuyez et maintenez enfoncé le TURBO button (T), puis appuyez à nouveau sur le même bouton d'action.
2. Macro Programming (Back Paddles)
The controller features two back-mappable buttons (PR and PL) that can be programmed with up to 16 button inputs, allowing for complex actions with a single press.

Image : Arrière view of the controller highlighting the PR and PL programmable back paddles and the 'SET' button, with an illustration of how multiple button presses can be mapped to a single paddle.
- Pour accéder au mode de programmation : Appuyez sur le Bouton SET (located on the back of the controller). The indicator light will flash.
- Pour programmer: Appuyez sur l'une des touches PR or PL paddle you wish to program. Then, input the sequence of up to 16 buttons you want to map.
- Sauver: Appuyez sur le Bouton SET again to exit programming mode. The indicator light will stop flashing.
- To Clear Macro: Enter programming mode, press the PR or PL paddle, then press the SET button again without inputting any sequence.
3. Personnalisation de l'éclairage RVB
Customize the controller's RGB lighting with 7 colors and multiple lighting modes to match your preference.

Image: Visual representation of different RGB lighting modes including Breathing LED Mode, Fixed LED Mode, Flickering LED Mode, and Single Zone Mode, with color options.
- To Change Color/Mode: Appuyez sur le Clé lumineuse (refer to button layout diagram) to cycle through 7 bright colors and various lighting modes (multi-zone, breathing, solid).
- Pour régler la luminosité : Tenez le Clé lumineuse et utilisez le Joystick analogique gauche vers le haut ou vers le bas pour régler le niveau de luminosité.
4. Capteur gyroscopique à 6 axes
The built-in 6-axis gyroscope provides more accurate somatosensory control, enhancing immersion in games that support motion sensing.
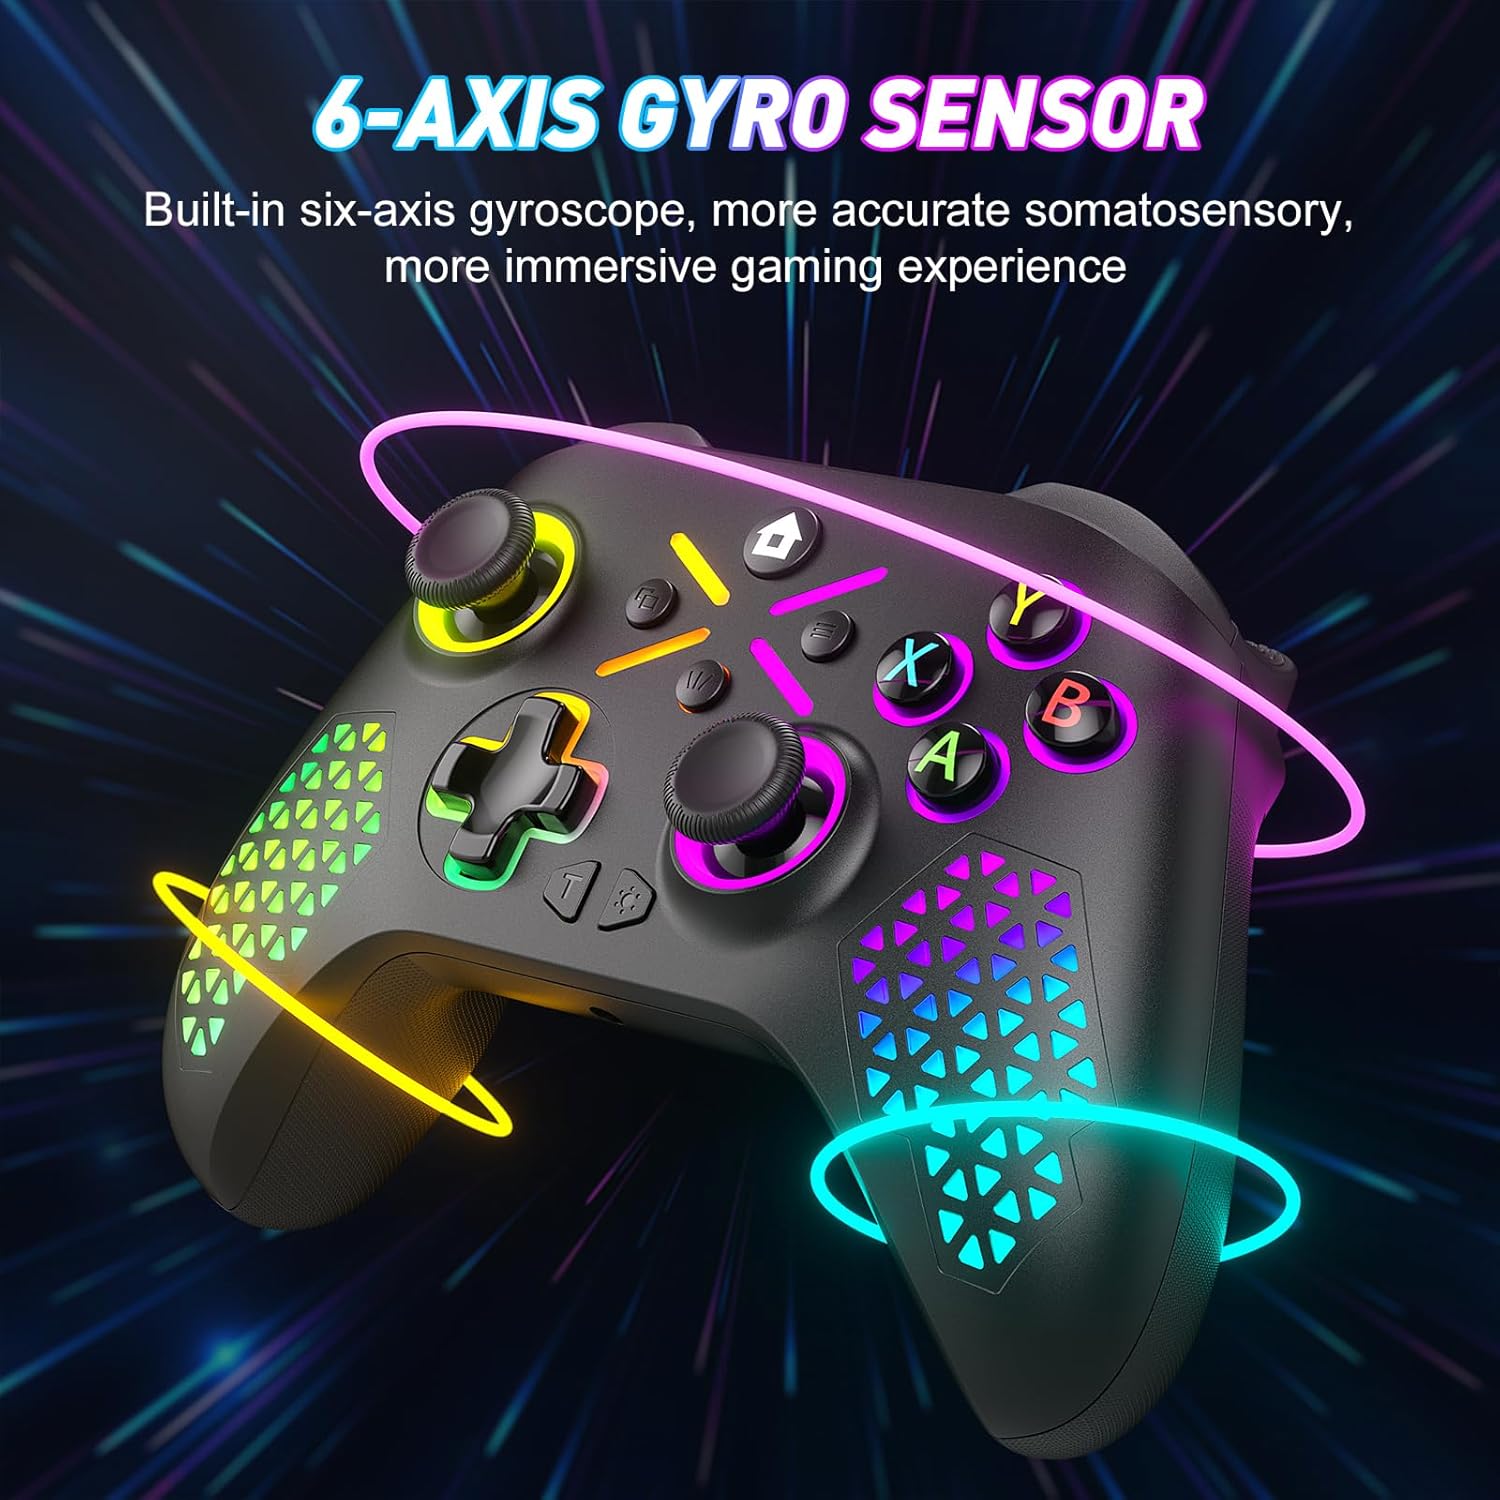
Image: The controller shown with glowing lines indicating motion, illustrating the 6-axis gyro sensor functionality for immersive gaming.
5. Prise audio 3.5 mm
Connect your compatible headset to the 3.5mm audio jack for in-game audio and communication.

Image: A split image showing the 6-axis gyro sensor on one side and the adjustable vibration feature with the 3.5mm audio jack on the other, emphasizing enhanced game immersion.
Entretien
Nettoyage
- Utilisez un chiffon doux et sec pour essuyer la surface de la manette.
- Pour les saletés tenaces, appliquez légèrementampNettoyez le chiffon avec de l'eau ou une solution nettoyante douce. Évitez les produits chimiques agressifs.
- Ne laissez aucun liquide pénétrer dans les ouvertures du contrôleur.
Stockage
- Rangez la manette dans un endroit frais et sec, à l'abri de la lumière directe du soleil et des températures extrêmes.
- If storing for an extended period, remove the AA batteries to prevent leakage.
Dépannage
Problèmes courants et solutions
- Controller not pairing with Xbox:
Ensure the controller has fresh batteries. Verify that the controller's software is up-to-date. Xbox system updates can sometimes affect third-party controller compatibility. Visit the Gamrombo support website for the latest software updates and detailed pairing instructions. - Controller not connecting via Bluetooth/Wired:
Check battery levels. For wired connection, ensure the USB cable is securely connected to both the controller and the PC. For Bluetooth, ensure Bluetooth is enabled on your device and the controller is in pairing mode. Try restarting both the controller and the device. - Boutons ou joysticks ne répondent pas :
Check for any physical obstructions or debris around the buttons or joysticks. Ensure the controller has sufficient power. If the issue persists after a drop, internal damage may have occurred, which might not be repairable or covered under warranty. - Les lumières RGB ne fonctionnent pas ou sont incorrectes :
Ensure the controller has power. Try cycling through the light modes and adjusting brightness using the Light Key. - La connexion se coupe fréquemment :
Ensure you are within the 10m (32.8ft) wireless range. Minimize interference from other wireless devices. Ensure the controller's software is updated.
Caractéristiques
Détails techniques
| Numéro de modèle | RH-102A |
| ASIN | B0FWCDB6F |
| Fabricant | Gambrombo |
| Connectivité | Wireless (WiFi), Bluetooth, Wired (USB) |
| Portée sans fil | Jusqu'à 10 mètres (32.8 pieds) |
| Type de batterie | 2 piles AA (non incluses) |
| Poids de l'article | 10.5 onces |
| Dimensions du colis | 12.68 x 9.88 x 0.55 pouces |
| Première date disponible | 15 octobre 2025 |
Garantie et assistance
Informations sur la garantie
Specific warranty details for the Gamrombo Wireless Gaming Controller are not provided within this manual. For information regarding warranty coverage, terms, and conditions, please refer to the product packaging or contact Gamrombo customer support directly.
Assistance clientèle
If you encounter any issues or have questions not addressed in this manual, please contact Gamrombo customer support. Contact information can typically be found on the product packaging, the official Gamrombo websur le site ou auprès de votre point de vente.


