Introduction
This manual provides detailed instructions for the safe and efficient operation of your Xiaomi Portable Electric Air Compressor 2 Pro. Please read this manual thoroughly before using the product and retain it for future reference. This device is designed for inflating tires on cars, motorcycles, bicycles, and balls, offering a convenient and portable solution for maintaining optimal pressure.
Consignes de sécurité
Avertissement: Le non-respect de ces consignes de sécurité peut entraîner un choc électrique, un incendie ou des blessures graves.
- Gardez l'appareil hors de portée des enfants.
- Ne pas utiliser le compresseur dans des conditions humides ou à proximité de liquides ou de gaz inflammables.
- Ensure the air hose is securely connected to the valve before starting inflation.
- Do not over-inflate items. Always refer to the recommended pressure for the item being inflated. The auto shut-off feature helps prevent over-inflation.
- Évitez toute utilisation continue prolongée afin de prévenir la surchauffe. Si l'appareil devient chaud, laissez-le refroidir.
- Use only the provided charging cable and a compatible 5V/3A power adapter for charging.
- Do not disassemble or modify the device. Contact customer support for repairs.
Contenu du colis
Vérifiez que tous les éléments sont présents dans le colis :
- Compresseur d'air électrique portable Xiaomi 2 Pro
- Fast-connecting air valve
- High-pressure air hose extension
- Needle valve (for balls)
- Presta valve adapter (for some bicycle tires)
- Câble de chargement de type C
- Pochette de rangement

Figure 1: Included accessories with the air compressor.
Produit terminéview
The Xiaomi Portable Electric Air Compressor 2 Pro is a compact and powerful inflation device. It features a digital LED display, multiple preset modes, and a long-lasting rechargeable battery for convenient use.
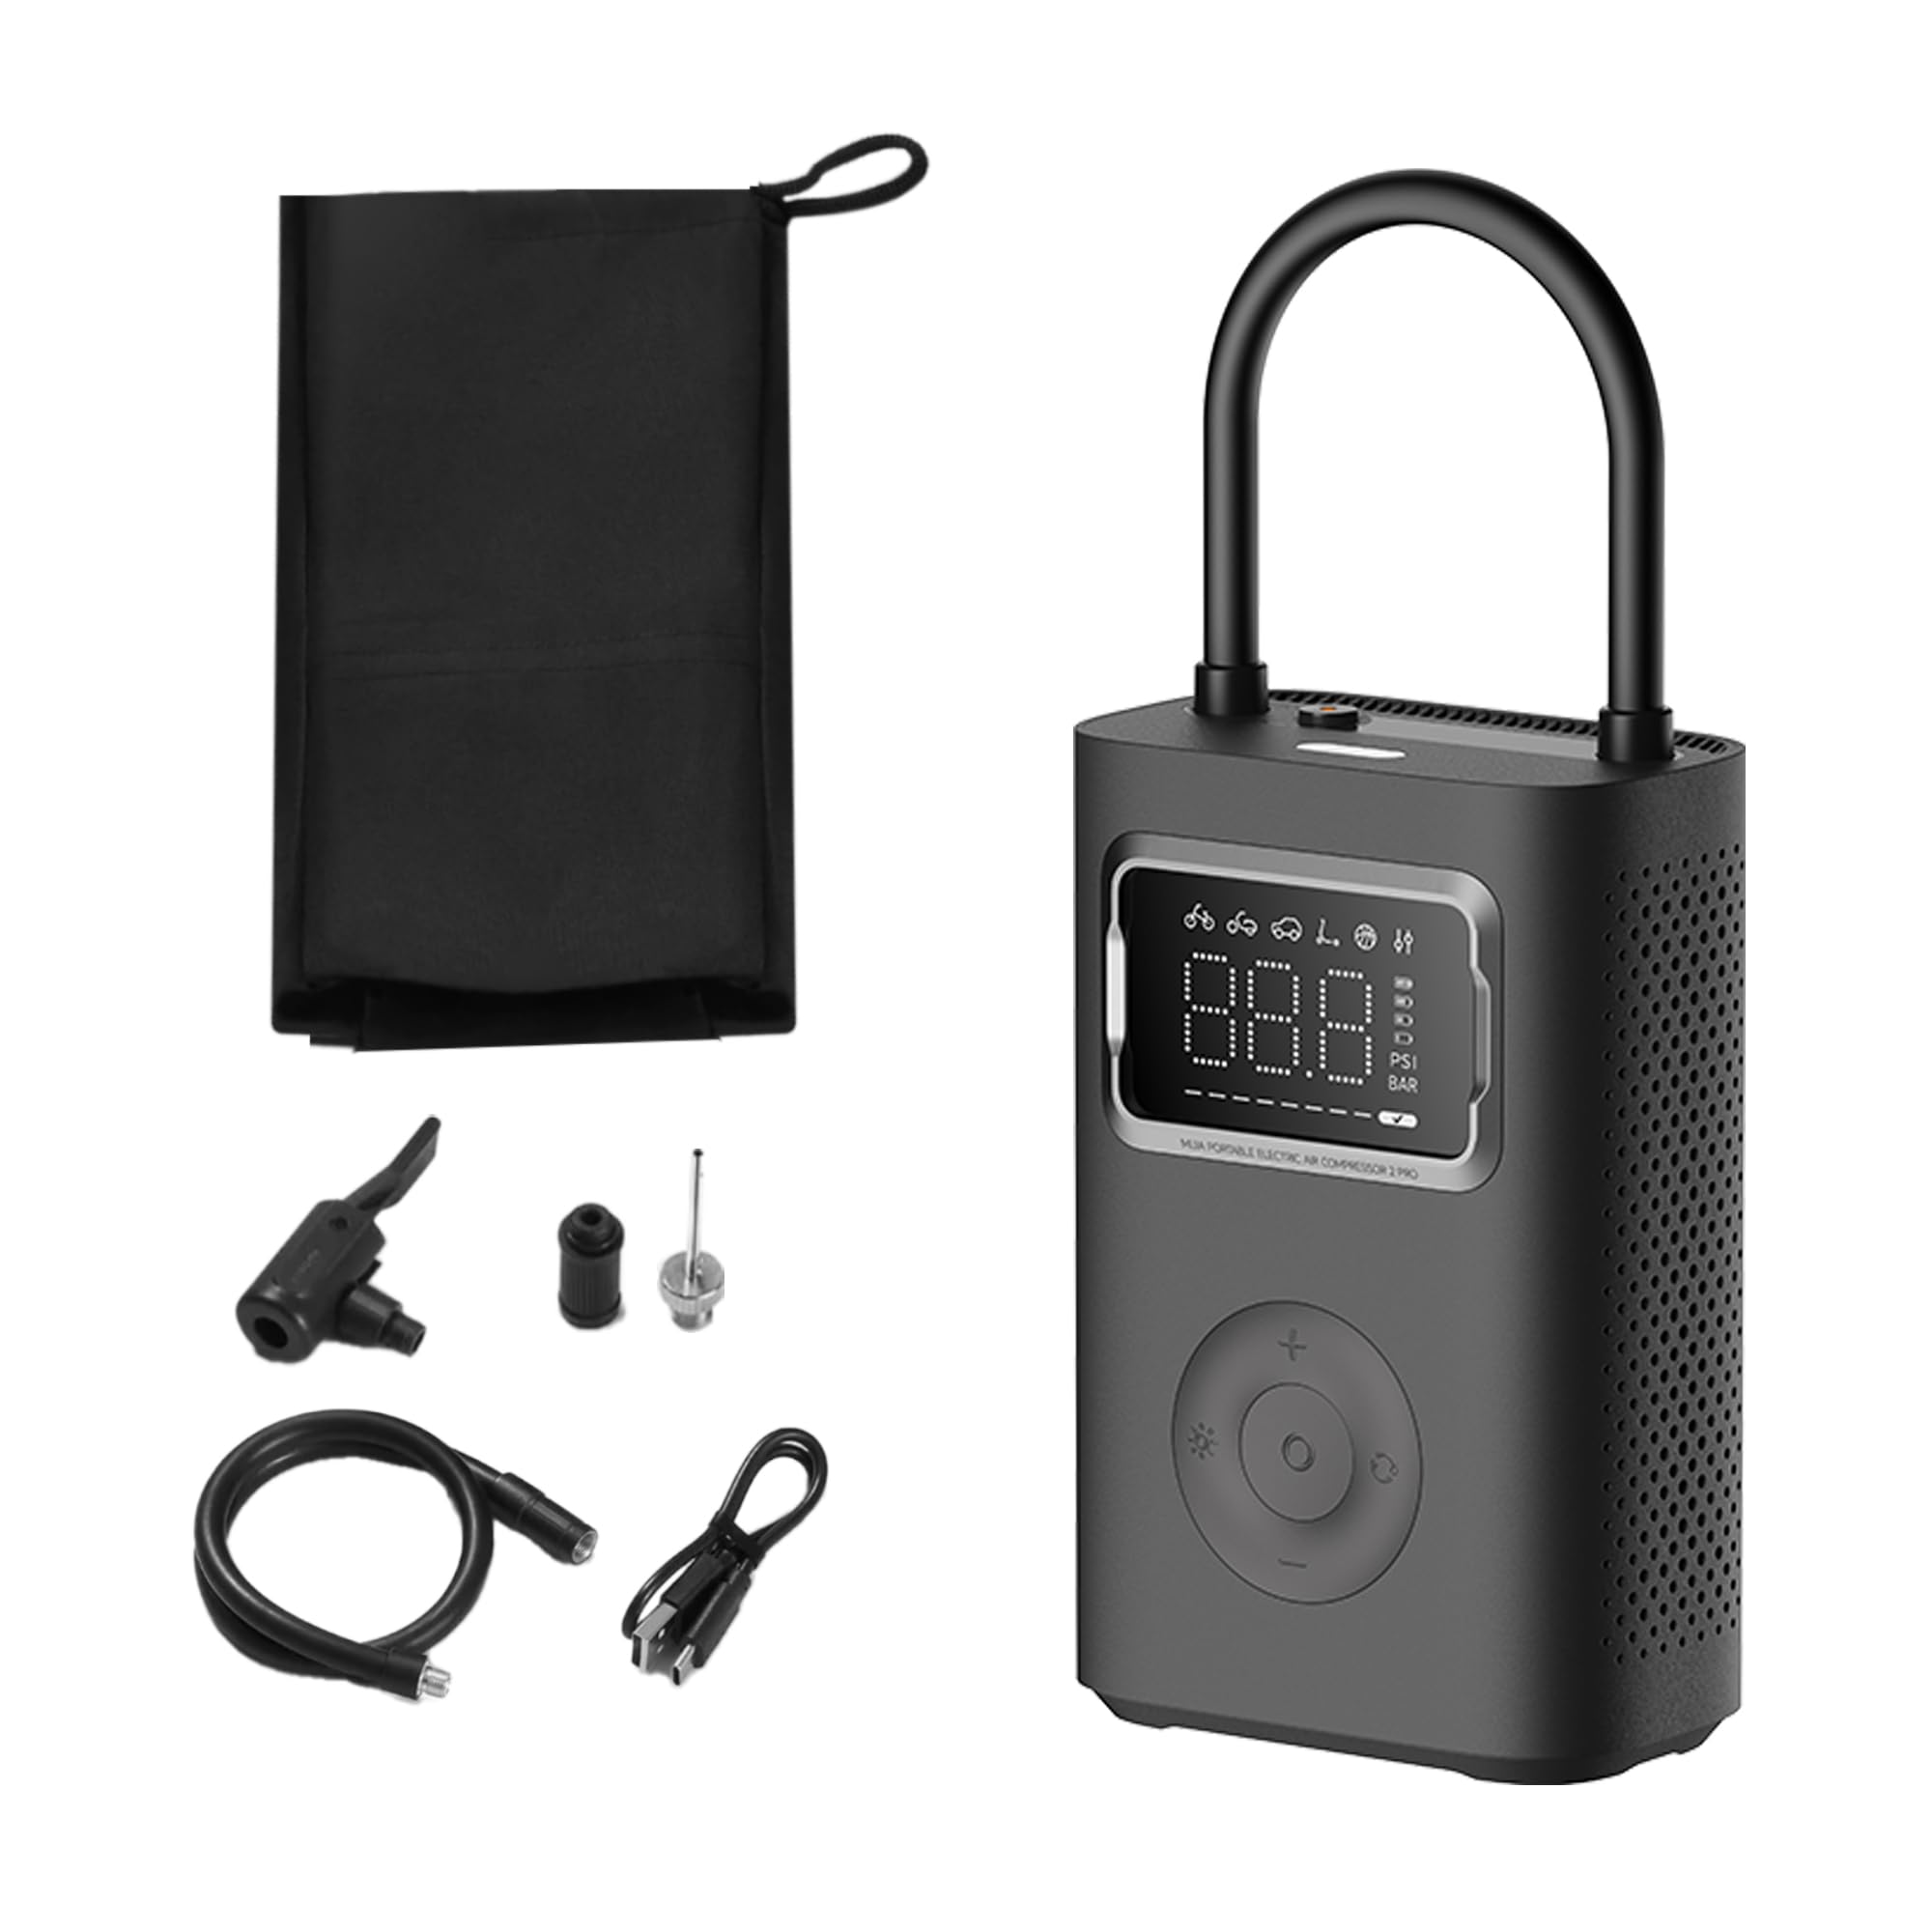
Figure 2: Xiaomi Portable Electric Air Compressor 2 Pro.
Caractéristiques principales :
- Pression maximale : Jusqu'à 150 PSI pour répondre à divers besoins de gonflage.
- Affichage LED numérique : Provides real-time pressure readings and allows for precise pressure setting.
- Arrêt automatique: Le gonflage s'arrête automatiquement une fois la pression préréglée atteinte, évitant ainsi le surgonflage.
- Sans fil et rechargeable : Powered by a 27 Watt-hour battery, offering portability and convenience.
- Plusieurs modes prédéfinis : Includes modes for car, motorcycle, bicycle, electric scooter, and ball, along with a custom mode.
- Dual-Purpose LED Light: Features a white light for illumination and a red light for signaling.
- Compact et léger : Conçu pour un stockage et un transport faciles.

Figure 3: Product details showing 150 PSI capability, battery indicator, and hose lock.
Installation
1. Charge initiale
Before first use, fully charge the air compressor. Connect the provided Type-C charging cable to the charging port on the device and the other end to a 5V/3A USB power adapter (not included). The battery indicator on the display will show charging progress. A full charge typically takes approximately 3.5 hours.
2. Raccordement du tuyau d'air
The air hose is stored by being locked into the device. To use, pull the air hose out of its storage slot. This action will automatically power on the device. Connect the appropriate valve adapter (Schrader, Presta, or needle valve) to the end of the air hose, depending on the item you intend to inflate.

Figure 4: Pulling the air hose from its slot to power on the device.
Mode d'emploi
1. Mise sous/hors tension
- Mise sous tension : Pull the air hose out of its storage slot. The device will automatically power on and display the current pressure.
- Éteindre: Push the air hose back into its storage slot. The device will automatically power off.
2. Comprendre l'affichage
The large LED display shows the current pressure, selected mode, and battery level. You can switch between PSI and Bar units using the unit selection button.

Figure 5: Digital display showing mode icons and pressure.
3. Selecting Inflation Modes
Press the mode button to cycle through the 6 preset inflation modes:
- Mode personnalisé: Default 35 PSI (adjustable 3-150 PSI / 0.2-10.3 Bar)
- Mode vélo : Pression par défaut : 45 PSI (réglable de 30 à 65 PSI)
- Mode moto : Default 2.4 Bar (adjustable 1.8-3.0 Bar)
- Mode voiture : Default 2.5 Bar (adjustable 1.8-3.5 Bar)
- Mode scooter électrique : Pression par défaut : 50 PSI (réglable de 45 à 60 PSI)
- Mode Balle : Pression par défaut : 8 PSI (réglable de 4 à 16 PSI)

Figure 6 : Plusview of multiple preset inflation modes.
4. Adjusting Pressure Settings
After selecting a mode, use the '+' and '-' buttons to adjust the target pressure. The display will show the target pressure blinking. Once set, the value will stabilize.
5. Processus d'inflation
- Connect the air hose with the appropriate adapter securely to the valve stem of the item to be inflated.
- L'écran affichera la pression actuelle de l'objet.
- Select the desired inflation mode and set the target pressure.
- Press the start button (usually the center button) to begin inflation.
- Le compresseur s'arrêtera automatiquement une fois la pression cible atteinte.
- Débranchez le tuyau d'air de la tige de la valve.

Figure 7: Auto pressure detection and inflation for a bicycle tire.
6. Utilisation de la lumière LED
Press the light button to activate the LED light. It has two modes: a white light for illumination in dark environments and a red flashing light for emergency signaling.
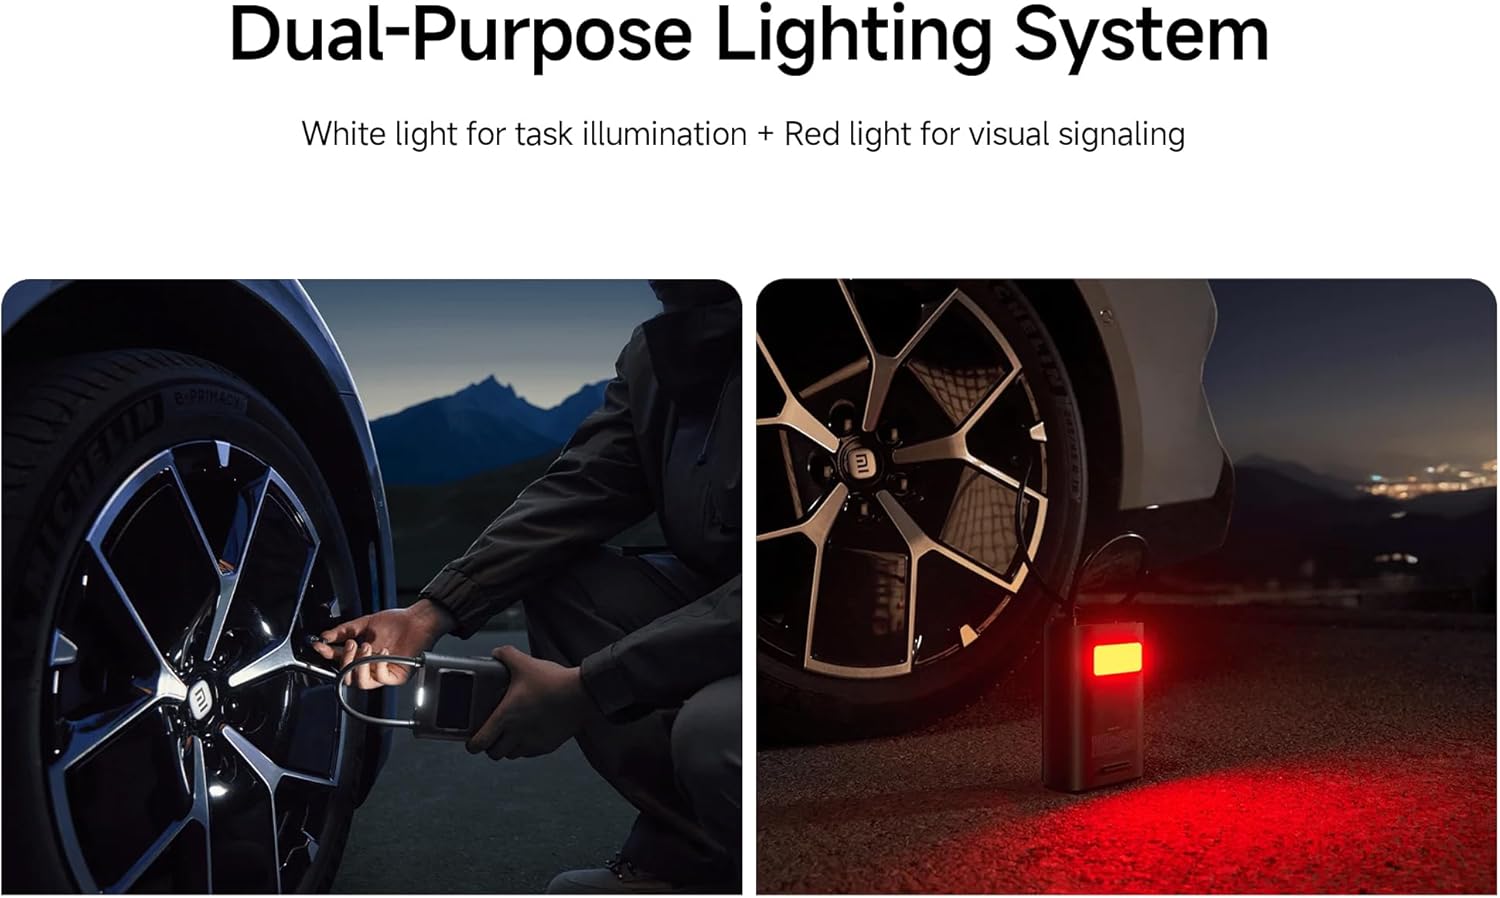
Figure 8: Dual-purpose lighting system in use (white for task, red for signaling).
Chargement
The device is equipped with a 27 Watt-hour rechargeable battery. When the battery level is low, the battery indicator on the display will show a low charge. Connect the Type-C charging cable to recharge. The device can reinflate approximately 16 car tires (from 2.0 Bar to 2.5 Bar) on a full charge, or inflate up to 138 size 7 basketballs (from 0 PSI to 8 PSI).

Figure 9: Battery capacity and inflation performance examples.
Entretien
- Nettoyage: Essuyez l'extérieur du compresseur avec un chiffon doux et sec.amp tissu. N'utilisez pas de produits chimiques agressifs ou de nettoyants abrasifs.
- Stockage: Store the device in a cool, dry place, away from direct sunlight and extreme temperatures. Ensure the air hose is properly stowed to prevent damage.
- Entretien de la batterie: Pour une durée de vie optimale de la batterie, rechargez l'appareil au moins une fois tous les trois mois s'il n'est pas utilisé régulièrement.
Dépannage
| Problème | Cause possible | Solution |
|---|---|---|
| L'appareil ne s'allume pas. | Battery is depleted; Air hose not fully pulled out. | Charge the device; Ensure the air hose is fully extended from its slot. |
| L'inflation est lente ou inefficace. | Low battery; Air hose not securely connected; Incorrect pressure setting. | Recharge the device; Check all connections for leaks; Verify the target pressure. |
| L'appareil s'arrête de manière inattendue. | Target pressure reached (auto shut-off); Overheating; Low battery. | This is normal if target pressure is met; Allow device to cool down; Recharge the device. |
| Lecture de pression inexacte. | Loose connection; Sensor error. | Ensure the air hose is tightly connected to the valve; If problem persists, contact support. |
Caractéristiques
| Fonctionnalité | Détail |
|---|---|
| Numéro de modèle | XM-MJCQB06QW-03 |
| Dimensions | 10.5 x 8 x 25.5 cm |
| Poids | 1.1 kg |
| Matériel | Plastique |
| Source d'énergie | Alimenté par batterie |
| Voltage | 10.8 volts |
| Quoitage | 27 wattheures |
| Ampère Capacité | 3 Amps |
| Pression maximale | 150 PSI |
| Longueur du tuyau | 200 mm |
| Caractéristiques spéciales | Automatic Shut-Off, Digital Display, LED Light, Lightweight |
| Utilisations recommandées | Tire Inflation (Car, Bike, Motorcycle, Electric Scooter), Ball Inflation, Toy Inflation |
Vidéos officielles des produits
Video 1: General product overview et démonstration des fonctionnalités clés.
Video 2: Demonstration of the compressor's portability and ease of use.
Video 3: Detailed look at the inflation process and digital display functionality.
Garantie et assistance
For warranty information or technical support, please refer to the warranty card included with your product or contact the manufacturer directly through their official website. Ensure you have your product model number (XM-MJCQB06QW-03) and purchase details available when seeking support.


