Introduction
This manual provides detailed instructions for the operation and maintenance of your KEPLUG MX9 Sunrise Alarm Clock. Please read this manual thoroughly before use to ensure proper functionality and to maximize your experience with the device.
The KEPLUG MX9 is a multifunctional device designed to enhance your sleep and wake-up routine, featuring a sunrise simulation alarm, white noise sound machine, and a dimmable night light.
Contenu du colis
- Réveil KEPLUG MX9 Sunrise
- Câble d'alimentation
- Manuel d'utilisation
Installation
Connexion électrique
- Connect the provided power cable to the DC 5V input port on the back of the alarm clock.
- Plug the other end of the power cable into a standard USB wall adapter (included) or a compatible USB port.
- The device will power on and the time display will illuminate.
Batterie de secours (en option)
The device requires 2 AAA batteries (not included) for battery backup functionality. These batteries preserve your time settings in the event of a power outage but do not power the alarm clock for normal operation.
- Repérez le compartiment de la batterie sur la partie inférieure de l'appareil.
- Insérez 2 piles AAA en veillant à respecter la polarité (+/-).
- Fermez soigneusement le couvercle du compartiment à piles.

This image shows the front of the KEPLUG MX9 Sunrise Alarm Clock, highlighting its compact design and the digital time display. The device is white with control buttons located on the lower front panel.
Vidéo 1 : Un overview of the KEPLUG MX9 Sunrise Alarm Clock, demonstrating its physical features and initial setup steps, including power connection and battery installation.
Mode d'emploi
Réglage de l'heure
- Appuyez et maintenez enfoncé le Réglage de l'heure button (usually indicated by a clock icon) for 2 seconds to enter time setting mode.
- Utilisez le + or - boutons pour régler l'heure. Appuyez sur les boutons. Réglage de l'heure Appuyez à nouveau sur le bouton pour confirmer.
- Répétez le processus pour régler les minutes.
- You may also select 12-hour or 24-hour format if available.
Réglage de l'alarme
- Appuyez et maintenez enfoncé le Alarme button (bell icon) for 2 seconds to enter alarm setting mode.
- Utilisez le + or - buttons to set the desired alarm time (hour and minute). Press the Alarme button to confirm each step.
- Select your preferred alarm sound from the available 6 options using the Musique button (note icon) or +/- boutons.
- Adjust the alarm volume (7 levels) using the + or - boutons.
- Pour activer/désactiver l'alarme, appuyez brièvement sur le bouton. Alarme bouton. Une icône d'alarme apparaîtra/disparaîtra sur l'écran.
The snooze function allows for an additional 9 minutes of sleep. To activate snooze, press any button on the front panel when the alarm sounds. The alarm will sound again after 9 minutes.
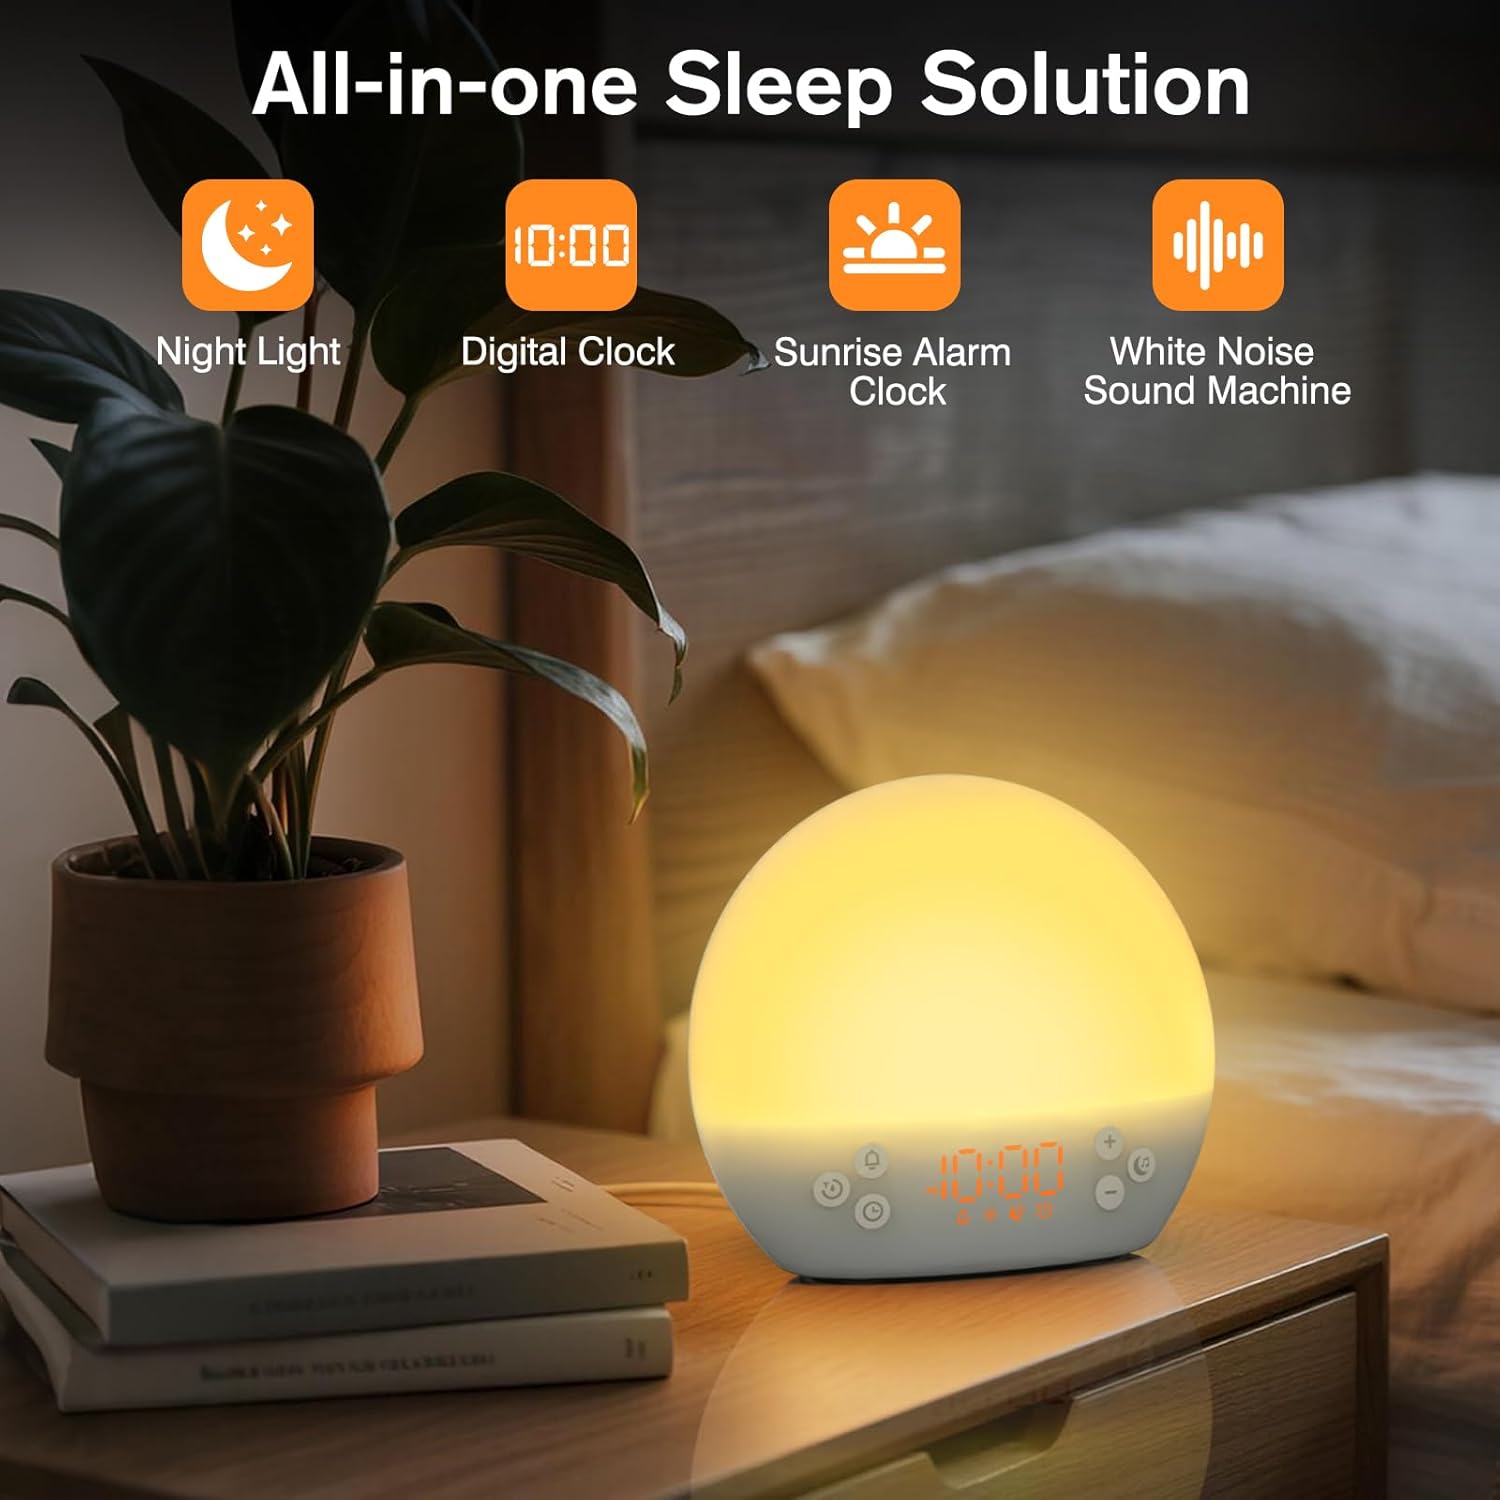
This image shows the KEPLUG MX9 alarm clock on a bedside table next to a plant, with its digital time display clearly visible. The clock emits a warm, soft light, indicating its function as a night light or ambient light source.
Simulation de lever de soleil
The sunrise simulation feature gradually brightens the light before your set alarm time, mimicking a natural sunrise. This duration can be customized from 15 to 120 minutes.
- During alarm setting, you can adjust the sunrise duration.
- Choose from 3 wake-up modes: gentle light + sound, just the alarm, or sunrise light without sound.
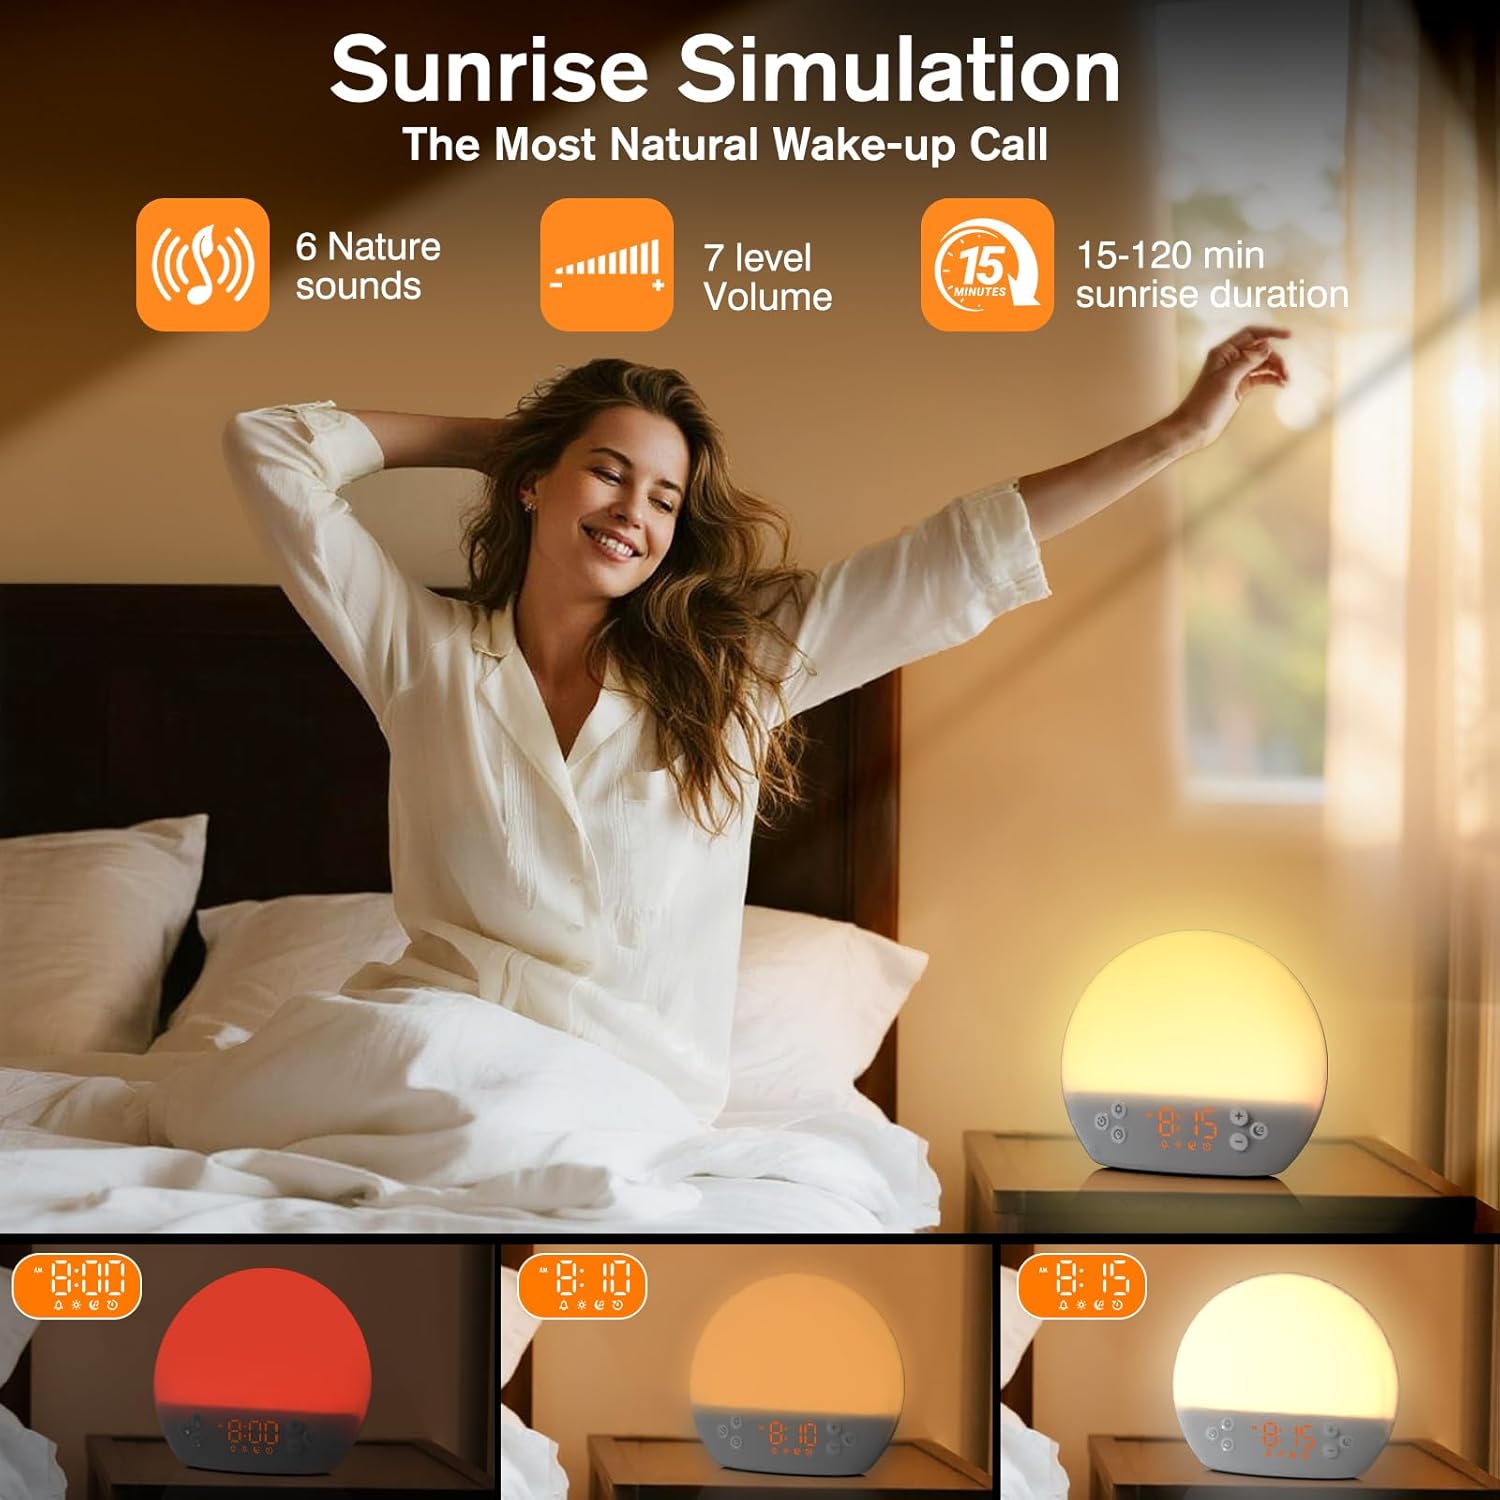
This image illustrates the sunrise simulation feature of the KEPLUG MX9 alarm clock. It shows a person waking up gently as the clock's light gradually brightens, simulating a natural sunrise over a period of 15-120 minutes.
Video 2: This video demonstrates the sunrise simulation feature, showing how the light gradually brightens to gently wake the user.
Machine à bruit blanc
The device offers 30 soothing sounds to aid in relaxation and sleep. These include 10 white noises (white, pink, brown noises, fan sounds) and 20 nature sounds (rain, ocean waves, thunderstorms, birdsong, campfires, lullabies).
- Appuyez sur le Musique button to cycle through the available sounds.
- Utilisez le + or - boutons pour régler le volume (15 niveaux).
- An optional sleep timer (30-120 minutes) can be set to automatically turn off sounds.
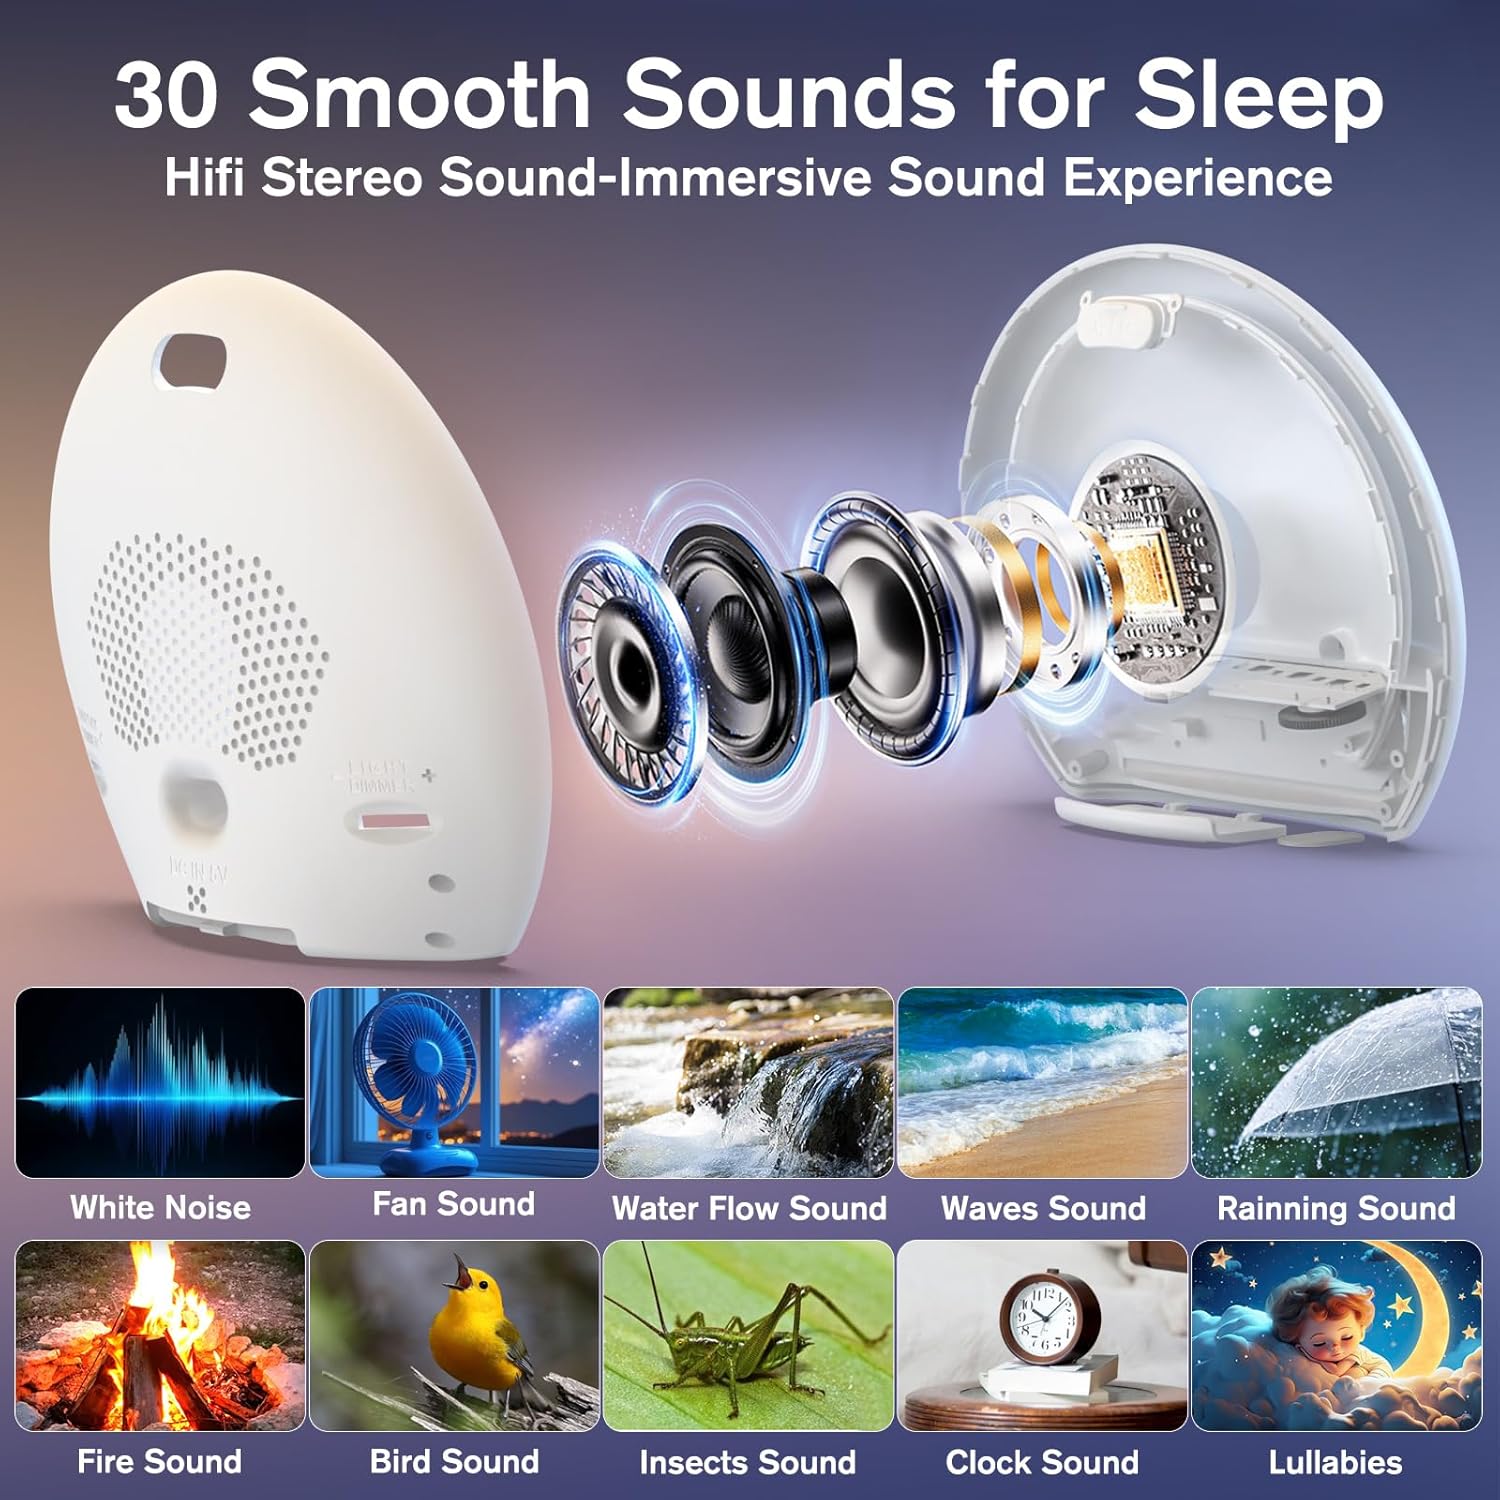
This image highlights the 30 soothing sounds available on the KEPLUG MX9, categorized into white noises and nature sounds, designed to create a tranquil environment for sleep.
Video 3: This video demonstrates the sound machine functionality, demonstrating the variety of white noise and nature sounds available.
Night Light & Dimmable Display
The alarm clock features 12-color night lights and adjustable brightness. It can be used as a bedside lamp, baby nursery light, or for creating romantic ambient lighting.
- Appuyez brièvement sur le Lumière button (sun icon) to turn the light on/off or change colors.
- Use the dedicated light dimmer slider on the back of the device to adjust the light brightness.
- The LED clock display brightness can also be adjusted to your personal comfort level using the display dimmer slider.
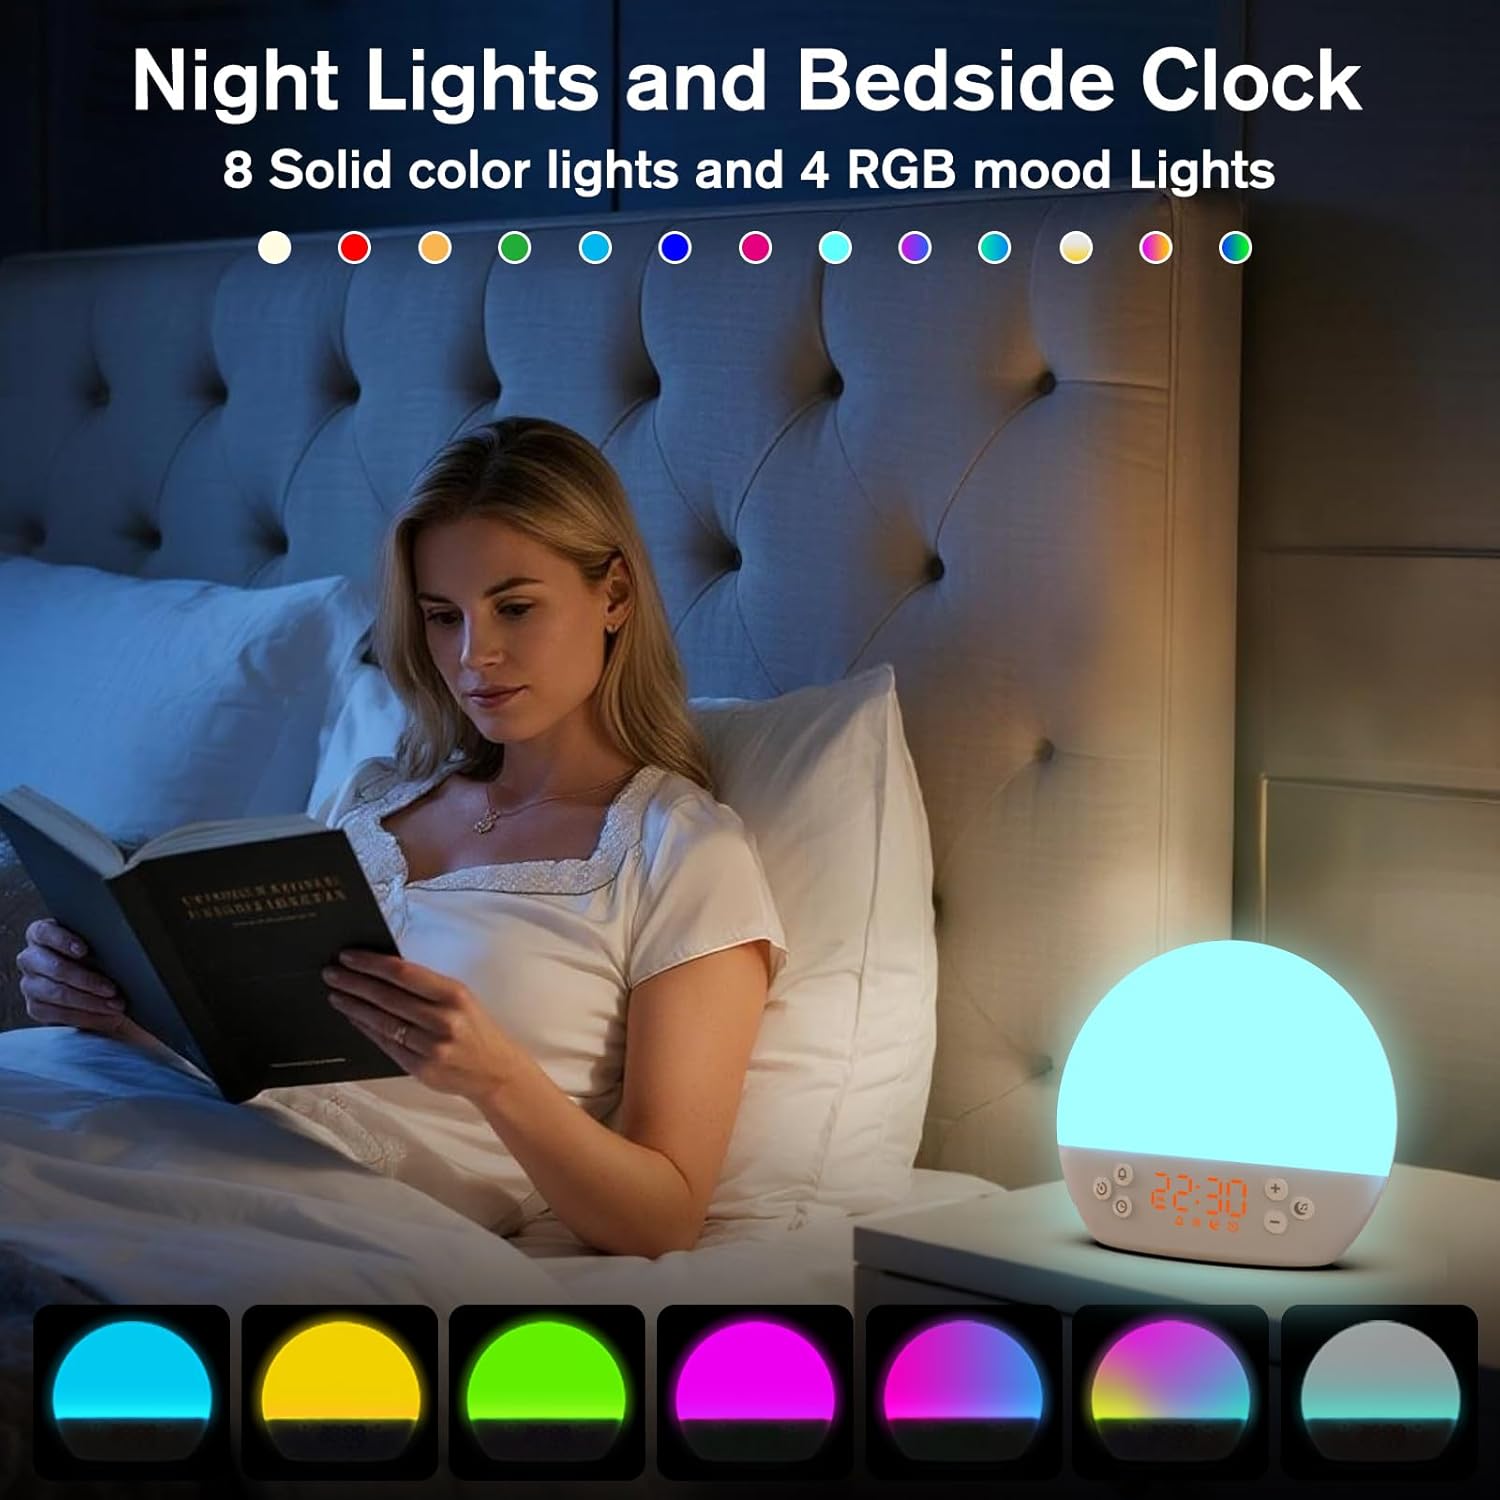
This image displays the KEPLUG MX9 alarm clock functioning as a night light, showing a range of 12 solid colors and 4 RGB mood lights. It highlights the device's versatility in creating different ambient settings.
Video 4: This video demonstrates the 12-color night light feature, showing the various color options and how to adjust them.
Intelligent Sleep Timer
The sleep timer allows you to set the device to automatically and gradually turn off sounds and lights after a specified duration (15, 30, 60, or 120 minutes), ensuring an undisturbed night's rest.
- Appuyez sur le Minuteur button (clock with arrow icon) to activate the sleep timer.
- Cycle through the available durations (15, 30, 60, 120 minutes) by repeatedly pressing the Minuteur bouton.
- The timer will begin counting down and the light/sound will gradually fade before turning off.
Entretien
Nettoyage
- Assurez-vous que l'appareil est débranché avant de le nettoyer.
- Essuyez la surface avec un chiffon doux et sec.
- N’utilisez pas de nettoyants abrasifs, de solvants ou de produits chimiques agressifs.
Stockage
Rangez l'appareil dans un endroit frais et sec, à l'abri de la lumière directe du soleil et des températures extrêmes lorsqu'il n'est pas utilisé pendant une période prolongée.
Dépannage
| Problème | Cause possible | Solution |
|---|---|---|
| L'appareil ne s'allume pas. | Câble d'alimentation non connecté ou défectueux. | Ensure the power cable is securely connected to both the device and a working power outlet. Try a different USB adapter or outlet. |
| L'alarme ne sonne pas. | Alarme non activée ou volume trop faible. | Check if the alarm icon is displayed. If not, activate the alarm. Increase the alarm volume. |
| Les réglages de l'heure sont perdus après une coupure de courant.tage. | No AAA batteries installed or batteries are depleted. | Install 2 new AAA batteries for backup. Remember, batteries only save settings, they do not power the clock for normal operation. |
| Light does not change color or brightness. | Incorrect button press or dimmer setting. | Short press the Light button to cycle colors. Use the light dimmer slider on the back to adjust brightness. |
Spécifications du produit
| Fonctionnalité | Détail |
|---|---|
| Nom du modèle | MX9 |
| Dimensions du produit | 2.76"P x 6.38"L x 5.71"H |
| Poids de l'article | 0.39 kilogrammes (13.7 onces) |
| Source d'énergie | Électrique filaire (5 V CC) |
| Batterie de secours | 2 AAA batteries (not included) for time settings only |
| Type de lumière | Wake Up Light, 12-color Night Light |
| Options de son | 30 Soothing Sounds (White Noise, Nature Sounds) |
| Sons d'alarme | 6 sons de la nature |
| Durée de sommeil | 9 minutes |
| Minuterie de mise en veille | 15, 30, 60, 120 minutes |
Consignes de sécurité
- Do not use in the bath or near water.
- Follow all instructions to avoid injury or damage to the device.
- Use at safe volumes to protect hearing.
- Tenir hors de portée des enfants et des animaux domestiques.
Garantie et assistance
For warranty information or technical support, please refer to the product packaging or contact KEPLUG customer service directly. Keep your purchase receipt for warranty claims.
Pour obtenir de l'aide supplémentaire, visitez le KEPLUG Store on Amazon.


