1. Introduction
The Audiolab 9000A is a high-performance integrated amplifier designed to be the central component of any advanced audio system. It combines a powerful amplifier, a high-resolution Digital-to-Analog Converter (DAC), and a dedicated phono preamplifier, offering extensive connectivity and advanced features for audiophiles.
This manual provides essential information for setting up, operating, and maintaining your Audiolab 9000A to ensure optimal performance and longevity.
2. Consignes de sécurité
Veuillez lire attentivement toutes les consignes de sécurité avant d'utiliser l'appareil. Conservez ce manuel pour toute consultation ultérieure.
- Alimentation: Connect the unit only to a power supply of the type marked on the rear panel.
- Ventilation: Assurez une ventilation adéquate. Ne bloquez pas les ouvertures de ventilation.
- Eau et humidité : N’exposez pas l’appareil à la pluie ou à l’humidité. Ne placez pas d’objets contenant du liquide sur l’appareil.
- Chaleur: Ne placez pas l'appareil à proximité de sources de chaleur telles que des radiateurs, des bouches de chauffage, des poêles ou tout autre appareil produisant de la chaleur.
- Nettoyage: Nettoyez uniquement avec un chiffon sec. Ne pas utiliser de nettoyants liquides ou aerosols.
- Entretien: N’essayez pas de réparer cet appareil vous-même. Confiez toute réparation à un technicien qualifié.
3. Contenu de la boîte
Carefully unpack the contents of the box. You should find the following items:
- Audiolab 9000A intégré Amplifier
- Cordon d'alimentation
- Télécommande
- Manuel de l'utilisateur (ce document)
- Antennas (for Bluetooth connectivity)
4. Produit terminéview
Panneau avant
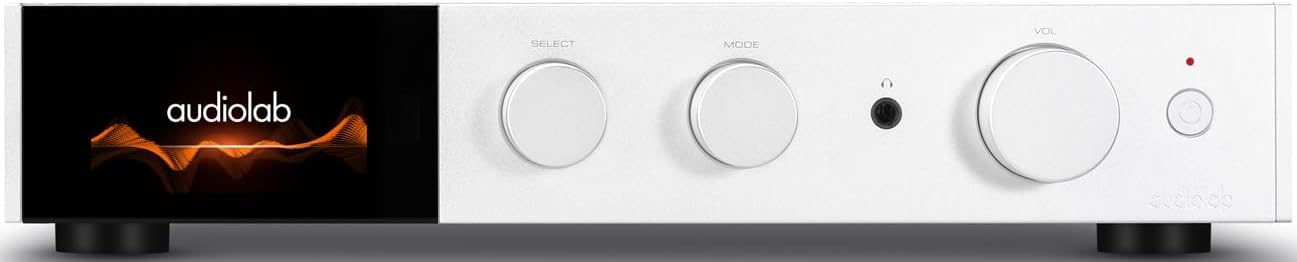
Figure 4.1 : Face avant view of the Audiolab 9000A, displaying the Audiolab logo on its full-color IPS LCD screen. The front panel features three rotary controls for Select, Mode, and Volume, along with a headphone jack and power button.

Figure 4.2 : Face avant view of the Audiolab 9000A, showcasing the full-color IPS LCD screen displaying VU meters. This visual option provides real-time audio level feedback.
The 9000A features a 4.3-inch (800 x 480mm) full-color IPS LCD screen, providing clear and informative playback, source, and file information. It also offers various display options, including two VU meter styles, allowing for visual feedback or a discreet appearance.
Connexions du panneau arrière

Figure 4.3: Rear panel of the Audiolab 9000A, showing a comprehensive array of input and output connections. These include analog, XLR, phono (MM), power amplifier input, SPDIF (coaxial and optical), PC USB, Bluetooth antenna, pre-amplifier output, stereo speaker terminals, and 12V trigger connections.
The rear panel provides a wide range of connectivity options, including multiple analog and digital inputs, a dedicated phono input, balanced XLR input, and various outputs for speakers and external components. Bluetooth antennas are also located here for wireless streaming.
Caractéristiques principales
- Amplification : Discrete Class AB power amplifier delivering 100W per channel into 8 ohms (160W into 4 ohms). Features Audiolab's CFB (Complementary Feedback) topology for superior linearity.
- Convertisseur numérique-analogique (CNA) : Equipped with the ESS 9038PRO flagship 32-bit DAC chip, supporting PCM up to 32-bit/768kHz and DSD up to DSD512.
- Décodage MQA : Full MQA decoding capability for high-resolution streaming.
- Phono Stage: Dedicated high-performance, low-noise Moving Magnet (MM) phono stage with JFET-based circuitry and precise RIAA equalization.
- Casque Amplifier : Casque dédié à retour de courant amplifier with wide bandwidth and high slew rate.
- Connectivité : Multiple analog inputs (3 x AUX, 1 x XLR), digital inputs (2 x Coaxial, 2 x Optical, 1 x PC USB), Bluetooth 5.1 with aptX HD/AAC/LDAC support.
- Modes de fonctionnement : Integrated, Pre-Power, and Pre Only modes for versatile system integration.
5. Installation
5.1 Placement
Place the Audiolab 9000A on a stable, level surface away from direct sunlight, heat sources, and excessive moisture. Ensure there is adequate space around the unit for ventilation.
5.2 Connexion des enceintes
- Ensure the 9000A is powered off and unplugged from the mains.
- Connect your loudspeakers to the speaker terminals on the rear panel (refer to Figure 4.3). Ensure correct polarity: red (+) to red (+) and black (-) to black (-).
- Tighten the binding posts securely, but do not overtighten.
5.3 Connexion des sources audio
Le 9000A offre diverses options d'entrée :
- Analog Inputs (AUX1, AUX2, AUX3): Use RCA cables to connect analog sources like CD players, tuners, or tape decks.
- Entrée XLR symétrique : For high-quality analog sources with XLR outputs.
- Entrée phono (MM) : Connect your turntable directly to this input. Ensure your turntable has a Moving Magnet (MM) cartridge.
- Digital Inputs (COAX1, COAX2, OPT1, OPT2): Connect digital sources such as CD transports, media streamers, or TVs using coaxial or optical cables.
- PC USB (USB B): Connect your computer for high-resolution audio playback.
- Bluetooth : Attach the supplied antennas to the rear panel for optimal Bluetooth signal reception.
5.4 Connexion d'alimentation
Once all audio connections are made, connect the supplied power cord to the IEC inlet on the rear panel and then to a suitable mains power outlet.
6. Mode d'emploi
6.1 Mise sous/hors tension
Press the power button on the front panel or the remote control to switch the unit on or off. The display will illuminate upon power-on.
6.2 Sélection des sources
Use the "SELECT" rotary control on the front panel or the source buttons on the remote control to cycle through the available input sources (AUX1, AUX2, AUX3, XLR, Phono, COAX1, COAX2, OPT1, OPT2, PC USB, Bluetooth).
6.3 Contrôle du volume
Adjust the listening volume using the "VOL" rotary control on the front panel or the Volume Up/Down buttons on the remote control.
Modes de fonctionnement 6.4
The 9000A offers three distinct operating modes, selectable via the menu:
- Integrated Mode: This is the default mode, where the pre-amplificateur et puissance amplifier stages are combined. Use this for connecting digital and analog sources directly to the 9000A and driving a pair of speakers.
- Pre-Power Mode: This mode disconnects the pre-amplificateur et puissance amplifier stages. The 9000A can then be used solely as a power amplifier (e.g., connected to an AV processor) or to insert external signal processing between the pre-out and power-in connections.
- Pre Only Mode: In this mode, the 9000A functions solely as a pre-amplifier, outputting the processed signal via its pre-amplifier outputs to an external power amplifier.
6.5 Filtres numériques
For digital inputs, the 9000A provides user-selectable digital filters to optimize the response to suit the source file and partnering equipment. Access these options through the unit's menu system.
6.6 Connectivité Bluetooth
- Ensure the Bluetooth antennas are connected to the rear panel.
- Select "Bluetooth" as the input source on the 9000A.
- Sur votre appareil mobile (smartphone, tablette, ordinateur portable), activez le Bluetooth et recherchez les appareils disponibles.
- Select "Audiolab 9000A" from the list to pair. Once paired, audio from your device will stream wirelessly to the amplifier.
- The 9000A supports aptX HD, AAC, and LDAC protocols for high-quality wireless audio.
6.7 Sortie casque
Connect your headphones to the 6.35mm (1/4 inch) headphone jack on the front panel. Connecting headphones will automatically mute the main speaker outputs.
7. Entretien
- Nettoyage: Use a soft, dry, lint-free cloth to clean the unit. Do not use abrasive cleaners, waxes, or solvents.
- Ventilation: Vérifiez régulièrement que les ouvertures de ventilation sont dégagées de poussière et de débris.
- Relations: Ensure all cables are securely connected. Loose connections can affect sound quality.
- Stockage: Si vous devez entreposer l'appareil pendant une période prolongée, débranchez-le de l'alimentation électrique et rangez-le dans un endroit frais et sec.
8. Dépannage
| Problème | Cause possible | Solution |
|---|---|---|
| Pas de courant | Cordon d'alimentation non branché ; prise de courant défectueuse ; appareil en mode veille. | Check power cord connection; Try a different outlet; Press power button on unit or remote. |
| Aucun son des haut-parleurs | Incorrect input selected; Speaker cables loose or incorrectly connected; Volume too low; Mute function active; Headphone connected. | Select correct input; Check speaker connections and polarity; Increase volume; Deactivate mute; Disconnect headphones. |
| Aucun son sur un canal | Speaker cable loose or faulty; Source cable faulty; Speaker faulty. | Check speaker and source cable connections; Test with another speaker or source. |
| Bruit de bourdonnement ou de bourdonnement | Ground loop; Nearby electrical interference; Faulty cable. | Ensure all components are properly grounded; Move unit away from other electronics; Try different cables. |
| Problèmes d'appariement Bluetooth | Antennas not connected; Device too far; Device already paired with another unit. | Connect Bluetooth antennas; Move device closer; Disconnect from other devices and try pairing again. |
9. Spécifications
| Catégorie | Détail |
|---|---|
| Description générale | Intégré Amplifier |
| Puissance de sortie nominale | 2 x 100W (8 ohms, THD<1%); 2 x 160W (4 ohms, THD<1%) Class AB |
| Puce CNA | ES9038Pro 32-bit DAC |
| Afficher | 4.3" (800 x 480mm) Full View Écran LCD IPS |
| Décodage MQA | Built-in Certified MQA Full Decoder (PC USB, Coax/Optical) |
| Bluetooth | Bluetooth 5.1 (aptX/aptX HD/AAC/LDAC) Support |
| Phono Stage | Dedicated High-performance, Low-noise MM Phono Stage |
| Casque AMP | Casque à rétroaction de courant dédié AMP |
| Modes de fonctionnement | Integrated / PRE-POWER / PRE Only Modes |
| USB Upgrade Support | Oui |
| Entrées | 3 x Analogue, 1 x XLR, 1 x Phono (MM), 1 x Power Amplifier, 2 x SPDIF (Coax), 2 x SPDIF (Optical), 1 x PC USB (USB B), 1 x Bluetooth, 1 x 12V Trigger |
| Sorties | 1 x PRÉ Amplifier, 1 x haut-parleur stéréo, 1 x casque, 1 x déclencheur 12V |
| Sampling Frequency (Optical/Coaxial) | 44.1 kHz à 192 kHz |
| Sampling Frequency (PC USB) | 44.1kHz-768kHz (PCM) / DSD64, DSD128, DSD256, DSD512 |
| Préamplifier Gain (max.) | +6dB (Line), +53dB (Phono MM) |
| Préamplifier THD | <0.0004% (1kHz @ 2V, Volume = 0dB) |
| DAC THD | <0.001% (1kHz @ 0dBFS) |
| Pouvoir Amplifier THD | <0.002 % (1 kHz à 50 W / 8 ohms) |
| Casque Amplifier THD | <0.01% (1kHz, 50mW) |
| Poids net | 9.4 kg |
| Dimensions (L x H x P) | 444 x 342 x 89 mm |
| Options de finition | Noir / Argent |
| Exigences en matière d'alimentation | 100-120 V ~ 50/60 Hz |
10. Garantie et assistance
Audiolab products are manufactured to the highest standards and undergo rigorous quality control. This product is covered by a manufacturer's warranty, the terms of which may vary by region. Please refer to the warranty card included with your product or visit the official Audiolab website pour des informations détaillées sur la garantie.
For technical support, service, or inquiries regarding your Audiolab 9000A, please contact your authorized Audiolab dealer or distributor. You can also find support resources, FAQs, and contact information on the official Audiolab website: www.audiolab.co.uk


