1. Consignes de sécurité
Veuillez lire et comprendre toutes les instructions avant d'installer ou d'utiliser ce produit. Le non-respect de ces instructions peut entraîner un choc électrique, un incendie ou d'autres dangers susceptibles de causer des dommages matériels ou des blessures.
- Coupez toujours l'alimentation au niveau du disjoncteur avant toute installation ou intervention.
- Consultez un électricien qualifié si vous n’êtes pas sûr du processus d’installation.
- Assurez-vous que tous les branchements électriques sont bien fixés et conformes aux codes et règlements locaux.
- Do not install on a dimmer switch.
- This fixture is rated for outdoor use and is water resistant.
2. Contenu du colis
Vérifiez que tous les composants sont présents avant de commencer l'installation.
- LED Outdoor Flood Wall Light (1 unit)
- Matériel de montage (vis, connecteurs de fils)
- Joint d'étanchéité
- Manuel d'instructions

Figure 2.1: Product components and adjustable parts.
3. caractéristiques du produit
The Maxxima LED Outdoor Flood Wall Light is designed for reliable outdoor security and illumination.
- Éclairage puissant : Delivers 950 lumens of 3000K warm white light with an energy-efficient 13W design.
- Détection de mouvement avancée : PIR motion sensor with up to a 70 ft range.
- Minuteurs réglables : Choose from 1, 5, or 10 minutes for how long the light stays on after motion detection.
- Capteur du crépuscule à l'aube : Photocell sensor automatically operates at night and conserves energy during the day.
- Tête réglable : Easily direct the light beam with a 180° vertical tilt.
- Adjustable Arm and Sensor: 90° vertical arm tilt and 180° vertical tilt & horizontal swivel for the motion sensor, with 360° sensor rotation.
- Construction durable : Built with aluminum, rated for 50,000 lifetime hours, ETL listed.
Vidéo 3.1 : Terminéview of Maxxima LED Outdoor Flood Light features and adjustability.
4. Installation
4.1 Montage du luminaire
- Coupez l’alimentation au niveau du disjoncteur avant de commencer l’installation.
- Remove the existing fixture (if any) and disconnect wiring.
- Attach the mounting plate to the junction box using the provided screws. Ensure the gasket is properly seated between the fixture and the mounting surface for a weather-tight seal.
- Feed the electrical wires from the junction box through the center hole of the mounting plate.
4.2 Connexions de câblage
Connectez les fils comme suit :
- Connectez le Noir fil reliant le luminaire au Noir (Live/Hot) wire from the junction box.
- Connectez le Blanc fil reliant le luminaire au Blanc Fil (neutre) provenant de la boîte de jonction.
- Connectez le Vert (Ground) wire from the fixture to the Vert or bare copper (Ground) wire from the junction box.
- Fixez toutes les connexions à l'aide des connecteurs de fils fournis.

Figure 4.1: Wiring connections for the flood light.
4.3 Assemblage final
- Rentrez soigneusement tous les fils dans la boîte de jonction.
- Align the fixture with the mounting plate and secure it with the remaining screws.
- Rétablir le courant au disjoncteur.
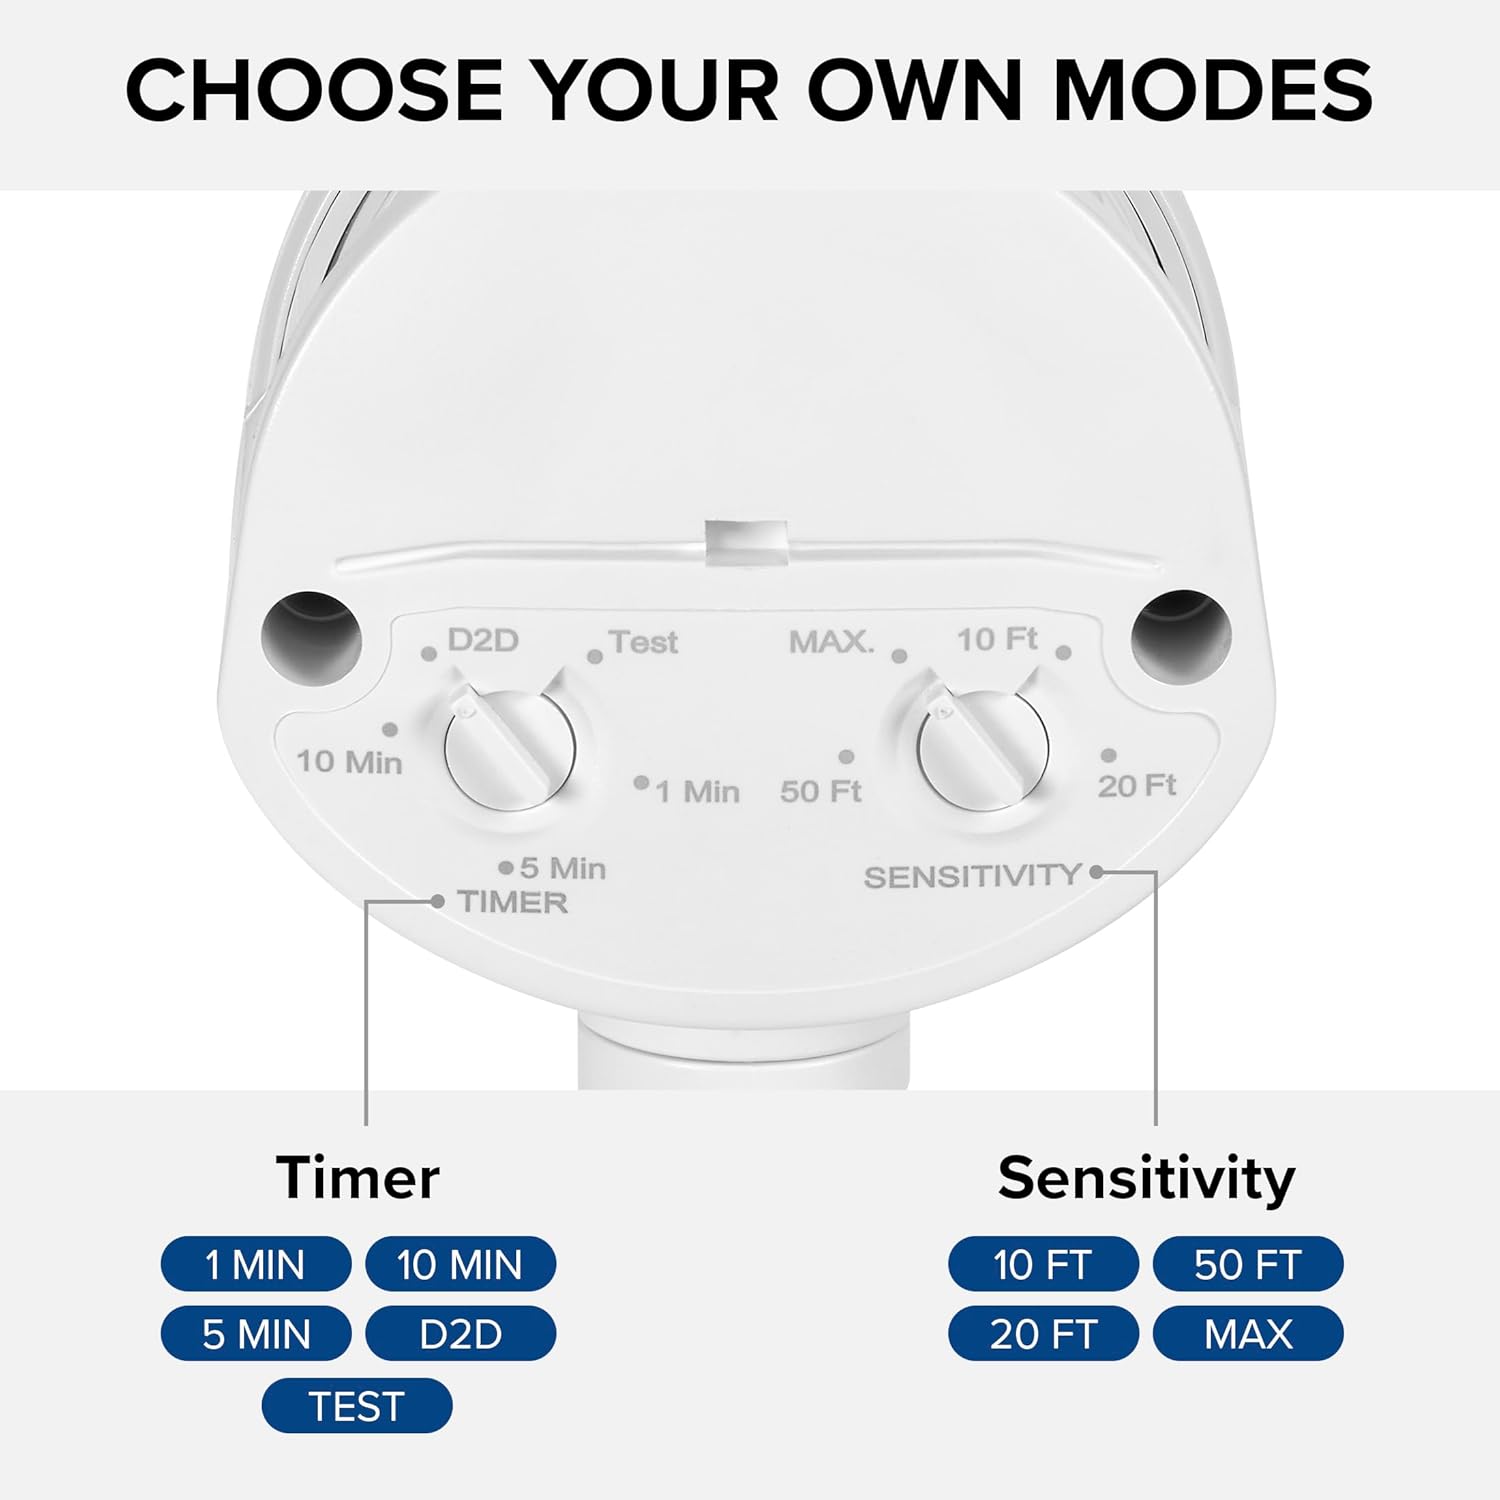
Figure 4.2: Installed flood light on an exterior wall.
5. Installation et réglages
The flood light features adjustable settings for the motion sensor and timer.
5.1 Adjusting the Sensor and Timer
The sensor unit has two adjustable dials located on its underside:
- TIMER Dial: Controls how long the light stays on after motion is detected. Options include 1 minute, 5 minutes, 10 minutes, or Dusk-to-Dawn (D2D).
- Réglage de la sensibilité : Adjusts the motion detection range. Options include 10 ft, 20 ft, 50 ft, or MAX (up to 70 ft).
To adjust, gently rotate the dials to your desired setting. The 'Test' mode on the TIMER dial allows for quick testing of motion detection during daylight hours.
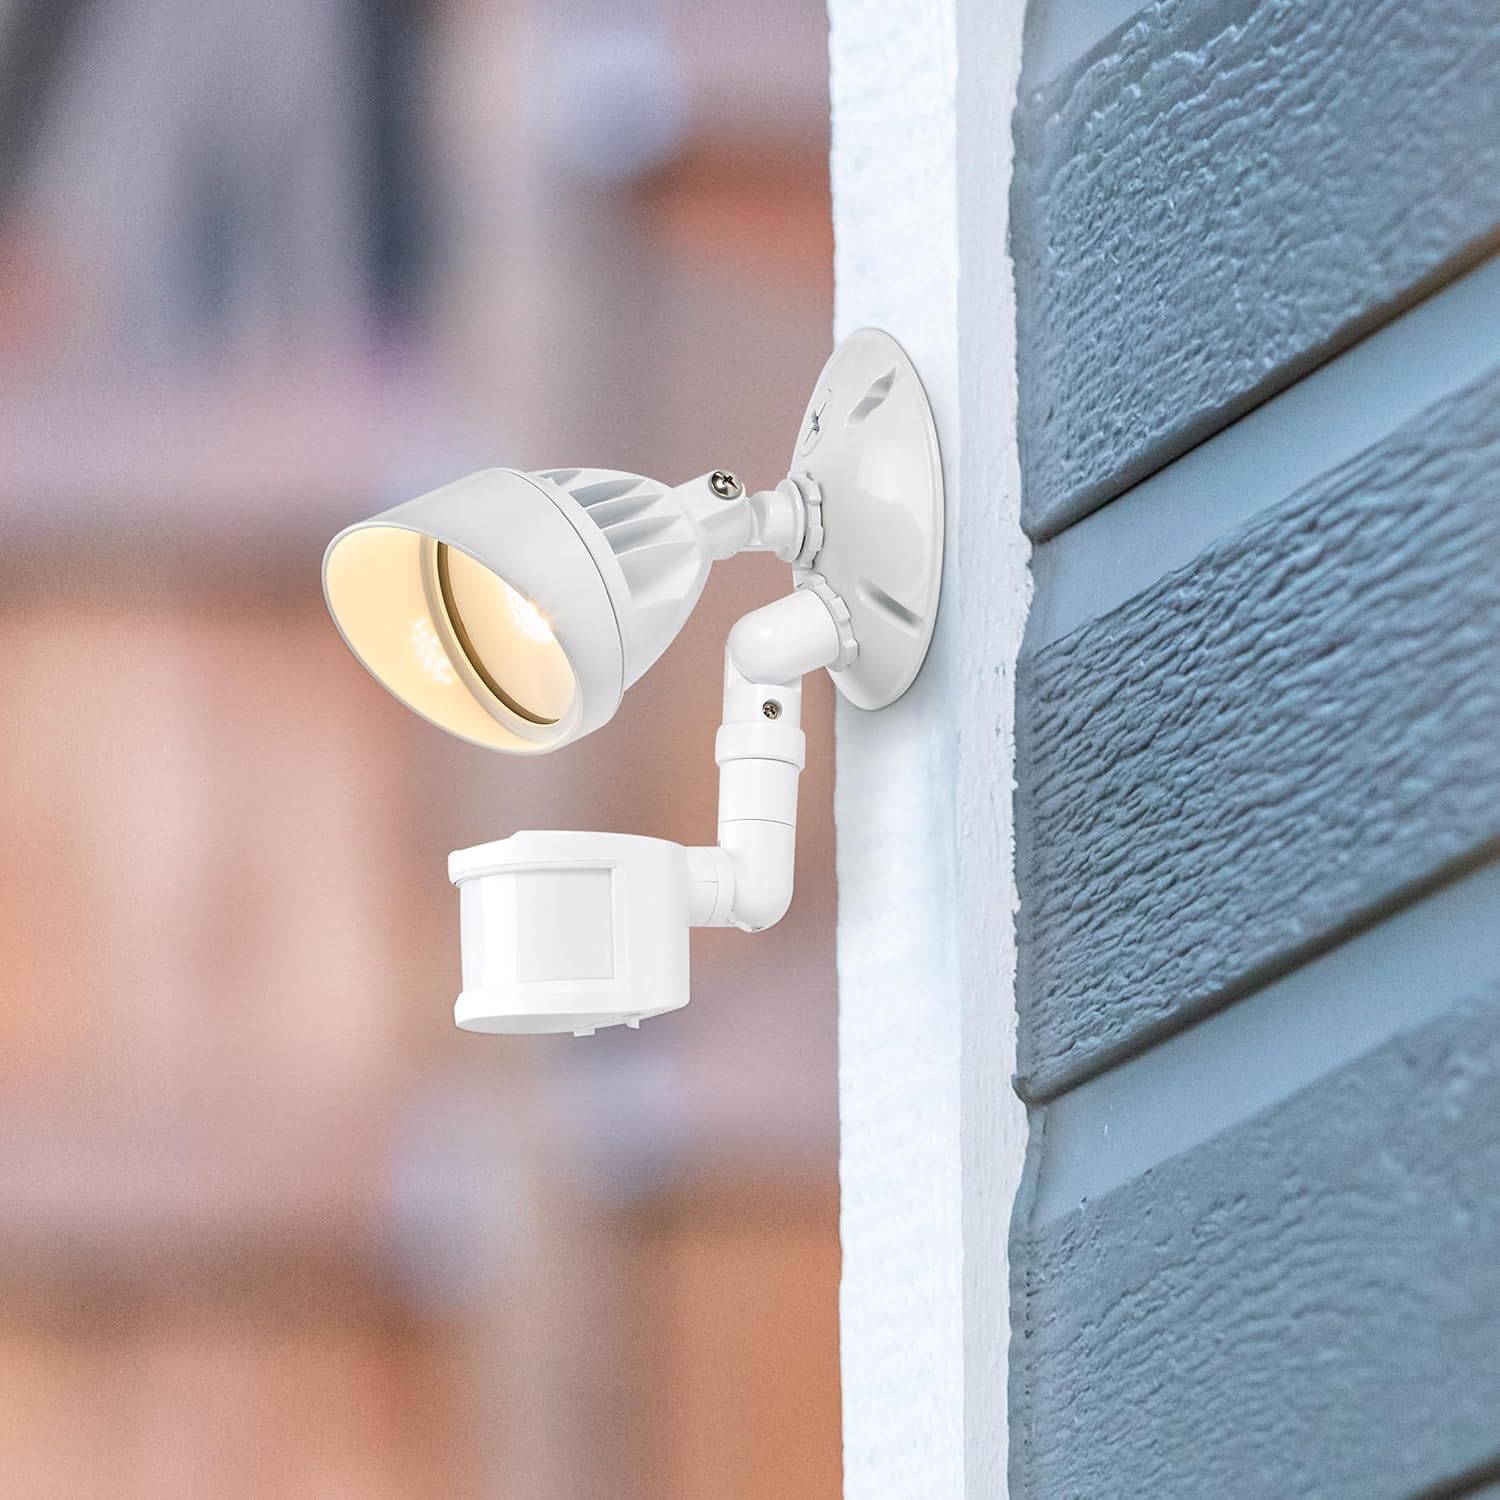
Figure 5.1: Timer and Sensitivity adjustment dials.
5.2 Adjusting Light Head and Sensor Position
The light head and motion sensor can be adjusted to cover specific areas:
- The light head can be tilted up to 180° vertically.
- The arm connecting the sensor to the base can tilt 90° vertically.
- The motion sensor itself can tilt 180° vertically and swivel 180° horizontally, with a full 360° rotation capability.

Figure 5.2: Adjustable light head and motion sensor.
6. Mode d'emploi
Once installed and configured, the Maxxima LED Outdoor Flood Wall Light operates automatically based on its sensor settings.
- Mode crépuscule-aube (D2D) : When the TIMER dial is set to D2D, the light will automatically turn on at dusk and remain on until dawn, regardless of motion.
- Mode détecteur de mouvement : When the TIMER dial is set to 1, 5, or 10 minutes, the light will activate when motion is detected within the set sensitivity range and ambient light conditions (typically at night). The light will remain on for the selected duration after the last motion is detected, then turn off.
- Mode d'essai: Setting the TIMER dial to 'Test' allows you to verify motion detection during daylight. The light will turn on for a few seconds when motion is detected, then turn off. This mode is useful for positioning the sensor.
7. Entretien
This LED flood light requires minimal maintenance.
- Nettoyage: Essuyez périodiquement le luminaire avec un chiffon doux et sec.amp Nettoyer avec un chiffon pour enlever la saleté et les débris. Ne pas utiliser de nettoyants abrasifs ni de solvants.
- Inspection: Regularly check for any loose connections or damage to the wiring or housing.
- The integrated LED light source is not user-replaceable.
8. Dépannage
If you experience issues with your flood light, refer to the following table for common problems and solutions.
| Problème | Cause possible | Solution |
|---|---|---|
| La lumière ne s'allume pas. | Pas d'alimentation ; câblage incorrect ; réglages des capteurs. | Check circuit breaker. Verify wiring connections. Adjust sensor to 'Test' mode to confirm functionality. Ensure ambient light is low enough for operation (if not in D2D). |
| La lumière reste allumée en permanence. | Sensor in D2D mode; constant motion detected; faulty sensor. | Check if TIMER dial is set to D2D. Ensure no objects are causing continuous motion detection. If problem persists, contact support. |
| La lumière s'allume trop souvent ou pas assez. | Sensitivity setting; sensor obstruction. | Adjust SENSITIVITY dial. Clear any obstructions from the sensor's field of view. |
| La lumière clignote. | Loose wiring; power fluctuations. | Coupez le courant et vérifiez tous les branchements. Consultez un électricien en cas de suspicion de fluctuations de courant. |
9. Spécifications
| Attribut | Valeur |
|---|---|
| Nom du modèle | MEL-S1013100W |
| Marque | Maxime |
| Rendement lumineux | 950 lumens |
| Quoitage | 13 watts |
| Température de couleur | 3000 Kelvin (blanc chaud) |
| Voltage | 120 volts |
| Matériel | Aluminium |
| Type de finition | Peint |
| Portée du capteur de mouvement | Jusqu'à 70 XNUMX pieds |
| Propagation du faisceau | 220° |
| Évaluation à vie | 50,000 heures |
| Certification | Répertorié ETL |
| Dimensions du produit | 4.4"L x 6"l x 6"H |
| Poids de l'article | 11.2 onces (0.7 livre) |
10. Garantie
This Maxxima LED Outdoor Flood Wall Light is backed by a Garantie de 3 ans À compter de la date d'achat. Cette garantie couvre les défauts de matériaux et de fabrication dans des conditions normales d'utilisation. Veuillez conserver votre preuve d'achat pour toute réclamation au titre de la garantie.
11. Assistance
For technical assistance, troubleshooting, or warranty inquiries, please contact Maxxima customer service.
Visit the Maxxima Store: MaxximaLEDLighting on Amazon
Maxxima is an American company with USA-based offices and customer service.


