1. Introduction
This manual provides detailed instructions for the installation, operation, and maintenance of your Gsycle Programmable Smart Thermostat. Please read this manual thoroughly before installation and use to ensure proper function and safety. Keep this manual for future reference.
2. Consignes de sécurité
- L'installation doit être effectuée par un électricien qualifié.
- Coupez toujours l'alimentation au niveau du disjoncteur avant d'installer ou d'entretenir le thermostat.
- Assurez-vous que tout le câblage est conforme aux codes et réglementations électriques locaux.
- Ne pas installer dans des endroits sujets à des vibrations excessives, à la lumière directe du soleil ou à des variations de température extrêmes.
- This thermostat is designed for AC95-240V electric heating systems. Do not use with other voltage systems or heating types.
3. Contenu du colis
Vérifiez que tous les éléments sont présents dans le colis :
- 1 x Gsycle Programmable Smart Thermostat
- 2 x vis de montage
- 1 x Manuel d'instructions (ce document)
4. Produit terminéview
The Gsycle Smart Thermostat features a sleek, round design with a 13mm recessed panel for seamless integration into your home. It includes an LED display for clear temperature readings and capacitive touch keys for intuitive control.
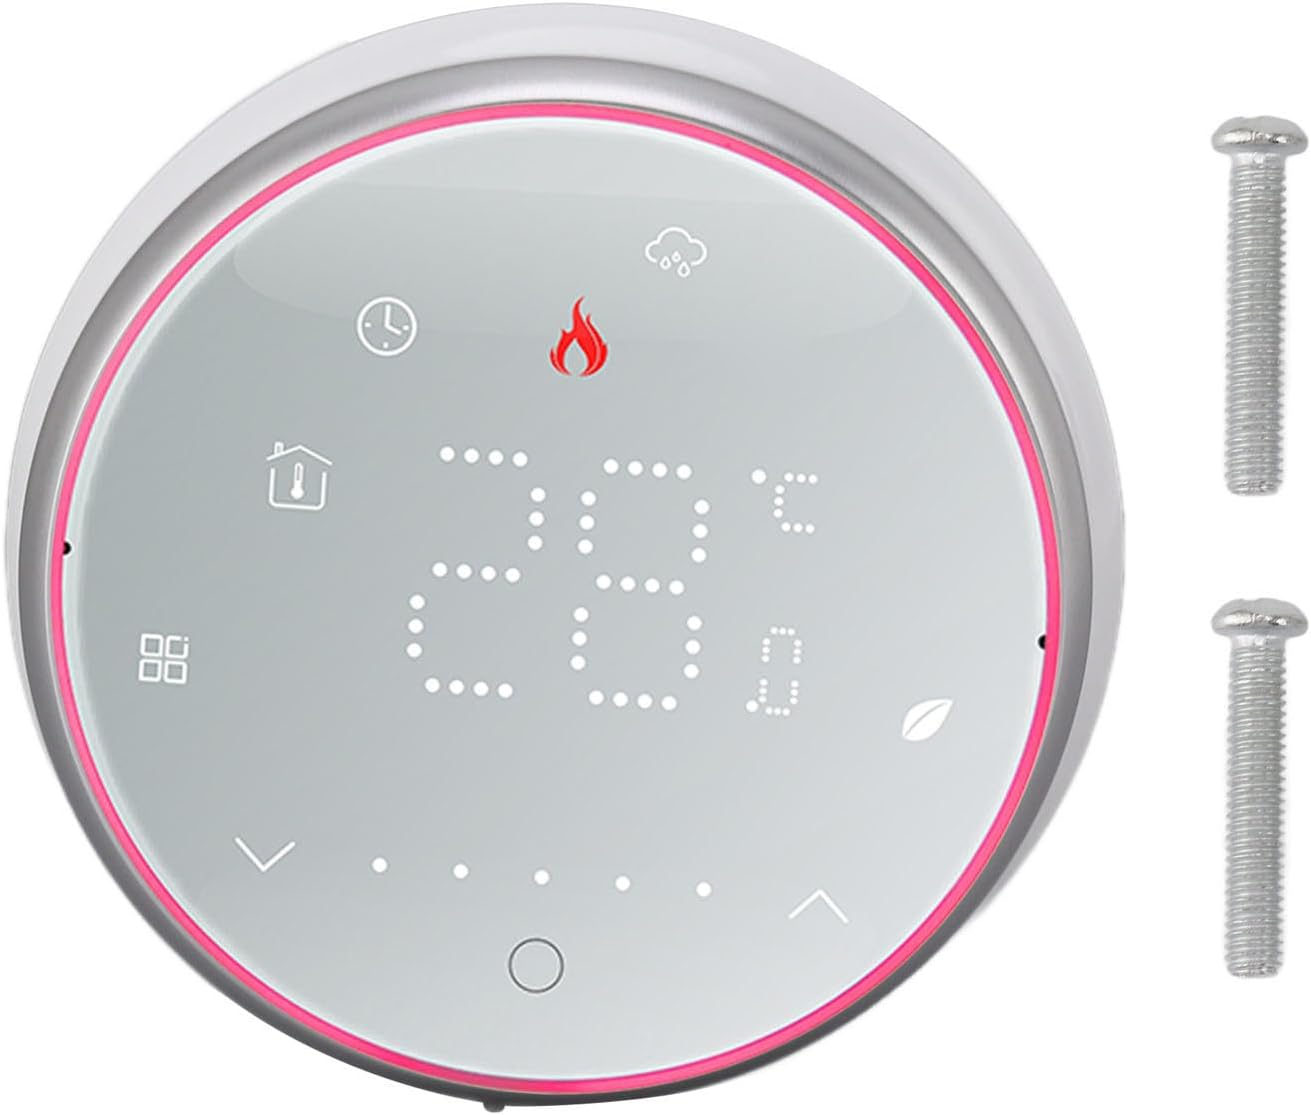
Figure 4.1 : Devant view of the Gsycle Smart Thermostat, showcasing its LED display and the included mounting screws.

Figure 4.2 : The thermostat's LED display showing different icons for mode, time, and temperature settings, indicating its versatile interface.

Figure 4.3 : Côté profile of the thermostat, illustrating its 13mm recessed panel design, thermal hole for accurate temperature sensing, and durable PC ABS shell construction.
5. Configuration et installation
Follow these steps for proper installation of your thermostat. Ensure power is OFF before proceeding.
5.1 Montage
- Choisissez un emplacement approprié sur un mur intérieur, à l'abri de la lumière directe du soleil, des courants d'air ou des sources de chaleur.
- The thermostat is designed to fit standard 86x86mm or European-style concealed boxes.
- Carefully separate the front panel from the back plate.
- Mount the back plate to the wall box using the provided screws. Ensure it is level.
5.2 Câblage
Connect the electrical wires to the terminals on the back plate according to your heating system's wiring diagram. This thermostat is for electric heating systems (AC95-240V, 16A). Consult a qualified electrician if you are unsure about wiring connections.
5.3 Assemblage final
- Once wiring is complete and secure, carefully reattach the front panel to the mounted back plate.
- Rétablissez le courant au niveau du disjoncteur. L'affichage du thermostat devrait s'allumer.

Figure 5.1 : The Gsycle Smart Thermostat seamlessly installed on a wall, demonstrating its recessed design in a typical home environment.
6. Mode d'emploi
Your Gsycle Smart Thermostat offers intuitive control and programmable features for optimal comfort and energy efficiency.
6.1 Fonctionnement de base
- Marche/Arrêt : Press the power icon (usually a circle with a line) to turn the thermostat on or off.
- Réglage de la température : Use the up and down arrow icons on the display to set your desired temperature. The current room temperature and set temperature will be displayed.
- Sélection du mode : Press the mode icon (e.g., flame for heating) to cycle through available operating modes.
6.2 paramètres programmables
The thermostat supports 5+1+1 day programming (5 weekdays, Saturday, Sunday) with 6 programmable time slots per day. This allows you to customize temperature settings to match your schedule and save energy.
- Access the programming menu by pressing and holding the menu/settings icon (refer to display icons).
- Navigate through the days and time slots using the arrow keys.
- Définissez la température souhaitée pour chaque créneau horaire.
- Confirm settings to save. The thermostat will automatically follow the programmed schedule.
6.3 Power Failure Protection
The thermostat is equipped with a power failure protection function. All your settings, including programmed schedules, are safely stored in memory and will be retained even during a power outage. No need to reconfigure after power is restored.
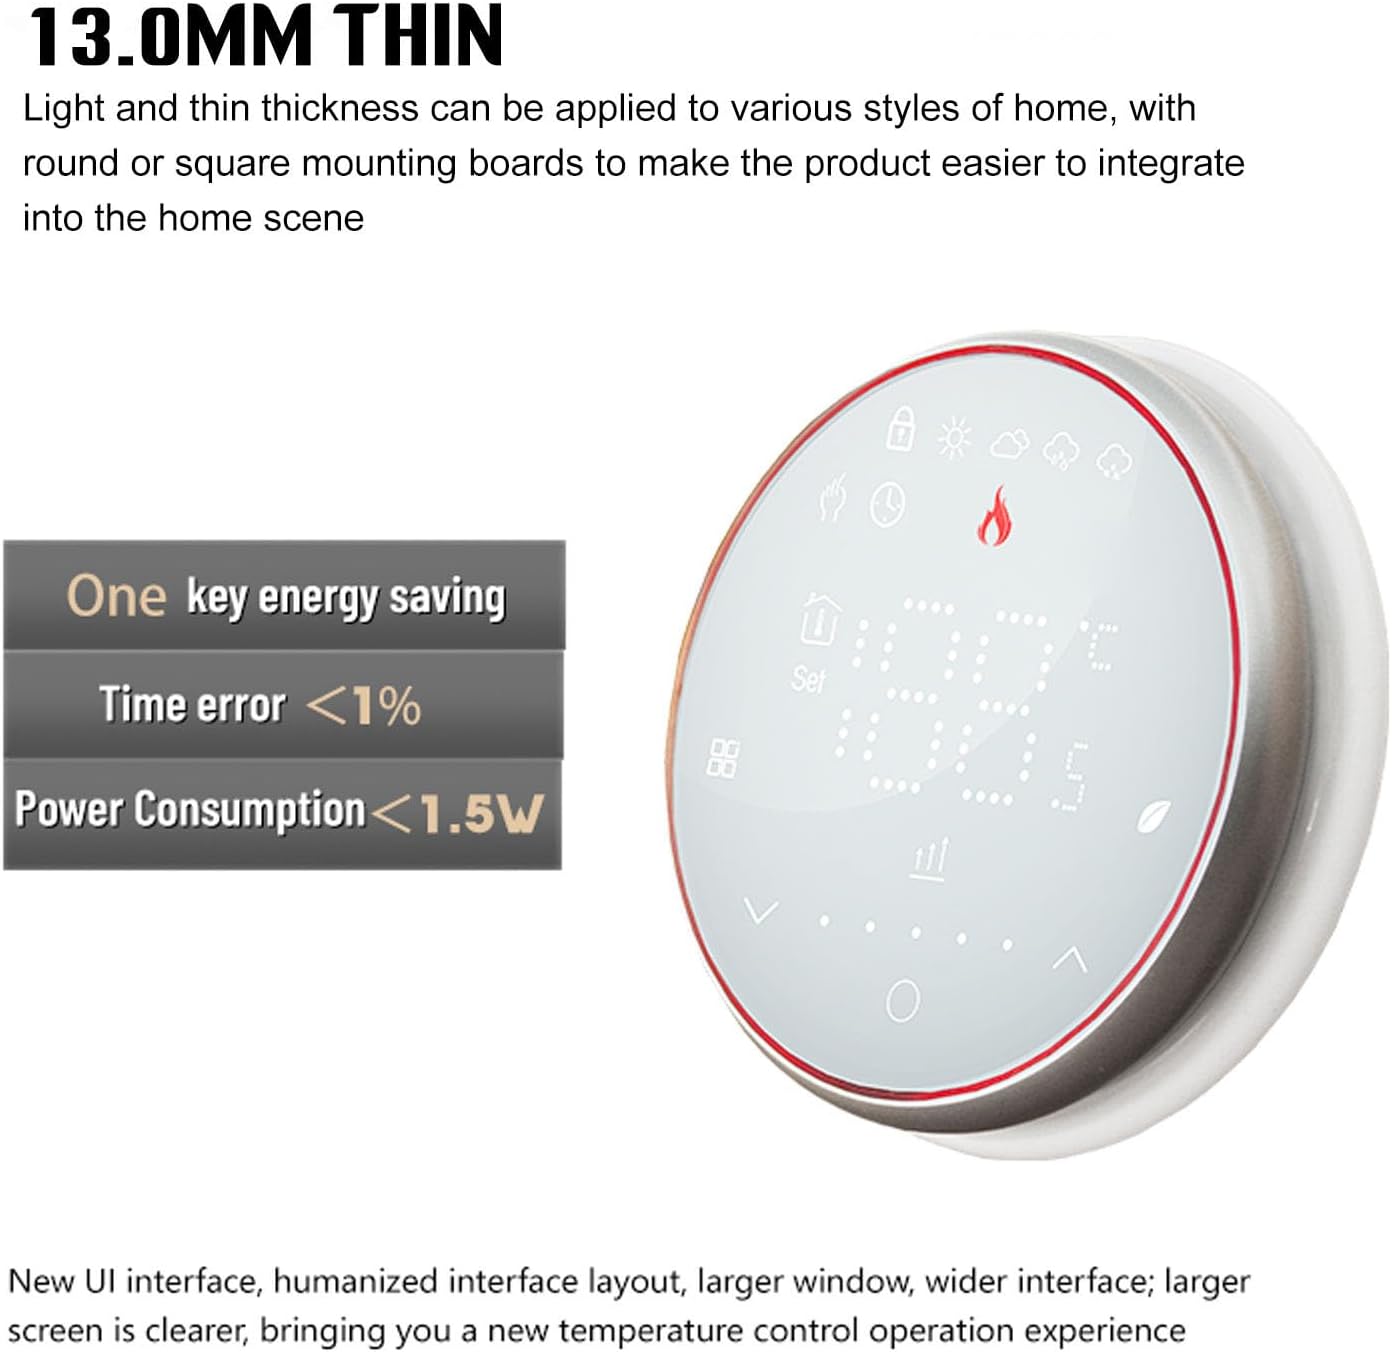
Figure 6.1 : The thermostat's design emphasizes its 13.0mm thin profile and energy-saving capabilities, including a time error of less than 1% and power consumption below 1.5W.
7. Entretien
To ensure optimal performance and longevity of your Gsycle Smart Thermostat, follow these simple maintenance guidelines:
- Nettoyage: Gently wipe the display and outer casing with a soft, dry cloth. Do not use abrasive cleaners, solvents, or chemical sprays, as these can damage the surface or internal components.
- Zone du capteur : Ensure the thermal hole (refer to Figure 4.3) is free from dust or obstructions to maintain accurate temperature readings.
- Évitez les impacts : Protect the thermostat from physical impact or dropping, which can damage the sensitive electronics.
8. Dépannage
Si vous rencontrez des problèmes avec votre thermostat, consultez les problèmes et solutions courants suivants :
| Problème | Cause possible | Solution |
|---|---|---|
| L'affichage du thermostat est vide | No power, incorrect wiring | Check circuit breaker. Verify wiring connections are secure and correct. |
| Lecture de température incorrecte | Sensor obstructed, thermostat location | Ensure the thermal hole is clear. Relocate thermostat if exposed to drafts or direct heat. |
| Le système de chauffage ne répond pas. | Wiring issue, system fault | Check wiring to the heating system. Consult a qualified technician if the heating system itself is faulty. |
| Programmable schedule not working | Settings not saved, manual override | Ensure programmed settings were saved. Check if the thermostat is in manual mode; switch to auto/program mode. |
Si le problème persiste après avoir essayé ces solutions, veuillez contacter le service client.
9. Spécifications
| Fonctionnalité | Spécification |
|---|---|
| Modèle | Gsycle8gzshgdwa1-12 |
| Voltaget gamme | CA 95-240 V |
| Actuel | 16A |
| Capteur | NTC3950, 10K |
| Erreur de température | ±1 Degree Celsius |
| Plage de contrôle de la température | 5-35 degrés Celsius |
| Plage de température ambiante | 5-99 degrés Celsius |
| Afficher la plage de température | 5-99 degrés Celsius |
| Normal Working Environment Temperature | 0-45 degrés Celsius |
| Normal Working Environment Humidity | 5-95% HR (sans condensation) |
| Température de stockage | -10-45 degrés Celsius |
| Consommation d'énergie | < 1.5 W |
| Erreur de temps | <1% |
| Mounting Insert Box | 86x86mm or Regular European Style Concealed Box |
| Connecteur | 2 x 1.5 mm² ou 1 x 2.5 mm² |
| Niveau de protection | IP20 |
| Type de clé | Touches tactiles capacitives |
| Matériel | PC, ABS |
| Poids | Environ 200 g / 7.1 oz |
| Épaisseur du panneau | 13mm (recessed) |
10. Garantie et assistance
Gsycle products are manufactured to high-quality standards. For warranty information or technical support, please refer to the contact details provided with your purchase documentation or visit the official Gsycle website. Please have your model number (Gsycle8gzshgdwa1-12) ready when contacting support.


