1. Introduction et plusview
The Osprey Raptor Jr is a mountain biking backpack designed for young riders. It features a 1.5-liter hydration reservoir, storage for additional equipment, and a secure fit system. This manual provides essential information for the proper use and care of your Raptor Jr backpack.

Illustration 1.1 : Avant view of the Osprey Raptor Jr backpack in Tundra Green.
This image displays the main product, the Osprey Raptor Jr backpack, showcasing its compact design and Tundra Green color. The Osprey logo is visible on the top flap, and the 'Raptor Jr' model name is printed near the bottom.
2. Principales caractéristiques
The Raptor Jr backpack is equipped with several features to enhance the mountain biking experience for young users:
- Integrated Hydration: Includes an Osprey Hydraulics LS 1.5 L reservoir for convenient hydration on the go.
- Secure Fit System: Bike-specific winged shoulder harness and airmesh wrap hipbelt provide stability during active use.
- Helmet Carry: Upper compression straps are designed to securely carry a full-face helmet.
- Options de stockage: Features a front shove-it pocket for quick access items and internal organization for tools and small essentials.
- Visibilité: Reflective logo enhances safety in low-light conditions.
- Matériaux durables : Constructed with bluesign® APPROVED, 100% recycled 210D dobby nylon with a DWR treatment made without PFAS.

Image 2.1: Young rider utilizing the Raptor Jr backpack during mountain biking.
This image shows a child wearing the Osprey Raptor Jr backpack while riding a mountain bike, demonstrating the pack's intended use and how it sits on a young rider's back.

Image 2.2: Hydration reservoir in use.
A young person is shown drinking from the bite valve of the Osprey Hydraulics reservoir, highlighting the integrated hydration feature of the backpack.
3. Installation
3.1 Hydration Reservoir Installation and Filling
- Access Reservoir Compartment: Locate the dedicated zippered compartment for the hydration reservoir, typically on the back panel of the pack.
- Remove Reservoir: Carefully pull out the Osprey Hydraulics LS 1.5 L reservoir.
- Remplissez le réservoir : Unscrew the cap, fill with water, and securely re-fasten the cap. Ensure the slide-seal closure is fully engaged if applicable.
- Insérer le réservoir : Slide the filled reservoir back into its compartment. Ensure the hose is routed through the designated port, usually over the shoulder.
- Tuyau sécurisé : Attach the bite valve to the magnetic sternum strap buckle or other designated clip on the shoulder strap for easy access.

Image 3.1: Back panel and hydration hose routing.
This image shows the back of the Osprey Raptor Jr backpack, highlighting the mesh back panel for ventilation and the hydration hose routed over the shoulder strap, ready for use.
3.2 Ajustement
Proper fit is crucial for comfort and stability, especially during mountain biking.
- Desserrer les sangles : Before putting on the pack, loosen all straps: shoulder straps, sternum strap, and hipbelt.
- Put on Pack: Placez le sac à dos sur votre dos.
- Adjust Hipbelt: Fasten and tighten the hipbelt so it sits comfortably around your hips, distributing weight effectively.
- Resserrer les bretelles : Pull the shoulder straps downwards to snug the pack against your back. Avoid overtightening, which can cause discomfort.
- Ajuster la sangle de poitrine : Fasten the sternum strap across your chest. Adjust its height and tension to prevent shoulder straps from slipping and to enhance stability. The magnetic bite valve attachment should be easily accessible.

Illustration 3.2 : Avant view of the pack on a child.
This image shows a child wearing the Osprey Raptor Jr backpack from the front, illustrating the placement of the shoulder and sternum straps.
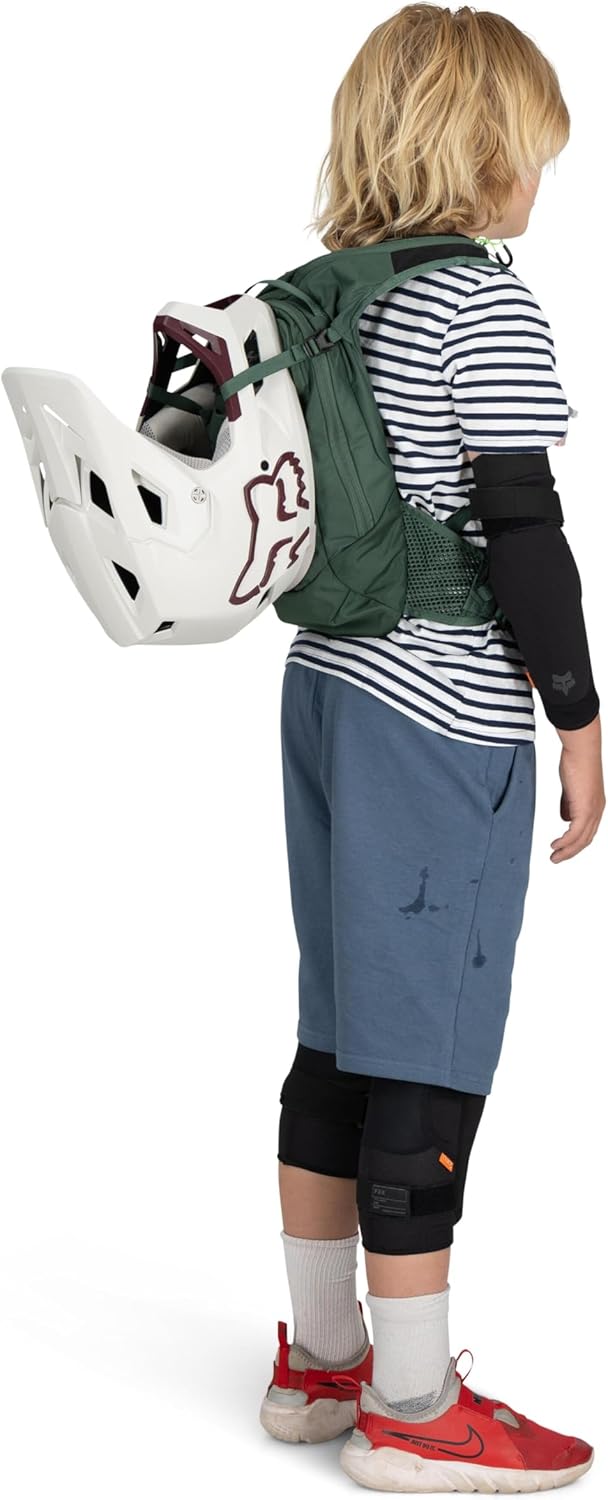
Image 3.3 : Dos view of the pack on a child.
This image shows a child wearing the Osprey Raptor Jr backpack from the back, demonstrating how the pack sits and the hipbelt's position.
4. Fonctionnement
4.1 Using Storage Pockets
- Front Shove-It Pocket: Use this external pocket for quick access items like a light jacket, gloves, or snacks.
- Internal Tool Organization: The main compartment includes sleeves and pockets designed to keep bike tools, spare tubes, and other small essentials organized and secure.
4.2 Helmet Carry
The Raptor Jr features a system for carrying a full-face helmet when not in use.
- Position Helmet: Place the helmet on the front of the pack, ensuring it is centered and stable.
- Sangles sécurisées : Utilize the upper compression straps to cinch down and secure the helmet firmly against the pack. Adjust tension to prevent movement.
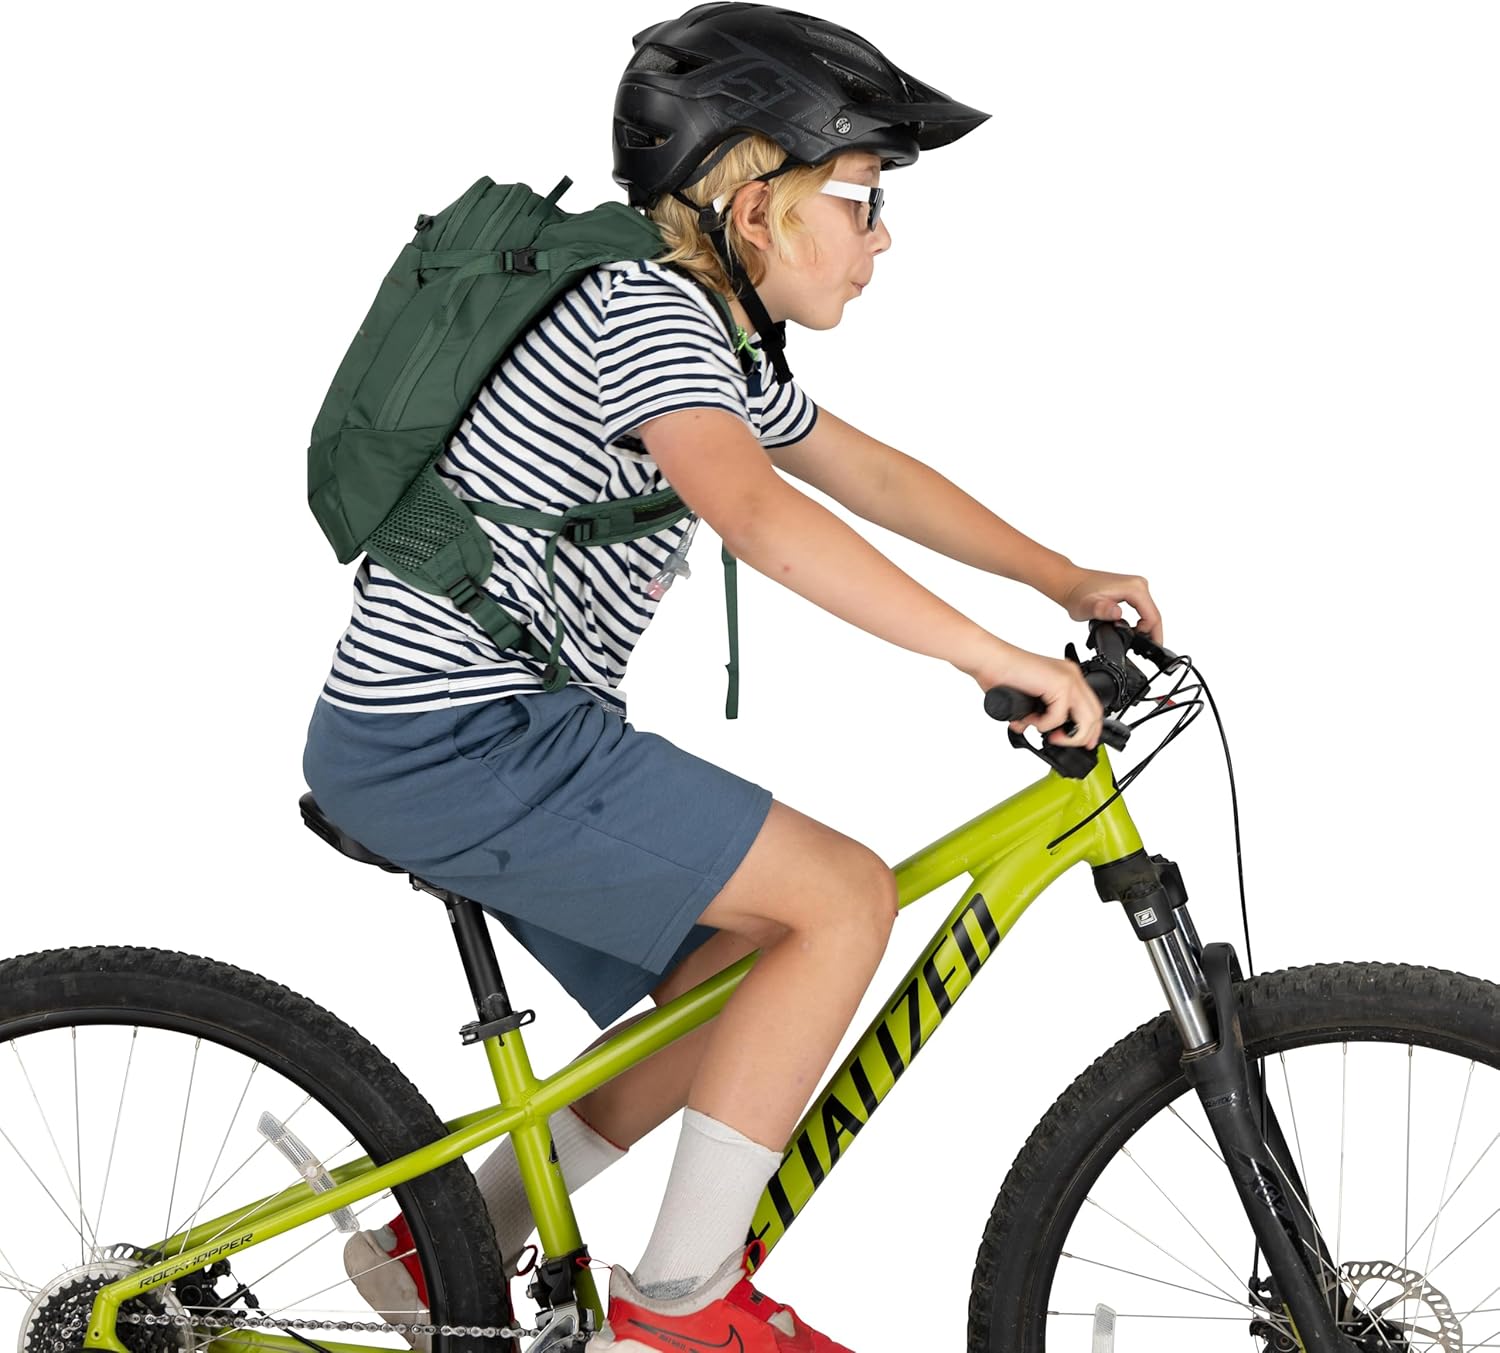
Image 4.1: Helmet attached to the backpack.
This image shows a child wearing the Osprey Raptor Jr backpack with a full-face helmet securely attached to the exterior using the pack's compression straps.
5. Entretien
5.1 Hydration Reservoir Care
- Nettoyage: After each use, empty the reservoir and rinse thoroughly with warm water. For deeper cleaning, use a mild soap or specialized reservoir cleaning tablets.
- Séchage: Ensure the reservoir is completely dry before storage to prevent mold and mildew. Use a reservoir drying rack or hang upside down with the opening propped open.
- Stockage: Store the clean, dry reservoir in a cool, dry place, away from direct sunlight.
5.2 Backpack Care
- Nettoyage: Nettoyer localement le sac à dos avec un produit anti-taches.amp cloth and mild soap. Do not machine wash or tumble dry, as this can damage the fabric and coatings.
- Séchage: Air dry the backpack completely in a shaded, well-ventilated area.
- Stockage: Store the pack in a cool, dry place, away from direct sunlight and extreme temperatures.
6. Dépannage
- Leaking Reservoir: Ensure the reservoir cap is tightly secured and the slide-seal closure (if applicable) is fully engaged. Check the hose connections for tightness. Inspect the reservoir for punctures or damage.
- Difficulty Drinking from Bite Valve: Ensure the bite valve is in the open position (twist to open/close). Bite down firmly on the valve while sucking. Check for kinks in the hydration hose.
- Coupe inconfortable : Re-adjust all straps (hipbelt, shoulder straps, sternum strap) according to the "Adjusting Fit" section. Ensure the pack is not overloaded beyond its intended capacity.
- Fermetures éclair qui coincent : Apply a small amount of zipper lubricant or graphite to the zipper teeth. Avoid forcing stuck zippers.
7. Spécifications
| Fonctionnalité | Détail |
|---|---|
| Nom du modèle | Raptor Jr |
| Numéro de modèle | 10006467 |
| Capacité | 5 Liters (Pack), 1.5 Liters (Reservoir) |
| Dimensions (H x L x P) | 14.6 x 8.3 x 6.7 pouces (37 x 21 x 17 cm) |
| Poids de l'article | 1.21 livres (0.55 kg) |
| Matériel | bluesign® APPROVED, 100% recycled 210D dobby nylon, DWR treatment made without PFAS |
| Type de sangle | Adjustable Shoulder, Sternum, and Hipbelt |
| Pocket Description | Front Shove-It Pocket, Internal Tool Organization |
| Code UPC | 843820195613 |

Image 7.1: Weight and volume specifications.
This image visually indicates a weight of 0.98 lb / 0.45 kg and a volume of 5 L / 305 in³, along with the bluesign® product certification. Please refer to the table above for the specific product weight of 1.21 pounds.
8. Garantie et assistance
8.1 Osprey All Mighty Guarantee
Osprey stands behind the quality of its products with the "All Mighty Guarantee." This commitment ensures that Osprey products are built to last. If your product experiences damage, such as a torn fabric, worn-out buckle, or broken zipper, Osprey will repair or replace it at no cost.
Note: This guarantee excludes certain products like Poco Child Carrier and Accessories, Raptor Pro, and Soelden/Sopris Pro, which have a limited five- or seven-year guarantee based on their practical lifespan. The Raptor Jr is covered under the standard All Mighty Guarantee.

Image 8.1: Osprey All Mighty Guarantee information.
This image displays the Osprey All Mighty Guarantee logo and text, emphasizing the brand's commitment to product durability and customer support.
For more details or to initiate a warranty claim, please visit the official Osprey website ou contactez leur support client.
Support en ligne: osprey.com/garantie


