1. Introduction
Thank you for choosing the Cangaroo Cai 2-in-1 Sterilizer and Dryer. This appliance is designed to sterilize and dry baby bottles and accessories, ensuring a hygienic environment for your baby's feeding items. It can sterilize up to six standard bottles simultaneously and is also suitable for smaller items like pacifiers and teats. This multifunctional device features an LCD display and touchscreen controls for ease of use. Please read this manual carefully before use and keep it for future reference.
2. Consignes de sécurité importantes
- Lisez toutes les instructions avant d’utiliser l’appareil.
- Ne plongez pas l'appareil, le cordon ou la fiche dans l'eau ou d'autres liquides.
- Tenir hors de portée des enfants. Cet appareil n'est pas un jouet.
- Placez toujours l'appareil sur une surface stable et résistante à la chaleur.
- N’utilisez pas l’appareil si le cordon ou la fiche est endommagé(e), ou si l’appareil fonctionne mal ou a été endommagé(e) de quelque manière que ce soit.
- Utilisez uniquement de l'eau distillée pour la stérilisation afin d'éviter l'accumulation de calcaire.
- Do not open the lid during operation as hot steam will escape.
- Laissez l'appareil refroidir complètement avant de le nettoyer ou de le ranger.
- Débranchez l'appareil de la prise lorsqu'il n'est pas utilisé et avant de le nettoyer.
- Assurer le voltage indiqué sur l'appareil correspond à votre vol localtage.
- Cet appareil est destiné à un usage domestique uniquement. Ne l'utilisez pas à l'extérieur.
3. Composants du produit
Familiarize yourself with the parts of your Cangaroo Cai Sterilizer and Dryer:
- Main Unit (Base with heating plate and control panel)
- Porte-bouteilles
- Plateau d'accessoires
- Couvercle
- Tongs (for hygienic handling of hot items)
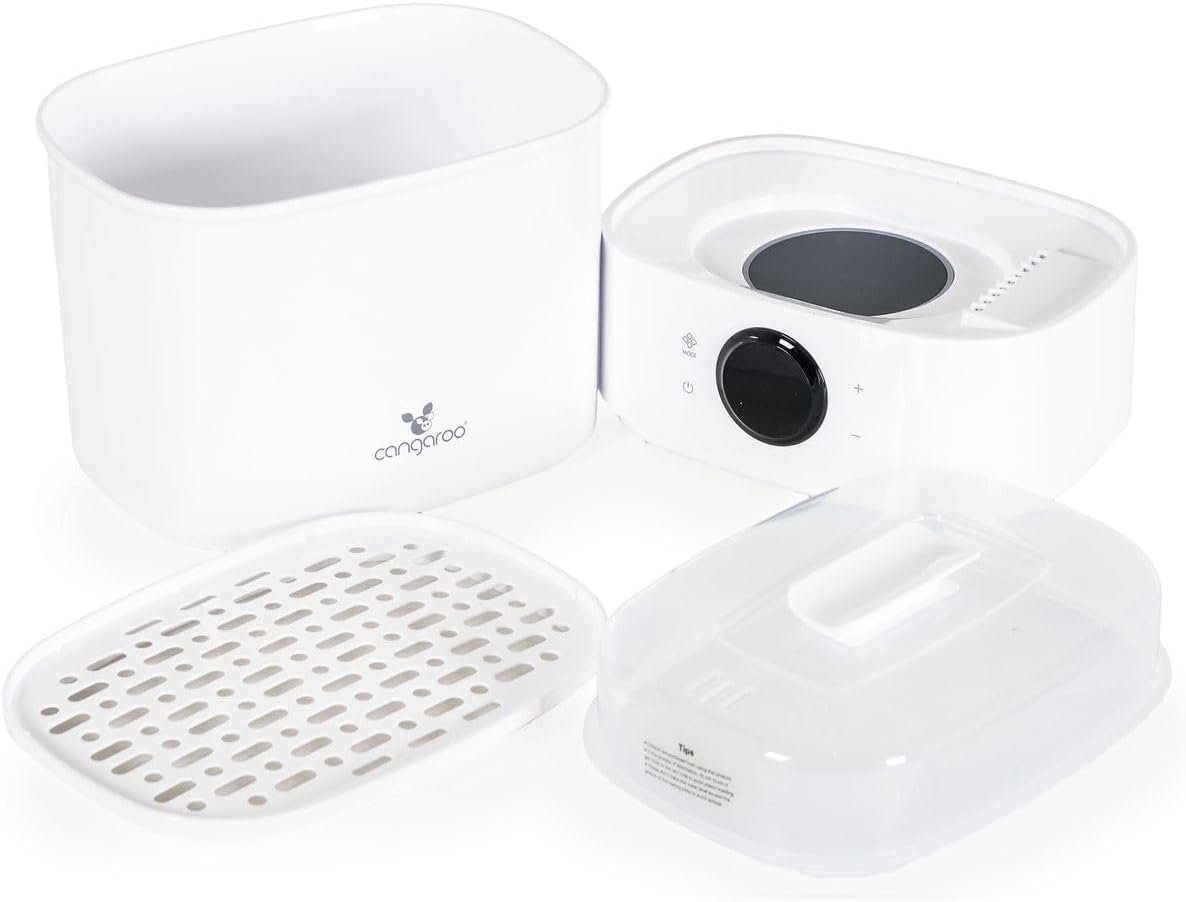
Image 3.1: All components of the Cangaroo Cai 2-in-1 Sterilizer and Dryer, including the main unit, bottle rack, accessory tray, and lid.

Image 3.2: The Cangaroo Cai 2-in-1 Sterilizer and Dryer shown with the included tongs for hygienic handling of sterilized items.
4. Installation et première utilisation
- Déballer: Retirez soigneusement tous les composants de l'emballage.
- Faire le ménage: Wash all removable parts (bottle rack, accessory tray, lid, tongs) in warm soapy water, rinse thoroughly, and dry. Wipe the main unit with a damp tissu.
- Assembler: Place the main unit on a clean, flat, heat-resistant surface.
- Ajoutez de l'eau: Using a measuring cup (not included, typically 70-100ml is sufficient), pour the recommended amount of distilled water onto the heating plate of the main unit. Do not overfill.
- Charger les éléments :
- Placez les bouteilles à l'envers sur le porte-bouteilles.
- Place smaller items like teats, pacifiers, or bottle caps on the accessory tray.
- Couverture: Placez le couvercle fermement sur l'ensemble assemblé.
- Connecter: Branchez le cordon d’alimentation sur une prise électrique adaptée.

Image 4.1: The Cangaroo Cai 2-in-1 Sterilizer loaded with baby bottles and accessories, ready for operation.
5. Mode d'emploi
The Cangaroo Cai Sterilizer features an LCD display and touchscreen controls for easy operation.
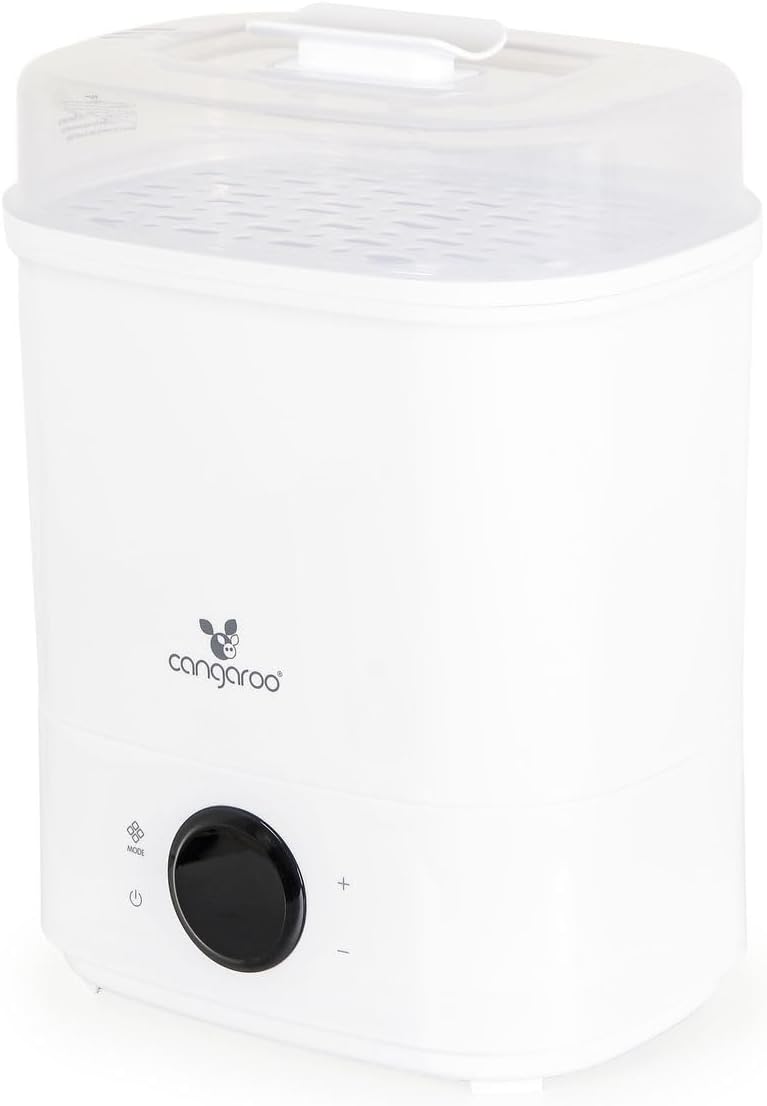
Image 5.1: Close-up of the Cangaroo Cai 2-in-1 Sterilizer's control panel, showing the LCD display, 'Mode' button, power button, and '+' / '-' buttons.
5.1. Marche/Arrêt
- Appuyez sur le Bouton d'alimentation (
 ) to turn the appliance on or off. The LCD display will illuminate.
5.2. Sélection d'un mode
The appliance offers a 2-in-1 function: Sterilization and Drying.
- Appuyez sur le Bouton MODE (
 ) to cycle through available operating modes. The display will show the selected mode.
 - Mode automatique : This mode sterilizes for 10 minutes and then dries for 50 minutes. This is the recommended default for a complete cycle.
- Other modes (e.g., Sterilize Only, Dry Only) may be available. Refer to the display for current selection.
5.3. Adjusting Time (if applicable)
If the selected mode allows for time adjustment (e.g., drying time), use the '+' et '-' buttons on the touchscreen to increase or decrease the duration.
5.4. Démarrage de l'opération
- Once the desired mode is selected, the appliance will typically start automatically after a few seconds, or you may need to press the Power button again to confirm and start.
- The light indicator will show that the appliance is operating.
- During operation, hot steam will be generated. Do not open the lid.
5.5. Après l'opération
- The appliance will automatically shut off when the cycle is complete.
- Débranchez l'appareil de la prise de courant.
- Allow the unit to cool down for at least 10 minutes before carefully removing the lid. Use the provided tongs to remove sterilized items to maintain hygiene and avoid burns.
6. Nettoyage et entretien
Regular cleaning ensures optimal performance and extends the lifespan of your sterilizer.
- Débranchez et refroidissez : Débranchez toujours l'appareil et laissez-le refroidir complètement avant de le nettoyer.
- Nettoyer la plaque chauffante :
- Over time, mineral deposits (limescale) may build up on the heating plate, especially if tap water is used. This can reduce efficiency.
- To descale, mix 50ml of white vinegar with 100ml of water and pour it onto the heating plate. Let it soak for 30 minutes to an hour, or until the deposits loosen.
- Do not turn on the appliance with the descaling solution.
- Pour out the solution and wipe the heating plate with a damp cloth. Rinse thoroughly with clean water.
- Alternatively, use a commercial descaling solution suitable for baby appliances, following the manufacturer's instructions.
- Clean Other Parts: Wash the bottle rack, accessory tray, lid, and tongs in warm soapy water. Rinse thoroughly and dry. These parts are generally not dishwasher safe unless specified.
- Essuyer l'unité principale : Essuyez l'extérieur de l'unité principale avec le produit adamp Chiffon. N’utilisez pas de nettoyants abrasifs et n’immergez pas l’unité principale dans l’eau.
- Stockage: Store the clean and dry appliance in a cool, dry place, away from direct sunlight.
7. Dépannage
| Problème | Cause possible | Solution |
|---|---|---|
| L'appareil ne s'allume pas. | Not plugged in; power outlet faulty; appliance faulty. | Vérifiez le branchement du cordon d'alimentation. Testez la prise avec un autre appareil. Si le problème persiste, contactez le service client. |
| Le cycle de stérilisation est trop long ou inefficace. | Quantité d'eau insuffisante ; accumulation excessive de calcaire sur la plaque chauffante. | Ensure correct amount of distilled water is used. Descale the heating plate as per maintenance instructions. |
| Les articles ne sont pas secs après le cycle de séchage. | Overloaded appliance; drying vents blocked; ambient humidity too high. | Do not overload the sterilizer. Ensure items are placed to allow air circulation. Check if drying vents are clear. Consider running a longer drying cycle if available. |
| Résidus blanc/brun sur la plaque chauffante. | Limescale buildup from minerals in water. | Descale the heating plate regularly using vinegar or a descaling solution. Always use distilled water. |
| Fuite de vapeur du couvercle. | Couvercle mal positionné ; joint du couvercle endommagé. | Ensure the lid is securely placed. Check the lid seal for any damage or wear. |
8. Spécifications techniques
| Numéro de modèle | 111782 |
| Vol évaluétage | 220 V |
| Fréquence nominale | 50 Hz |
| Consommation d'énergie | 550 W |
| Dimensions du produit (L x l x H) | 18.9 x 25.5 x 35 cm (environ 18 x 25 x 35 cm) |
| Poids du produit | 1.6 kg |
| Capacité | Up to 6 standard bottles |
| Fabricant | Cangaroo |
9. Garantie et assistance
For warranty information and customer support, please refer to the warranty card included with your product or visit the official Cangaroo webConsultez le site. Conservez votre reçu d'achat comme preuve d'achat.
If you experience any issues not covered in the troubleshooting section, please contact Cangaroo customer service for assistance.


