1. Produit terminéview
The HOROW HR-R19S is a 19-inch extra tall two-piece toilet designed for enhanced comfort and accessibility. Its heightened seat reduces pressure on knees and joints, making it suitable for seniors, pregnant individuals, those with disabilities, and taller users. This model features a 1.28 GPF single flush system and a 12-inch rough-in for standard installation.
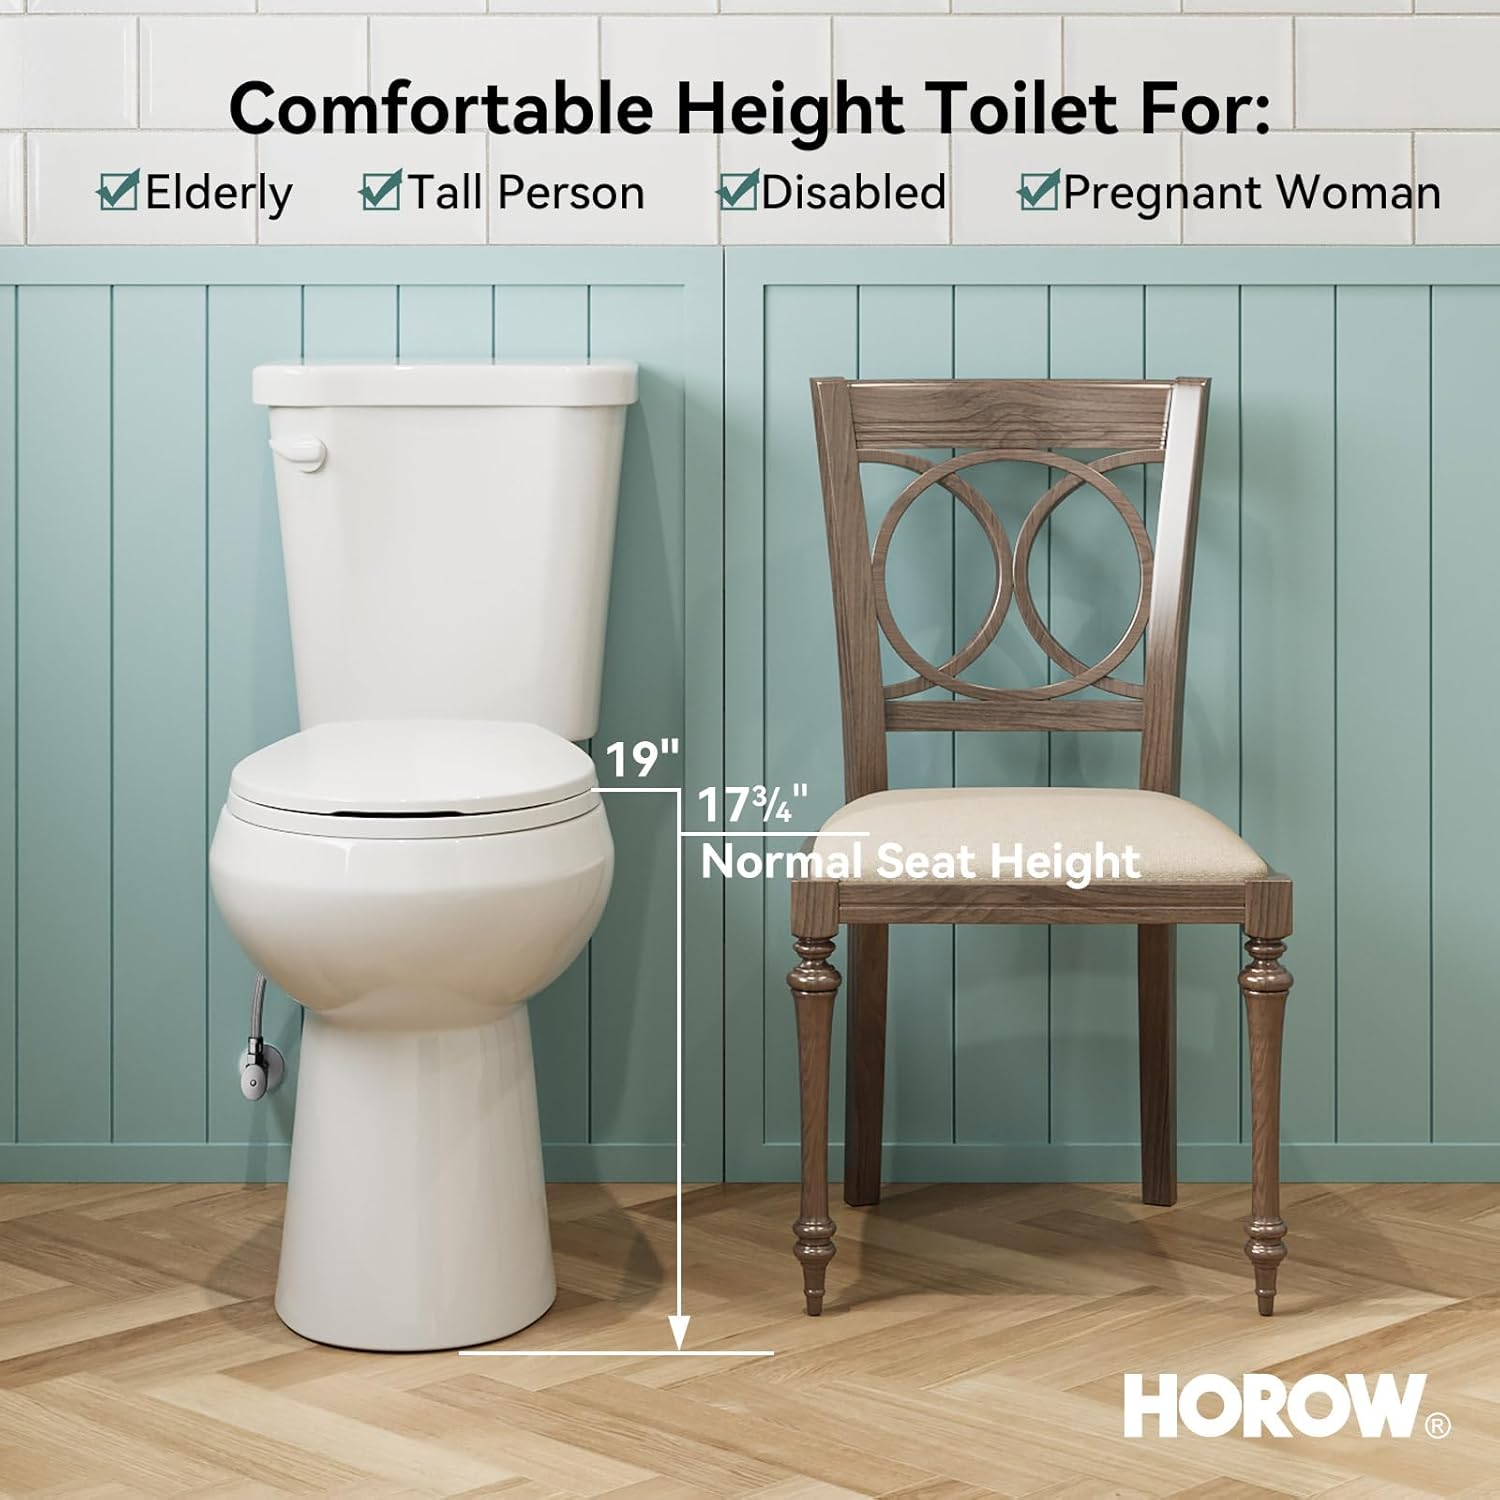
Figure 1: Height comparison of the 19-inch tall toilet versus a standard chair, highlighting its ergonomic design.

Figure 2 : Côté profile of the HOROW HR-R19S toilet, emphasizing its elevated seat height.
2. Consignes de sécurité
The elevated height of this toilet is designed to enhance user safety by minimizing the distance between standing and sitting positions. This feature provides greater stability and support, reducing the risk of falls and injuries, particularly for elderly users or individuals with mobility challenges. Always ensure the toilet is securely installed according to the instructions to maintain stability.
3. Contenu de la boîte
Vérifiez que tous les composants sont présents avant de commencer l'installation :
- Cuvette des toilettes
- Réservoir des toilettes
- Siège de toilette
- Couvercle de réservoir
- Caps (for bolt covers)
- T-Bolts (for securing the toilet to the floor)
- Wax Ring (for sealing the toilet to the drain)

Figure 3: Contents of the HOROW HR-R19S toilet package.
4. Spécifications
| Fonctionnalité | Détail |
|---|---|
| Numéro de modèle | HR-R19S |
| Couleur | Blanc |
| Dimensions du produit (P x L x H) | 27.36" x 15.75" x 34.65" |
| Matériel | Ceramic (Bowl/Tank), PP (Seat) |
| Poids de l'article | 82 livres |
| Type d'installation | Fixé au sol |
| Forme | Round Bowl |
| Type affleurant | Single Flush, 1.28 GPF |
| Taille brute | 12 pouces |
| Hauteur du siège (à partir du sol) | 19 pouces |

Figure 4: Technical dimensions and rough-in details.
5. Instructions d'installation
This HOROW toilet is designed for straightforward floor-mounted installation with a standard 12-inch rough-in, ensuring compatibility with most bathroom setups. Refer to Figure 4 for detailed dimensions.
5.1 Liste de contrôle de pré-installation
- Assurez-vous que l'arrivée d'eau est coupée au niveau du robinet d'arrêt principal.
- Remove the old toilet (if applicable) and clean the flange area.
- Vérifiez que tous les composants énumérés dans la section 3 sont présents.
- Confirm your rough-in measurement is 12 inches.
5.2 Installation étape par étape
- Install T-Bolts: Insert the T-bolts into the floor flange and secure them with washers and nuts, ensuring they are upright and parallel to the wall.
- Appliquer le joint de cire : Place the wax ring onto the horn of the toilet bowl or directly onto the floor flange, ensuring a good seal.
- Placer le bol : Carefully lower the toilet bowl onto the T-bolts, aligning the bolt holes with the bolts. Press down firmly and evenly to compress the wax ring.
- Sécurisez le bol : Place washers and nuts onto the T-bolts and tighten them alternately until the bowl is snug against the floor. Ne pas trop serrer to avoid cracking the ceramic. Cover the bolts with the decorative caps.
- Installer le réservoir : Position the tank onto the back of the toilet bowl, aligning the bolt holes. Secure the tank to the bowl using the provided bolts, washers, and nuts. Tighten evenly.
- Raccorder l'alimentation en eau : Connect the water supply line to the fill valve on the toilet tank. This toilet is compatible with both 7/8'' and 1/2'' water lines. If your supply line is 7/8'', screw off the adapter on the toilet's connection point before connecting. If it's 1/2'', connect directly.
- Installer un siège de toilette : Attach the soft-closing PP seat to the toilet bowl using the provided screws, ensuring it is securely fixed and will not loosen.
- Test de fuites : Turn on the water supply slowly and check for any leaks around the tank, bowl, and water supply connection. Flush the toilet several times to ensure proper operation and check for leaks.
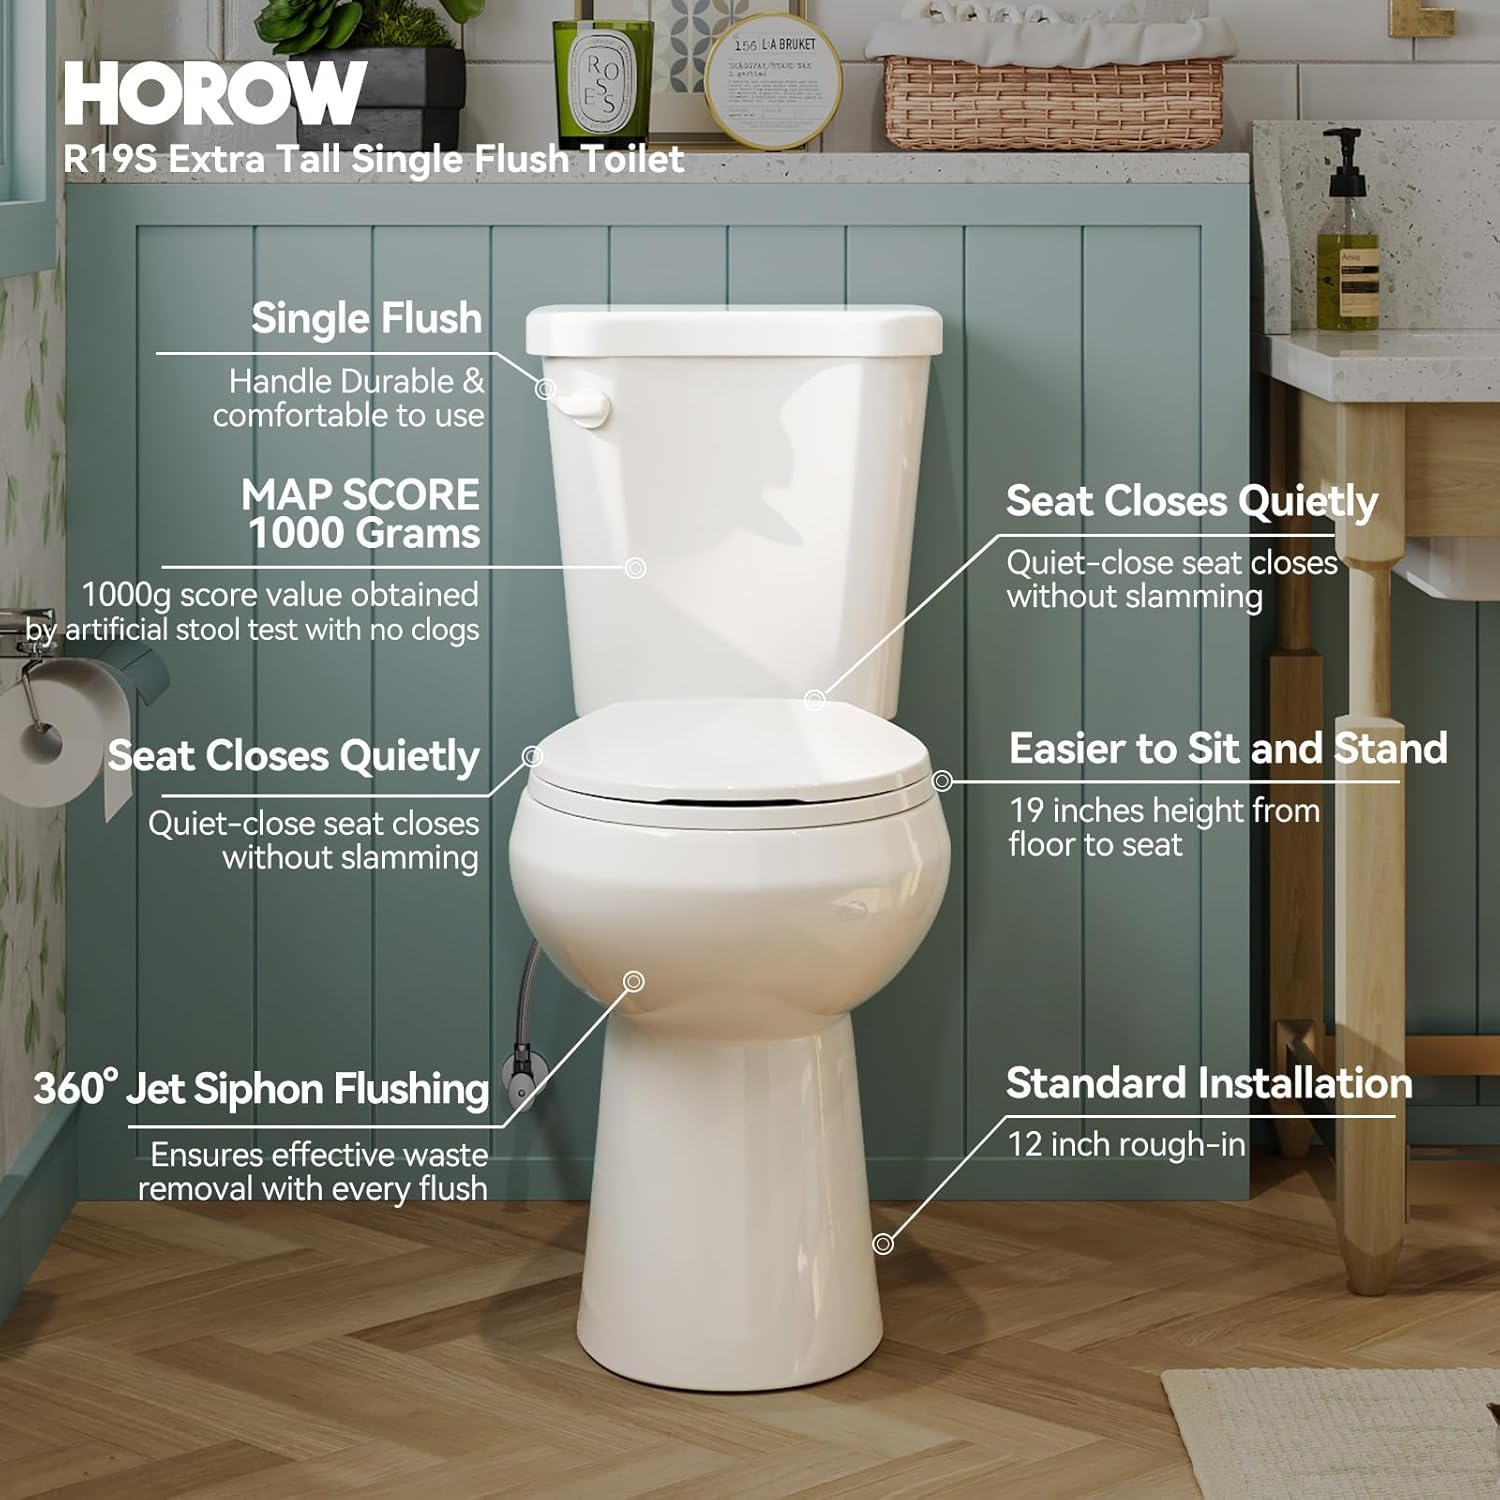
Figure 5: Key features and installation points of the HOROW HR-R19S.
6. Mode d'emploi
The HOROW HR-R19S toilet features a powerful and efficient single-flush system designed for optimal waste removal and water conservation.
6.1 Flushing Operation
- Single Flush Mechanism: The toilet is equipped with a 1.28 GPF (Gallons Per Flush) side-mounted flush handle.
- Powerful Siphon Flushing: A light press of the ergonomic side button activates the 360° Jet Siphon flush. This system is engineered for rapid and thorough waste removal, preventing clogs and eliminating odors effectively.
- Conservation de l'eau : The 1.28 GPF flush uses approximately 20% less water than older, less efficient toilets, contributing to water savings without compromising performance.

Figure 6: Illustration of the Jet Siphon Powerful Flushing System.
7. Entretien et nettoyage
Regular cleaning and maintenance will ensure the longevity and optimal performance of your HOROW toilet.
7.1 Nettoyage des toilettes
- Ceramic Surfaces: The high-quality ceramic and non-porous surface of the two-piece toilet make it easy to clean. Simply wipe the surface with water and a mild, non-abrasive cleaner to restore its cleanliness and shine.
- Bowl and Trapway: The siphon jet and fully skirted drain design reduce stains in the toilet bowl and around the trapway, simplifying cleaning. Use a toilet brush with a suitable cleaner for the bowl interior.
- Siège de toilette: The soft-closing PP seat can be cleaned with a damp cloth and mild soap. Avoid harsh chemicals that may damage the seat material.
7.2 Soft-Closing Seat
The toilet is equipped with a soft-closing PP seat. This feature ensures the seat closes quietly and slowly, reducing noise, especially during nighttime use. Avoid forcing the seat down, as this can damage the soft-closing mechanism.
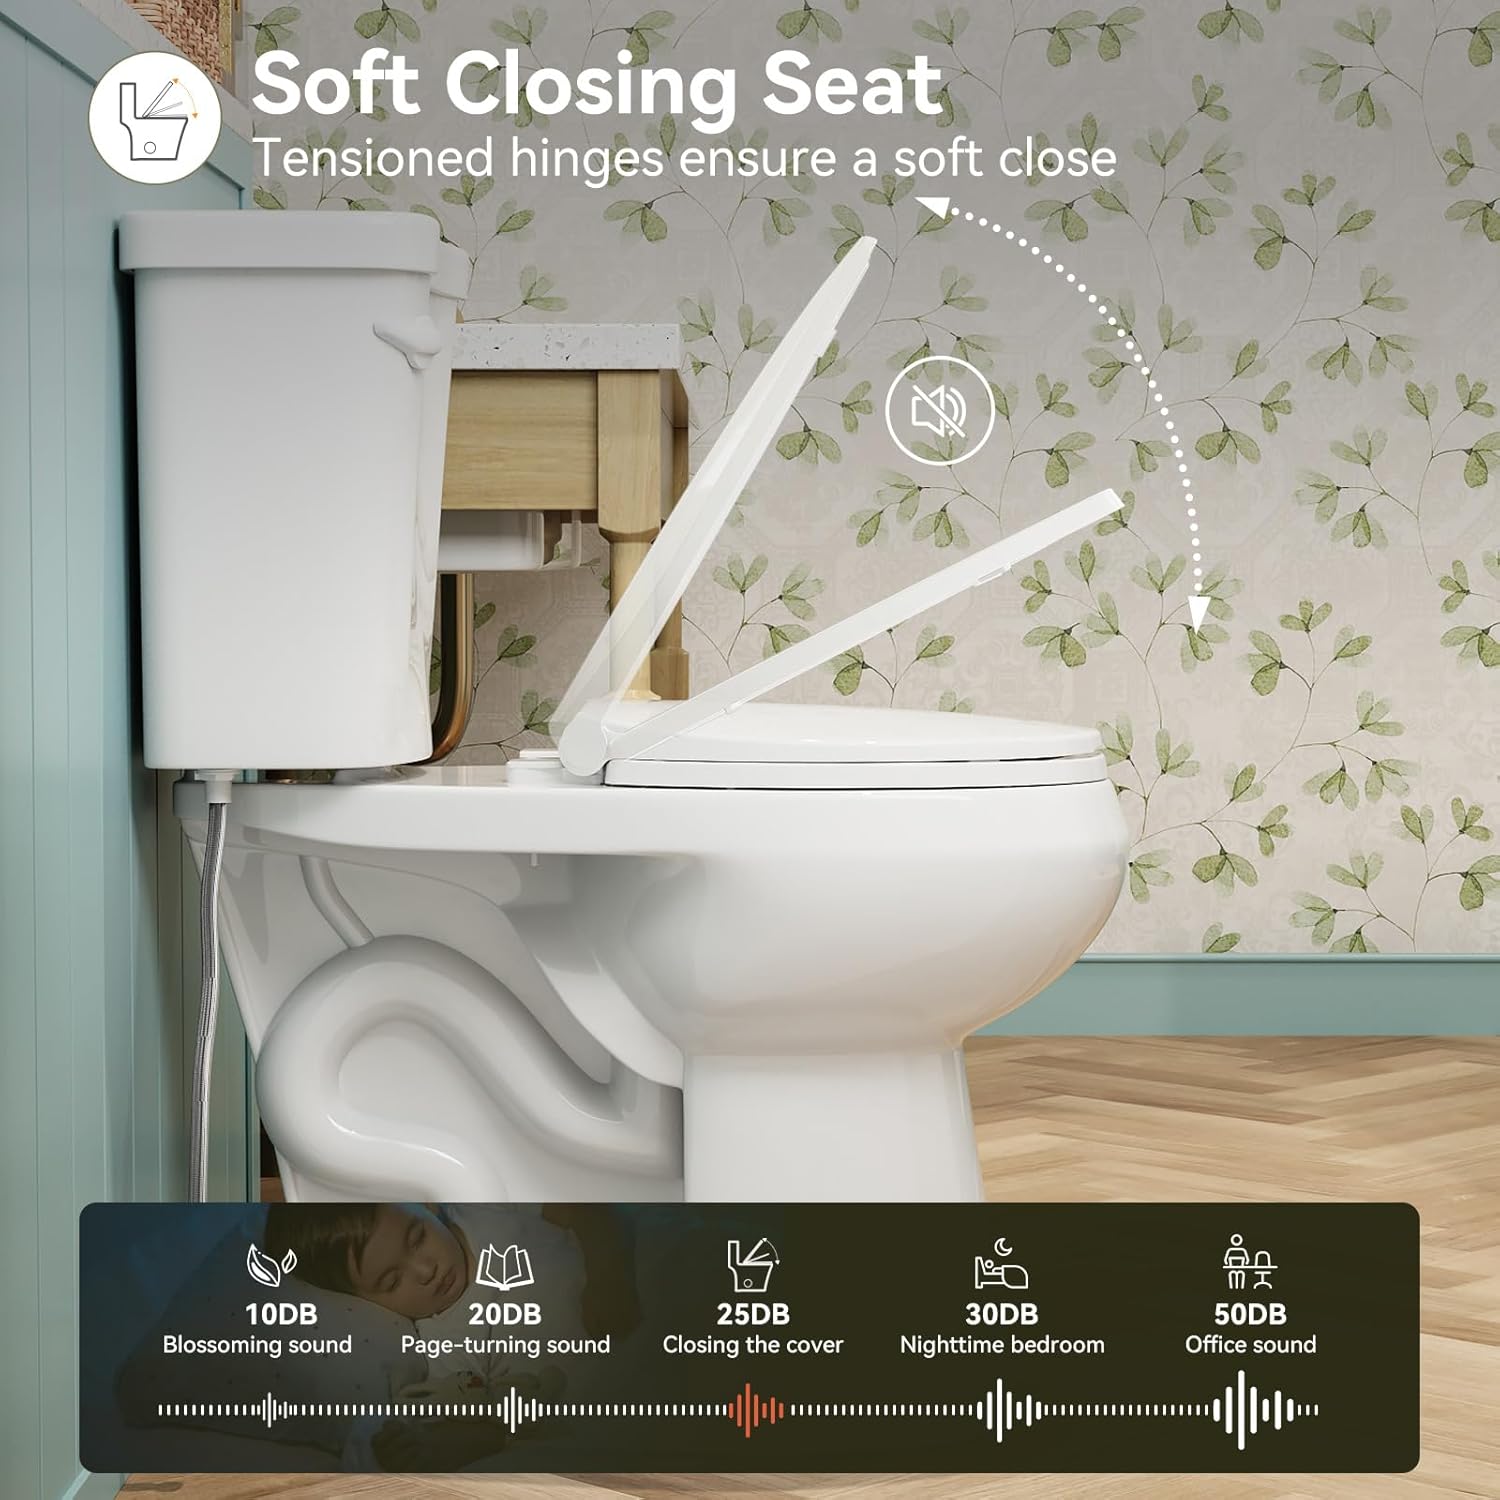
Figure 7: Soft-closing seat mechanism and noise reduction.
8. Dépannage
This section addresses common issues you might encounter with your HOROW toilet.
8.1 Weak Flush or Incomplete Flush
- Vérifiez le niveau d'eau : Ensure the water level in the tank is at the recommended fill line. Adjust the fill valve if necessary.
- Obstruction: Inspect the rim jets and siphon jet for any mineral deposits or obstructions. Clean with a small wire or brush if blocked.
- Clapet/Joint : Ensure the flapper or flush valve seal is operating correctly and creating a tight seal when closed, and opening fully during a flush.
8.2 Eau courante continue
- Clapet/Joint : Check if the flapper or flush valve seal is properly seated and not worn or warped. Replace if damaged.
- Vanne de remplissage : Ensure the fill valve is not overfilling the tank, causing water to spill into the overflow tube. Adjust the float mechanism if needed.
- Handle Linkage: Verify that the flush handle chain is not too tight, which could prevent the flapper from fully closing.
8.3 Fuites
- Conduite d'alimentation en eau : Check the connection between the water supply line and the fill valve for tightness.
- Tank-to-Bowl Connection: Ensure the bolts securing the tank to the bowl are tightened evenly.
- Bague de cire : If water is leaking from the base of the toilet, the wax ring may not be sealed properly or may be damaged. This typically requires removing the toilet and replacing the wax ring.
9. Garantie et assistance
HOROW values customer satisfaction and stands behind the quality of its products.
9.1 Informations sur la garantie
This HOROW toilet comes with a Garantie limitée de 1 ans from the date of purchase. Additionally, HOROW provides service après-vente à vie for its products. This warranty covers manufacturing defects and issues arising from normal use.
9.2 Assistance clientèle
For any questions, concerns, or assistance with installation, operation, or warranty claims, please contact HOROW customer service. Our customer service center aims to respond to all inquiries within 12 hours.
Please have your model number (HR-R19S) and purchase information ready when contacting support.


