1. Introduction
The REPTITRIP PT02 Reptile Dimming Thermostat is designed to provide precise and stable temperature control for various heating equipment in reptile enclosures, incubators, and plant breeding setups. Utilizing PID technology, it accurately adjusts output power to maintain a consistent temperature, minimizing fluctuations that can stress animals. This manual provides detailed instructions for the safe and effective use of your thermostat.
2. caractéristiques du produit
- PID Technology: Accurately controls device output power for stable and efficient temperature regulation, reducing sudden temperature changes. (Note: Not for use with T5 lamps, fluorescent lamps, DEL lamps, or sun lamp(s.)
- Surveillance de la température en temps réel : Features a temperature probe that detects ambient temperature and adjusts output power accordingly. Control range: 68°F to 113°F (20°C to 45°C).
- Enhanced Reptile Health: Prevents temperature fluctuations and drastic lighting changes, contributing to the health and vitality of reptiles such as bearded dragons, lizards, ball pythons, chameleons, corn snakes, and turtles.
- Applications polyvalentes : Compatible with heating lamps, heating pads, and other equipment. Suitable for reptiles, amphibians, egg hatching, and plant seedlings. Maximum output load: 260W.
- Écran LCD : Shows real-time output power and environmental temperature for clear monitoring. LCD backlight turns off after 20 seconds to minimize disturbance at night. Switchable between °F and °C.
- Utilisation facile : Simply set the desired temperature, and the thermostat will maintain it. Ensure the temperature probe is placed correctly in the area requiring control.
3. Consignes de sécurité
Veuillez lire et comprendre toutes les consignes de sécurité avant d'utiliser cet appareil. Le non-respect de ces consignes peut entraîner des blessures ou endommager le produit.
- Do not exceed the maximum output load of 260W.
- Ensure the thermostat is connected to a properly grounded power outlet.
- Keep the device and its probe away from water or excessive moisture.
- Do not use this thermostat with T5 lamps, fluorescent lamps, DEL lamps, or sun lamps. It is designed for dimmable heating elements only.
- Regularly inspect the power cord and probe for any signs of damage. Discontinue use if damage is found.
- Tenir hors de portée des enfants et des animaux domestiques.
4. Contenu du colis
- REPTITRIP PT02 Dimming Thermostat Unit
- Sonde de température
- Manuel d'utilisation
5. Produit terminéview
Familiarize yourself with the components and display of your REPTITRIP PT02 thermostat.

Image: Labeled diagram of the REPTITRIP PT02 thermostat showing the Timer Display, Power Meter, Current Temperature, Output Power, Setting Temperature, Switching °F/°C, Temp Setup Button, and On/Off & Timer Setup Button.
- Écran LCD : Shows current time, power meter, current temperature (PV), set temperature (SV), and output power percentage.
- Bouton moins (-) : Diminue les valeurs lors du réglage.
- Bouton Plus (+) : Augmente les valeurs lors du réglage.
- Bouton de réglage: Enters setting mode for time and temperature.
- Bouton OK/Marche/Arrêt : Turns the device on/off and confirms settings.
- Sonde de température: Détecte la température ambiante.
6. Instructions de configuration
- Placement of Temperature Probe:
Carefully place the temperature probe in the area where you want to control the temperature. Ensure it is not directly touching the heating element or submerged in water unless specifically designed for such use. The probe detects if the current temperature reaches the set target.

Image: A temperature probe is shown placed within a reptile enclosure, illustrating proper positioning for accurate temperature detection.
- Mise sous tension :
Plug the thermostat into a standard 120VAC, 60Hz power outlet. Press the OK bouton pour allumer l’appareil.

Image: A finger pressing the 'OK' button on the thermostat to power it on.
- Définir l'heure actuelle :
Appuyez sur le ENSEMBLE button. The time display will flash. Use the - et + boutons pour régler l'heure et les minutes. Appuyez sur OK pour confirmer chaque réglage.

Image: The thermostat display showing the time setting interface, with a finger pressing the 'SET' button.
- Raccordez l'appareil de chauffage :
Plug your heating lamp or heat pad into the thermostat's output socket. Ensure the heating device is compatible with dimming control and does not exceed the 260W maximum load.
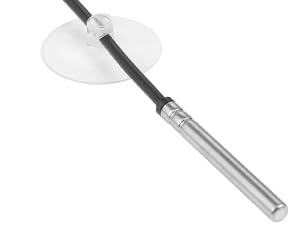
Image: The thermostat unit with its output socket connected to both a heat mat and a heat lamp, demonstrating its versatility.
7. Mode d'emploi
- Setting Target Temperature (SV):
With the device on, press the ENSEMBLE button once. The set temperature (SV) will flash. Use the - et + buttons to adjust the desired temperature. Press OK to confirm the setting. The thermostat will now work to maintain this temperature.

Image: A finger pressing the '+' button to increase the set temperature on the thermostat display.
- Changement d'unité de température (°F/°C) :
Pour basculer entre Fahrenheit et Celsius, maintenez la touche ENSEMBLE button for approximately 3 seconds until the unit flashes. Use the - or + button to select your preferred unit, then press OK pour confirmer.
- Comprendre l'affichage :
The display shows the current temperature (PV), the set temperature (SV), and the output power percentage. The power meter bars indicate the current power output to the heating device. As the ambient temperature approaches the set temperature, the output power will gradually decrease (dimming) to maintain stability.
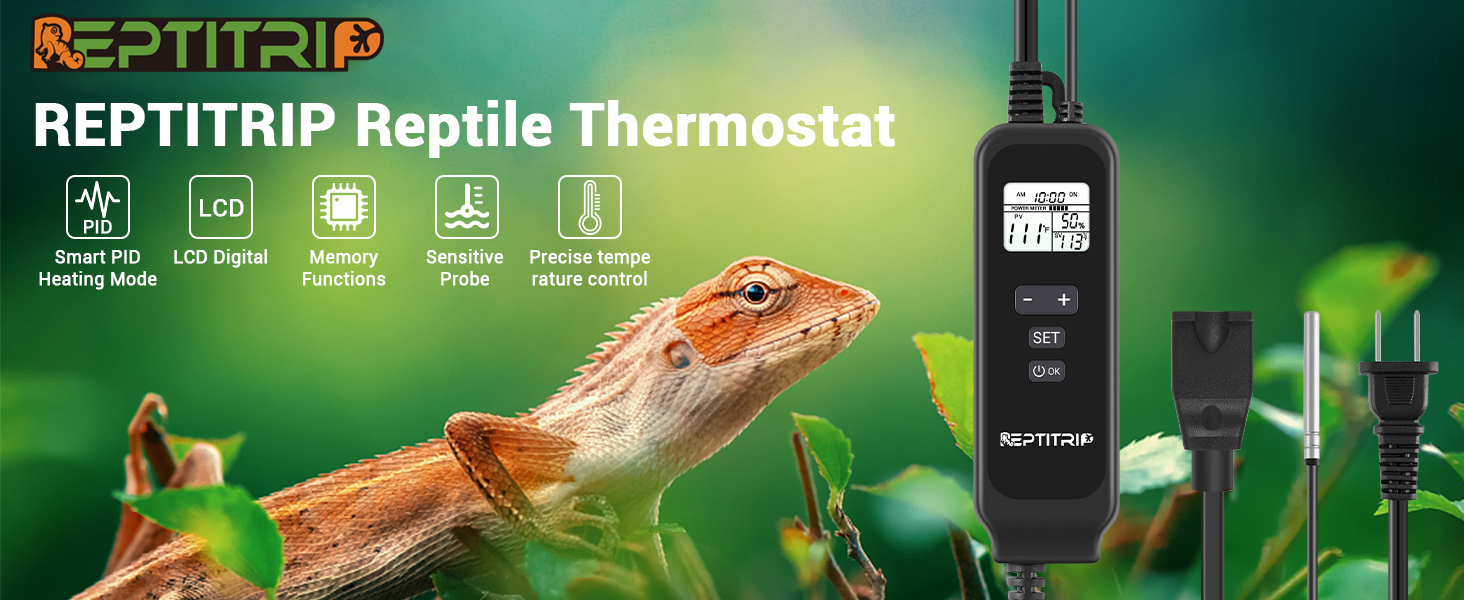
Image: A graphical representation of the PID dimming thermostat operation, showing how output power (represented by light bulb brightness) is adjusted to maintain a stable set temperature.
- Fonction minuterie (le cas échéant) :
The thermostat supports a timer function for a set duration. To activate, press the OK button to turn on the device. Press ENSEMBLE to enter the time setting mode. Adjust the hours using the - et + boutons. Presse OK to confirm. The device will maintain the set temperature for the specified duration. Note: The device does not have an internal clock for setting a specific start time; the timer begins when activated.

Image: The thermostat display showing a timer set for 12 hours and a target temperature of 104°F, indicating the device will maintain this temperature for the set duration.
8. Entretien
- Nettoyage: Disconnect the thermostat from power before cleaning. Wipe the unit with a soft, dry cloth. Do not use abrasive cleaners or immerse the unit in water.
- Entretien de la sonde : Veillez à ce que la sonde de température reste propre et exempte de débris. Évitez de plier ou d'endommager le câble de la sonde.
- Stockage: When not in use, store the thermostat in a cool, dry place away from direct sunlight.
9. Dépannage
| Problème | Cause possible | Solution |
|---|---|---|
| Le thermostat ne s'allume pas. | Pas d'alimentation, connexion défectueuse. | Check power outlet and ensure the thermostat is securely plugged in. Press the OK button to power on. |
| Temperature not reaching set target or fluctuating significantly. | Heating element too weak/strong, probe improperly placed, incompatible heating device. | Ensure heating element wattage is appropriate for the enclosure size. Reposition the probe away from direct heat or cold spots. Verify heating device compatibility (not for T5, fluorescent, LED, or sun lamp(s). |
| Display shows incomplete information (e.g., only '9' instead of '90'). | Dysfonctionnement de l’affichage. | Unplug the device, wait 30 seconds, and plug it back in. If the issue persists, contact customer support. |
| Heating element is always on/off, not dimming. | Incompatible heating element, thermostat malfunction. | Ensure the connected heating element is dimmable. Some heating elements are only on/off. If using a dimmable element and the issue persists, contact customer support. |
10. Spécifications
| Fonctionnalité | Spécification |
|---|---|
| Marque | REPTITRIP |
| Numéro de modèle | PT02 |
| Couleur | Noir |
| Puissance/Wattage | 260 watts (Max Output Load) |
| Voltage | 120 volts |
| Matériel | Acrylonitrile butadiène styrène (ABS) |
| Caractéristiques spéciales | Gradable |
| Poids de l'article | 249 g |
| Plage de contrôle de la température | 68°F à 113°F (20°C à 45°C) |
| Type de contrôle de température | Automatic (PID Thermostatic Control) |
| Technologie de connectivité | Câblé |
| Composants inclus | Dimmer Switch, Temperature sensor |
| Source d'énergie | Électrique avec fil |
11. Garantie et assistance
REPTITRIP products are designed for reliability and performance. For warranty information, technical support, or any questions regarding your PT02 Dimming Thermostat, please contact REPTITRIP customer service through the retailer where you purchased the product or visit the official REPTITRIP website for contact details. Please have your model number (PT02) and purchase information ready when contacting support.


