Introduction
This manual provides detailed instructions for the installation, operation, and maintenance of your Daytech Freezer Door Alarm, Model USR-1. This device is designed to alert you when a refrigerator or freezer door is left open, helping to preserve food and save energy. Please read this manual thoroughly before using the product to ensure proper function and safety.
Produit terminéview
The Daytech Freezer Door Alarm consists of a main unit and a magnetic sensor. When the magnetic sensor is separated from the main unit (indicating an open door), the alarm will activate after a set delay. The device features adjustable volume and multiple delay modes.

Figure 1: Main Unit Components and Dimensions
- Avertisseur sonore: Emits the alarm or chime sound.
- Indicateur LED : Provides visual feedback for status and mode selection.
- Chime/Alarm/OFF Switch: Selects between chime mode, alarm mode, or turns the device off.
- Contrôle du volume : Règle le niveau sonore.
- Work Mode Set Key: Selects the delay duration before the alarm activates.
Contenu du colis
Vérifiez que tous les éléments sont présents dans votre colis :
- boîte d'emballage du produit
- Refrigerator Door Alarm (Main Unit and Magnet)
- Manuel d'utilisation
- AAA batteries (quantity depends on the set purchased)
- Screws (quantity depends on the set purchased)
Video 1: Product Unboxing and Package Contents. This video demonstrates the items included in the package, such as the alarm units, user manual, and batteries.
Installation
The alarm can be installed on various types of refrigerators and freezers. Ensure the installation surface is clean and dry.
Étapes d'installation :
- Clean the desired installation area on your refrigerator or freezer door frame.
- Peel off the protective film from the double-sided adhesive tape on the back of the main unit and the magnet.
- Attach the main unit to the door frame and the magnet to the door, ensuring the triangular markings on both parts are aligned. The gap between the main unit and the magnet should be less than 0.98 inches (2.5 cm) when the door is closed.
- Press firmly for a few seconds to secure.

Figure 2: Installation Process
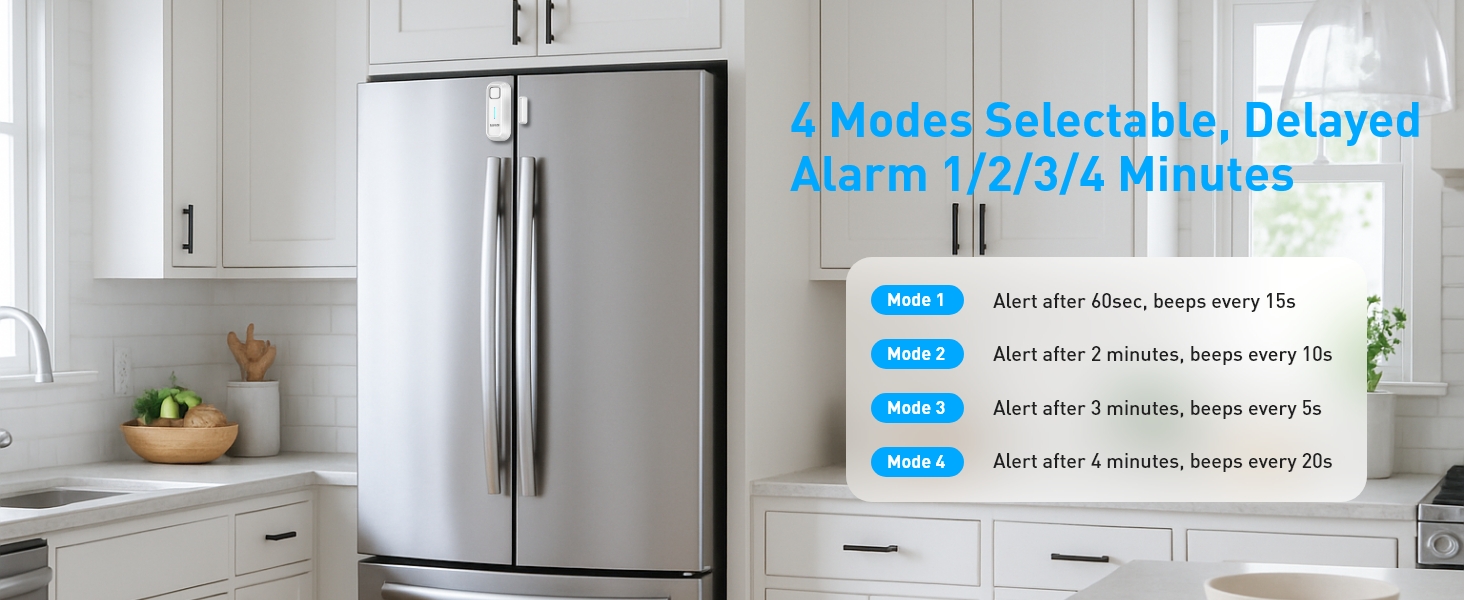
Figure 3: Recommended Installation Positions and Gap Requirements
Mode d'emploi
1. Ringtone and Mode Selection:
Use the 'Chime/Alarm/OFF' switch on the side of the main unit to select the desired sound mode:
- Mode carillon : A gentle reminder sound.
- Mode d'alarme: A loud alert sound.
- OFF: Turns the device off, no sound will be made.
2. Réglage du volume :
The alarm features 5 adjustable volume levels (0-120dB). Use the 'Volume' button on the side to cycle through the volume settings until you reach your preferred level.

Figure 4: Adjustable Volume Levels
3. Delay Mode Selection:
The alarm offers four delay modes, allowing you to choose how long the door can remain open before the alert sounds. Press the 'SET Key' button to cycle through the modes.
Video 2: Functional Adjustment Demonstration. This video illustrates how to switch between chime and alarm modes, adjust volume, and select different delay modes.
Modes de fonctionnement
The Daytech Freezer Door Alarm offers four distinct working modes, each with a different delay duration and alert pattern:
| Mode | Durée du délai | Alert Pattern |
|---|---|---|
| Mode 1 | 1 minute (60 seconds) | Alarm/Chime sounds for 5 seconds every 15 seconds. |
| Mode 2 | 2 minutes (120 secondes) | Alarm/Chime sounds for 10 seconds every 10 seconds. |
| Mode 3 | 3 minutes (180 secondes) | Alarm/Chime sounds for 15 seconds every 5 seconds. |
| Mode 4 | 4 minutes (240 secondes) | Alarm/Chime sounds for 20 seconds every 15 seconds. |

Figure 5 : Plusview of Working Modes
Remplacement de la batterie
The Daytech Freezer Door Alarm requires 2 AAA batteries. When the batteries are low, the alarm's performance may be affected. Replace batteries as follows:
- Slide the battery cover on the back of the main unit downwards to open.
- Retirez les piles AAA usagées.
- Insérez deux piles AAA neuves en veillant à respecter la polarité (+/-).
- Faites glisser le couvercle de la batterie en place jusqu'à ce qu'il s'enclenche correctement.

Figure 6 : Étapes de remplacement de la batterie
Dépannage
If you encounter issues with your Daytech Freezer Door Alarm, refer to the following troubleshooting guide:
| Problème | Cause possible | Solution |
|---|---|---|
| L'alarme ne sonne pas lorsque la porte est ouverte. | 1. Device is OFF. 2. Les piles sont faibles ou mal installées. 3. Magnet and main unit are too far apart. | 1. Ensure the 'Chime/Alarm/OFF' switch is set to Chime or Alarm mode. 2. Remplacez les piles et vérifiez la polarité. 3. Re-position the main unit and magnet to ensure the gap is less than 0.98 inches (2.5 cm) when the door is closed. |
| Alarm sounds too frequently or falsely triggers. | 1. Magnet and main unit are too close or misaligned. 2. Delay mode is set too short. | 1. Adjust the position of the magnet and main unit to ensure proper alignment and a slight gap when the door is closed. 2. Select a longer delay mode using the 'SET Key'. |
| Le volume est trop faible ou trop élevé. | Le réglage du volume n'est pas optimal. | Adjust the volume using the 'Volume' button on the side of the main unit. |
Caractéristiques
| Fonctionnalité | Détail |
|---|---|
| Numéro de modèle | USR-1 |
| Dimensions | 3.9 x 1.6 x 0.86 pouces (100 x 40 x 22 mm) |
| Poids de l'article | 3.34 onces |
| Source d'énergie | Alimenté par batterie |
| Piles requises | 2 piles AAA (incluses) |
| Type de batterie | Alcalin |
| Niveau de bruit | Jusqu'à 120 décibels |
| Type de montage | Support de porte |
| Techniques de détection | Capteur de contact |
| Appareils compatibles | Home Security System (general) |
| Couleur | Blanc |
Garantie et assistance
Daytech products are manufactured to high-quality standards. For warranty information or technical support, please refer to the contact details provided with your purchase or visit the official Daytech webConsultez le site. Conservez votre reçu d'achat comme preuve d'achat.


