1. Introduction
Thank you for choosing the HOFTRONIC LED Ceiling Light. This product is designed for indoor use and features an integrated motion sensor and twilight switch, ensuring efficient and convenient lighting. This manual provides essential information for safe installation, operation, and maintenance of your new ceiling light.
2. Consignes de sécurité
- Always disconnect power at the main circuit breaker before installation, maintenance, or repair.
- L'installation doit être effectuée par un électricien qualifié ou conformément aux normes électriques locales.
- Assurer le vol d'alimentationtage matches the product specifications (230 Volts).
- Ne modifiez en aucun cas le produit. Toute modification non autorisée peut annuler la garantie et présenter des risques pour la sécurité.
- This product is rated IP20 for indoor use only. Do not expose to moisture or outdoor elements.
- Évitez de regarder directement la source lumineuse LED lorsqu'elle est allumée, car cela pourrait provoquer une fatigue oculaire.
3. Produit terminéview
The HOFTRONIC LED Ceiling Light combines energy-efficient LED technology with smart sensor capabilities. It features a PIR (Passive Infrared) motion sensor and an adjustable twilight switch to optimize energy consumption.
Caractéristiques principales :
- Capteur de mouvement intégré : Detects movement within a 360° range, up to 6 meters.
- Interrupteur crépusculaire : Activates the light only when ambient light levels fall below a set threshold. This feature can be disabled.
- Paramètres réglables : Time delay and lux sensitivity are continuously adjustable.
- Installation facile : Features a rotary click system for quick and secure ceiling mounting.
- Efficacité énergétique : 12W power consumption with 1160 lumens output.
- Lumière blanche froide : Provides 6400K cool white illumination. Other variants (3000K Warm White, 4000K Neutral White) are available.

Image 3.1: The HOFTRONIC LED Ceiling Light is available in various color temperatures, including 3000K Warm White, 4000K Neutral White, and 6400K Daylight White (the current model).
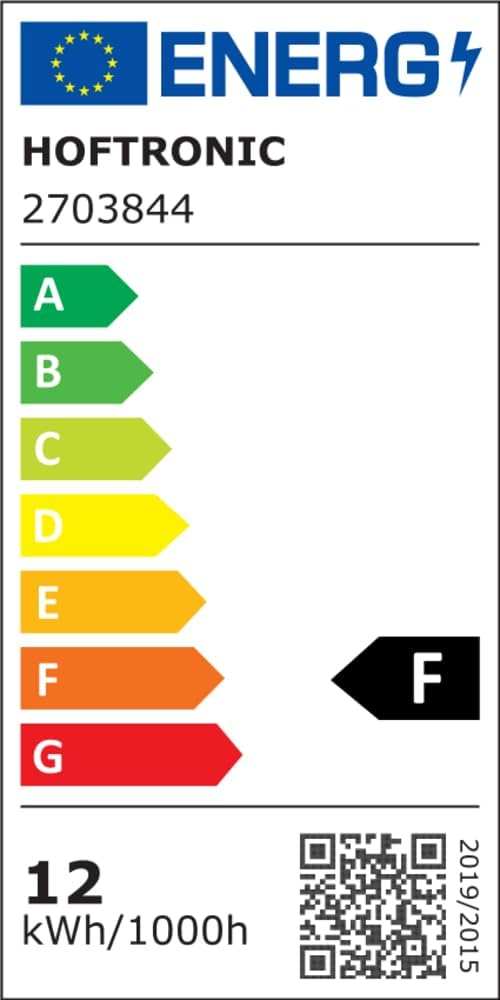
Image 3.2 : Vue de dessus view of the LED ceiling light, highlighting its compact, round design and central sensor.
4. Spécifications
| Fonctionnalité | Spécification |
|---|---|
| Marque | HOFTRONIC |
| Numéro de modèle | 2703844 |
| Dimensions (L x l x H) | 29 x 29 x 6 cm |
| Poids | 0.5 kg |
| Matériel | Plastique |
| Pouvoir | 12 watts |
| Flux lumineux | 1160 lumens |
| Température de couleur | 6400 Kelvin (blanc froid) |
| Voltage | 230 Volts (CA) |
| Type de capteur | PIR Motion Sensor, Twilight Switch |
| Angle de détection | 360° |
| Portée de détection | Jusqu'à 6 mètres |
| Indice de protection IP | IP20 (utilisation en intérieur) |
| Durée de vie | 20,000 heures |
| Classe d'efficacité énergétique | F |

Image 4.1: EU Energy Label for the HOFTRONIC LED Ceiling Light. For more details, visit the official EPREL database: https://eprel.ec.europa.eu/qr/1529287

Image 4.2: Dimensional drawing of the ceiling light, indicating a diameter of 290mm and a height of 60mm.
5. Configuration et installation
The HOFTRONIC LED Ceiling Light is designed for straightforward installation using a rotary click system. All necessary mounting hardware is included.
Étapes d'installation :
- La sécurité avant tout : Turn off the power supply at the main circuit breaker before beginning installation.
- Préparez la surface de montage : Mark the drilling points on the ceiling using the light fixture's base as a template. Ensure no electrical wires or pipes are present behind the drilling points.
- Trous de forage : Percez des trous aux emplacements marqués et insérez les chevilles appropriées (si nécessaire pour votre type de plafond).
- Base de montage : Secure the mounting base to the ceiling using the provided screws.
- Connexion du fil : Connect the electrical wires from your ceiling to the terminal block on the light fixture. Ensure correct polarity (Live, Neutral, Earth if applicable). Refer to the wiring diagram below.
- Fixer le luminaire : Align the main light fixture with the mounted base and twist it clockwise until it clicks securely into place. The rotary click system ensures a firm connection.
- Restaurer l'alimentation : Remettez le courant au niveau du disjoncteur.

Image 5.1: Internal components of the light, showing the LED array and the wiring terminal block for electrical connection.
6. Mode d'emploi
This LED ceiling light features adjustable settings for its motion sensor and twilight switch. These settings allow you to customize the light's behavior to suit your specific needs.
Ajustement du capteur :
The sensor module has two adjustment knobs, typically labeled 'TIME' and 'LUX'.
- TEMPS (Délai) : This knob controls how long the light remains illuminated after motion is no longer detected. It is continuously adjustable, typically from 10 seconds to 3 minutes. Turn the knob clockwise to increase the time delay, and counter-clockwise to decrease it.
- LUX (Twilight Switch Sensitivity): This knob sets the ambient light level at which the motion sensor becomes active. It is continuously adjustable, typically from 3 lux (very dark) to 2000 lux (daylight). Turn the knob towards the 'sun' symbol for the sensor to be active only in brighter conditions, or towards the 'moon' symbol for it to be active in darker conditions. The twilight switch can also be completely disabled, allowing the motion sensor to operate regardless of ambient light.

Image 6.1: The sensor adjustment knobs for 'Time delay' and 'Twilight switch' (Lux sensitivity).
PIR Sensor Note: This product uses a Passive Infrared (PIR) sensor. PIR sensors detect changes in infrared radiation (heat) caused by moving objects. They do not detect movement through walls or glass, making them suitable for specific indoor areas like corridors, storage rooms, or offices where detection is needed within the direct line of sight.
7. Entretien
The HOFTRONIC LED Ceiling Light requires minimal maintenance.
- Nettoyage: Assurez-vous que l'appareil est hors tension avant de le nettoyer. Essuyez-le avec un chiffon doux, sec ou légèrement humidifié.amp Chiffon. N’utilisez pas de nettoyants abrasifs, de solvants ou de produits chimiques agressifs, car ils pourraient endommager la finition ou les composants électroniques.
- Aucune pièce réparable par l'utilisateur : La source lumineuse LED est intégrée et ne peut être remplacée par l'utilisateur. Ne tentez pas d'ouvrir ni de réparer le luminaire.
- Objectif du capteur : Keep the sensor lens clean and free from obstructions to ensure optimal performance.
8. Dépannage
If you encounter issues with your HOFTRONIC LED Ceiling Light, refer to the following common problems and solutions:
| Problème | Cause possible | Solution |
|---|---|---|
| La lumière ne s'allume pas. | Pas d'alimentation électrique. LUX setting too high (daylight mode). Capteur obstrué ou défectueux. | Vérifiez le disjoncteur. Adjust LUX knob towards 'moon' symbol or disable twilight switch. Ensure sensor is clear. Test in a dark environment. |
| La lumière reste allumée en permanence. | Mouvement constant dans la zone de détection. Réglage du temps trop long. LUX setting too low (always on). Capteur défectueux. | Ensure no continuous motion. Adjust TIME knob to a shorter duration. Adjust LUX knob towards 'sun' symbol. Contactez le support si le problème persiste. |
| La lumière s'allume inopinément. | Minor movements (pets, drafts). Capteur trop sensible. | Adjust sensor placement if possible. Reduce TIME setting. |
| La portée de détection est trop courte/longue. | Installation height/angle. Facteurs environnementaux. | Ensure optimal installation height (typically 2-4 meters). The sensor range is fixed up to 6 meters. |
9. Garantie et assistance
The HOFTRONIC LED Ceiling Light is designed for a long operational life of 20,000 hours. Based on an average usage of 10 hours per day, 250 days per year, this equates to approximately 8 years of use.
For warranty claims, technical support, or further assistance, please contact your retailer or the HOFTRONIC customer service department. Please have your model number (2703844) and proof of purchase available when contacting support.


