1. Introduction
Thank you for choosing the COUGAR MX360 RGB Mid Tower Case. This manual provides essential information for the proper installation, operation, and maintenance of your new PC case. The MX360 RGB combines a sleek design with ARGB LED strips on the front panel, offering excellent cooling performance and support for a wide range of components, including up to a 360mm radiator, 315mm graphics cards, and 170mm CPU coolers. Its compact layout and full-length PSU shroud contribute to a clean and organized build.
2. Consignes de sécurité
- Débranchez toujours l'alimentation électrique de la prise murale avant d'installer ou de retirer un composant.
- Handle components with care to avoid damage from static electricity. Consider using an anti-static wrist strap.
- Gardez les petites pièces et les vis hors de portée des enfants.
- Assurez une ventilation adéquate autour du boîtier pour éviter toute surchauffe.
- N’essayez pas de modifier le boîtier ou ses composants, car cela pourrait annuler votre garantie et présenter des risques pour votre sécurité.
3. Contenu du colis
Veuillez vérifier que tous les éléments suivants sont inclus dans votre colis :
- Boîtier mi-tour COUGAR MX360 RGB
- Boîte d'accessoires (contenant des vis, des entretoises, des serre-câbles, etc.)
- Manuel de l'utilisateur (ce document)
4. Produit terminéview
The COUGAR MX360 RGB case features a minimalist design with integrated ARGB lighting and a tempered glass side panel for showcasing votre construction.

Figure 4.1 : Face avant view of the COUGAR MX360 RGB case, showing the interior and active RGB lighting.
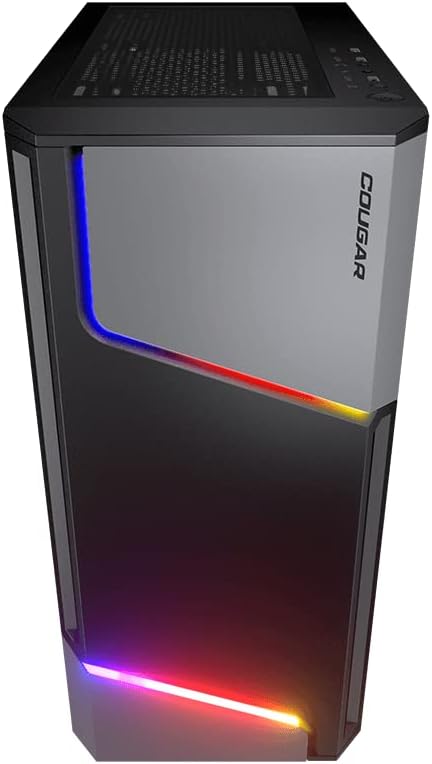
Figure 4.2 : Face avant view of the COUGAR MX360 RGB case, highlighting the integrated ARGB LED strips.
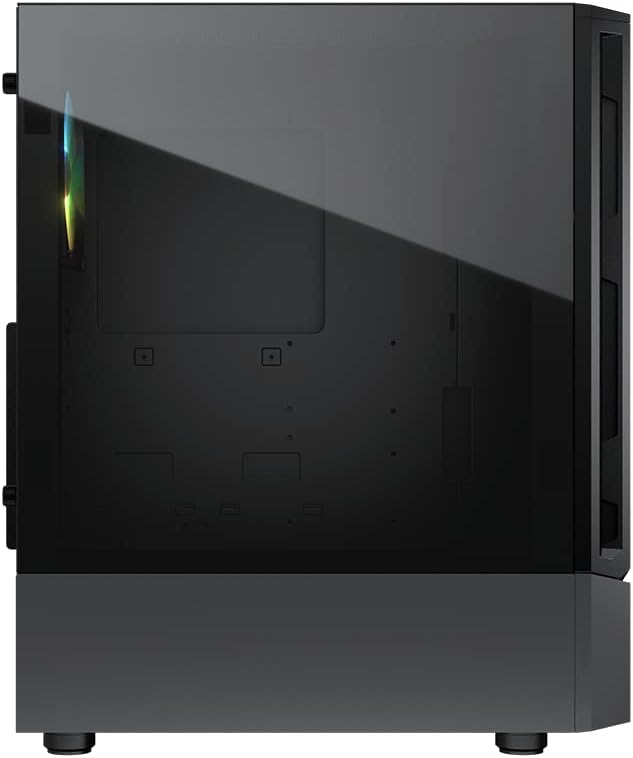
Figure 4.3 : Côté view of the COUGAR MX360 RGB case, featuring the tempered glass panel.

Figure 4.4 : Face avant inclinée view of the COUGAR MX360 RGB case, showcasing its design and ARGB elements.
5. Configuration et installation
Follow these steps to install your components into the COUGAR MX360 RGB case.
5.1 Préparation du dossier
- Placez l'étui sur une surface plane et stable.
- Remove the tempered glass side panel by unscrewing the thumb screws at the rear of the case and carefully sliding the panel off.
- Remove the opposite metal side panel by unscrewing the thumb screws and sliding it off.
5.2 Installation de la carte mère
- Installez la plaque d'E/S (si elle n'est pas préinstallée sur votre carte mère) dans l'ouverture arrière du boîtier.
- Ensure the correct standoffs are installed for your motherboard form factor (ATX, Micro-ATX, Mini-ITX). Adjust or add standoffs as needed.
- Placez soigneusement votre carte mère sur les entretoises en alignant les trous de vis.
- Fixez la carte mère à l'aide des vis fournies.
5.3 Installation du bloc d'alimentation (PSU)
- Locate the PSU shroud at the bottom of the case.
- Glissez votre bloc d'alimentation dans le compartiment prévu à cet effet par l'arrière du boîtier.
- Fixez le bloc d'alimentation à l'aide de vis situées à l'arrière du boîtier.
- Route necessary cables through the cutouts in the PSU shroud for cable management.
5.4 Installation du disque de stockage
The MX360 RGB supports various storage configurations.
- Disques durs 3.5 pouces : Install into the drive cage located under the PSU shroud.
- Disques SSD/HDD 2.5 pouces : Mount onto the dedicated trays or mounting points behind the motherboard tray.
5.5 Installation de la carte graphique (GPU)
- Retirez les caches des emplacements PCIe nécessaires à l'arrière du boîtier.
- Insérez votre carte graphique dans l'emplacement PCIe approprié sur la carte mère.
- Secure the graphics card with screws. The case supports graphics cards up to 315mm in length.
5.6 Installation du système de refroidissement (ventilateurs/radiateurs)
The case supports up to six fans and a 360mm water cooling radiator.
- Devant: Supports up to 3 x 120mm or 2 x 140mm fans, or a 240/280/360mm radiator.
- Haut: Supports up to 2 x 120mm or 2 x 140mm fans, or a 240/280mm radiator.
- Arrière: Compatible avec 1 ventilateur de 120 mm.
Install fans or radiators using the provided screws, ensuring proper airflow direction.
5.7 Connexions du panneau avant
Connect the front panel cables (USB, Audio, Power, Reset, LED) to their corresponding headers on your motherboard. Refer to your motherboard manual for exact header locations.
5.8 ARGB Lighting Connection
The integrated ARGB LED strips on the front panel connect via a 5V/3Pin ARGB connector. Connect this cable to a compatible 5V/3Pin ARGB header on your motherboard to synchronize lighting effects with your system.
6. Utilisation du boîtier
Once all components are installed and connected, replace the side panels. Power on your system using the power button on the top I/O panel. The ARGB lighting will illuminate, controlled by your motherboard's software or a dedicated ARGB controller if you have one installed.
7. Entretien
Un entretien régulier contribue à garantir des performances optimales et une longue durée de vie aux composants de votre PC.
- Filtres à poussière : The MX360 RGB includes removable dust filters (e.g., top, bottom). Periodically remove and clean these filters with compressed air or water (ensure they are completely dry before reinstallation).
- Nettoyage intérieur: Use compressed air to remove dust from internal components like fans, heatsinks, and the motherboard.
- Nettoyage extérieur : Essuyez les surfaces extérieures avec un chiffon doux, damp chiffon. Évitez les nettoyants abrasifs.
8. Dépannage
En cas de problème, reportez-vous aux étapes de dépannage courantes suivantes :
- Pas d'alimentation : Ensure all power cables (24-pin ATX, 8-pin CPU, GPU power) are securely connected. Check the PSU switch is in the 'ON' position. Verify front panel power button connection to the motherboard.
- L'éclairage ARGB ne fonctionne pas : Confirm the 5V/3Pin ARGB connector is correctly plugged into a compatible motherboard header. Check your motherboard's RGB software for control settings.
- Surchauffe: Ensure all case fans are spinning and oriented correctly for optimal airflow. Check for dust buildup on filters and components. Verify CPU cooler and GPU cooler are properly installed.
- Connexions lâches : Re-seat all components (RAM, GPU, storage drives) and check all power and data cables.
9. Spécifications
| Fonctionnalité | Spécification |
|---|---|
| Marque | PUMA |
| Nom du modèle | MX360 RVB |
| Numéro de modèle de l'article | CGR-5CC6G-RGB |
| Type de cas | Mid Tower |
| Dimensions (L x l x H) | 14.88 x 8.27 x 18.11 pouces (378 x 210 x 460 mm) |
| Poids de l'article | 10.56 livres (4.8 kilogramme) |
| Matériel | Tempered Glass, Fine Metal |
| Couleur | Noir |
| Prise en charge de la carte mère | Mini-ITX/Micro-ATX/ATX |
| Max. Longueur de la carte graphique | 315 mm |
| Max. Hauteur du refroidisseur de processeur | 170 mm |
| Prise en charge du bloc d'alimentation | ATX standard PS2 |
| Méthode de refroidissement | Air / Eau |
| Support de radiateur | Front: 360mm / 280mm / 240mm / 140mm / 120mm Haut : 280 mm / 240 mm / 140 mm / 120 mm Arrière : 120 mm |
| Soutien des fans | Avant : 3 x 120 mm / 2 x 140 mm Dessus: 2 x 120 mm / 2 x 140 mm Arrière: 1 x 120 mm |
| Baies de lecteur | 3.5" HDD: 2 2.5" SSD: 2+2 (converted from 3.5" drive bays) |
| Panneau d'E/S | 2 ports USB 3.0, 1 port USB 2.0, 1 entrée micro, 1 entrée audio, bouton RGB |
| Dossier spécial | ARGB LED Strips, Full-length PSU Cover for Cable Hiding and Improved Airflow |
10. Garantie et assistance
COUGAR products are designed and manufactured to the highest quality standards. For warranty information, please refer to the warranty card included with your product or visit the official COUGAR webConsultez le site. Conservez votre preuve d'achat pour toute réclamation au titre de la garantie.
For technical support or further assistance, please visit the official COUGAR webVous pouvez également consulter leur site web ou contacter leur service client. Vous trouverez plus d'informations et de ressources sur le site. COUGAR Store on Amazon.


