1. Introduction
This manual provides detailed instructions for the setup, operation, and maintenance of your Adler AD 1196B Digital Alarm Clock. Please read this manual thoroughly before using the device to ensure proper function and longevity.
2. Produit terminéview
2.1 Principales caractéristiques
- Digital time display with 12/24 hour format.
- Écran rétroéclairé pour une utilisation facile viewing, automatically turns off after 4 seconds.
- Three independent alarm time settings.
- Three alarm activation settings: 5 days (weekday), 6 days (weekday + Saturday), 7 days (every day).
- Displays current time, date, indoor temperature, and humidity.
- Battery-powered for portability and backup during power outaget.
2.2 Contenu du paquet
- Adler AD 1196B Digital Alarm Clock Unit
- Manuel d'utilisation
Note: 2x AA batteries are required and not included in the package.

Figure 1 : Face avant view of the Adler AD 1196B Digital Alarm Clock, displaying 12:00, 26°C, 56% humidity, and the current date.
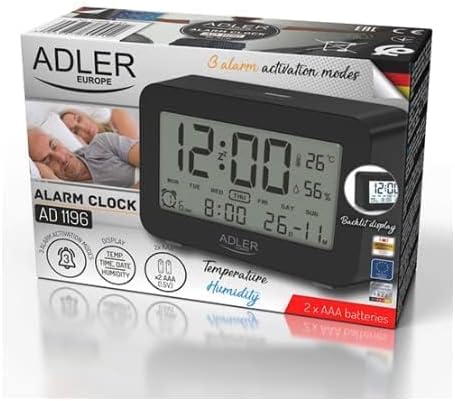
Figure 2: The Adler AD 1196B Digital Alarm Clock shown in its retail packaging, highlighting key features.
3. Installation
3.1 Installation de la batterie
- Repérez le couvercle du compartiment à piles à l'arrière du réveil.
- Faites glisser ou soulevez le couvercle pour ouvrir le compartiment.
- Insérez deux (2) piles AA, en veillant à respecter la polarité (+ et -) comme indiqué à l'intérieur du compartiment.
- Replacez soigneusement le couvercle du compartiment à piles.
The clock will power on automatically once batteries are inserted. The display will show default settings or begin flashing.
3.2 Mise sous tension initiale
Upon successful battery installation, the display will illuminate. You may need to press a button (e.g., "MODE" or "SET") to activate the display if it remains blank after battery insertion. The backlight will activate briefly and then turn off.
4. Mode d'emploi
Familiarize yourself with the control buttons, typically located on the back or top of the device. Common buttons include: MODE, SET, UP/+, DOWN/-, ALARM.
4.1 Réglage de l'heure
- Appuyez et maintenez enfoncé le ENSEMBLE bouton (ou MODE button, depending on model) until the hour digits begin to flash.
- Utilisez le HAUT/+ or VERS LE BAS/- boutons pour régler l'heure.
- Presse ENSEMBLE (ou MODE) again to move to the minute setting.
- Utilisez le HAUT/+ or VERS LE BAS/- boutons pour régler les minutes.
- Continuez à appuyer ENSEMBLE (ou MODE) to cycle through 12/24 hour format, and then to exit time setting mode.
4.2 Réglage de la date
- Depuis l'affichage normal de l'heure, appuyez sur MODE button repeatedly until the date display starts flashing or you enter date setting mode.
- The year digits may flash first. Use HAUT/+ or VERS LE BAS/- pour ajuster l'année.
- Presse MODE to move to the month setting, then adjust with HAUT/+ or VERS LE BAS/-.
- Presse MODE to move to the day setting, then adjust with HAUT/+ or VERS LE BAS/-.
- Presse MODE again to confirm and exit date setting.
4.3 Setting Alarms (Alarm 1, Alarm 2, Alarm 3)
The AD 1196B features three independent alarms. The process is similar for each.
- Appuyez sur le ALARME bouton une fois pour view Alarm 1. Press again for Alarm 2, and a third time for Alarm 3.
- Alors que viewing the desired alarm (e.g., AL1), press and hold the ENSEMBLE appuyer sur le bouton jusqu'à ce que les chiffres de l'heure de l'alarme clignotent.
- Utiliser HAUT/+ or VERS LE BAS/- pour régler l'heure de l'alarme.
- Presse ENSEMBLE passer au réglage des minutes de l'alarme.
- Utiliser HAUT/+ or VERS LE BAS/- pour régler l'alarme en minutes.
- Presse ENSEMBLE encore une fois pour confirmer l'heure du réveil.
- Pour activer/désactiver une alarme, appuyez sur le bouton. ALARME button repeatedly until the alarm icon (e.g., bell symbol) appears or disappears next to the corresponding alarm number (AL1, AL2, AL3).
4.4 Alarm Activation Modes (5, 6, 7 Days)
After setting an alarm time, you can choose its activation frequency:
- While in alarm setting mode (after setting minutes for an alarm), press ENSEMBLE one more time. The display will show a day indicator (e.g., "5 DAY", "6 DAY", "7 DAY").
- Utiliser HAUT/+ or VERS LE BAS/- to cycle through the options:
- 5 JOUR: L'alarme sonne du lundi au vendredi.
- 6 JOUR: L'alarme sonne du lundi au samedi.
- 7 JOUR: Alarm sounds every day of the week.
- Presse ENSEMBLE to confirm your selection and exit alarm setting for that specific alarm.
4.5 Fonction de rétroéclairage
The display features a backlight for improved visibility in low light conditions. The backlight automatically activates when a button is pressed and turns off after approximately 4 seconds to conserve battery power.
4.6 Affichage de la température et de l'humidité
The alarm clock continuously displays the current indoor temperature (in Celsius) and relative humidity percentage. No specific action is required to view these readings; they are shown on the main display.
5. Entretien
5.1 Nettoyage
To clean the alarm clock, gently wipe the surface with a soft, dry cloth. Do not use abrasive cleaners, solvents, or chemical sprays, as these may damage the display or casing.
5.2 Remplacement de la batterie
When the display becomes dim or the clock functions erratically, it is time to replace the batteries. Follow the battery installation steps in Section 3.1. Always replace both batteries with new AA batteries of the same type. Dispose of old batteries responsibly according to local regulations.
6. Dépannage
| Problème | Cause possible | Solution |
|---|---|---|
| L'écran est vide ou sombre. | Les piles sont faibles ou mal installées. | Remplacez les piles par des piles AA neuves, en respectant la polarité. |
| L'alarme ne sonne pas. | L'alarme n'est pas activée ou est mal réglée. | Ensure the alarm icon is visible on the display. Verify the alarm time and activation mode (5, 6, or 7 days) are set correctly. |
| L'heure/la date est incorrecte. | L'heure et la date n'ont pas été réglées ou réinitialisées après le changement de pile. | Follow instructions in Section 4.1 and 4.2 to set the correct time and date. |
| Les relevés de température et d'humidité semblent inexacts. | L'horloge est placée près d'une source de chaleur, d'une bouche d'aération ou en plein soleil. | Relocate the clock to a stable environment away from extreme temperature or humidity fluctuations. Allow time for readings to stabilize. |
7. Spécifications
- Modèle: AD 1196B
- Source d'alimentation : 2 piles AA (non incluses)
- Type d'affichage : Écran LCD numérique rétroéclairé
- Fonctions: Time, Date, Day of Week, Temperature (°C), Humidity (%), 3 Alarms with 3 Activation Modes
- Durée du rétroéclairage : Environ 4 secondes
- Matériel: Plastique
- Dimensions (L x P x H) : 11 cm x 3.81 cm x 5 cm
- Poids: 1.6 kg
8. Garantie et assistance
Pour toute information relative à la garantie ou pour obtenir une assistance technique, veuillez consulter la carte de garantie fournie avec votre produit ou contacter directement le fabricant. Conservez votre reçu d'achat comme preuve d'achat.
Manufacturer: Adler


