Introduction
This manual provides detailed instructions for the setup, operation, and maintenance of your Gioteck SC3 Wireless Pro Controller. Designed for use with Nintendo Switch, PC, and mobile devices, this controller features programmable back buttons, customizable RGB lighting, and changeable magnetic thumb sticks for an enhanced gaming experience.
1. Installation
1.1 Contenu du paquet
- Gioteck SC3 Wireless Pro Controller
- Câble de chargement USB
- Additional Magnetic Thumb Sticks (if included)
- Manuel de l'utilisateur (ce document)
1.2 Charger le contrôleur
Before initial use, fully charge the controller. Connect the supplied USB charging cable to the controller's charging port and the other end to a USB power source (e.g., Nintendo Switch dock, PC USB port, or USB wall adapter).
- L'indicateur LED affichera l'état de charge.
- Une charge complète prend généralement environ 2 à 3 heures.
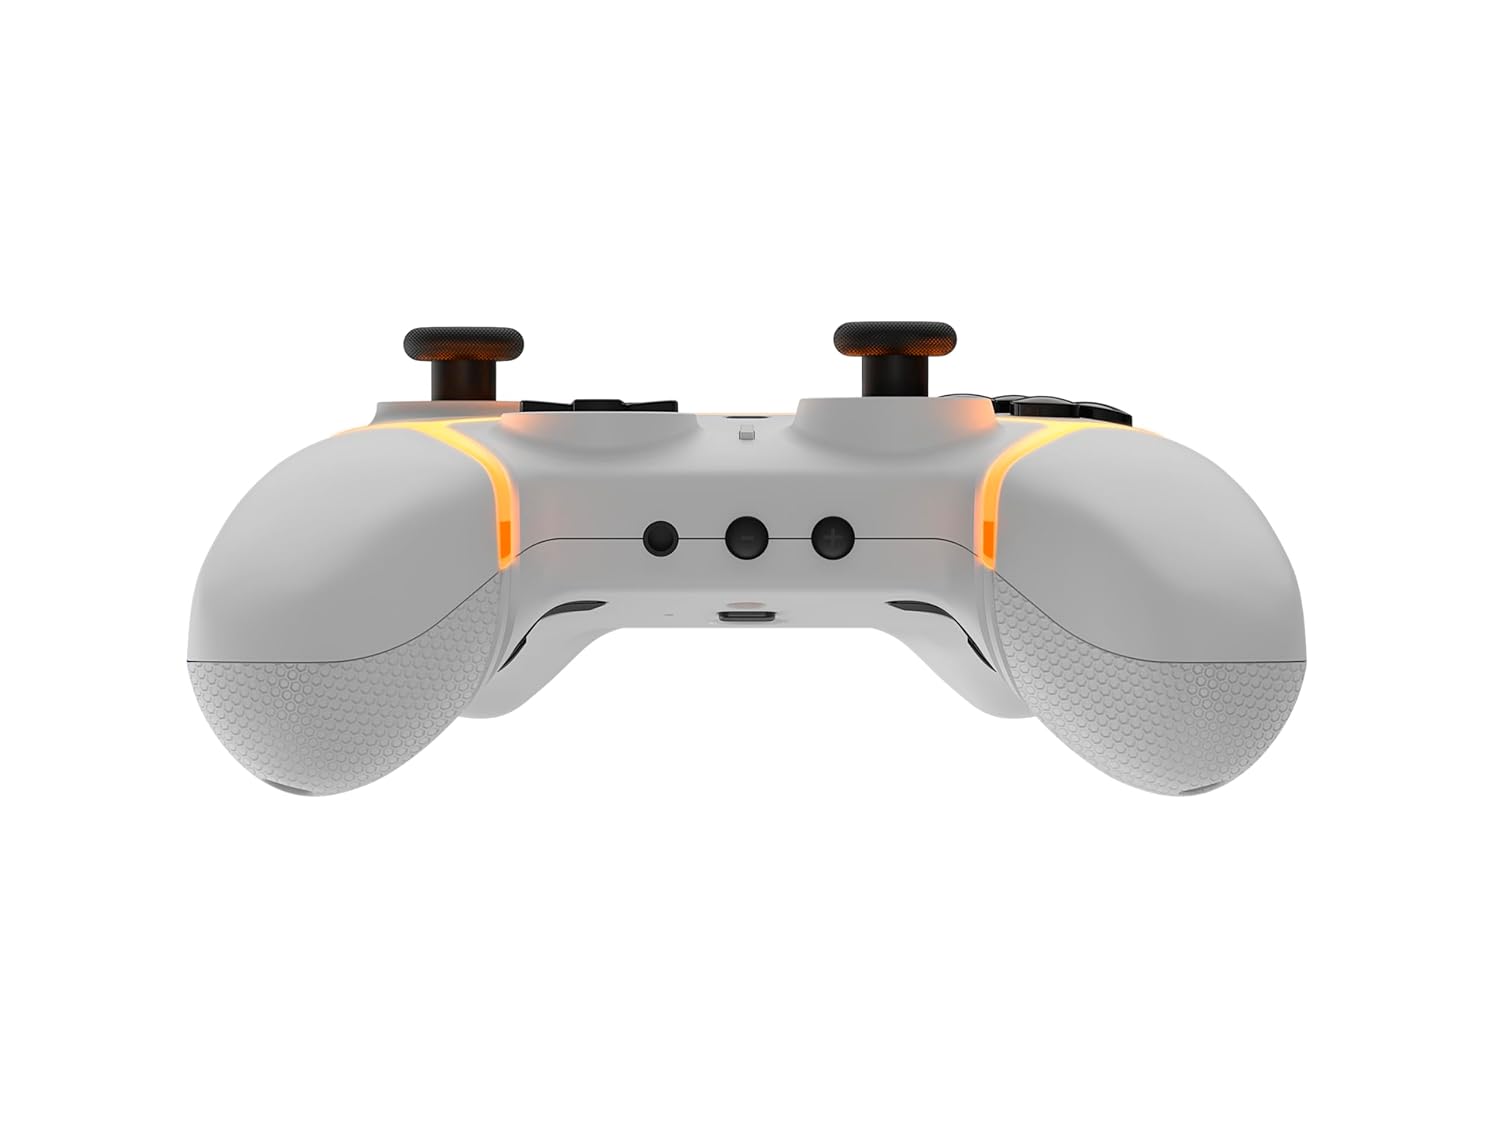
Image : Bas view of the Gioteck SC3 controller, highlighting the USB-C charging port located between the two textured grips.
1.3 Appairage avec la Nintendo Switch
- Depuis le menu HOME de la Nintendo Switch, sélectionnez Contrôleurs, alors Changer la prise/l'ordre.
- On the SC3 controller, press and hold the Bouton d'appairage (usually a small button on the top or back) for a few seconds until the LED indicators begin to flash rapidly.
- Once the controller is recognized by the Switch, the player LED(s) on the controller will illuminate solid, indicating successful pairing.
- Appuyez sur le Un bouton pour confirmer.
Note: For subsequent uses, the controller should automatically reconnect to the last paired Switch console when powered on.
1.4 Connecting to PC/Mobile (Bluetooth)
- Ensure Bluetooth is enabled on your PC or mobile device.
- On the SC3 controller, press and hold the Bouton d'appairage for a few seconds until the LED indicators flash rapidly.
- On your PC/mobile device, navigate to Bluetooth settings and search for new devices.
- Select "Gioteck SC3" or similar from the list of available devices to pair.
- The controller's LED will become solid upon successful connection.
1.5 Installing Magnetic Thumb Sticks
The SC3 controller features changeable magnetic thumb sticks. To replace them:
- Gently pull the existing thumb stick straight up to remove it.
- Align the desired magnetic thumb stick with the base and gently push it down until it snaps into place.

Image : Avant view of the Gioteck SC3 controller, showcasing the magnetic thumb sticks and button layout.
2. Mode d'emploi
Disposition à 2.1 boutons
The SC3 controller features a traditional button layout. Refer to the image below for button identification.

Image : Vue de face inclinée view of the Gioteck SC3 controller, displaying the full button layout including face buttons, D-pad, analog sticks, and shoulder buttons.
- Joysticks analogiques gauche/droite : Pour le contrôle des mouvements et de la caméra.
- Croix directionnelle: Entrée directionnelle.
- Boutons A/B/X/Y : Boutons d'action.
- Boutons L/R/ZL/ZR : Boutons d'épaule et gâchettes.
- Boutons +/- : Start/Select equivalents.
- Bouton d'accueil: Retour au menu principal de la console.
- Bouton de capture : Prend des captures d'écran.
2.2 Boutons de retour programmables
The SC3 controller includes programmable back buttons (M1, M2, M3, M4) for custom assignments.

Image : Arrière view of the Gioteck SC3 controller, clearly showing the four programmable back buttons (M1, M2, M3, M4) and textured grips.
Étapes de programmation :
- Appuyez et maintenez enfoncé le Bouton de programme (refer to diagram if available, usually a small button on the back) until the LED indicator flashes.
- Appuyez sur le Bouton Retour (M1, M2, M3, or M4) you wish to program. The LED will flash slowly.
- Appuyez sur le Bouton d'entrée (e.g., A, B, X, Y, L, R, ZL, ZR, D-pad direction) you want to assign to the back button.
- Appuyez sur le Bouton de programme again to save the assignment. The LED will stop flashing.
- Repeat for other back buttons as desired.
To clear a programmed button, follow steps 1-2, then press the Program Button again without pressing an input button.
2.3 Personnalisation de l'éclairage RVB
The controller features customizable RGB lighting. Specific instructions for changing colors or effects are typically found in the product's quick start guide or by pressing a dedicated button combination (e.g., Function + R3).
Consult the quick start guide included with your controller for precise button combinations to adjust RGB lighting.
2.4 Commandes de mouvement
The SC3 controller supports motion controls, allowing for immersive gameplay in compatible Nintendo Switch titles. No special setup is usually required; motion controls activate automatically when supported by the game.
2.5 Audio Headset Jack
A 3.5mm audio headset jack is located on the controller for connecting compatible headsets. It includes dedicated mute and volume control buttons.
- Volume haut/bas : Régler la sortie audio.
- Bouton de sourdine: Mute/unmute microphone input.

Image : Haut view of the Gioteck SC3 controller, highlighting the 3.5mm audio jack, volume controls, and mute button.
3. Entretien
3.1 Nettoyage
Pour nettoyer votre manette, utilisez un chiffon doux et sec. Pour les saletés tenaces, frottez-la légèrement.ampNettoyez le chiffon avec de l'eau. Évitez d'utiliser des produits chimiques agressifs, des nettoyants abrasifs ou des solvants, car ils peuvent endommager la finition et les composants internes de la manette.
- Do not immerse the controller in water or any other liquid.
- Assurez-vous que tous les ports sont secs avant de charger ou de connecter des appareils.
3.2 Stockage
Rangez la manette dans un endroit frais et sec, à l'abri de la lumière directe du soleil et des températures extrêmes. Évitez de poser des objets lourds dessus afin de prévenir tout dommage.
3.3 Entretien de la batterie
The controller contains a rechargeable battery. To prolong battery life:
- Évitez de décharger complètement la batterie fréquemment.
- Rechargez régulièrement la manette, même si elle n'est pas utilisée pendant de longues périodes (par exemple, une fois tous les 3 à 6 mois).
- Ne pas exposer le contrôleur à des températures supérieures à 60 °C (140 °F).
4. Dépannage
4.1 Manette non connectée/non appariée
- Vérifier la batterie : Assurez-vous que la manette est suffisamment chargée.
- Réparation: Follow the pairing instructions in Section 1.3 or 1.4.
- Ingérence: Move closer to the console/device and away from potential sources of wireless interference (e.g., Wi-Fi routers, other Bluetooth devices).
- Réinitialiser le contrôleur : Locate a small reset button (often a pinhole) on the back of the controller. Use a paperclip to press and hold it for a few seconds. Then attempt to re-pair.
- Update Console/Device Software: Ensure your Nintendo Switch, PC, or mobile device's operating system is up to date.
4.2 Buttons/Sticks Not Responding
- Resynchronisation : Déconnectez et reconnectez le contrôleur.
- Faire le ménage: Assurez-vous qu'aucun débris ne soit coincé autour des boutons ou des bâtonnets.
- Test in another game/menu: Determine if the issue is specific to a game or system-wide.
- Réinitialiser le contrôleur : Effectuez une réinitialisation matérielle comme décrit ci-dessus.
4.3 Motion Controls Not Working
- Compatibilité du jeu : Vérifiez que le jeu auquel vous jouez prend en charge les commandes de mouvement.
- Recalibrer : On Nintendo Switch, you can recalibrate motion controls in the system settings.
- Réinitialiser le contrôleur : Effectuer une réinitialisation matérielle.
5. Spécifications
| Modèle: | Gioteck SC3 Wireless Pro Controller |
| Compatibilité: | Nintendo Switch (Original, Lite, OLED), PC, Mobile Devices |
| Connectivité : | Bluetooth sans fil |
| Dimensions (environ) : | 2.87 x 5.35 x 6.34 pouces (7.29 x 13.59 x 16.1 cm) |
| Poids (environ) : | 10.6 onces (300 grammes) |
| Prise audio: | 3.5mm with mute and volume controls |
| Caractéristiques spéciales : | Programmable back buttons, Magnetic thumb sticks, RGB lighting, Motion controls |
6. Informations sur la garantie
The Gioteck SC3 Wireless Pro Controller comes with a manufacturer's warranty. For specific details regarding warranty coverage, duration, and claims process, please refer to the warranty card included with your product or visit the official Gioteck website.
Veuillez conserver votre preuve d'achat à des fins de garantie.
7. Assistance clientèle
If you encounter any issues or have questions not covered in this manual, please contact Gioteck customer support. Contact information can typically be found on the product packaging or the official Gioteck website.
Gioteck Officiel Website: www.gioteck.com


