1. Introduction
This manual provides essential information for the safe and efficient operation, maintenance, and troubleshooting of your Profile GE Automatic Espresso Machine + Milk Frother. Please read these instructions thoroughly before first use and retain for future reference.

Image 1.1: The Profile GE Automatic Espresso Machine with a prepared espresso and a latte.
2. Consignes de sécurité
Respectez toujours les consignes de sécurité de base lors de l'utilisation d'appareils électriques afin de réduire les risques d'incendie, d'électrocution et de blessures.
- Ensure the appliance is connected to a grounded outlet.
- Ne plongez pas la machine, le cordon ou la fiche dans l'eau ou d'autres liquides.
- Débranchez l'appareil de la prise lorsqu'il n'est pas utilisé et avant de le nettoyer.
- N’utilisez aucun appareil dont le cordon ou la fiche est endommagé.
- Gardez vos mains et les câbles éloignés des surfaces chaudes.
- Utilisez uniquement les accessoires recommandés par le fabricant.
3. Produit terminéview
Le Profile GE Automatic Espresso Machine is designed for convenience and quality, featuring an integrated grinder, milk frother, and smart connectivity.
3.1 Composants
- Panneau de contrôle: Touch-sensitive buttons for various drink selections and functions.
- Trémie à grains : Stores whole coffee beans for grinding.
- Réservoir d'eau: Réservoir amovible pour l'alimentation en eau.
- Bec verseur à café : Distribue du café infusé.
- Baguette à vapeur : Pour faire mousser le lait.
- Bac de récupération: Collects excess liquids.
- Conteneur à marc : Récupère le marc de café usagé.

Image 3.1: The top control panel with buttons for Espresso, Americano, My Brew, Steam, and Hot Water.

Image 3.2: The integrated bean hopper with whole coffee beans and grind size adjustment knob.

Image 3.3: The removable water reservoir being lifted from the machine.
4. Installation
4.1 Déballage et installation initiale
- Retirez soigneusement tous les matériaux d’emballage.
- Place the machine on a stable, level surface away from heat sources and direct sunlight.
- Veillez à prévoir un espace suffisant autour de la machine pour la ventilation et l'accès aux composants.
4.2 Nettoyage initial
Before first use, clean all removable parts with warm water and mild detergent. Rinse thoroughly and dry. Wipe the exterior of the machine with a damp tissu.
4.3 Remplissage du réservoir d'eau
- Remove the water reservoir from the machine (refer to Image 3.3).
- Fill with fresh, cold drinking water up to the MAX line.
- Replace the reservoir securely into the machine.
4.4 Ajout des grains de café
- Open the lid of the bean hopper (refer to Image 3.2).
- Pour whole coffee beans into the hopper. Do not overfill.
- Fermez bien le couvercle.
4.5 Mise en marche et rinçage initial
- Branchez le cordon d’alimentation sur une prise électrique reliée à la terre.
- Press the power button on the control panel. The machine will perform an initial rinse cycle.
- Place a container under the coffee spout to collect the rinse water.
4.6 SmartHQ App Connection
For enhanced customization and software updates, connect your espresso machine to the SmartHQ app.
- Téléchargez l'application SmartHQ depuis la boutique d'applications de votre appareil.
- Follow the in-app instructions to pair your espresso machine.
- Customize drink preferences, volume, and strength through the app.

Image 4.1: Using the SmartHQ app to control and customize the espresso machine.
5. Mode d'emploi
5.1 Préparation du café
The machine offers Espresso, Americano, Lungo, and Hot Water options. The 'My Cup' setting is pre-set to Ristretto and can be adjusted via the SmartHQ app.
- Ensure the water reservoir is filled and the bean hopper contains coffee beans.
- Placez une tasse sous le bec verseur.
- Select your desired drink (Espresso, Americano, Lungo, My Cup) from the control panel.
- La machine moudra automatiquement les grains, préparera le café et le servira.

Image 5.1: The espresso machine dispensing a fresh shot of espresso.
5.2 Réglage de la taille de la mouture
The integrated conical burr grinder allows for 5 levels of grind size adjustment, from coarsest to finest, to optimize flavor extraction.
- Locate the grind size adjustment knob inside the bean hopper (refer to Image 3.2).
- Turn the knob to select your desired grind setting. Finer grinds are suitable for espresso, while coarser grinds are better for longer coffee types.
5.3 Using the Steam Frother
The steam frother creates various milk textures for cappuccinos, lattes, and more.
- Fill the included stainless steel frothing pitcher with cold milk.
- Placez la buse vapeur dans le lait.
- Appuyez sur le bouton « Steam » du panneau de commande.
- Move the pitcher to achieve desired foam texture.
- Once finished, press the 'Steam' button again to stop.
- Immediately clean the steam wand after each use to prevent milk residue buildup.
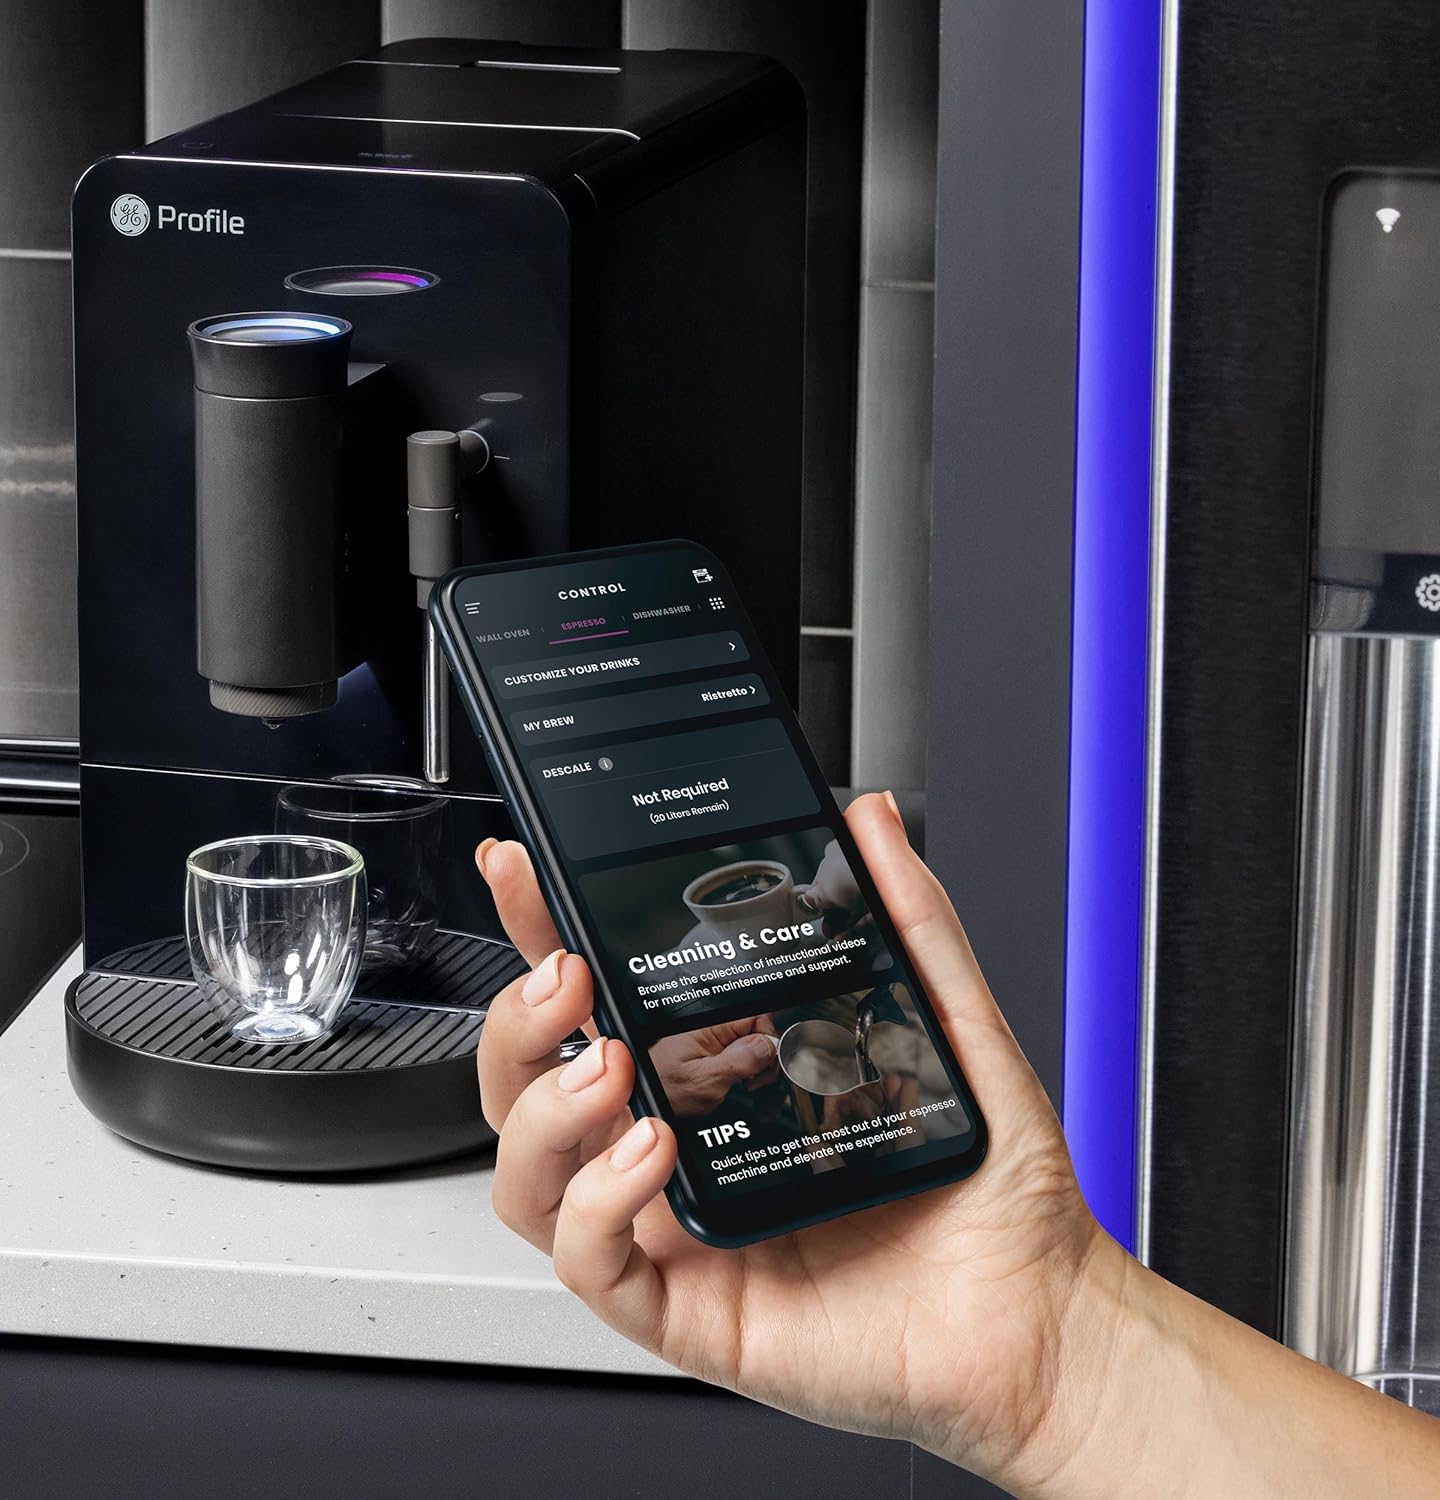
Image 5.2: A hand using the steam wand to froth milk in a stainless steel pitcher.
6. Entretien
Un nettoyage et un entretien réguliers garantissent des performances optimales et une longue durée de vie à votre machine à expresso.
6.1 Nettoyage quotidien
- Baguette à vapeur : Après chaque utilisation, essuyez la buse vapeur avec un chiffon humide.amp cloth. Purge steam briefly to clear any milk residue from the nozzle.
- Bac de récupération et récipient à marc : Vider et rincer quotidiennement. L'appareil indiquera quand vider le bac à marc.
- Réservoir d'eau: Rincez quotidiennement et remplissez d'eau fraîche.
6.2 Nettoyage hebdomadaire
- Unité de brassage : The brew unit is typically removable for rinsing under running water. Refer to the included cleaning kit instructions for detailed steps.
- Trémie à grains : Periodically clean out any oil residue or old beans.
6.3 Détartrage
The machine will prompt you when descaling is required. Use a descaling solution specifically designed for espresso machines and follow the instructions provided with the descaling agent or in the SmartHQ app.
7. Dépannage
Cette section aborde les problèmes courants que vous pourriez rencontrer avec votre machine à expresso.
| Problème | Cause possible | Solution |
|---|---|---|
| No coffee dispensed / "Add Beans" message | Bean hopper empty or beans not feeding correctly. | Refill bean hopper. Gently stir beans to ensure they feed into the grinder. |
| Le café est trop léger ou trop dilué. | Grind size too coarse, insufficient coffee dose, or descaling needed. | Adjust grind size to a finer setting. Check SmartHQ app for strength settings. Perform descaling if prompted. |
| Le lait ne mousse pas correctement | Steam wand clogged, milk type unsuitable, or insufficient steam pressure. | Clean steam wand thoroughly. Use fresh, cold milk. Ensure machine is heated to steam temperature. |
| La machine ne s'allume pas | Non branché, alimentation coupéetage, ou disjoncteur déclenché. | Check power connection. Verify power outlet functionality. Reset circuit breaker if necessary. |
| SmartHQ app connectivity issues | Incorrect Wi-Fi password, network interference, or app bug. | Verify Wi-Fi credentials. Ensure machine is within Wi-Fi range. Restart app and machine. Check for app updates. |
8. Spécifications
- Marque: Profile
- Nom du modèle : GE Profile Machine à expresso automatique + mousseur
- Numéro de modèle de l'article : P7CEBBS6RBB
- Couleur: Noir
- Dimensions du produit : 7"P x 16"L x 12.5"H
- Poids de l'article : 16 livres
- Voltage: 120V
- Mode de fonctionnement : Entièrement automatique
- Caractéristiques spéciales : Built-In Bean Hopper, Built-In Conical Burr Grinder & Adjustable Grind Size, Programmable My Brew Setting, Steam Frother & Frothing Pitcher, WiFi Connected
- Composants inclus : Cleaning Kit, Coffee Bean Container, Espresso Machine, Steam Wand, Milk Pitcher, Water Tank
- Type d'entrée de café : Haricots entiers
- Entrée de l'interface humaine : Écran tactile

Image 8.1: Product dimensions of the espresso machine.
9. Garantie et assistance
This product is covered by a manufacturer's warranty. For specific warranty details, registration, or technical support, please refer to the warranty card included with your product or visit the official GE Profile website. You may also contact customer service through the SmartHQ app for assistance.


