Introduction
Thank you for choosing the Lepro 5m RGB LED Strip Light. This product is designed to provide versatile and vibrant lighting for various indoor applications. Featuring high-brightness SMD5050 LEDs, a wide range of colors, and easy installation, it enhances the ambiance of any space. Please read this manual carefully before installation and use to ensure proper operation and safety.
Qu'y a-t-il dans la boîte
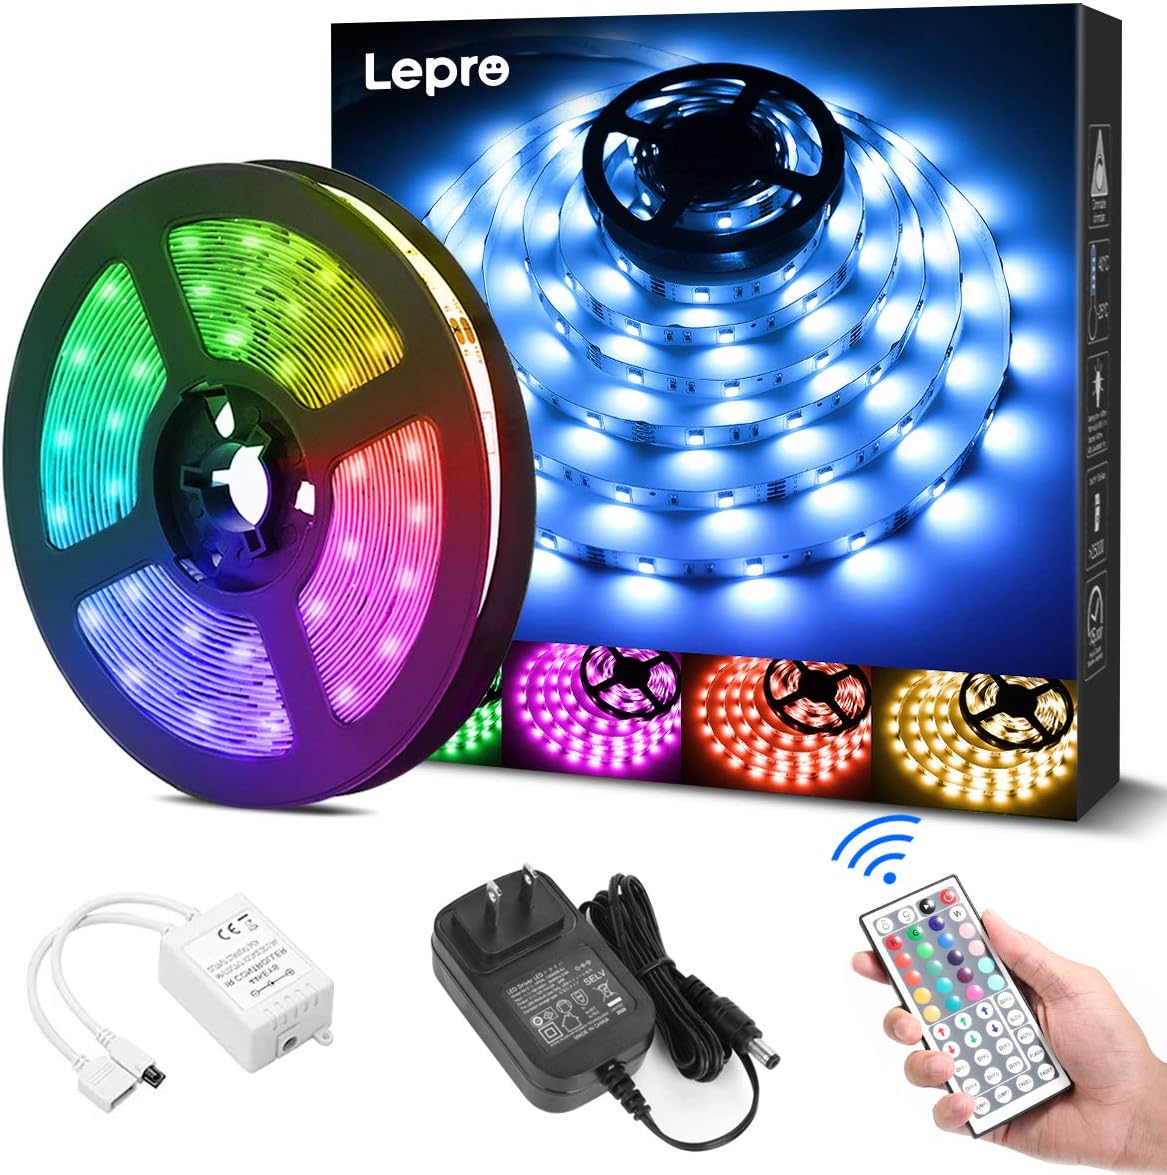
Vérifiez que tous les composants sont présents avant de commencer l'installation :
- LED Strip Light (5 meters) x 1
- Adaptateur secteur DC12V x 1
- Connection Receiver x 1
- Télécommande x 1
- Instruction Manual (Japanese) x 1
Consignes de sécurité
- Ce produit est conçu pour utilisation en intérieur uniquementNe pas exposer à l'eau ou à une forte humidité.
- Assurez-vous que l’alimentation électrique est débranchée avant l’installation ou la maintenance.
- Use only the provided DC12V power adapter. Using an incompatible power supply may damage the product or pose a fire hazard.
- Ne pliez pas brusquement la bande LED et n'appliquez pas de force excessive, car cela pourrait endommager le circuit.
- Tenir hors de portée des enfants.
- If any part of the product is damaged, discontinue use immediately and contact support.
Installation
Suivez ces étapes pour installer correctement votre ruban LED :
- Préparez la surface : Clean the desired installation surface thoroughly. Ensure it is dry, smooth, and free of dust or oil for optimal adhesive performance.
- Mesurer et couper (facultatif) : If a shorter length is required, cut the LED strip along the designated cut marks (indicated by a scissor icon) using scissors. Note: Only cut at these specific marks. Cutting elsewhere will damage the strip. Cut sections cannot be reconnected without additional connectors (sold separately).
- Appliquer la bandelette : Peel off the backing from the 3M adhesive tape on the back of the LED strip. Carefully press the strip onto the cleaned surface, ensuring firm contact along its entire length.
- Connecter les composants : Connect the LED strip to the connection receiver, ensuring the arrows on both components align. Then, connect the DC12V power adapter to the receiver.
- Mise sous tension : Plug the power adapter into a suitable power outlet. Remove the insulation sheet from the remote control before first use. Point the remote control towards the receiver and press the power button to turn on the lights.


Mode d'emploi
The LED strip light is controlled using the included 44-key remote control. Ensure the remote is pointed towards the receiver for effective operation.
Fonctions de la télécommande :
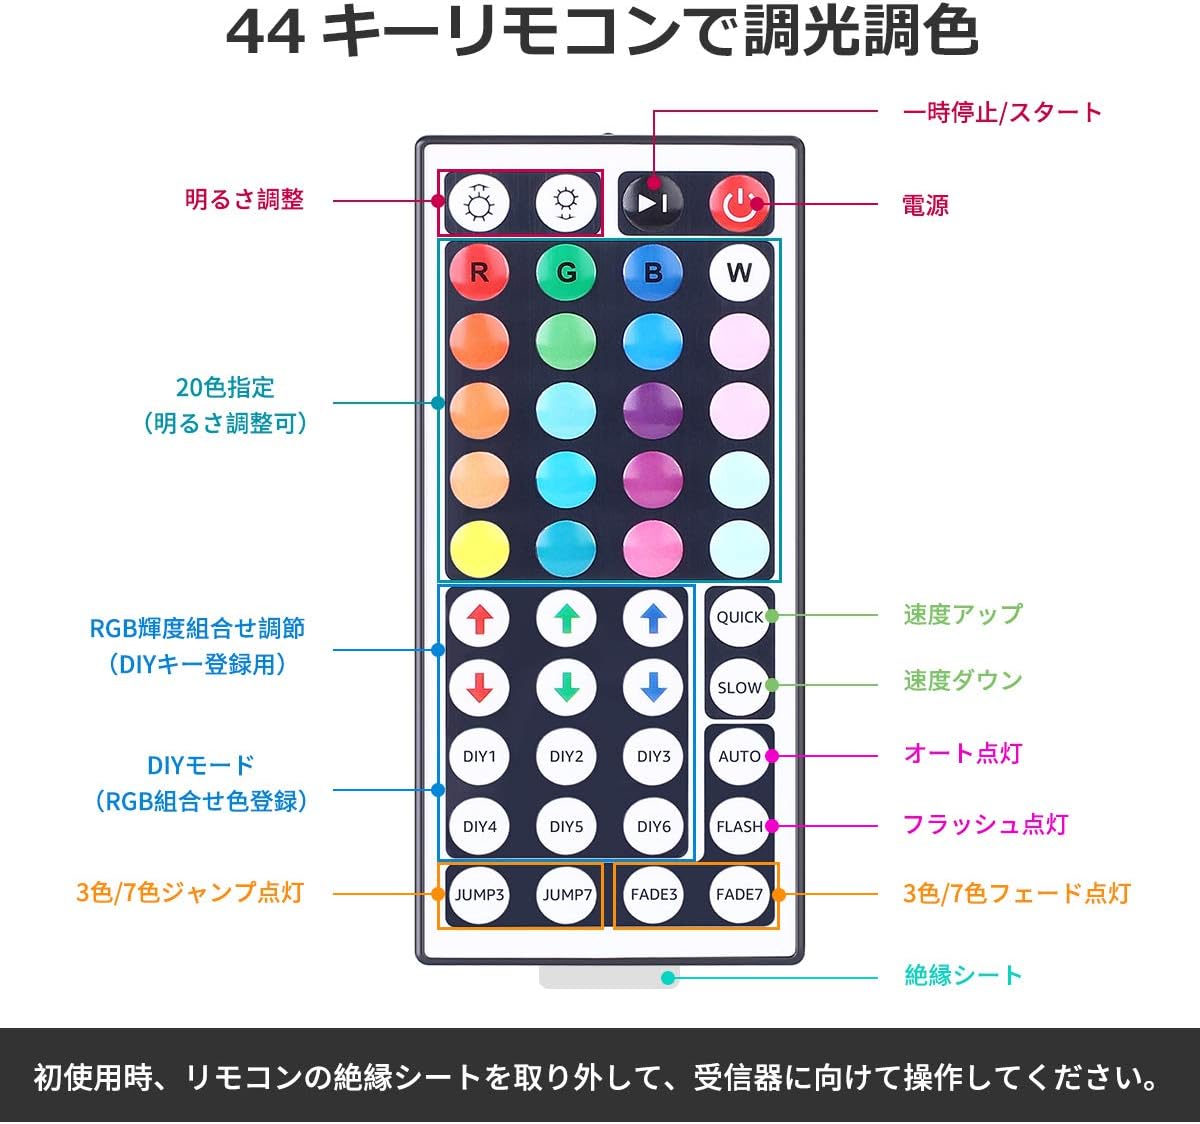
- Marche/Arrêt : Appuyez sur le bouton d'alimentation rouge allumer ou éteindre les lumières.
- Réglage de la luminosité : Utilisez le boutons fléchés haut et bas (labeled 'Brightness Adjust') to increase or decrease the light intensity.
- Sélection de couleur : Choisissez parmi 20 couleurs prédéfinies by pressing the corresponding color buttons.
- Modes de bricolage : Le Boutons DIY1-DIY6 allow you to create and save custom colors by adjusting the Red, Green, and Blue intensity using the RGB arrow buttons.
- Modes dynamiques :
- RAPIDE/LENT : Ajustez la vitesse des modes dynamiques.
- VOITURE: Parcourt automatiquement tous les modes dynamiques.
- FLASH: Des couleurs défilent.
- SAUT3/SAUT7 : Jumps between 3 or 7 colors.
- FADE3/FADE7 : Passe progressivement de 3 à 7 couleurs.
Entretien
- Nettoyage: Ensure the power is off and unplugged before cleaning. Gently wipe the LED strip with a dry, soft cloth. Do not use harsh chemicals or abrasive cleaners.
- Stockage: If storing the strip for an extended period, ensure it is clean and dry. Roll it loosely to prevent damage to the LEDs or circuit. Store in a cool, dry place away from direct sunlight.
- Entretien de l'adhésif : The 3M adhesive is strong, but repeated removal and reapplication may reduce its effectiveness.
Dépannage
| Problème | Cause possible | Solution |
|---|---|---|
| La bande LED ne s'allume pas. | 1. Power adapter not plugged in. 2. Remote control insulation sheet not removed. 3. Connections are loose or incorrect. 4. La pile de la télécommande est déchargée. | 1. Ensure power adapter is securely plugged into an outlet. 2. Remove the clear plastic insulation sheet from the remote control battery compartment. 3. Check all connections, ensuring arrows align between the strip and receiver. 4. Replace the remote control battery (CR2025 or equivalent). |
| La télécommande ne répond pas. | 1. Télécommande non pointée vers le récepteur. 2. Obstruction between remote and receiver. 3. La pile de la télécommande est déchargée. | 1. Point the remote directly at the receiver. 2. Remove any objects blocking the line of sight. 3. Remplacez la pile de la télécommande. |
| Certaines parties de la bande ne s'allument pas. | 1. Damage to the LED strip. 2. Incorrect cutting. | 1. Inspect the strip for physical damage. If damaged, contact support. 2. Ensure cuts were made only at designated marks. |
Caractéristiques
- Numéro de modèle : PR410082-RGB-JP
- Marque: Lépreux
- Type de source lumineuse : LED (SMD5050)
- Quantité de LED : 150 LEDs (30 LEDs per meter)
- Longueur de la bande : 5 mètres
- Consommation d'énergie : 18 W
- Vol d'entréetage: DC12V 1.5A
- Options de couleur : RGB (20 preset colors + DIY modes)
- Méthode de contrôle : 44-key IR Remote Control
- Utilisation intérieure/extérieure : Intérieur
- Caractéristiques spéciales : Dimmable, Cuttable, 3M Adhesive, PSE Certified
- Taille du paquet: 13.1 x 10.7 x 6.7 cm; 230 g

Garantie et assistance
This Lepro LED Strip Light comes with a Garantie de 2 ans. If you encounter any issues or have questions regarding the product, please contact Lepro JP customer support through the retailer's platform. Provide your order details and a description of the issue for prompt assistance.
For further assistance, you can visit the official Lepro store on Amazon: Boutique Amazon Lepro


