Introduction
The Steca Solarix PLI is a comprehensive hybrid inverter solution designed for photovoltaic island systems. It integrates an MPPT solar charge controller, a 230V pure sine wave inverter, and an integrated battery charger into a single unit. This device enables the creation of an independent 230V power grid using a solar generator and battery bank. It also supports recharging batteries via generator or grid connection.
The Solarix PLI functions as a grid-guided UPS hybrid inverter with zero export capability and blackout protection. In grid-connected operation, solar power helps reduce electricity costs. In the event of a power outage, the battery seamlessly takes over power supply within 10 milliseconds, ensuring continuous operation of essential loads.
Consignes de sécurité
Veuillez lire attentivement toutes les consignes de sécurité avant l'installation et l'utilisation. Le non-respect de ces consignes peut entraîner un choc électrique, un incendie ou des blessures graves.
- L'installation doit être effectuée uniquement par du personnel qualifié.
- Assurez-vous que toutes les sources d'alimentation sont déconnectées avant d'effectuer tout câblage ou opération de maintenance.
- N’exposez pas l’onduleur à la pluie, à la neige, aux projections d’eau ou à tout autre liquide.
- Do not disassemble the unit. There are no user-serviceable parts inside. Refer all servicing to qualified service personnel.
- Assurez une ventilation adéquate autour de l’onduleur pour éviter toute surchauffe.
- Connect the inverter only to battery systems with the correct voltage (24V pour ce modèle).
- Always use appropriate overcurrent protection devices (fuses/breakers) for all circuits connected to the inverter.
- Tenez les enfants éloignés de l'onduleur et de ses connexions.
Produit terminéview
The Steca Solarix PLI unit features a robust design with a clear display and intuitive controls for monitoring and configuration.
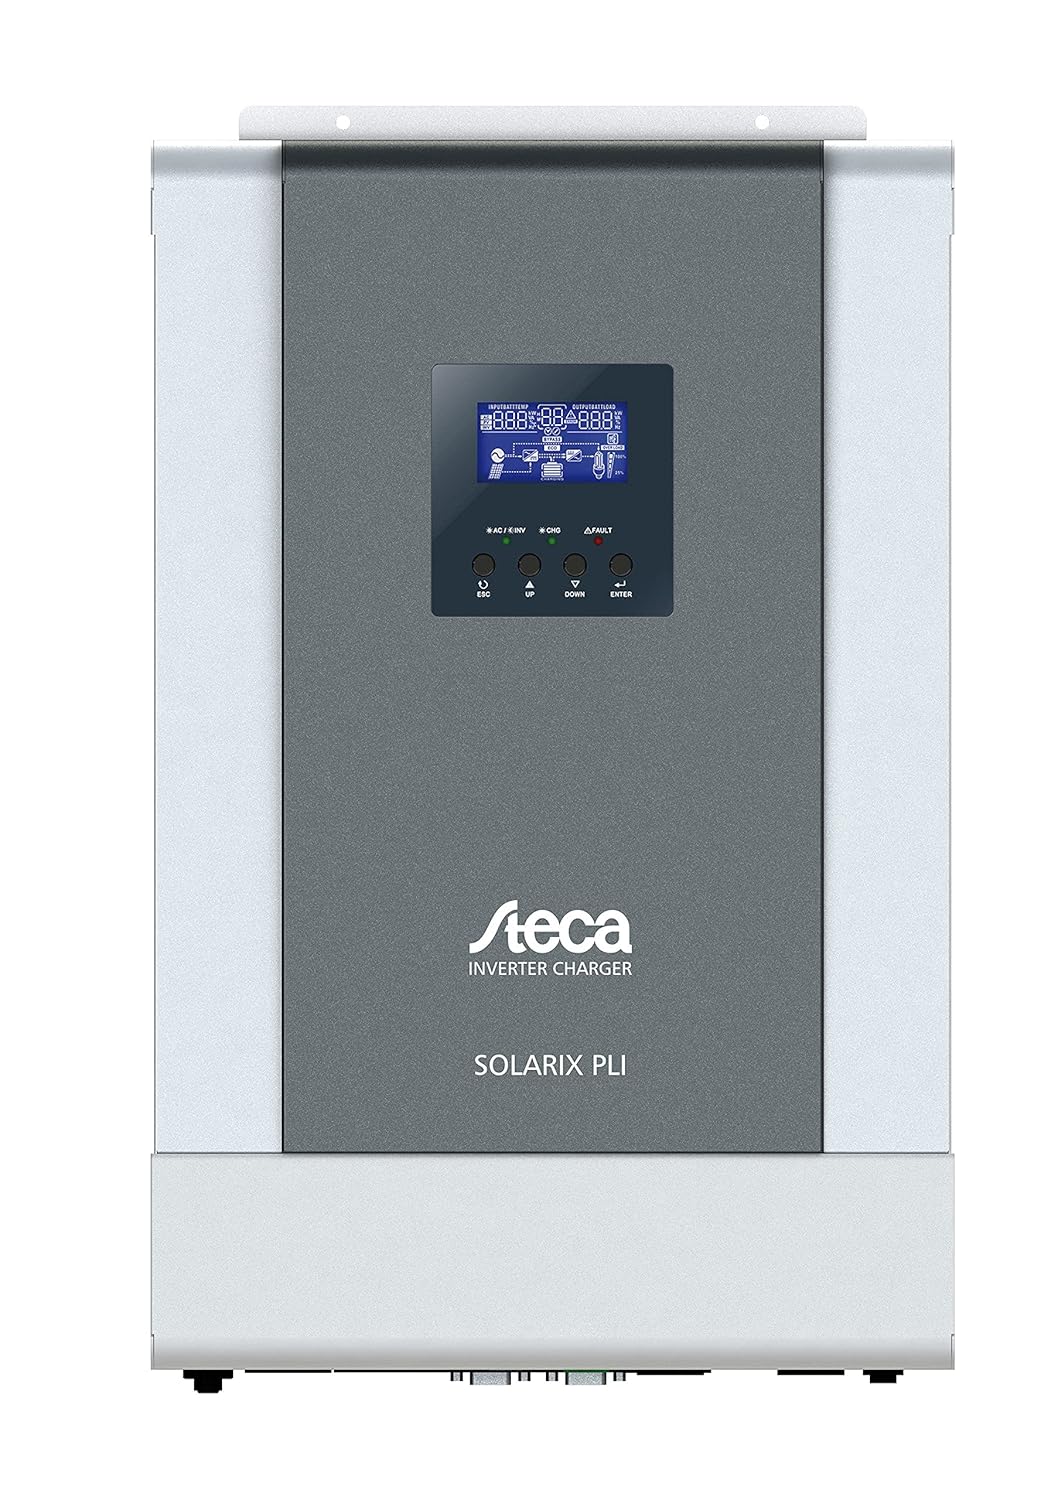
Figure 1 : Face avant view of the Steca Solarix PLI 2400-24V Hybrid Inverter. The central display shows operational status, while buttons below allow navigation and setting adjustments.
Les principaux composants comprennent :
- Écran LCD : Shows real-time system data, operating status, and error codes.
- Boutons de contrôle : Used for navigating menus and adjusting settings (ESC, UP, DOWN, ENTER).
- Bornes d'entrée/sortie CA : For connecting to the grid and supplying AC loads.
- Bornes de batterie : Pour le raccordement à la batterie.
- Bornes d'entrée PV : For connecting to the solar panel array.
- Ports de communication : For external monitoring and control (e.g., USB, RS232).

Figure 2: Dimensional drawing of the Steca Solarix PLI, indicating its physical size and mounting points. Dimensions are provided in millimeters.
Installation
Proper installation is crucial for the safe and efficient operation of your Solarix PLI inverter. Follow these general steps:
- Montage: Select a suitable location for mounting the inverter. It should be indoors, dry, well-ventilated, and away from direct sunlight or heat sources. Ensure the mounting surface can support the inverter's weight (approx. 9.01 kg).
- Connexion de la batterie : Connect the battery bank to the inverter's battery terminals. Ensure correct polarity (+ to + and - to -). Use appropriately sized cables and fuses. This model is designed for 24V battery systems.
- Connexion du champ photovoltaïque : Connect the solar panel array to the PV input terminals. Observe correct polarity and ensure the PV array voltagLa tension et le courant sont conformes aux spécifications de l'onduleur.
- Connexion d'entrée CA (réseau/générateur) : If connecting to the utility grid or a generator, connect the AC input cable to the designated terminals. Ensure proper grounding.
- Connexion de sortie CA (charges) : Connect your AC loads (appliances, circuits) to the AC output terminals of the inverter.
- Mise sous tension initiale : Once all connections are secure and verified, switch on the battery breaker, then the PV array breaker (if applicable), and finally the AC input breaker. The inverter display should power on.
- Configuration: Use the control buttons and LCD display to configure operating parameters such as battery type, charging current, output voltage, and operating modes according to your system requirements.
Refer to the detailed wiring diagrams and specific instructions in the full user manual for precise connection procedures and safety precautions.
Opérationnel
The Steca Solarix PLI offers various operating modes to optimize energy flow. The LCD display provides real-time information on input voltage, volume de sortietage, battery status, charging current, and load power.
Affichage et navigation
The LCD display shows various screens cycling through system parameters. Use the UP and DOWN buttons to manually cycle through screens or adjust values in settings. The ENTER button confirms selections, and ESC returns to the previous menu or screen.
Modes de fonctionnement
- Utility Priority (UPS Mode): The inverter primarily uses grid power to supply loads and charge batteries. Solar power is used when available to supplement or reduce grid consumption. In case of grid failure, it switches to battery power.
- Priorité solaire : Solar power is prioritized for loads and battery charging. Grid power is only used when solar power is insufficient or batteries are low.
- Priorité à la batterie : Loads are primarily supplied by battery power. Solar charges the battery. Grid power is used as a last resort when battery voltage descend en dessous d'un seuil défini.
Standby Functionality
The inverter features a standby mode to conserve energy. It typically enters standby when the load is below a certain threshold (e.g., <40W) and reactivates when the load increases (e.g., >100W). This threshold may be configurable in advanced settings.
Entretien
Regular maintenance ensures the longevity and optimal performance of your Steca Solarix PLI inverter.
- Nettoyage: Nettoyez régulièrement l'extérieur de l'onduleur avec un chiffon doux et sec. N'utilisez pas de nettoyants liquides ni de solvants. Assurez-vous que les ouvertures de ventilation sont exemptes de poussière et de débris.
- Vérification des connexions : Annually inspect all electrical connections (battery, PV, AC input/output) for tightness and signs of corrosion. Loose connections can cause overheating and damage.
- Ventilation: Veillez à ce que la zone autour de l'onduleur reste dégagée afin de permettre une bonne circulation de l'air et une dissipation optimale de la chaleur.
- État de la batterie : Monitor your battery bank's health according to the battery manufacturer's recommendations. Ensure proper charging and discharge cycles.
Always disconnect all power sources before performing any maintenance or inspection.
Dépannage
This section addresses common issues you might encounter with your Steca Solarix PLI inverter.
| Problème | Cause possible | Solution |
|---|---|---|
| No 230V output / Error Code 09 (Soft Start Failure) | Internal main board defect. | This often indicates a hardware failure that cannot be user-repaired. Contact Steca customer support or a qualified service technician. |
| Inverter does not activate from standby with low loads. | Load is below the inverter's standby activation threshold (e.g., <100W). | Increase the load connected to the inverter above the activation threshold. Check if the standby threshold is configurable in the settings. |
| Persistent warning tone. | Indicates a system warning (e.g., low battery, overload, high temperature). | Check the LCD display for specific error codes or warning messages. Address the underlying issue (e.g., reduce load, check ventilation, charge batteries). While the tone can be disabled, it's recommended to address the cause. |
| Display/Menu navigation buttons (UP/DOWN) seem reversed. | Minor firmware quirk or design choice. | Adapt to the button behavior. It does not affect functionality. |
| Inverter not charging batteries from PV. | Insufficient solar input, PV connection issue, or charge controller settings. | Check PV array connections and ensure sufficient sunlight. Verify PV input voltage on the display. Check charge controller settings (e.g., battery type, charging current). |
For issues not listed here or if solutions do not resolve the problem, please contact Steca customer support.
Caractéristiques
| Attribut | Valeur |
|---|---|
| Marque | STECA |
| Numéro de modèle | 4250852802154 |
| Poids de l'article | 9.01 kilogrammes |
| Dimensions du produit | 49.6 x 47.79 x 23 cm (Emballage) |
| Couleur | Noir |
| Épaisseur du produit | 130 millimètres |
| Type de lecteur | Battery, Solar |
| Voltage | 230 volts |
| Quoitage | 5700 Watt (Max. PV Generator) |
| Composants inclus | Onduleur hybride |
| Piles requises | No (for inverter operation, but requires external battery bank for energy storage) |
| Première date disponible | 16 juin 2021 |
| Facteur de forme | Étagère |
Garantie et assistance
The Steca Solarix PLI typically comes with a manufacturer's warranty. Based on available information, the warranty period for this product is generally 2 ans À compter de la date d'achat. Veuillez conserver votre preuve d'achat pour toute réclamation au titre de la garantie.
For technical support, troubleshooting beyond this manual, or warranty service, please contact Steca customer service. You may need to provide your product model number (4250852802154) and serial number (if applicable).
Note: Warranty terms may vary by region and retailer. Always refer to the official warranty documentation provided with your product for precise details.