1. Introduction
Merci pour votre achatasing the PRIMO PR501SV Cordless 3-in-1 Stick Vacuum Cleaner. This manual provides essential information for the safe and efficient use, maintenance, and troubleshooting of your appliance. Please read it thoroughly before first use and keep it for future reference.
2. Consignes de sécurité
Pour réduire les risques d'incendie, d'électrocution ou de blessure, suivez toujours les consignes de sécurité de base lors de l'utilisation d'un appareil électrique.
- Lisez toutes les instructions avant d’utiliser l’appareil.
- Ne pas utiliser à l'extérieur ou sur des surfaces humides.
- Ne pas utiliser ce produit comme jouet. Une attention particulière est nécessaire en cas d'utilisation par ou à proximité d'enfants.
- Utiliser uniquement comme décrit dans ce manuel. Utiliser uniquement les accessoires recommandés par le fabricant.
- Ne pas utiliser si le cordon ou la fiche est endommagé(e). Si l'appareil ne fonctionne pas correctement, s'il est tombé, s'il a été endommagé, laissé à l'extérieur ou s'il est tombé dans l'eau, veuillez le rapporter à un centre de service agréé.
- Ne tirez pas et ne transportez pas l'appareil par le cordon, ne l'utilisez pas comme poignée, ne fermez pas une porte sur le cordon et ne tirez pas le cordon sur des bords ou des coins tranchants. Ne faites pas passer l'appareil sur le cordon. Gardez le cordon éloigné des surfaces chaudes.
- Ne débranchez pas l'appareil en tirant sur le cordon. Pour débrancher, saisissez la fiche et non le cordon.
- Ne manipulez pas la fiche ou l’appareil avec les mains mouillées.
- N'introduisez aucun objet dans les ouvertures. N'utilisez pas l'appareil si une ouverture est obstruée. Évitez toute présence de poussière, de peluches, de cheveux ou de tout ce qui pourrait réduire la circulation d'air.
- Gardez les cheveux, les vêtements amples, les doigts et toutes les parties du corps éloignés des ouvertures et des pièces mobiles.
- Ne ramassez rien qui brûle ou qui fume, comme des cigarettes, des allumettes ou des cendres chaudes.
- Ne pas utiliser pour aspirer des liquides inflammables ou combustibles, tels que de l’essence, ni dans des zones où ils peuvent être présents.
- Ne ramassez pas de produits toxiques (par exemple, eau de Javel, nettoyant à l'ammoniaque, déboucheur de canalisations).
- Ne pas utiliser sans bac à poussière et/ou filtres en place.
- Éteignez toutes les commandes avant de débrancher.
- Soyez particulièrement prudent lorsque vous nettoyez les escaliers.
- Ne pas utiliser pour ramasser des objets durs ou pointus tels que du verre, des clous, des vis, des pièces de monnaie, etc.
- Empêcher le démarrage involontaire. Assurez-vous que l'interrupteur est en position d'arrêt avant de brancher la batterie, de ramasser ou de transporter l'appareil.
- Rechargez uniquement avec le chargeur spécifié par le fabricant. Un chargeur adapté à un type de bloc-batterie peut créer un risque d'incendie lorsqu'il est utilisé avec un autre bloc-batterie.
- En cas d'utilisation abusive, du liquide peut s'échapper de la batterie. Évitez tout contact. En cas de contact accidentel, rincez à l'eau. En cas de contact du liquide avec les yeux, consultez également un médecin. Le liquide éjecté de la batterie peut provoquer une irritation ou des brûlures.
3. Contenu du colis
Carefully unpack your PRIMO PR501SV and ensure all components are present and in good condition. Refer to the image below for identification.

Figure 3.1 : Composants inclus
This image displays the main components of the PRIMO PR501SV vacuum cleaner: the motor unit with integrated dust reservoir, the long lightweight metallic tube, the motorized floor brush, a crevice tool for narrow spaces, a dusting brush for delicate surfaces, the power adapter for charging, and a wall mount for convenient storage.
- Motor Unit with Dust Reservoir (0.6 L capacity)
- Lightweight Metallic Tube
- Brosse à plancher motorisée
- Outil pour crevasses
- Brosse à épousseter
- Adaptateur secteur
- Support mural avec vis
4. Produit terminéview
The PRIMO PR501SV is a versatile 3-in-1 cordless vacuum cleaner designed for various cleaning tasks. It can be configured as a stick vacuum, a handheld vacuum, or a crumb collector.

Figure 4.1: 3-in-1 Configurations
This image illustrates the three primary modes of the PR501SV: as a complete stick vacuum for floor cleaning, as a handheld unit equipped with the crevice tool for tight spots, and as a handheld unit with the dusting brush for upholstery or delicate surfaces. The wall mount is also visible, indicating a storage solution.
5. Configuration et assemblage
Suivez ces étapes pour assembler votre aspirateur :
- Assembler l'aspirateur balai : Insert the metallic tube into the main motor unit until it clicks into place. Then, attach the motorized floor brush to the other end of the metallic tube, ensuring it is securely fastened.
- Configuration pour appareil portable : To use as a handheld vacuum, detach the metallic tube and motorized floor brush from the motor unit. Attach either the crevice tool or the dusting brush directly to the motor unit's suction opening.
- Installation murale : Choose a suitable location near a power outlet. Use the provided screws to securely attach the wall mount to the wall. Ensure it is at a height that allows the vacuum to hang freely.

Figure 5.1: Wall Mount Storage
This image shows a user placing the assembled stick vacuum onto the wall mount, demonstrating how the appliance can be conveniently stored and charged when not in use.
6. Chargement de la batterie
The PRIMO PR501SV is powered by an 18.5V Lithium-ion battery. Before first use, fully charge the battery.
- Connect the power adapter to the charging port on the motor unit.
- Branchez l'adaptateur dans une prise murale.
- The battery indicator lights will illuminate during charging. A full charge typically takes 4-5 hours.
- Once fully charged, the indicator lights will show a full battery level. Disconnect the charger.

Figure 6.1: Battery Indicator and Runtime
This close-up image displays the battery charge indicator on the vacuum cleaner. It shows two modes: 'MAX-R' (Max Power) offering approximately 20 minutes of runtime, and 'ECO-G' (Eco Mode) providing around 40 minutes of runtime, indicating the battery's endurance based on the selected power setting.
7. Mode d'emploi
Your vacuum cleaner offers two speed settings and multiple configurations for versatile cleaning.
7.1. Réglages de mise sous/hors tension et de vitesse
- Press the power button once to turn on the vacuum in ECO mode.
- Press the power button a second time to switch to MAX power mode.
- Appuyez une troisième fois sur le bouton d'alimentation pour éteindre l'aspirateur.
7.2. Stick Vacuum Mode
Use this mode for cleaning floors, carpets, and larger areas.
- Ensure the metallic tube and motorized floor brush are securely attached to the motor unit.
- Select the desired power mode (ECO or MAX).
- Guide the vacuum over the surface to be cleaned. The motorized brush helps agitate dirt for effective cleaning.

Figure 7.1: Agile and Flexible Cleaning
This image highlights the vacuum's maneuverability, showing it easily reaching under furniture like a sofa. The design allows for a 180-degree swivel, making it agile and flexible for cleaning hard-to-reach areas.
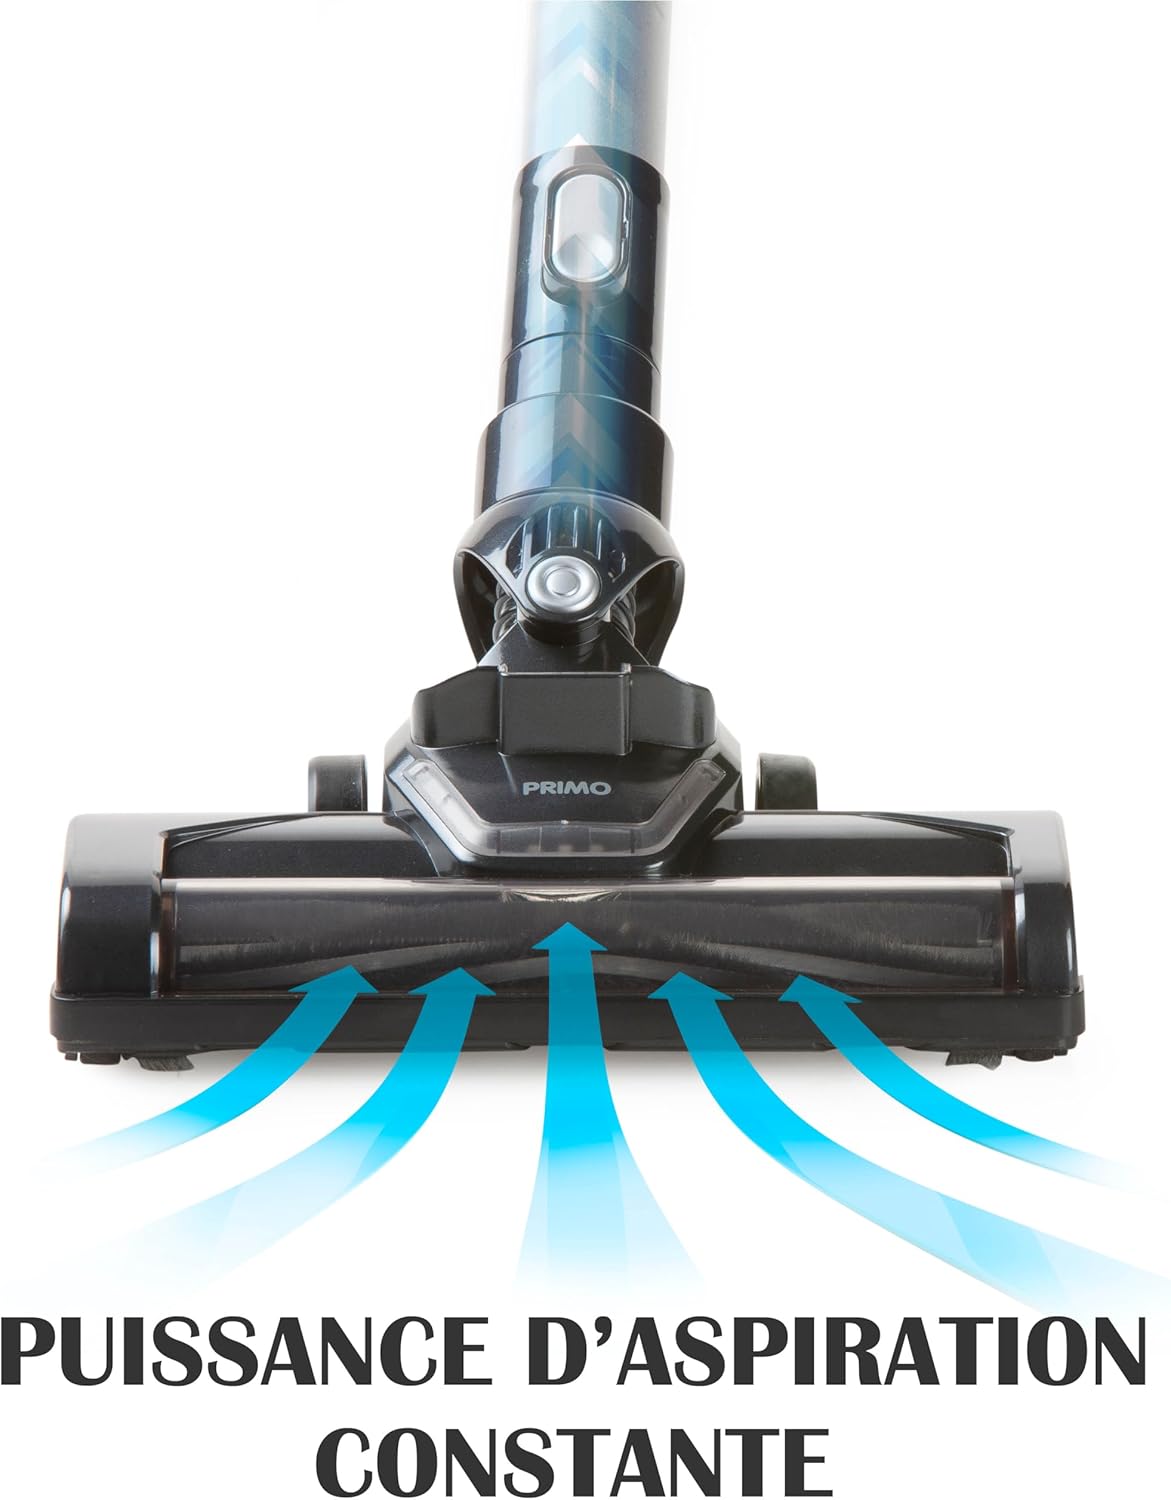
Figure 7.2: Constant Suction Power
This graphic illustrates the consistent and powerful suction generated by the vacuum's floor brush. Blue arrows depict the airflow, demonstrating how dirt and debris are effectively drawn into the vacuum head for thorough cleaning.
7.3. Handheld Vacuum Mode
Ideal for cleaning upholstery, car interiors, stairs, and small spills.
- Detach the metallic tube and motorized floor brush from the motor unit.
- Attach the crevice tool for narrow gaps or the dusting brush for surfaces like curtains or keyboards.
- Turn on the vacuum and clean the desired area.

Figure 7.3: Handheld Cleaning on Upholstery
This image shows the PRIMO PR501SV being used as a handheld vacuum to clean a sofa. It highlights the convenience and effectiveness of this mode for cleaning furniture and other elevated surfaces.
8. Entretien
Un entretien régulier garantit des performances optimales et prolonge la durée de vie de votre aspirateur.
8.1. Emptying the Dust Reservoir
Empty the 0.6 L dust reservoir regularly, especially when it reaches the 'MAX' line.
- Assurez-vous que l'aspirateur est éteint.
- Press the release button on the dust reservoir to detach it from the motor unit.
- Hold the dust reservoir over a trash bin and open the bottom flap to empty the contents.
- Close the flap and reattach the dust reservoir to the motor unit until it clicks securely.

Figure 8.1: Easy Dust Reservoir Emptying
This image illustrates the simple process of detaching the 0.6-liter dust reservoir from the main unit for emptying. The design allows for quick and hygienic disposal of collected debris.
8.2. Nettoyage du filtre HEPA
The HEPA 13 filter retains 99.95% of dust particles. Clean it regularly to maintain suction power.
- Remove the dust reservoir as described above.
- Carefully remove the HEPA filter from inside the dust reservoir.
- Tapotez doucement le filtre au-dessus d'une poubelle pour enlever la poussière.
- If heavily soiled, rinse the filter under running water. Ensure it is completely dry before reinserting. Do not use detergents or hot water.
- Reinsert the dry HEPA filter into the dust reservoir and reattach the reservoir to the motor unit.
8.3. Nettoyage de la brosse motorisée pour sols
Les cheveux et les débris peuvent s'emmêler dans la brosse rotative, ce qui affecte son fonctionnement.
- Ensure the vacuum is turned off and disconnected from the metallic tube.
- Locate the release mechanism on the side of the motorized brush head.
- Remove the brush roll from the housing.
- Use scissors or a brush to remove any tangled hair or debris from the brush roll.
- Réinsérez le rouleau de brosse propre et fixez-le en place.
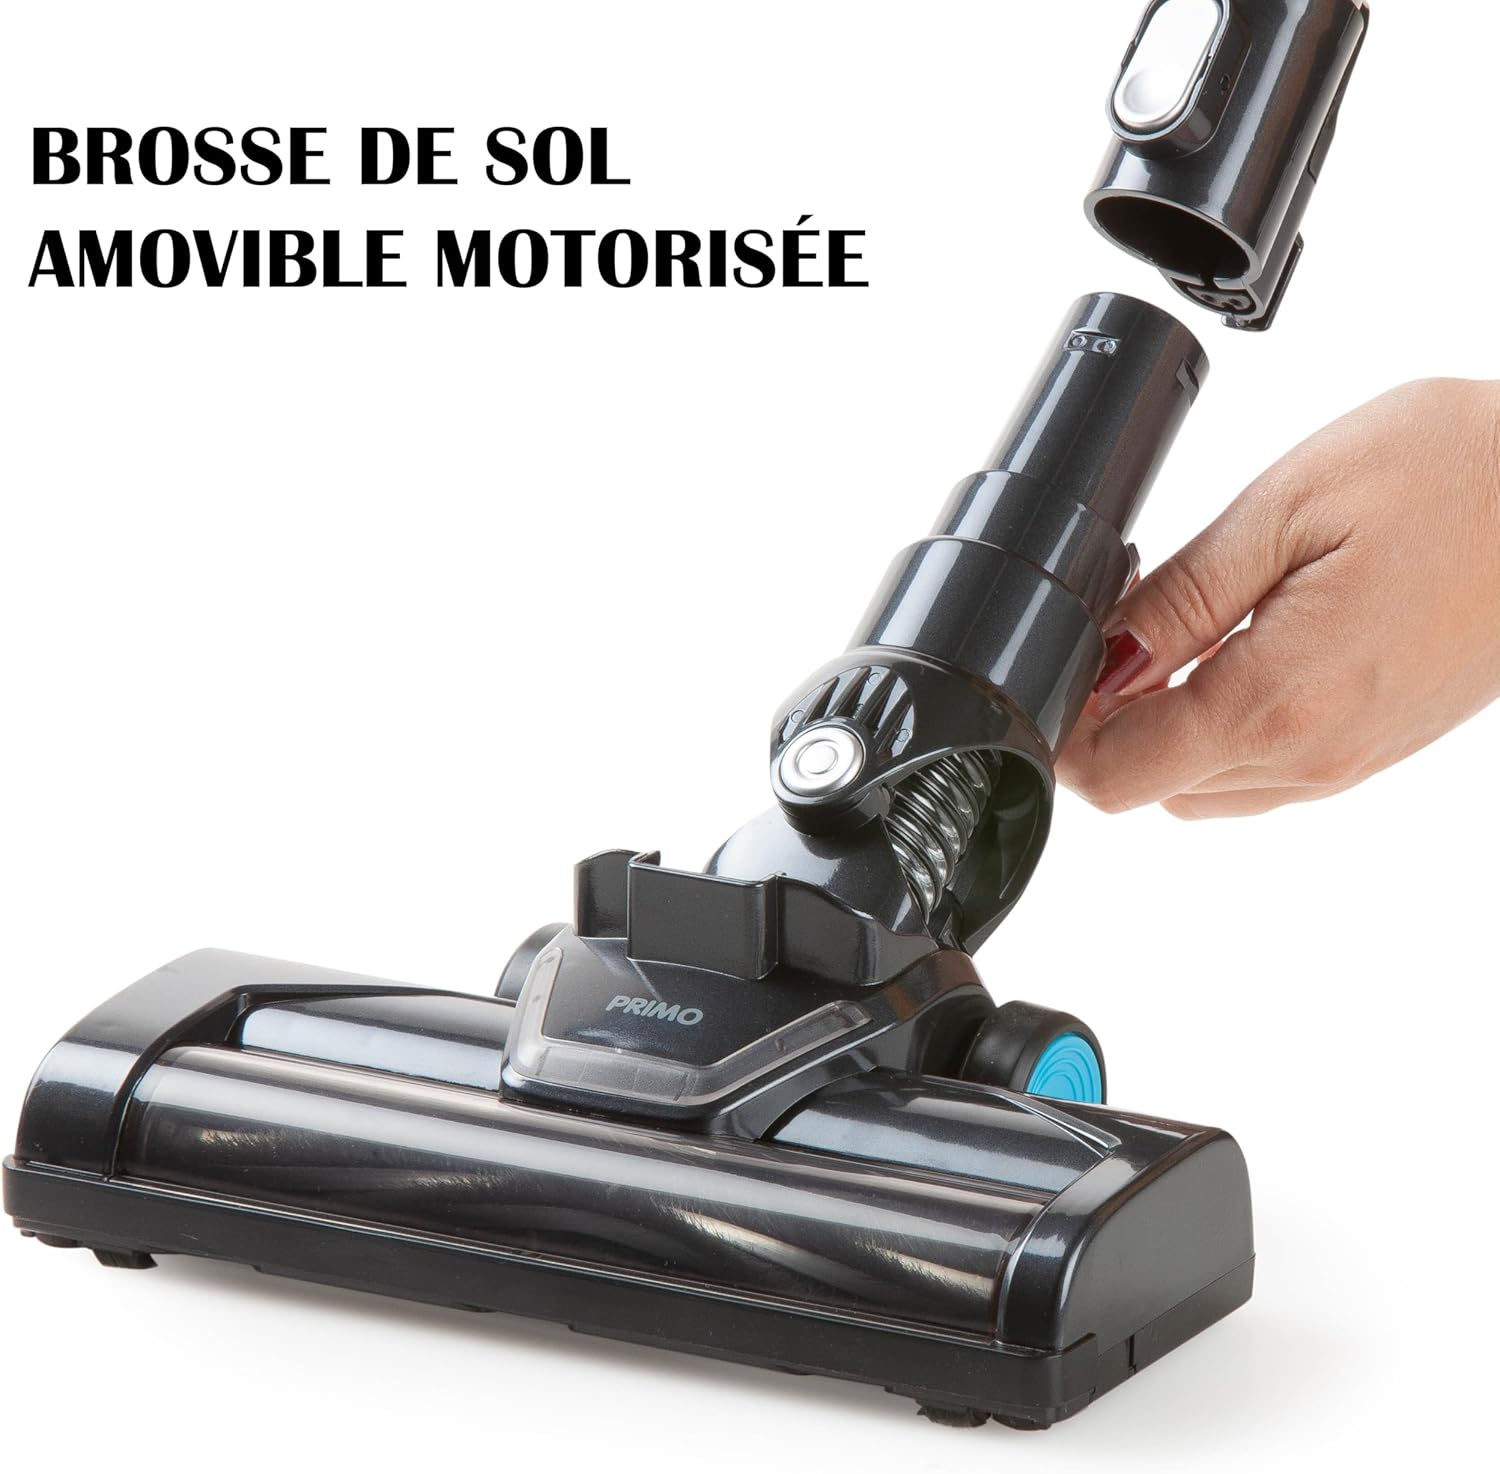
Figure 8.2: Removable Motorized Floor Brush
This image shows the motorized floor brush being detached from the vacuum's main body. This feature allows for easy access to the brush roll for cleaning tangled hair and debris, ensuring consistent performance.
9. Dépannage
If you encounter issues with your PRIMO PR501SV, refer to the following common problems and solutions:
| Problème | Cause possible | Solution |
|---|---|---|
| L'aspirateur ne s'allume pas | La batterie est déchargée Le bouton d'alimentation n'est pas enfoncé correctement | Charger complètement la batterie Appuyez fermement sur le bouton d'alimentation |
| Faible puissance d'aspiration | Dust reservoir is full Le filtre est bouché Le rouleau à pinceaux est emmêlé Nozzle/tube is blocked | Empty the dust reservoir Nettoyer le filtre HEPA Clean the motorized brush roll Vérifiez et éliminez toute obstruction dans la buse ou le tube. |
| La brosse motorisée ne tourne pas. | Le rouleau à pinceaux est emmêlé Connection to main unit is loose | Nettoyer le rouleau brosse Ensure the brush head is securely attached to the tube or motor unit |
| Autonomie de la batterie courte | Batterie pas complètement chargée Using MAX power mode continuously Dégradation de la batterie | Assurez-vous que la batterie est complètement chargée (4 à 5 heures). Use ECO mode for longer runtime Contactez le service client si l'autonomie de la batterie diminue significativement avec le temps. |
Si le problème persiste après avoir essayé ces solutions, veuillez contacter le support client.
10. Spécifications
| Fonctionnalité | Spécification |
|---|---|
| Numéro de modèle | PR501SV |
| Marque | PRIME |
| Taper | Aspirateur-balai sans fil 3 en 1 |
| Batterie | Lithium-ion 18.5 V |
| Temps de charge | 4-5 heures |
| Runtime (ECO mode) | Environ 40 minutes |
| Runtime (MAX power) | Environ 20 minutes |
| Dust Reservoir Capacity | 0.6 litres |
| Type de filtre | HEPA13 |
| Nombre de vitesses | 2 |
| Niveau de bruit | 75 dB |
| Poids | 2 kilogrammes |
| Dimensions (L x l x H) | 16 x 23 x 113 cm |
| Surface recommandée | Sols durs |
| Composants inclus | Motor unit, metallic tube, motorized floor brush, crevice tool, dusting brush, power adapter, wall mount |
11. Garantie et assistance
For warranty information and customer support, please refer to the warranty card included with your purchase or visit the official PRIMO webConsultez le site. Conservez votre preuve d'achat pour toute réclamation au titre de la garantie.


