1. Consignes de sécurité
Veuillez lire et comprendre l'intégralité de ce manuel avant de tenter d'assembler, d'utiliser ou d'installer le produit. Le non-respect de cette consigne pourrait entraîner un choc électrique, un incendie ou d'autres blessures.
- Coupez toujours l'alimentation au niveau du disjoncteur principal avant toute installation ou opération de maintenance.
- Tous les raccordements électriques doivent être conformes aux codes et règlements locaux, ainsi qu'au Code national de l'électricité. Si vous n'êtes pas familiarisé avec le câblage électrique, consultez un électricien qualifié.
- Assurez-vous que le lieu d'installation puisse supporter le poids du ventilateur.
- Ne pas utiliser le ventilateur si les pales ou le boîtier sont endommagés.
- Keep hands clear of fan blades during operation.
2. Produit terminéview
2.1 Principales caractéristiques
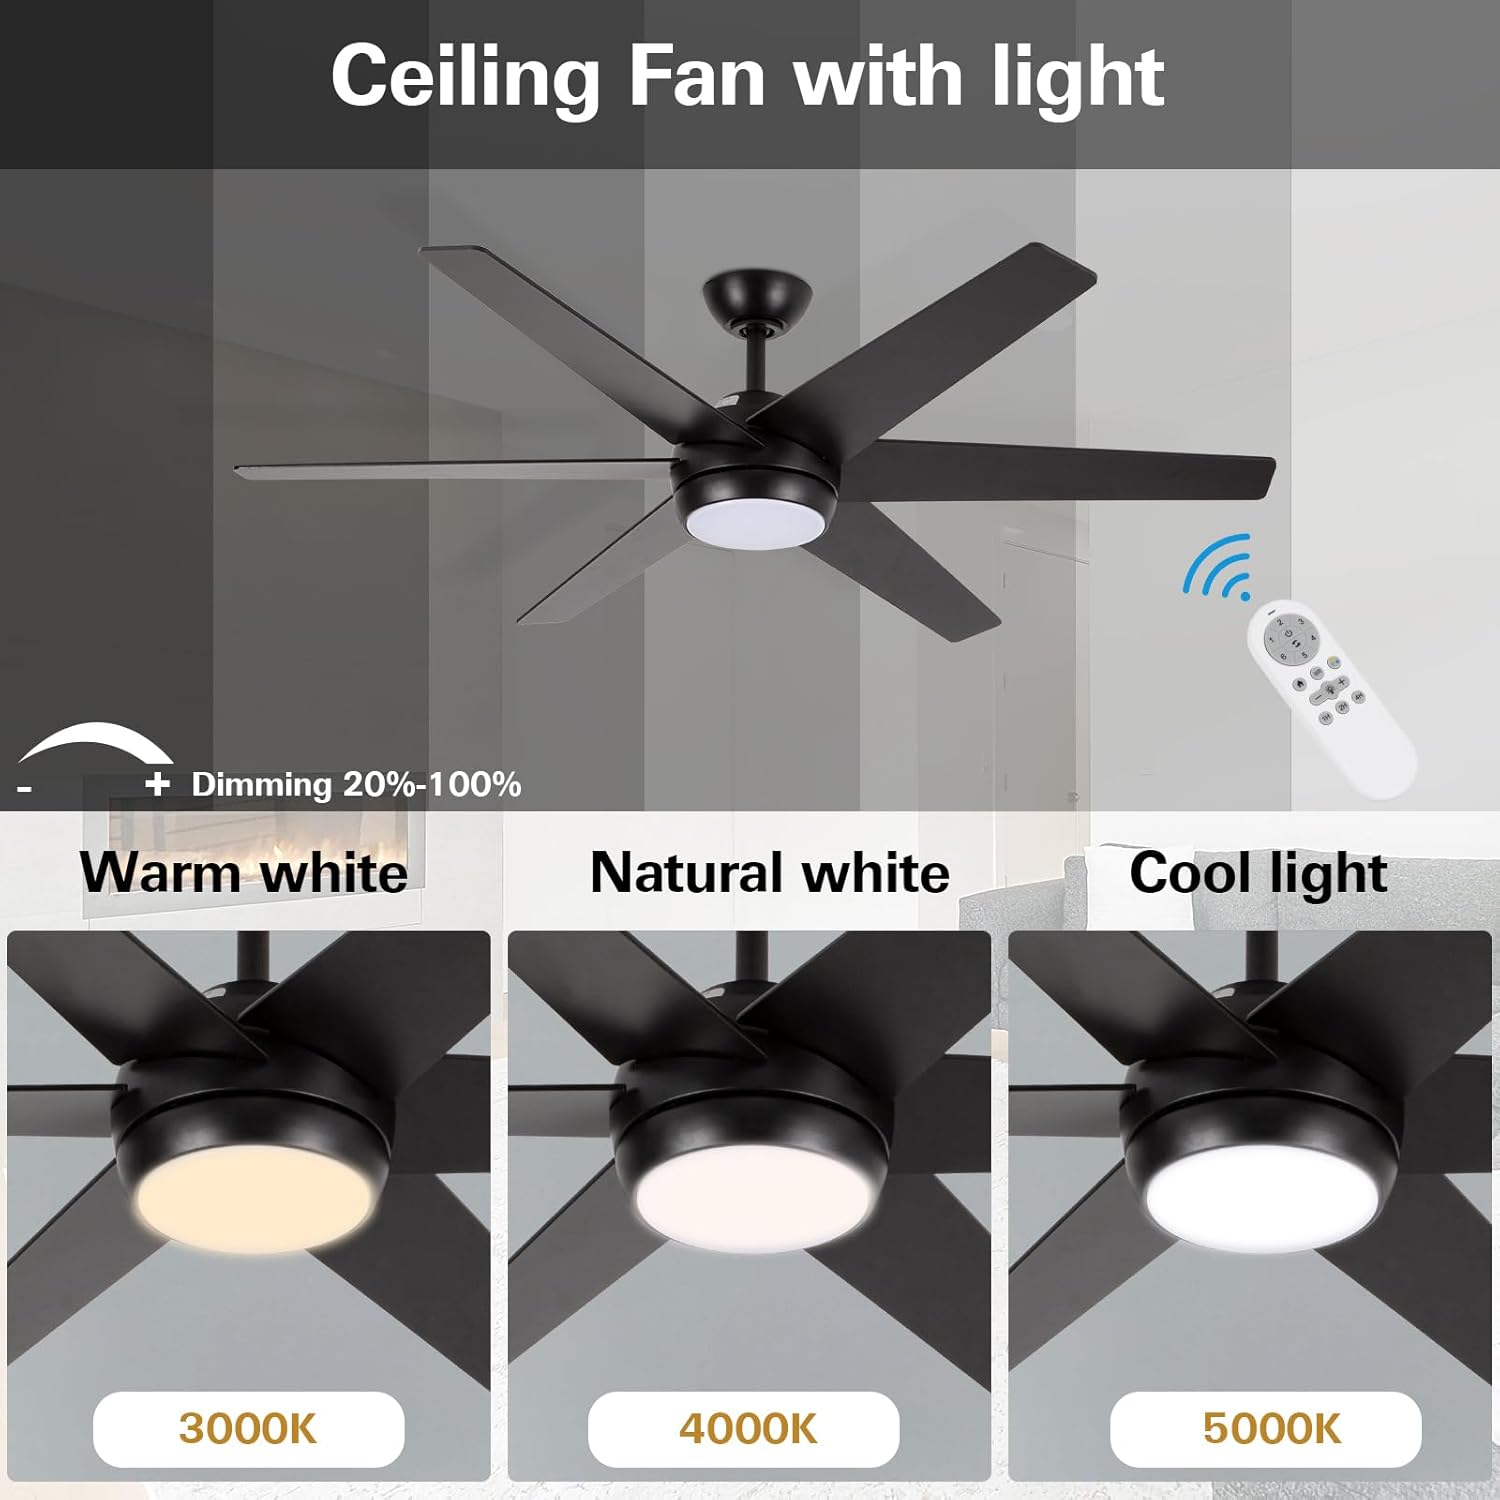
- Design minimaliste moderne : 52-inch ceiling fan with metal motor housing and six dual-color blades. Features an acrylic cover and flicker-free integrated LED light.
- Lumière LED à intensité variable : Replaceable 18W LED light source with three color temperature options (3000K Warm White, 4000K Natural White, 5000K Cool White) and adjustable brightness (20%–100%).
- Moteur réversible silencieux : Allows for downward airflow in summer for cooling and upward airflow in winter for warm air distribution. Designed for quiet operation.
- Multifunction Remote Control: Offers six fan speeds, a natural wind option, 1/2/4-hour timer functions, and a security anti-theft function (light turns on for 5 minutes every two hours).
2.2 Spécifications
| Attribut | Spécification |
|---|---|
| Marque | hykolité |
| Numéro de modèle | HYK-52BK-LED-RC |
| Taille | 52 pouces |
| Couleur | Noir |
| Matériel | Wood (blades), Metal (shade) |
| Source de lumière | LED intégrée (18 W) |
| Température de couleur | 3000K, 4000K, 5000K |
| Luminosité | 870 lumens |
| Méthode de contrôle | Télécommande |
| Vitesses des ventilateurs | 6 speeds + Natural Wind |
| Fonction de minuterie | 1, 2, 4 heures |
| Utilisation intérieure/extérieure | Uniquement en intérieur |
| Dimensions du produit | 52"L x 5.9"l x 13.2"H |
2.3 Visuels du produit


3. Installation
For detailed visual instructions, please refer to the official installation video below. Ensure power is disconnected at the circuit breaker before beginning installation.
Vidéo: Official Installation Guide for hykolity 52 inch Ceiling Fan with LED Light and Remote Control. This video demonstrates the step-by-step process of assembling and mounting the fan, including wiring connections.
3.1 Guide d'installation étape par étape
- Prepare the Downrod:
- Loosen the hanging ball screw and remove the horizontal bolt to detach the hanging ball.
- Remove the lower latch from the hanging pipe.
- Prepare the Motor Assembly:
- Partially loosen the preassembled set screws in the yoke at the top of the motor assembly.
- Assemble Downrod to Motor:
- Thread the main wiring harness through the hole at the bottom of the lifting pipe (downrod).
- Slip the downrod into the motor assembly yoke, aligning the holes for the safety pin and cotter pin.
- Tighten the set screws in the motor assembly yoke.
- Install Remote Control Receiver:
- Insert the remote control receiver (BCE) into the lifting pipe.
- Put the crossbolt back through the lifting ball to secure it, then replace the original latch and tighten the lifting screw.
- Mount the Hanging Bracket:
- Install the hanging bracket to the outlet box using the provided outlet box screws (or original screws).
- Connect the GROUND (GREEN) wires from the fan and remote control receiver to the BARE/GREEN supply wire from the ceiling.
- Connect the BLACK wire from the remote control receiver to the BLACK supply wire from the ceiling.
- Connect the WHITE wire (labeled AC IN N) from the remote control receiver to the WHITE supply wire from the ceiling.
- Connect the wire group from the remote control receiver to the wire group from the motor assembly.
- Accrochez le ventilateur :
- Grab the fan firmly with two hands. Slide the downrod through the opening in the hanging bracket and let the hanging ball rest on the hanging bracket.
- Tournez la fente de la boule de suspension jusqu'à ce qu'elle soit alignée avec la languette du support de suspension.
- Gently slide the remote control receiver flat-side up into the mounting bracket.
- Re-insert the screw that was removed and then tighten both screws securely.
- Installer les pales du ventilateur :
- Loosen the screws and remove the installation fan blade decorative panel.
- Slide a blade through one of the narrow, rectangular openings on the motor housing, aligning holes in the blade with holes in the blade arm.
- Insert 3 blade attachment screws with fingers first and then tighten screws securely with a Phillips screwdriver. Repeat this procedure for the remaining blades.
- Installation du kit d'éclairage LED :
- Connect the wire group from the motor housing to the wire group from the LED light kit. Ensure Molex connections snap together securely.
- Serrez les 3 vis avec un tournevis cruciforme.
- Attacher Lampombre:
- Faites tourner le lampshade clockwise to ensure fixation.
4. Mode d'emploi
The hykolity ceiling fan is operated using the included multifunction remote control.
4.1 Fonctions de la télécommande
- Vitesse du ventilateur (1-6) : Adjusts the fan speed from low (1) to high (6).
- Marche/Arrêt du ventilateur : Permet d'allumer ou d'éteindre le ventilateur.
- Moteur réversible : Modifie le sens de rotation des pales du ventilateur pour les modes été (flux d'air descendant) ou hiver (flux d'air ascendant).
- Lumière allumée/éteinte : Permet d'allumer ou d'éteindre la lumière LED intégrée.
- Light Dimming (20%-100%): Régle la luminosité de la lumière LED.
- Température de couleur (3000K/4000K/5000K) : Cycles through Warm White, Natural White, and Cool White light settings.
- Vent naturel : Activates a mode that simulates natural breeze by varying fan speeds.
- Timer Function (1H/2H/4H): Permet de programmer l'arrêt automatique du ventilateur après 1, 2 ou 4 heures.
- Security Anti-Theft Function: Activates a mode where the light turns on for 5 minutes every two hours.
4.2 Reversible Motor Operation
The reversible motor feature allows you to optimize air circulation for different seasons:
- Mode été : Set the fan to rotate counter-clockwise to create a downward airflow, producing a cooling effect.
- Mode hiver : Set the fan to rotate clockwise to circulate warm air upwards, helping to distribute heat evenly throughout the room.
5. Entretien
Un entretien régulier garantit des performances optimales et une longue durée de vie à votre ventilateur de plafond.
- Nettoyage: Utilisez un chiffon doux et sec.amp Utilisez un chiffon pour nettoyer les pales du ventilateur et le carter du moteur. N’utilisez pas de nettoyants abrasifs ni de solvants.
- Inspection de la lame : Periodically check the fan blades for any signs of damage or warping. Ensure all blade attachment screws are secure.
- Connexions électriques : Annually inspect all electrical connections for tightness and wear.
- Source de lumière : The integrated LED light source is replaceable. Contact customer service for replacement parts if needed.
6. Dépannage
If you experience issues with your hykolity ceiling fan, refer to the following common problems and solutions:
| Problème | Cause possible | Solution |
|---|---|---|
| Le ventilateur ne démarre pas | No power to the fan; loose wiring connections; remote control battery dead. | Vérifiez le disjoncteur ; assurez-vous que tous les branchements électriques sont bien serrés ; remplacez la pile de la télécommande. |
| Light does not turn on/off | Loose wiring connection to light kit; LED light source failure; remote control issue. | Check light kit wiring; contact customer service for LED replacement; ensure remote is functioning correctly. |
| Le ventilateur fait un bourdonnement | Loose mounting screws; unbalanced blades; motor issue. | Tighten all mounting screws; ensure blades are balanced and securely attached; if noise persists, contact customer service. |
| La télécommande ne fonctionne pas | Dead battery; remote not paired with receiver; interference. | Replace battery; refer to remote pairing instructions (if applicable, usually automatic); ensure no strong interference sources nearby. |
7. Garantie et support client
For warranty information or any further assistance, please contact hykolity customer service. Refer to the product packaging or the official hykolity webConsultez le site pour obtenir des détails spécifiques sur la garantie et les informations de contact.
If you encounter any issues during use, feel free to contact us for assistance.


