1. Introduction
This manual provides comprehensive instructions for the safe and efficient operation, maintenance, and troubleshooting of your Virutex FC116U Lock Mortiser. The FC116U is a specialized machine designed for creating precise slots on doors and other elements for fitting locks. Its portable design ensures ease of use and transport, making it suitable for various woodworking projects and professional carpentry tasks.
2. Produit terminéview
2.1. Principales caractéristiques
- Designed for quick and precise mortising of lock slots on doors.
- Portable and easy to transport for on-site work.
- Includes features for handles insertion, dust collection, and rubber protection to prevent surface damage.
- Equipped with a locking bar for secure positioning during operation.
- Allows mortising on doors that are already hung.
2.2. Composants
The Virutex FC116U Lock Mortiser comes with the following main components:
- Lock mortiser machine body
- Tool UT16I (cutting tool/bit)
- Handles insert
- Dust collector attachment
- Rubber protection pads
- Barre de verrouillage
- Various sized bits (e.g., 18mm, 22mm, 24mm)
- Wrenches for adjustment
- Mallette de transport
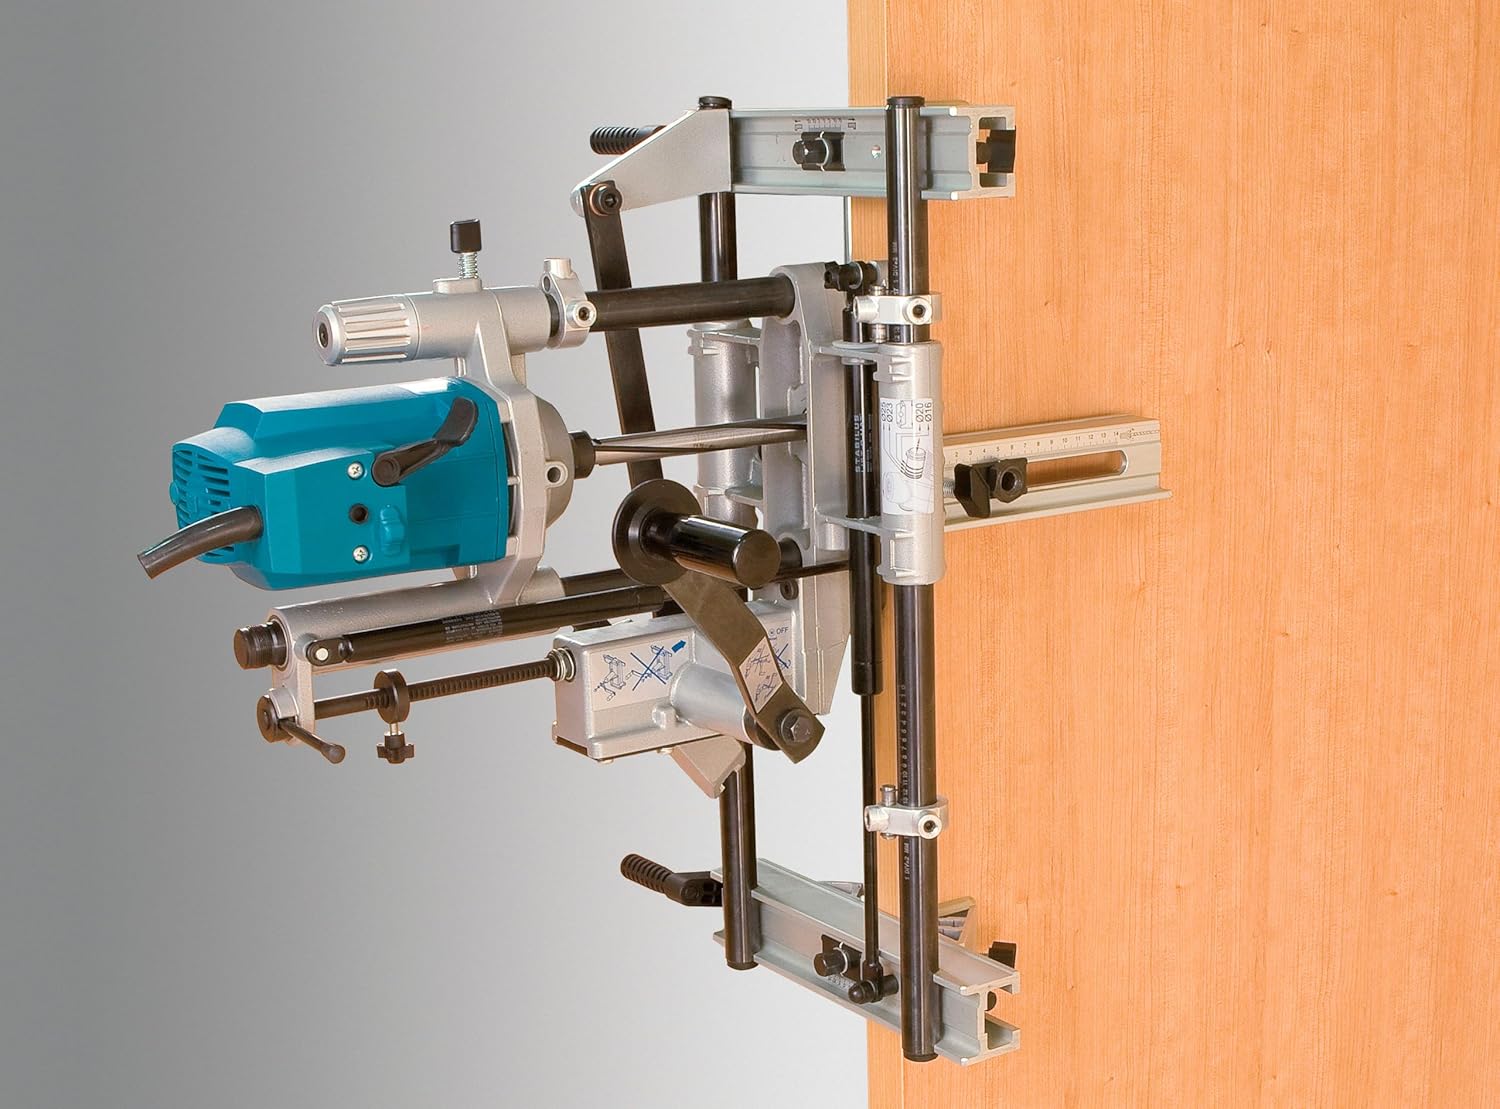
Figure 1: The Virutex FC116U Lock Mortiser main unit. This image displays the complete assembly of the lock mortiser, including the motor, frame, and adjustment mechanisms.
3. Consignes de sécurité
Always prioritize safety when operating power tools. Read and understand all safety warnings and instructions before using the Virutex FC116U Lock Mortiser. Failure to follow these instructions may result in electric shock, fire, and/or serious injury.
- Portez l'équipement de protection individuelle (EPI) approprié, notamment des lunettes de sécurité, une protection auditive et des gants.
- Assurez-vous que la pièce est solidement clampavant de commencer toute opération.
- Gardez les mains et les vêtements amples éloignés des pièces mobiles.
- Débranchez l'outil de la source d'alimentation avant d'effectuer des réglages ou de changer d'accessoires.
- Use the correct bit size and type for the material and desired mortise.
- Maintenir une zone de travail propre et bien éclairée.
4. Installation
Proper setup is crucial for achieving precise results and ensuring safe operation. Follow these steps to prepare your FC116U Lock Mortiser:
- Déballage et inspection : Retirez soigneusement tous les composants de la mallette de transport. Vérifiez qu'ils ne sont pas endommagés.
- Montage de l'unité :
- Position the mortiser on the edge of the door where the lock will be installed.
- Utilisez le clamping feet and locking bar to securely fasten the unit to the door. Ensure the rubber protection pads are in place to prevent surface damage.
- Longueur de réglage :
- Measure the length of the lock body that will be inserted into the door.
- Adjust the mortiser's guides to match this length, ensuring the cutting area corresponds to the lock dimensions.
- Réglage de la profondeur :
- Measure the depth of the lock body.
- Set the depth stop on the mortiser to prevent cutting too deep into the door.
- Installation de la fraise de coupe :
- Select the appropriate size cutting bit (e.g., 18mm, 22mm, 24mm) for your lock.
- Securely insert the bit into the chuck of the mortiser's motor unit.

Figure 2: The Virutex FC116U Lock Mortiser securely mounted on a door edge, ready for operation. This view highlights the clamping mechanism and the tool's stable positioning.

Figure 3 : Gros plan view of the depth adjustment mechanism on the Virutex FC116U, showing the scale for precise setting.
Video 1: Virutextools FC116U Tutorial. This video demonstrates the complete setup and operation process for the Virutex FC116U Lock Mortiser, including adjustments and actual mortising.
5. Mode d'emploi
Once the mortiser is securely set up, proceed with the following steps to create the lock mortise:
- Mise sous tension : Connect the mortiser to a suitable power outlet.
- Lancer la coupe : Gently push the motor unit forward, allowing the cutting bit to engage with the door material.
- Perform Mortise: Move the motor unit smoothly along the guides, allowing the bit to cut the desired slot. Apply steady, even pressure.
- Éliminer les débris : The integrated dust collector helps manage wood chips. Periodically clear any accumulated debris to maintain visibility and prevent clogging.
- Version complète : Once the desired length and depth are achieved, retract the motor unit.
- Éteindre: Débranchez l'outil de la source d'alimentation.
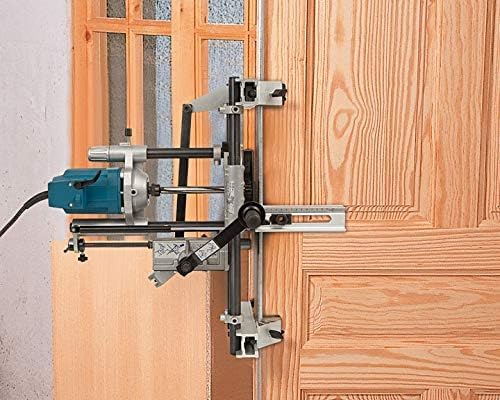
Figure 4: The Virutex FC116U Lock Mortiser actively cutting a mortise into a door, demonstrating the tool's operational use.

Figure 5: A hand inserting a lock into a precisely cut mortise, illustrating the final result of using the mortiser.
6. Entretien
Regular maintenance ensures the longevity and optimal performance of your Virutex FC116U Lock Mortiser.
- Nettoyage: After each use, clean the unit thoroughly to remove all wood dust and debris. Use a brush or compressed air.
- Bit Care : Inspect cutting bits for sharpness and damage. Replace dull or damaged bits to ensure clean cuts and prevent strain on the motor.
- Lubrification: Periodically lubricate moving parts and guide rods with a light machine oil to ensure smooth operation.
- Stockage: Store the mortiser in its original carrying case in a dry, clean environment to protect it from dust and moisture.
7. Dépannage
If you encounter issues with your FC116U Lock Mortiser, refer to the following common troubleshooting tips:
- Mauvaise qualité de coupe :
- Check if the cutting bit is sharp and undamaged.
- Ensure the unit is securely clamped to the door, preventing movement during operation.
- Verify that the depth and length adjustments are correctly set.
- L'outil ne démarre pas :
- Vérifiez la connexion électrique et assurez-vous que la prise est fonctionnelle.
- Inspectez le cordon d’alimentation pour déceler tout dommage.
- Vibrations/bruit excessifs :
- Vérifiez que toutes les fixations sont bien serrées.
- Check the cutting bit for proper installation and balance.
- Inspect for any foreign objects obstructing moving parts.
8. Spécifications
| Fonctionnalité | Détail |
|---|---|
| Marque | Virutex |
| Nom du modèle | FC116U |
| Dossier spécial | Portable |
| Type de serrure | Serrure à mortaiser |
| Dimensions de l'article (L x l x H) | 21 x 24 x 17 pouces |
| Matériel | Rubber (for protection pads) |
| Utilisations recommandées | Door Lock Installation, Woodworking Projects, Home Renovations, Professional Carpentry |
| Couleur | Bleu, argent |
| Nombre de pièces | 1 (unité principale) |
| Composants inclus | Lock mortiser machine, tool UT16I |
| Poids de l'article | 54 livres |
| Méthode de contrôle | Touche |
9. Garantie et assistance
For customer support inquiries, please refer to the seller's contact information or the product's official website. Specific warranty details may vary and are typically provided at the point of purchase or within the product packaging.
The product is sold by Virutextools, which also handles shipping and customer support. For returns, a 30-day easy return policy is generally available.


