Introduction
Thank you for choosing Lepro Dreamcolor LED Strip Lights. This manual provides detailed instructions for the safe and efficient installation, operation, and maintenance of your new LED strip lights. Please read this manual thoroughly before use and retain it for future reference.

Figure 1: Lepro 65.6ft Dreamcolor LED Strip Lights kit components.
Produit terminéview
Contenu du colis
- 65.6ft Dreamcolor LED Strip Lights (2 x 32.8ft rolls)
- Télécommande
- Adaptateur secteur
- Boitier de commande
- 6 Mounting brackets/fixing clips
- 6 vis
Caractéristiques principales
- Dreamcolor Effect: Displays multiple colors simultaneously on a single strip, creating a rainbow-like effect.
- Synchronisation de la musique : Built-in sensitive microphone allows lights to change colors and patterns with music beats.
- Installation facile : Features 3M adhesive backing for secure attachment and includes mounting clips for additional support.
- Double contrôle : Operate the lights using the included 20-key remote control or the 3-button control box.
- Modes dynamiques : Offers a variety of dynamic lighting modes and effects for different ambiance settings.
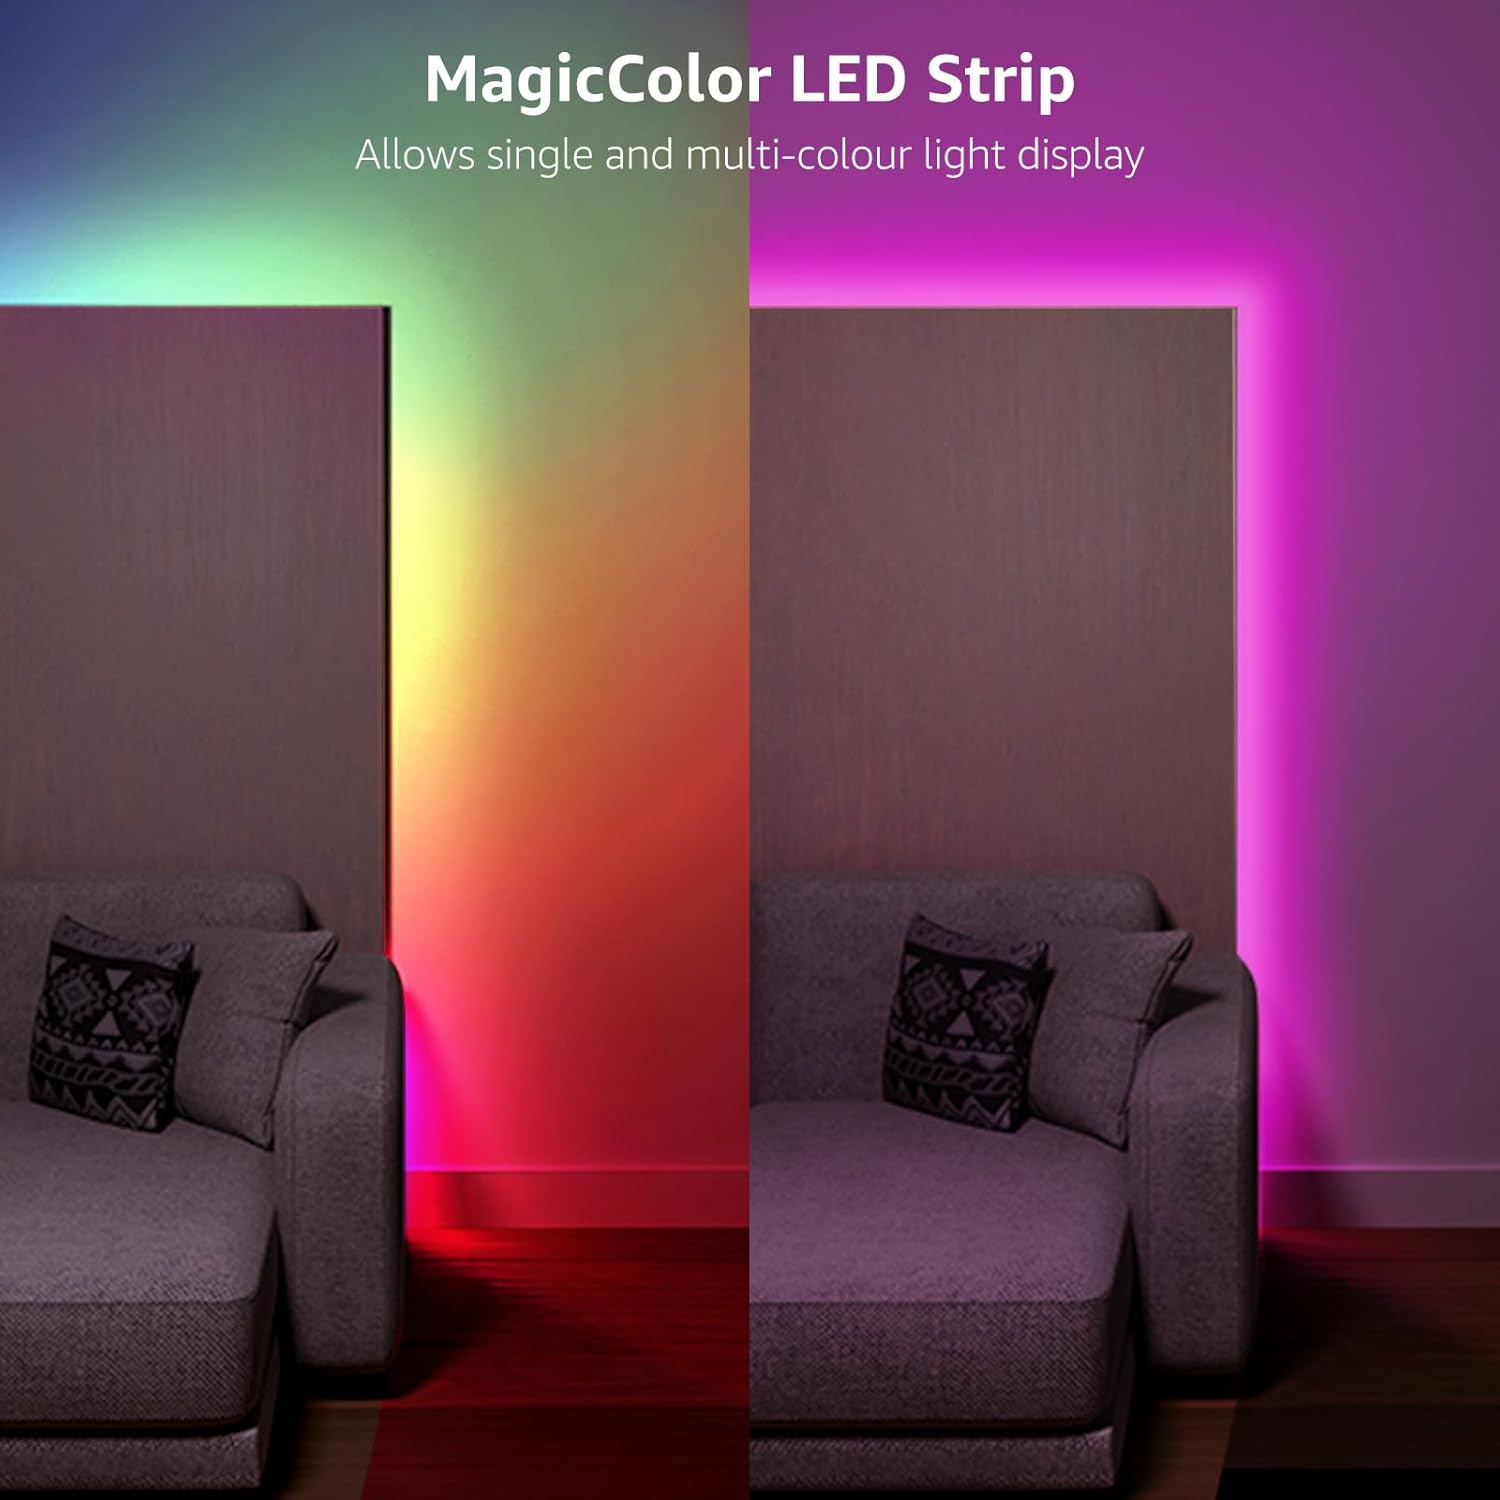
Figure 2: Dreamcolor LED Strip displaying multiple colors simultaneously.
Configuration et installation
Préparation
- Assurez-vous que la surface d'installation est propre, sèche et lisse.
- Unroll the LED strip lights completely before powering them on to prevent overheating.
- Plan your desired layout to ensure the strip length is sufficient and power connections are accessible.
Étapes d'installation
- Connecter les composants : Connect the LED strip(s) to the control box, and then connect the control box to the power adapter. Ensure all connections are secure.
- Lampes de test : Before peeling the adhesive, plug in the power adapter to a wall outlet to test if the lights function correctly.
- Peler et coller : Carefully peel off the protective backing from the 3M adhesive tape on the back of the LED strip. Press the strip firmly onto the prepared surface along your desired path.
- Add Support (Optional but Recommended): For enhanced security and longevity, use the provided mounting brackets and screws. Place clips at regular intervals, especially around corners or areas with less adhesion.
- Câblage sécurisé : Ensure all cables are neatly arranged and secured to prevent accidental disconnections or damage.
Remarque importante :
- The LED strip lights are not designed to be cut. Cutting the strip will damage the circuit and render it inoperable.
- Ce produit est classé pour utilisation en intérieur uniquement and is not water resistant. Avoid exposure to moisture or outdoor elements.

Figure 3: Easy installation steps for the LED strip lights.
Mode d'emploi
Your Lepro Dreamcolor LED Strip Lights can be controlled using either the included 20-key remote control or the 3-button control box.
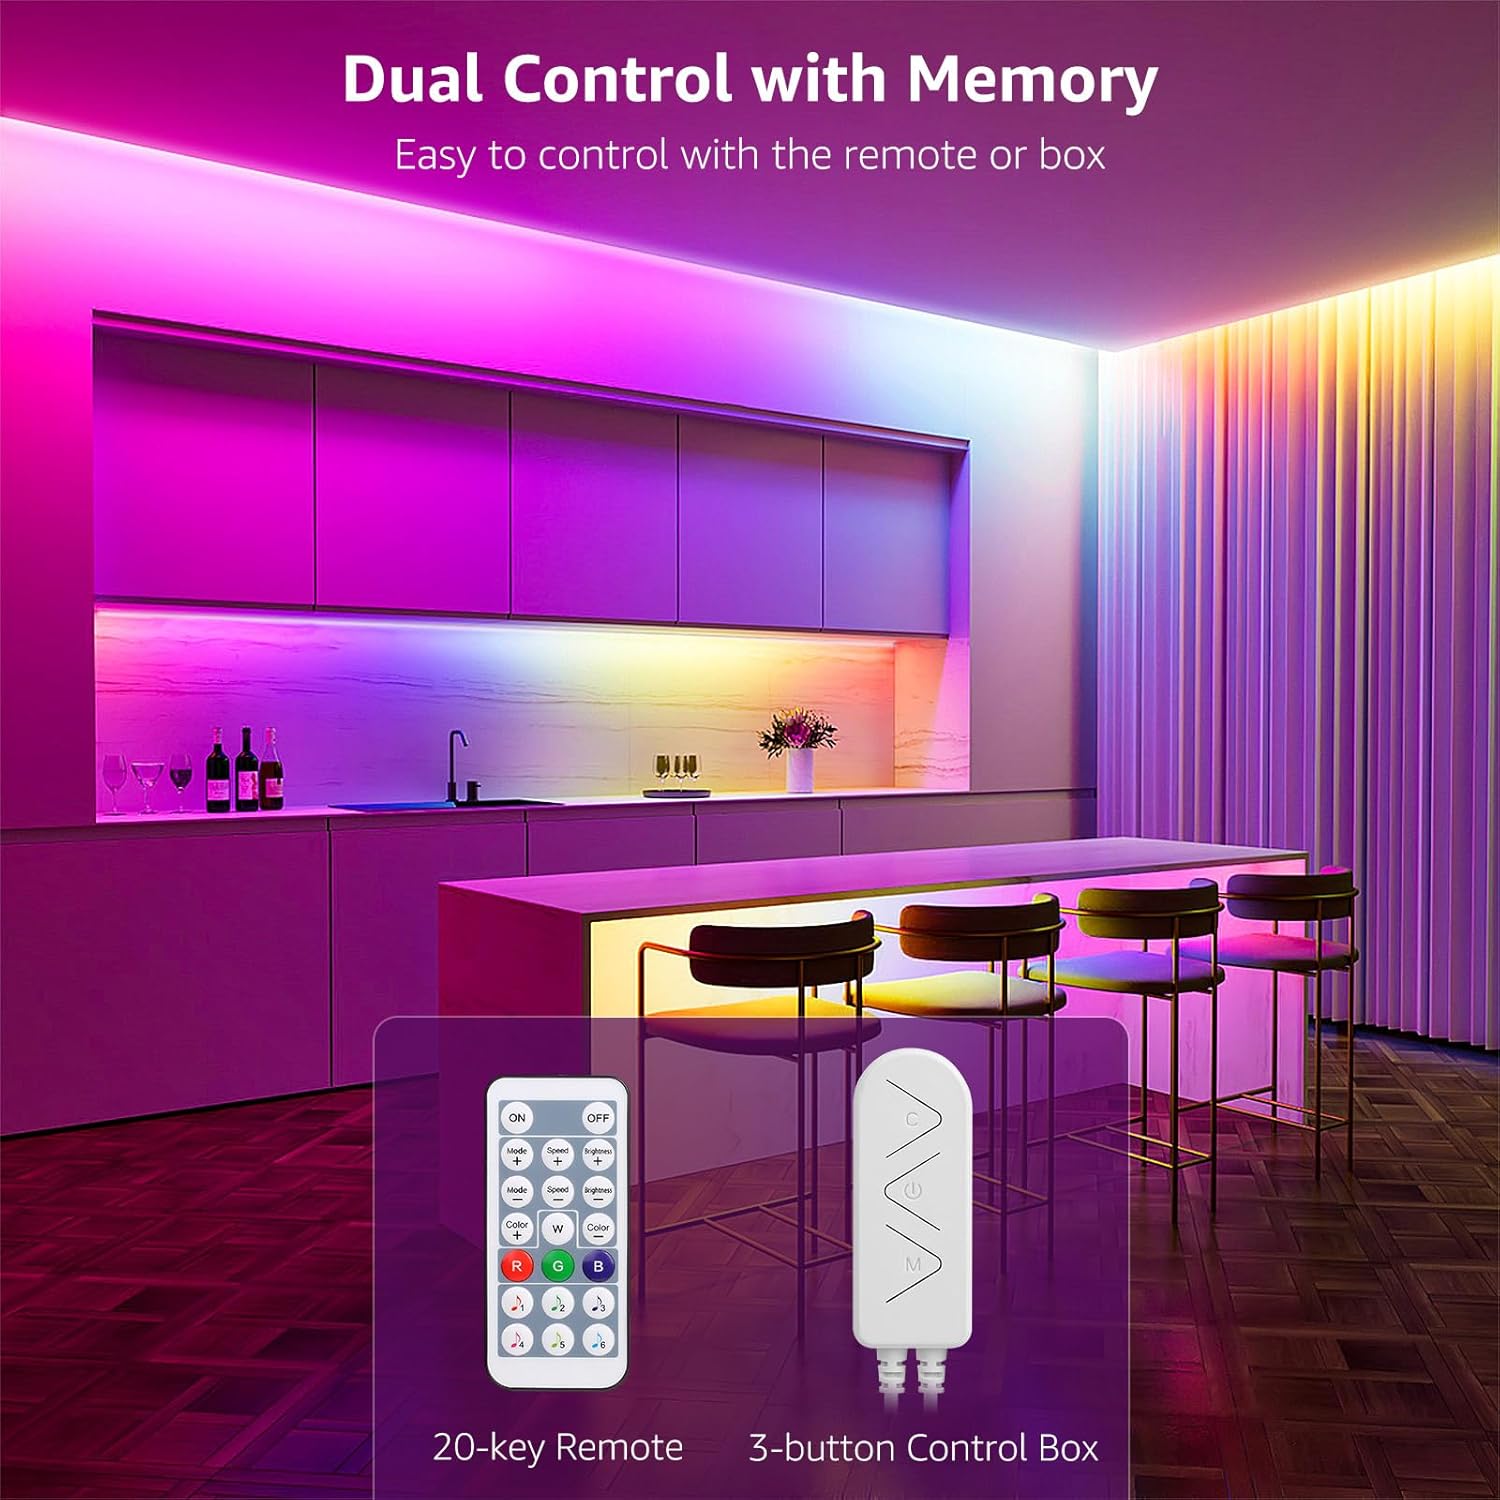
Figure 4: Remote control and 3-button control box.
Fonctionnement de la télécommande
Point the remote control directly at the IR receiver on the control box for optimal response.
- MARCHE/ARRÊT : Allumer ou éteindre les lumières.
- Boutons R/G/B/W : Select static Red, Green, Blue, or White colors.
- Boutons de sélection des couleurs : Choose from a variety of preset static colors.
- Luminosité +/- : Réglez le niveau de luminosité des lumières.
- Mode +/-: Cycle through various dynamic lighting effects (e.g., Breathe, Run, Chase, Stack, Flow, Starry, Rainbow, Dreamcolor).
- Vitesse +/- : Ajustez la vitesse des effets d'éclairage dynamiques.
- Mode Musique : Activer la synchronisation musicale.
Fonctionnement du boîtier de commande
The 3-button control box provides basic control directly on the unit:
- Bouton d'alimentation : Allume ou éteint les lumières.
- Bouton Mode : Il alterne entre différents modes d'éclairage.
- Bouton Musique : Activates or deactivates music synchronization.
Fonction de synchronisation musicale
The built-in microphone in the control box detects ambient sound and music, allowing the lights to change colors and patterns in rhythm. Press the 'Music' button on the remote or control box to activate this feature. There are multiple music modes to choose from, offering different visual responses to sound.

Figure 5: LED strip lights in music sync mode.

Figure 6 : Examples of dynamic light effects.
Entretien
Nettoyage
To maintain optimal performance and appearance, clean the LED strip lights periodically:
- Ensure the lights are unplugged and completely off before cleaning.
- Gently wipe the surface of the LED strips with a soft, dry, or slightly damp tissu.
- Do not use harsh chemicals, abrasive cleaners, or excessive moisture, as this can damage the lights.
Stockage
If you need to store the LED strip lights for an extended period:
- Unplug the power adapter and carefully detach the strips.
- Roll the strips loosely to avoid kinking or damaging the internal wiring.
- Conserver dans un endroit frais et sec, à l'abri de la lumière directe du soleil et des températures extrêmes.
Prudence:
Ce produit est non résistant à l'eau. Do not install in wet locations or expose to rain or splashes. Ensure the power adapter and control box remain dry at all times.
Dépannage
If you encounter issues with your LED strip lights, refer to the following table for common problems and solutions:
| Problème | Cause possible | Solution |
|---|---|---|
| Les lumières ne s'allument pas. |
|
|
| La télécommande ne fonctionne pas. |
|
|
| Lights are not syncing with music. |
|
|
| L'adhésif ne maintient pas la bande. |
|
|
Spécifications techniques
| Fonctionnalité | Spécification |
|---|---|
| Numéro de modèle | PR410096-RGB-WP-US |
| Longueur | 65.6 feet (2 x 32.8ft rolls) |
| Couleur claire | Multicolor (RGB Dreamcolor) |
| Type de source lumineuse | DIRIGÉ |
| Nombre de sources lumineuses | 150 |
| Voltage | 12 volts (CC) |
| Quoitage | 36 watts |
| Source d'énergie | Électrique avec fil |
| Type de contrôleur | Remote Control, Control Box |
| Utilisation intérieure/extérieure | Intérieur |
| Niveau de résistance à l'eau | Non résistant à l'eau |
| Matériel | Métal, Vinyle |
| Poids de l'article | 1.14 livres |
| Dimensions du produit | 6.34 x 6.26 x 3.27 pouce (emballage) |
Garantie et assistance
Informations sur la garantie
Lepro products are manufactured to high-quality standards. While specific warranty terms may vary, Lepro is known for its commitment to customer satisfaction. Please retain your proof of purchase for any warranty claims.
Assistance clientèle
Should you encounter any issues or have questions regarding your Lepro Dreamcolor LED Strip Lights, please contact Lepro customer support. You can typically find contact information on the product packaging or the official Lepro website. When contacting support, please provide your product model number (PR410096-RGB-WP-US) and a detailed description of the issue.


