1. Introduction
The i-Star Portable DAB/DAB+/FM Radio offers a versatile listening experience with clear digital and analog radio reception. Designed for portability, it features a built-in rechargeable battery and a compact design, making it suitable for use at home or on the go. This manual provides essential information for setting up, operating, and maintaining your radio.

Figure 1 : Devant view of the i-Star Portable DAB/DAB+/FM Radio, highlighting its compact design and user interface.
2. Installation
2.1 Déballage et charge initiale
- Retirez soigneusement la radio et tous les accessoires de leur emballage.
- Connect the supplied USB charging cable to the radio's Micro USB port and to a compatible USB power adapter (not included) or a computer's USB port.
- Allow the radio to charge fully before first use. The charging indicator will typically change or turn off when charging is complete. A full charge provides up to 4 hours of playback.
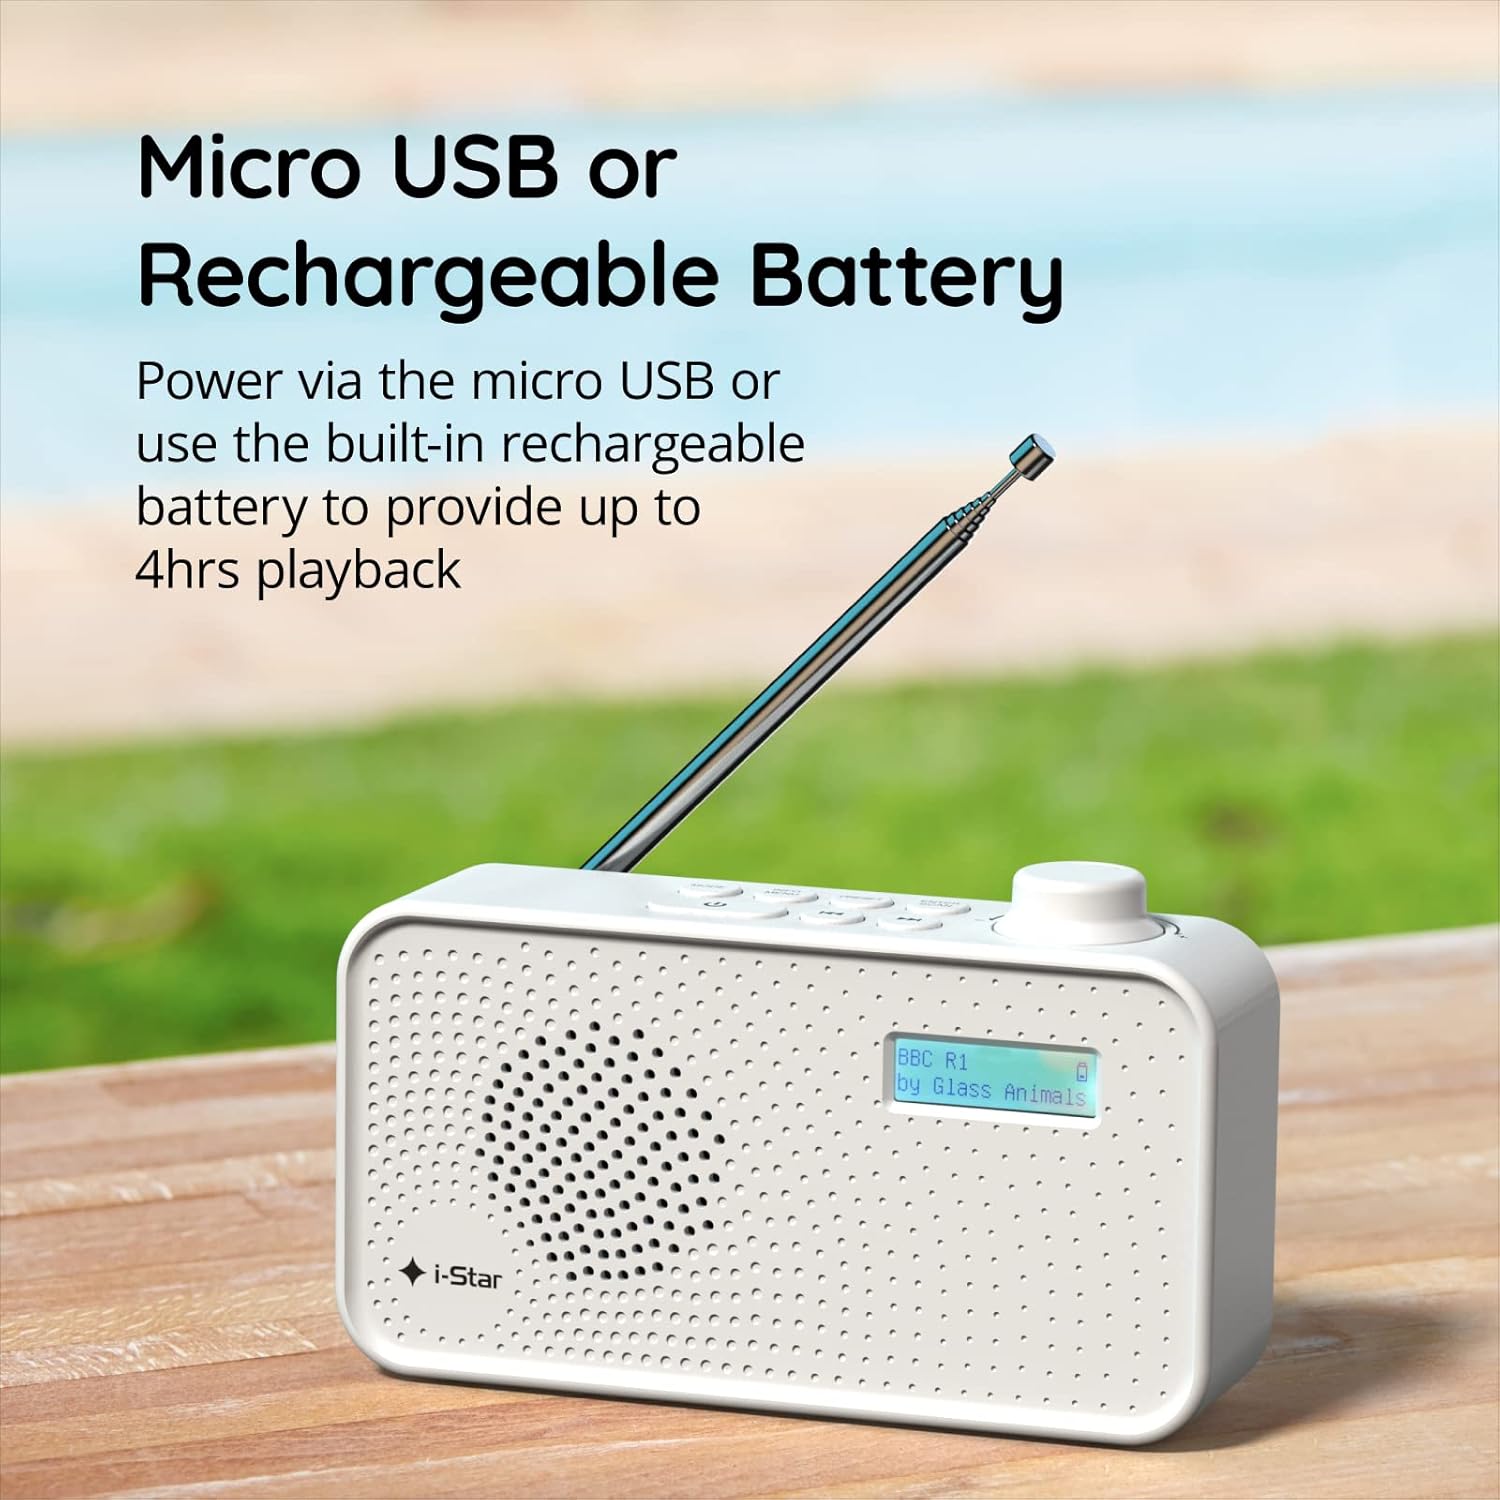
Figure 2 : The radio powered via Micro USB or its built-in rechargeable battery.
2.2 First Power On and Automatic Scan
- Déployez complètement l'antenne télescopique pour une réception optimale.
- Appuyez et maintenez enfoncé le VEILLE bouton pour allumer la radio.
- Upon first power-on, the radio will automatically perform a scan for available DAB/DAB+ stations. This process may take a few minutes.
- Une fois la recherche terminée, la radio se syntonisera sur la première station disponible.
3. Mode d'emploi
3.1 Switching Between DAB/DAB+ and FM Modes
- Appuyez sur le MODE button repeatedly to switch between DAB/DAB+ and FM radio modes. The current mode will be displayed on the LCD screen.

Figure 3 : The radio supports DAB, DAB+, and FM for a wide range of listening options.
3.2 Stations de syntonisation
- Mode DAB/DAB+ : Utilisez le PRÉRÉGLAGE or RÉGLER buttons (left/right arrows) to navigate through the list of available stations. Press ENTRER/SCANNER pour sélectionner une station.
- Mode FM: Appuyez sur le ENTRER/SCANNER button to automatically scan for the next available FM station. Alternatively, use the RÉGLER buttons for manual fine-tuning.
3.3 Enregistrement et rappel des préréglages
- Syntonisez la station souhaitée.
- Appuyez et maintenez enfoncé le PRÉRÉGLAGE appuyez sur le bouton jusqu'à ce que « Preset Store » apparaisse à l'écran.
- Utilisez le RÉGLER boutons pour sélectionner un numéro prédéfini (1-60).
- Presse ENTRER/SCANNER pour confirmer et sauvegarder la station.
- Pour rappeler une station enregistrée, appuyez brièvement sur la touche PRÉRÉGLAGE bouton, puis utilisez le RÉGLER appuyez sur les boutons pour sélectionner le numéro prédéfini souhaité, puis appuyez sur ENTRER/SCANNER.
3.4 Contrôle du volume
- Faites pivoter le VOLUME knob (located on the right side) clockwise to increase volume and counter-clockwise to decrease volume.
3.5 Fonction minuterie de sommeil
- Pour activer la minuterie de mise en veille, appuyez sur INFORMATIONS/MENU button repeatedly until 'Sleep' appears.
- Utilisez le RÉGLER buttons to select the desired sleep duration (e.g., 15, 30, 45, 60, 90 minutes).
- Presse ENTRER/SCANNER to confirm. The radio will automatically turn off after the set time.

Figure 4 : The sleep timer feature allows the radio to automatically switch off after a set period.
3.6 Headphone Listening
- Connect standard 3.5mm headphones (not included) to the headphone jack located on the side of the radio for private listening. The internal speaker will be muted automatically.

Figure 5 : Connect headphones for personal listening without disturbing others.
4. Entretien
4.1 Entretien général
- Keep the radio away from direct sunlight, heat sources, and moisture.
- Évitez de faire tomber la radio ou de la soumettre à des chocs violents.
- Ne tentez pas de démonter la radio ; cela annulera la garantie.
4.2 Nettoyage
- Essuyez l'extérieur de la radio avec un chiffon doux et sec.
- N’utilisez pas de nettoyants abrasifs, de cires ou de solvants, car ils pourraient endommager la finition.
5. Dépannage
- Pas d'alimentation : Ensure the radio is charged or connected to a power source via the USB cable. Check if the STANDBY button has been pressed.
- Pas de son : Check the volume level. Ensure headphones are not connected if you intend to use the speaker.
- Poor Reception (DAB/DAB+ or FM): Fully extend the telescopic antenna. Try repositioning the radio. Perform a full scan for DAB/DAB+ stations. In FM mode, try manual tuning.
- Radio Freezes/Unresponsive: Turn the radio off and on again. If the issue persists, allow the battery to fully discharge and then recharge it.
6. Spécifications
| Fonctionnalité | Spécification |
|---|---|
| Marque | i-étoile |
| Numéro de modèle | 90059PI |
| Couleur | Blanc |
| Bandes radio prises en charge | DAB, DAB+, FM |
| Technologie de réglage | Digital (DAB/DAB+), Analog (FM) |
| Connectivité | USB (pour le chargement), prise casque 3.5 mm |
| Source d'énergie | Rechargeable Lithium-ion Battery (1200 mAh), USB Power |
| Autonomie de la batterie | Jusqu'à 4 heures (sur une seule charge) |
| Caractéristiques spéciales | Portable, Sleep Timer, 60 Station Presets |
| Composants inclus | Câble de chargement USB, manuel d'utilisation |
| Poids de l'article | 440 gramme |
7. Garantie et assistance
This product is covered by a standard manufacturer's warranty. Please refer to the warranty card included in your packaging for specific terms and conditions. For technical support, troubleshooting assistance, or warranty claims, please contact your retailer or the i-Star customer service department. Contact details can typically be found on the product packaging or the official i-Star website.


