1. Introduction
Thank you for choosing the LTS Hand Held Electric Concrete Vibrator. This manual provides essential information for the safe and efficient operation, maintenance, and troubleshooting of your new concrete vibrator. Please read this manual thoroughly before initial use and keep it for future reference.
This product is designed to remove air bubbles from freshly poured concrete, ensuring a denser, stronger, and more uniform concrete finish. It is suitable for various construction applications.
2. Consignes de sécurité
Respectez toujours les consignes de sécurité de base lorsque vous utilisez des outils électriques afin de réduire les risques d'incendie, d'électrocution et de blessures.
Sécurité générale
- Sécurité de la zone de travail : Maintenez votre zone de travail propre et bien éclairée. Les zones encombrées ou sombres augmentent les risques d'accidents. N'utilisez pas d'outils électriques dans des atmosphères explosives, notamment en présence de liquides, de gaz ou de poussières inflammables.
- Sécurité électrique : La fiche de l'outil électrique doit être compatible avec la prise murale. Ne modifiez jamais la fiche. N'endommagez pas le cordon d'alimentation. Ne l'utilisez jamais pour transporter, tirer ou débrancher l'outil. Tenez le cordon éloigné de la chaleur, de l'huile, des arêtes vives et des pièces mobiles.
- Sécurité personnelle : Stay alert, watch what you are doing, and use common sense when operating a power tool. Do not use a power tool while you are tired or under the influence of drugs, alcohol, or medication. Always wear appropriate personal protective equipment (PPE), including safety glasses, hearing protection, and sturdy footwear.
- Utilisation et entretien des outils : N’utilisez pas l’outil électrique de force. Utilisez l’outil électrique adapté à votre application. Débranchez la prise de la source d’alimentation avant tout réglage, changement d’accessoires ou rangement de l’outil électrique.
Specific Concrete Vibrator Safety
- Ensure the vibrator hose is securely attached to the motor unit before operation.
- Ne pas immerger le bloc moteur dans l’eau ou tout autre liquide.
- Avoid bending the vibrator hose excessively, as this can damage the internal shaft.
- Operate the vibrator only in well-ventilated areas.
- Do not touch the vibrating poker head during operation or immediately after use, as it may be hot.
3. Contenu du colis
Votre colis doit contenir les éléments suivants :
- 2 x LTS Hand Held Electric Concrete Vibrator Motor Units
- 2 x 1.5m Long, 35mm Diameter Vibrating Poker Hoses
- 1 x Manuel d'utilisation (ce document)

Image 3.1: Two complete LTS Hand Held Electric Concrete Vibrator units, each consisting of a motor unit and an attached vibrating poker hose.
4. Installation
Follow these steps to prepare your concrete vibrator for use:
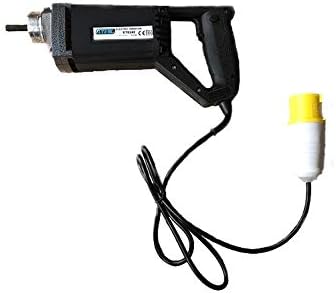
Image 4.1: The LTS Hand Held Electric Concrete Vibrator motor unit.
- Déballer les composants : Retirez soigneusement tous les composants de l'emballage. Vérifiez qu'ils n'ont pas été endommagés pendant le transport.
- Attach Vibrator Hose:
- Align the threaded end of the vibrating poker hose with the corresponding threaded port on the motor unit.
- Screw the hose onto the motor unit clockwise until it is hand-tight.
- Ensure a secure connection to prevent detachment during operation.
- Connexion électrique : Plug the power cord into a suitable 110V electrical outlet. Ensure the outlet is properly grounded.
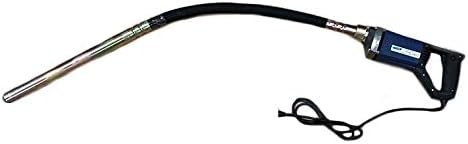
Image 4.2: The LTS Hand Held Electric Concrete Vibrator with the 1.5m long vibrating poker hose securely attached.
5. Mode d'emploi
Proper operation is crucial for achieving optimal concrete consolidation and extending the life of your tool.
- Vérification avant utilisation : Before starting, ensure all connections are secure and the power cord is free from damage.
- Starting the Vibrator: Turn on the power switch located on the motor unit. The vibrator head will begin to vibrate.
- Vibrating Concrete:
- Slowly insert the vibrating poker head into the freshly poured concrete.
- Penetrate the concrete vertically or at a slight angle, ensuring the poker reaches the bottom of the formwork or the previous lift.
- Keep the poker submerged for approximately 5-15 seconds, or until air bubbles stop rising to the surface and the concrete surface becomes smooth and glossy.
- Slowly withdraw the poker, allowing the concrete to flow back into the void created by the poker.
- Overlap vibration areas by about 50% to ensure complete consolidation.
- Avoid touching the formwork with the vibrator head, as this can damage the forms or create surface imperfections.
- Stopping the Vibrator: Turn off the power switch on the motor unit when finished or when moving to a new section.
Tips for Effective Vibration:
- Do not over-vibrate concrete, as this can lead to segregation of aggregates.
- Maintain a consistent rhythm and pattern for uniform results.
- For deep pours, vibrate in layers, ensuring each layer is properly consolidated before adding the next.
6. Entretien
Regular maintenance will ensure the longevity and optimal performance of your concrete vibrator.
- Nettoyage: After each use, clean the vibrator head and hose thoroughly to remove any concrete residue. Use a stiff brush and water. Do not use harsh chemicals or solvents that could damage the hose material. Ensure the motor unit remains dry.
- Inspection: Regularly inspect the power cord for cuts, fraying, or damage. Check the vibrator hose for cracks, kinks, or excessive wear. Ensure the connection between the hose and motor unit is secure.
- Stockage: Store the concrete vibrator in a clean, dry place, away from direct sunlight and extreme temperatures. Coil the hose loosely to prevent kinks.
- Soins du groupe motopropulseur : Keep the ventilation openings on the motor unit clear of dust and debris to prevent overheating.
7. Dépannage
This section addresses common issues you might encounter with your concrete vibrator.
| Problème | Cause possible | Solution |
|---|---|---|
| Vibrator does not start. | No power supply; Power switch off; Damaged cord/plug; Motor fault. | Check power outlet and circuit breaker; Ensure power switch is ON; Inspect cord/plug for damage (replace if necessary); Contact customer support. |
| Faible vibration. | Loose hose connection; Worn internal shaft/bearings; Motor overheating. | Tighten hose connection; Allow motor to cool down; Contact customer support for repair. |
| Excessive noise or unusual sounds. | Internal mechanical issue; Loose components. | Discontinue use immediately; Contact customer support. |
| Motor unit gets hot quickly. | Blocked ventilation; Overload; Prolonged continuous use. | Clear ventilation openings; Do not overload the tool; Allow for cooling breaks during extended use. |
If you encounter problems not listed here or if the suggested solutions do not resolve the issue, please contact LTS customer support.
8. Spécifications
Technical specifications for the LTS Hand Held Electric Concrete Vibrator:
| Fonctionnalité | Spécification |
|---|---|
| Marque | LTS |
| Modèle | Hand Held Electric Concrete Vibrator |
| Vol d'entréetage | 110V |
| Fréquence | 60 Hz |
| Pouvoir | 580 W |
| Maximum Load RPM | 4500 tr/min |
| Longueur du tuyau | 1.5 mètres |
| Diamètre du tuyau | 35mm (Note: Product description states 32mm, title states 35mm. Using 35mm as per title for consistency, but noting discrepancy.) |
| Poids unitaire | Approx. 10 kg (Total 20 kg for 2 units) |
| Couleur | May Vary (Blue or Black) |
9. Garantie et assistance
This LTS Hand Held Electric Concrete Vibrator comes with a Garantie de 2 ans à compter de la date d'achat.
The warranty covers defects in materials and workmanship under normal use. It does not cover damage resulting from misuse, abuse, accidents, unauthorized repairs, or normal wear and tear.
For warranty claims, technical support, or spare parts, please contact your retailer or the manufacturer directly. Please have your purchase receipt and product model information ready when contacting support.
Fabricant: LTS
Service client: Veuillez consulter votre documentation d'achat pour obtenir les coordonnées spécifiques.


