1. Introduction
This manual provides comprehensive instructions for the installation, operation, and maintenance of your Alpine S-A60M Mono Car Audio Amplifier. The S-A60M is a Class-D amplifier designed to deliver reliable power for your car audio subwoofer system. For optimal performance and safety, please read this manual thoroughly before installation and use.
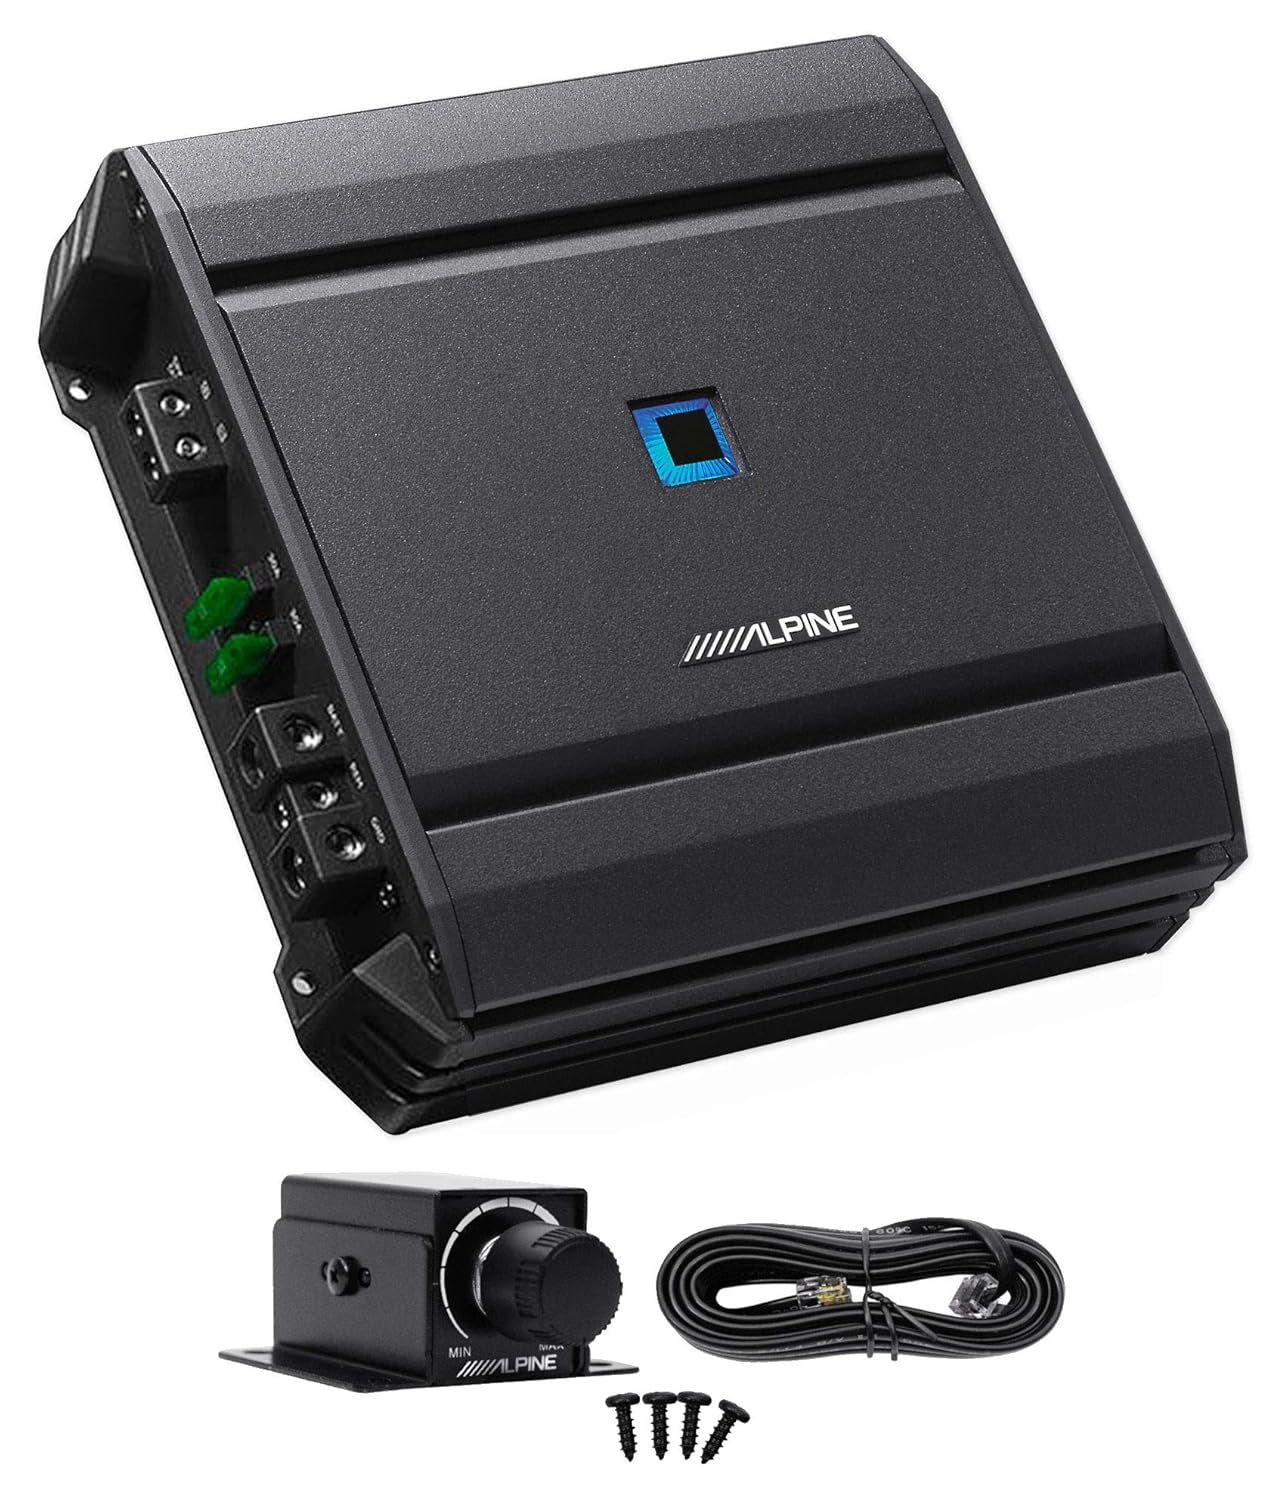
Image 1.1: Alpine S-A60M Mono Car Audio Amplifier with optional RUX-KNOB.2 remote bass control knob and wiring accessories.
2. Consignes de sécurité
Respectez toujours les consignes de sécurité suivantes afin d'éviter les blessures ou les dommages matériels. ampamplificateur ou véhicule :
- Débranchez la borne négative de la batterie du véhicule avant de commencer toute installation.
- Assurez-vous d'une mise à la terre correcte sur le châssis du véhicule.
- Utilisez un câblage de section appropriée pour les connexions d'alimentation et de terre, comme spécifié dans la section installation.
- Protect all wiring from sharp edges and pinch points.
- Ne montez pas le ampInstaller l'amplificateur dans des endroits exposés à la lumière directe du soleil, à une chaleur excessive, à l'humidité ou à la poussière.
- Montez solidement le amplifier to prevent it from coming loose during sudden stops or impacts.
- Évitez de faire fonctionner le amplifier at excessively high volume levels for prolonged periods, which can damage hearing or speakers.
- Si vous avez des doutes concernant une quelconque étape du processus d'installation, consultez un professionnel qualifié.
3. Configuration et installation
Une installation correcte est essentielle à la performance et à la longévité de votre appareil. amplifier. Suivez attentivement ces étapes.
3.1 Câblage de l'alimentation électrique
Refer to the diagram below for correct power supply connections. Always use the specified wire gauges and ensure all connections are secure.

Image 3.1: Power Supply Wiring Diagram. This diagram illustrates the correct method for connecting the amplifier to the vehicle's power system, including the battery, fuse, and ground connections. Ensure the fuse capacity matches the ampexigences du régulateur.
Important: The total fuse capacity of the amplifier must be installed and the specified wire length. For detailed information, refer to the "Power Supply" section in the owner's manual. Always connect the power wire directly to the positive battery terminal and the ground wire to a clean, unpainted metal surface on the vehicle chassis.
- Batterie (BATT) : Connect to the positive (+) terminal of the vehicle battery via an appropriate fuse.
- Télécommandé (REM) : Connectez-vous à la sortie de mise en marche à distance de votre autoradio.
- Masse (GND): Raccordez-le à une partie métallique propre et non peinte du châssis du véhicule.
- Speaker Output (SPK OUT): Connect to your subwoofer(s).

Image 3.2: Amplifier Power and Speaker Output Terminals. This image displays the terminals for power input (BATT, REM, GND) and speaker output (SPK OUT) on the Alpine S-A60M amplifier, along with the integrated fuses.
3.2 Connexions d'entrée audio
The S-A60M supports both low-level (RCA) and high-level (speaker wire) inputs.
- Entrée de bas niveau (RCA) : Connectez les câbles RCA des sorties subwoofer ou préamplifiées large bande de votre autoradio à amplifier's INPUT (L/R) terminals.
- Entrée de haut niveau : If your head unit does not have RCA outputs, connect speaker wires from your head unit's speaker outputs directly to the amplifier's high-level input terminals (if available, or use a line output converter).

Image 3.3: Amplifier Input and Control Panel. This image highlights the various input and control settings on the Alpine S-A60M, including the input level switch, gain control, low-pass filter, bass equalizer, and the port for the optional remote bass control.
4. Utilisation du Amplifier
Une fois installé, ajustez le ampRéglages de l'amplificateur pour une performance sonore optimale.
4.1 Réglage du niveau d'entrée
- Réglez le NIVEAU D'ENTRÉE switch to "LO" for low-level (RCA) inputs or "HI" for high-level inputs.
- Ajustez le GAGNER control to match the output of your head unit. Start with the gain at minimum, play a familiar track, and slowly increase the gain until distortion is heard, then back off slightly.
4.2 LP Filter (Low-Pass Filter)
The LP Filter allows only frequencies below the set point to pass through to the subwoofer. This is essential for proper subwoofer integration.
- Ajustez le FILTRE LP knob to set the desired crossover frequency (e.g., 80Hz-120Hz is common for subwoofers).
Égaliseur de basses 4.3
The Bass EQ provides a boost to specific bass frequencies.
- Ajustez le Égaliseur de basse knob to increase or decrease bass output. Use sparingly to avoid distortion and speaker damage.
4.4 Remote Bass Control (Optional RUX-KNOB.2)
If you have the optional Alpine RUX-KNOB.2 remote bass control, connect it to the REMOTE BASS CONTROL port sur le amplifier. This allows for convenient, on-the-fly adjustment of subwoofer output from the driver's seat.
5. Entretien
Un entretien régulier garantit la longévité et les performances optimales de votre appareil. amplifier.
- Nettoyage: Essuyez périodiquement le ampNettoyez l'extérieur de l'appareil avec un chiffon doux et sec. Évitez d'utiliser des produits chimiques agressifs ou des nettoyants abrasifs.
- Relations: Annually check all power, ground, and speaker connections to ensure they are secure and free from corrosion. Loose connections can lead to poor performance or damage.
- Ventilation: Assurez-vous que ampLes ailettes de refroidissement de l'amplificateur sont dégagées de toute obstruction afin de permettre une dissipation thermique adéquate.
6. Dépannage
Si vous rencontrez des problèmes avec votre ampEn cas de doute, veuillez consulter le tableau suivant avant de solliciter l'aide d'un professionnel.
| Symptôme | Cause possible | Solution |
|---|---|---|
| Pas d'alimentation/Pas de son | Blown fuse, loose power/ground connection, remote wire not connected, amplifier en mode protection. | Check fuses (on amplifier and in power line), verify all power and ground connections, ensure remote wire is connected to head unit's remote output, check for overheating or short circuits. |
| Son déformé | Gain set too high, improper input level switch setting, damaged speaker, poor signal source. | Reduce gain, ensure INPUT LEVEL switch matches input type (LO/HI), check speaker wiring and condition, test with a different audio source. |
| Aucune sortie de basses | LP Filter set too high/low, Bass EQ set too low, subwoofer wiring issue. | Adjust LP Filter to appropriate frequency, increase Bass EQ if desired (with caution), verify subwoofer connections and impedance. |
| Ample lificateur surchauffe | Insufficient ventilation, improper impedance load, gain set too high. | Assurez une circulation d'air adéquate autour de ampAmplificateur, vérifiez que l'impédance des haut-parleurs correspond. amplifier's capabilities, reduce gain setting. |
7. Spécifications
Detailed technical specifications for the Alpine S-A60M amplifier.
- Numéro de modèle : S-A60M
- CTA-2006-B Power Rating:
- 330W RMS x 1 (4ohm, 14.4V, 1% THD+N)
- 600W RMS x 1 (2ohm, 14.4V, 1% THD+N)
- Rapport signal/bruit (S/N) : >85dB (ref: 1W into 4 ohm), >105dB (ref: rated power into 4 ohm)
- Distorsion Harmonique Totale + Bruit (THD+N) : 0.03% (ref 1W into 4 ohm)
- Réponse en fréquence : 10Hz-400Hz (+/-3 dB)
- DampFacteur d'ingé : >1000
- Voltage: 14.4 volts (CC)
- Vol d'approvisionnement maximaltage: 14.4 volts (CC)
- Volume d'alimentation minimaltage: 14.4 volts (CC)
- Type de montage : Montage en surface
- Dimensions du colis : 10.2 x 9.7 x 3.8 pouces
- Poids: 6.8 livres
- Remote Bass Knob Compatible: Yes (requires RUX-KNOB.2, sold separately)
8. Garantie et assistance
Alpine products are designed and manufactured to the highest quality standards. For specific warranty information regarding your S-A60M amplifier, please refer to the warranty card included with your product or visit the official Alpine website.
For technical support, service inquiries, or to locate an authorized Alpine dealer, please visit the official Alpine webConsultez leur site web ou contactez leur service client. Conservez votre reçu d'achat comme preuve d'achat pour toute réclamation au titre de la garantie.
Alpine Électronique d'Amérique, Inc.
www.alpine-usa.com


