1. Introduction
The LAUNCH CR319 is a handheld On-Board Diagnostics II (OBD2) code reader designed to assist in diagnosing vehicle engine issues. It provides access to various diagnostic functions to help users identify and clear trouble codes, monitor vehicle performance data, and check emission readiness status. This manual provides detailed instructions for the proper use and maintenance of your CR319 device.
2. Produit terminéview
2.1 Principales caractéristiques
- Fonctions OBD2 complètes : Prend en charge les 10 modes de test OBD2.
- Bibliothèque de recherche DTC : Built-in database with over 3000 code definitions.
- Prise en charge multilingue : Disponible en anglais, portugais, russe, italien, espagnol, français et allemand.
- Prêt à l'emploi : No batteries or charger required; powered directly from the vehicle's OBD2 port.
- Conception compacte : Facile à manipuler et à ranger.
2.2 Composants de l'appareil
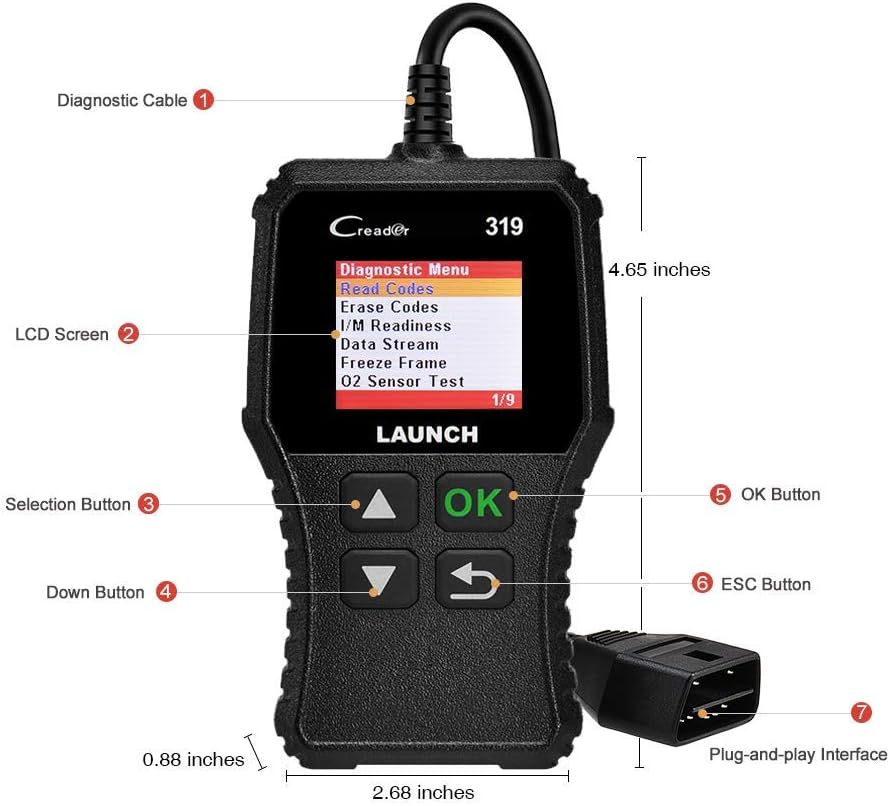
The image above illustrates the main components of the LAUNCH CR319 OBD2 Scanner. Key parts include the Diagnostic Cable (1) for connecting to the vehicle, the LCD Screen (2) for displaying information, Selection Buttons (3) for navigation, the Down Button (4), the OK Button (5) for confirmation, the ESC Button (6) to return to the previous screen, and the Plug-and-Play Interface (7) which is the OBD2 connector.
3. Installation
- Localisez le port OBD2 : The OBD2 port is typically located under the dashboard on the driver's side of the vehicle. Refer to your vehicle's owner's manual if you cannot locate it.
- Connectez le scanner : Plug the CR319's diagnostic cable connector firmly into the vehicle's OBD2 port. The device will power on automatically.
- Démarrez le véhicule : Turn the vehicle's ignition to the 'ON' position (engine off) or start the engine, depending on the diagnostic function you intend to perform.
4. Mode d'emploi
After connecting the CR319 to your vehicle, the main menu will appear. Use the Up/Down selection buttons to navigate through the options and the OK button to confirm a selection. The ESC button returns to the previous screen.
4.1 Lire les codes
Cette fonction récupère les codes de diagnostic (DTC) enregistrés par l'ordinateur de bord du véhicule. Ces codes indiquent des problèmes spécifiques détectés par le système d'autodiagnostic du véhicule.
- Dans le menu principal, sélectionnez 'Diagnostiquer'.
- Sélectionner 'Read Codes'.
- The scanner will display any stored, pending, or permanent codes along with their descriptions.
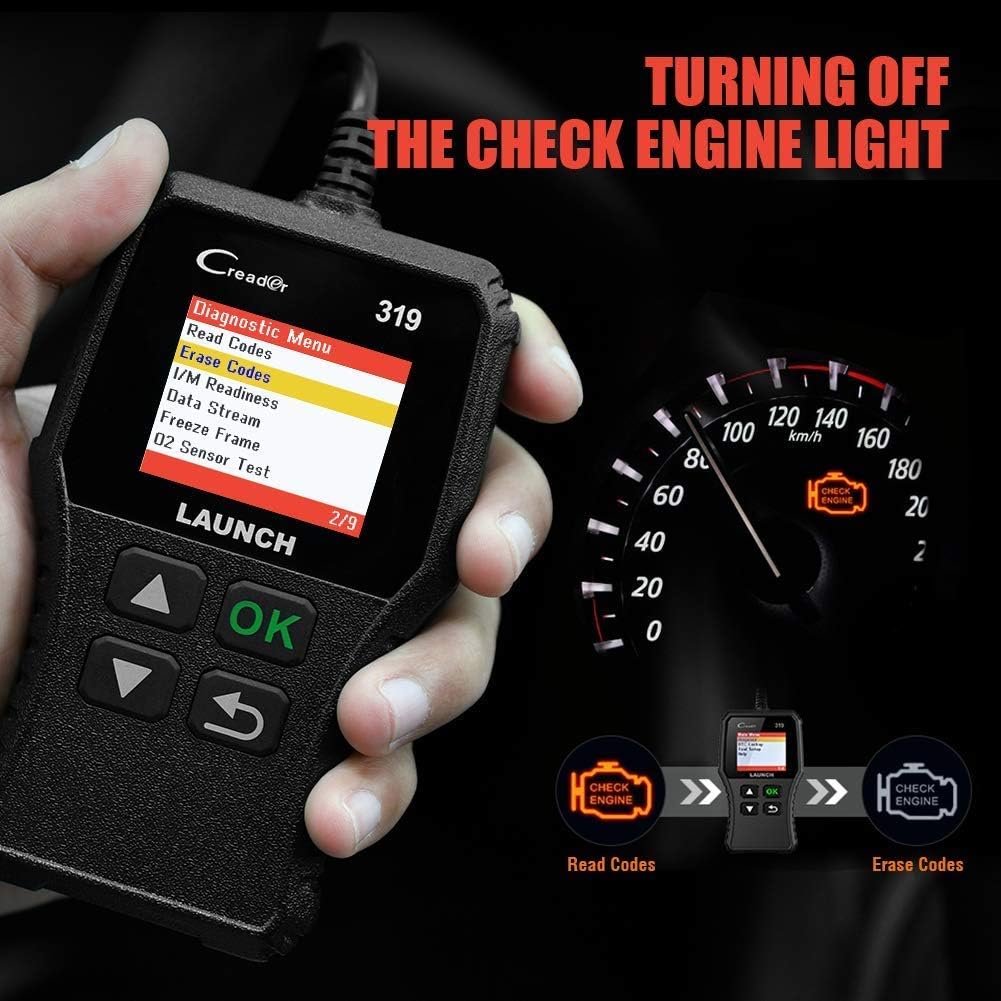
4.2 Effacer les codes
This function erases DTCs from the vehicle's computer and turns off the Check Engine Light (MIL). Ensure any underlying issues are resolved before clearing codes, as they may reappear.
- Dans le menu principal, sélectionnez 'Diagnostiquer'.
- Sélectionner 'Erase Codes'.
- Confirmez l'action lorsque vous y êtes invité. Le voyant moteur devrait s'éteindre.
4.3 Préparation I/M
This function checks the status of the vehicle's emission-related monitoring systems to determine if they are ready for an emissions test.
- Dans le menu principal, sélectionnez 'Diagnostiquer'.
- Sélectionner 'I/M Readiness'.
- The screen will display the status of various monitors (e.g., Misfire Monitor, Fuel System Monitor). 'OK' or 'Complete' indicates the monitor has run and passed; 'INC' or 'Incomplete' means the monitor has not yet run or completed its diagnostic cycle.
4.4 Flux de données (données en direct)

This function displays real-time operational data from the vehicle's engine control unit (ECU). This data can include engine RPM, vehicle speed, oxygen sensor readings, coolant temperature, and more.
- Dans le menu principal, sélectionnez 'Diagnostiquer'.
- Sélectionner 'Data Stream'.
- Use the Up/Down buttons to scroll through the various data parameters.
4.5 Arrêt sur image
When an emission-related fault occurs, the vehicle's computer records a snapshot of operating conditions at the time of the fault. This data is called Freeze Frame data.
- Dans le menu principal, sélectionnez 'Diagnostiquer'.
- Sélectionner 'Freeze Frame'.
- Review the recorded parameters to understand the conditions under which the fault occurred.
4.6 Recherche de DTC

This feature allows you to manually enter a Diagnostic Trouble Code and view its definition from the scanner's internal database.
- Dans le menu principal, sélectionnez 'DTC Lookup'.
- Use the navigation buttons to input the desired DTC.
- Presse 'D'ACCORD' à view the code definition.
4.7 Other OBD2 Functions
The CR319 also supports the following OBD2 functions, accessible through the 'Diagnose' menu:
- Test du capteur d'O2: Récupère les résultats des tests de surveillance du capteur d'oxygène pour les tests les plus récemment effectués.
- Test du système EVAP (Mode 8) : Lance un test du système de contrôle des émissions par évaporation.
- Test du moniteur embarqué (Mode 6) : Récupère les résultats des tests des composants et systèmes du groupe motopropulseur liés aux émissions qui ne font pas l'objet d'une surveillance continue.
- Informations sur le véhicule: Affiche le numéro d'identification du véhicule (VIN), l'identifiant d'étalonnage (CALID) et le numéro de vérification d'étalonnage (CVN).
5. Compatibilité

The LAUNCH CR319 OBD2 Scanner is compatible with most American, European, and Asian vehicles manufactured from 1996 and newer that are OBDII-compliant. It supports all standard OBDII protocols, including KWP2000, ISO9141, J1850 VPW, J1850 PWM, and CAN (Controller Area Network).
5.1 Véhicules pris en charge
- 12V Gasoline cars.
- Vehicles compliant with OBDII standards (1996 US-based, 2000 EU-based, and newer Asian cars).
5.2 Not Supported Vehicles
- Diesel cars.
- 24V Heavy duty vehicles.
- Hybrid vehicles.
- Electric vehicles.
6. Spécifications
| Fonctionnalité | Spécification |
|---|---|
| Modèle | CR319 |
| Afficher | Écran LCD couleur |
| Vol d'exploitationtage | 9-18V (via le port OBD2) |
| Protocoles pris en charge | KWP2000, ISO9141, J1850 VPW, J1850 PWM, CAN |
| Dimensions (L x l x H) | 1.5 x 6 x 10.8 pouces |
| Poids | 7.4 onces |
| Température de fonctionnement | 0°C à 50°C (32°F à 122°F) |
| Température de stockage | -20°C à 70°C (-4°F à 158°F) |
| Langues prises en charge | English, Portuguese, Russian, Italian, Spanish, French, German |
7. Dépannage
7.1 L'appareil ne s'allume pas
- Ensure the diagnostic cable is securely connected to the vehicle's OBD2 port.
- Vérifiez que le contact du véhicule est en position « ON » ou que le moteur tourne.
- Vérifiez le fusible du véhicule pour le port OBD2 (consultez le manuel du propriétaire de votre véhicule).
7.2 Erreur de communication avec le véhicule
- Confirm the vehicle is OBDII-compliant (generally 1996 and newer for gasoline vehicles).
- Ensure the diagnostic cable is properly connected.
- Turn off the ignition, wait 10 seconds, then turn it back to 'ON' and try again.
- If possible, test the scanner on another compatible vehicle to rule out a device malfunction.
7.3 Codes Cannot Be Cleared
- Assurez-vous que le contact du véhicule est en position « ON » (moteur éteint).
- If the underlying fault that triggered the code is still present, the code may not clear or will reappear immediately. Address the vehicle's issue first.
8. Entretien
- Nettoyage: Utilisez un chiffon doux et sec pour nettoyer l'appareil. Évitez les nettoyants abrasifs et les solvants.
- Stockage: Rangez le scanner dans un endroit propre et sec, à l'abri des températures extrêmes et de la lumière directe du soleil.
- Entretien des câbles : Do not pull the cable forcefully or bend it sharply. Inspect the cable for damage before each use.
9. Garantie et assistance
For warranty information, technical support, or service inquiries, please contact LAUNCH customer support. Refer to the product packaging or the official LAUNCH website pour les coordonnées les plus récentes.


