Introduction
This manual provides essential information for the safe and effective operation, maintenance, and troubleshooting of your Daytona 3 Ton Low Profile Floor Jack. Designed for heavy-duty use, this jack features a low-profile design to fit under most vehicles and a rapid pump system for quick lifting. Please read this manual thoroughly before use to ensure proper handling and to prevent injury or damage.
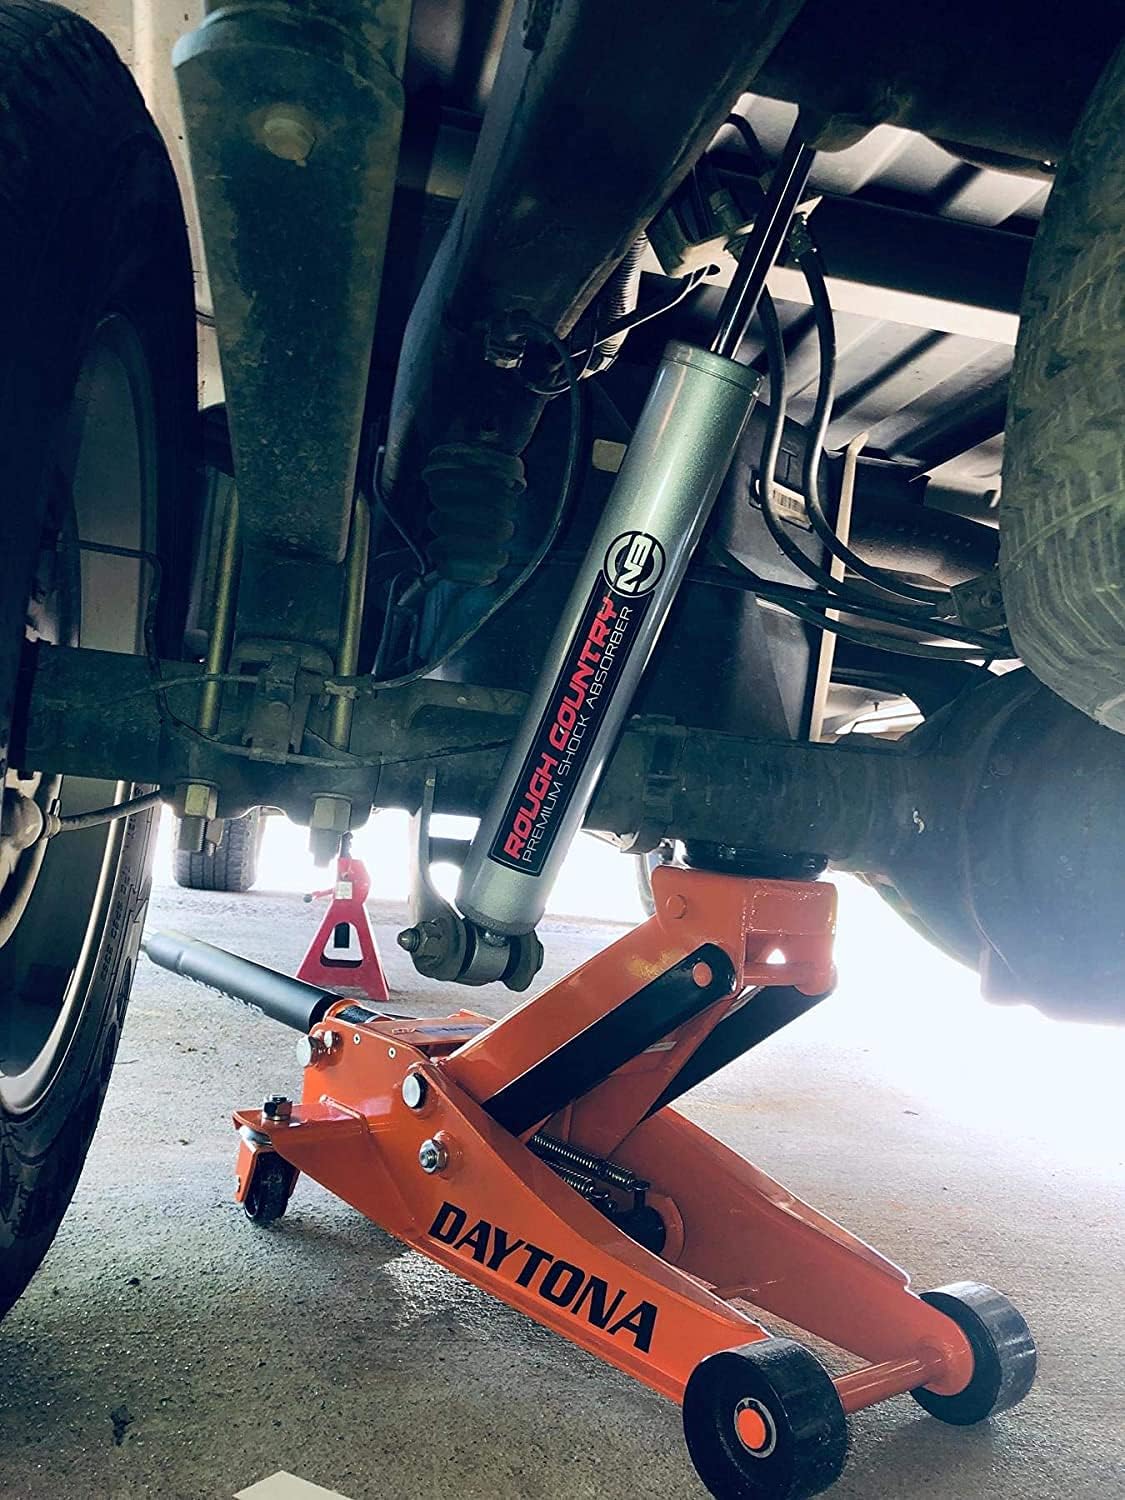
Figure 1: The Daytona 3 Ton Low Profile Floor Jack in orange, showcasing its robust design and low-profile châssis.
Consignes de sécurité
AVERTISSEMENT: Le non-respect de ces instructions peut entraîner des blessures graves ou des dommages matériels.
- Always use jack stands to support the vehicle after lifting. Never rely solely on the floor jack for support.
- Ensure the jack is on a hard, level surface capable of supporting the load. Avoid using on asphalt or soft ground.
- Center the load on the saddle. Off-center loads can cause the jack to tip.
- Ne pas dépasser la capacité nominale de 3 tonnes.
- Gardez vos mains et vos pieds à l'écart des pièces mobiles.
- Portez un équipement de protection individuelle (EPI) approprié, tel que des lunettes de sécurité et des gants.
- Ne modifiez pas le cric et ne l'utilisez pas à d'autres fins que le levage de véhicules.
- Before lowering, ensure all tools and personnel are clear from under the vehicle.
Composants terminésview
Familiarize yourself with the main components of your floor jack:
- Selle: The circular pad that contacts the vehicle's lift point. It is rotating and removable to adapt to lift accessories.
- Bras de levage : The main arm that raises and lowers the saddle.
- Poignée: Used for pumping the jack and controlling the lowering mechanism.
- Soupape de décharge: Located at the base of the handle, controls the lowering speed.
- Roues avant: Fixed wheels at the front of the jack.
- Rear Swivel Casters: Ball bearing casters at the rear for 360° mobility.
- Unité hydraulique : Contains the dual piston hydraulic system for rapid lifting.

Figure 2 : Vue de dessus view of the Daytona 3 Ton Floor Jack, highlighting the saddle, handle connection, and the "3 TON LOW PROFILE HIGH PERFORMANCE" label.
Installation
- Déballage: Carefully remove the jack from its packaging. Inspect for any shipping damage.
- Assemblage de la poignée : Insert the handle into the handle socket at the rear of the jack. Secure it according to the instructions provided in the separate assembly sheet (if applicable).
- Purge d'air (saignement) : Before first use, or if the jack has been stored horizontally, it may be necessary to purge air from the hydraulic system.
- Tournez la soupape de décharge dans le sens antihoraire pour l'ouvrir complètement.
- Actionnez la poignée rapidement 10 à 15 fois à vide.
- Tournez la soupape de décharge dans le sens des aiguilles d'une montre pour la fermer.
- Test the jack's lifting and lowering function. Repeat if necessary.
Mode d'emploi
Lifting a Vehicle:
- Préparez le véhicule : Park the vehicle on a hard, level surface. Engage the parking brake and block the wheels that will remain on the ground.
- Positionner le cric : Locate the vehicle manufacturer's recommended lifting points. Slide the jack under the vehicle, ensuring the saddle is centered directly under the lifting point.
- Soulever le véhicule : Turn the release valve clockwise until it is firmly closed. Pump the handle up and down to raise the vehicle to the desired height. The dual piston system provides rapid lifting.
- Fixez le tout avec des chandelles : Immediately place appropriately rated jack stands under the vehicle's designated support points. Slowly lower the vehicle onto the jack stands by gradually turning the release valve counter-clockwise. Once the vehicle is securely resting on the jack stands, remove the floor jack.
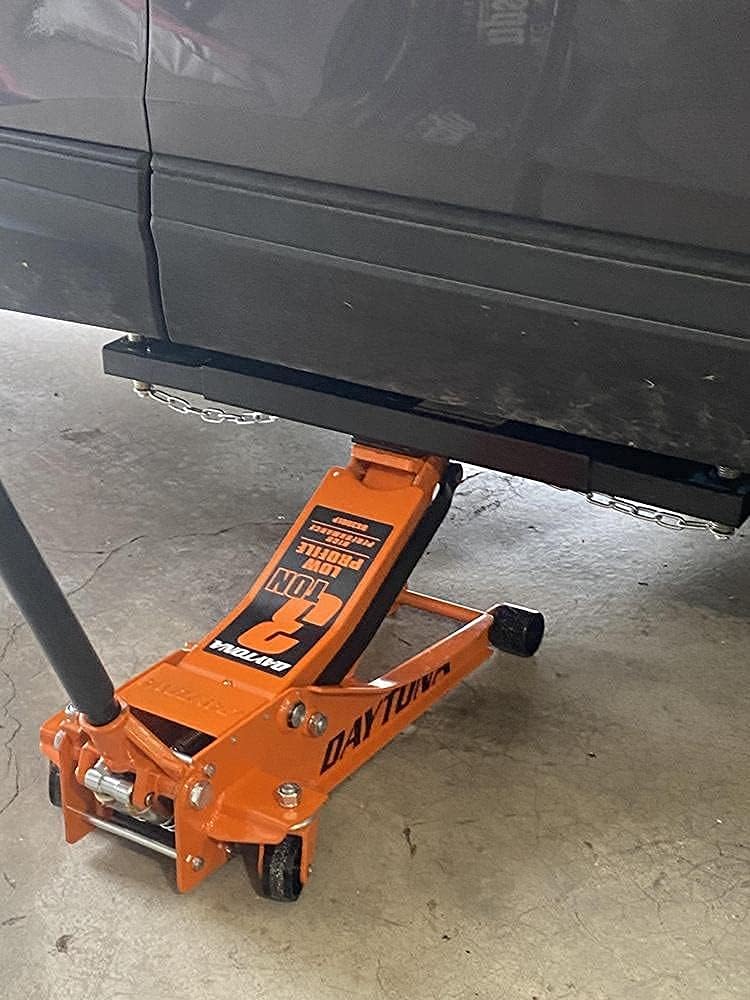
Figure 3: The Daytona 3 Ton Floor Jack correctly positioned under a vehicle's frame, ready for lifting. Note the low profile allowing access.
Lowering a Vehicle:
- Préparez-vous à l'abaissement : Ensure the area around and under the vehicle is clear of obstructions and personnel.
- Augmenter légèrement : If the vehicle is on jack stands, position the floor jack under the original lifting point and raise the vehicle slightly to clear the jack stands.
- Retirer les chandelles : Retirez soigneusement les chandelles.
- Abaisser le véhicule : Slowly turn the release valve counter-clockwise to gradually lower the vehicle to the ground. Do not open the valve too quickly, as this can cause the vehicle to drop rapidly.
- Retirer Jack : Once the vehicle is fully on the ground, remove the floor jack.
Entretien
- Lubrification: Periodically lubricate all moving parts with light machine oil. Check the wheels and casters for smooth operation.
- Fluide hydraulique : Check the hydraulic fluid level every 6 months. To check, lower the jack completely, remove the oil filler plug, and ensure the fluid is level with the bottom of the filler hole. Use only high-quality hydraulic jack oil. Do not use brake fluid or motor oil.
- Nettoyage: Keep the jack clean and free of dirt, grease, and debris. This helps prevent corrosion and ensures smooth operation.
- Stockage: Store the jack in a clean, dry place with the ram fully retracted to prevent rust and extend seal life.
- Inspection: Avant chaque utilisation, inspectez le cric afin de déceler tout signe de dommage, de fuite ou d'usure. N'utilisez pas un cric endommagé.
Dépannage
| Problème | Cause possible | Solution |
|---|---|---|
| Le cric ne soulève pas la charge. | Release valve open; Low hydraulic fluid; Air in system; Overload. | Close release valve; Add hydraulic fluid; Purge air from system; Reduce load (do not exceed 3 tons). |
| Le cric se soulève lentement ou de façon irrégulière. | Low hydraulic fluid; Air in system; Worn seals. | Add hydraulic fluid; Purge air from system; Contact qualified service personnel for seal replacement. |
| Jack ne baissera pas. | Release valve stuck closed; Obstruction. | Gently turn release valve counter-clockwise; Check for obstructions around the mechanism. |
| Le cric fuit. | Joints endommagés ; raccords desserrés. | Contact qualified service personnel for seal replacement; Tighten fittings if accessible and safe. |
Caractéristiques
| Fonctionnalité | Détail |
|---|---|
| Numéro de modèle | MX64240 |
| Capacité de charge | 3 tonnes |
| Hauteur de levage minimale | 3-1/4 pouces |
| Hauteur de levage maximale | 20 pouces |
| Système hydraulique | Pompe rapide à double piston |
| Mobilité | Ball bearing premium rear swivel casters for 360° mobility |
| Selle | Rotatif, amovible |
| Couleur | Orange |
Garantie et assistance
For warranty information or technical support, please refer to the official Daytona webConsultez leur site web ou contactez leur service client. Conservez votre reçu d'achat pour toute réclamation au titre de la garantie.
Support en ligne: Visitez le Daytona Store on Amazon pour obtenir des informations sur les produits et des ressources d'assistance.