1. Introduction
Thank you for choosing the Vacmaster 10 Gallon 4 Peak HP Wet/Dry Vacuum with Detachable Blower, model VBVA1010PF. This manual provides essential information for the safe assembly, operation, maintenance, and troubleshooting of your new appliance. Please read all instructions carefully before use and retain this manual for future reference.
2. Consignes de sécurité importantes
AVERTISSEMENT : Afin de réduire les risques d'incendie, d'électrocution ou de blessure, veuillez lire et comprendre toutes les instructions avant d'utiliser cet appareil.
- Ne laissez pas l'appareil sans surveillance lorsqu'il est branché. Débranchez-le de la prise lorsqu'il n'est pas utilisé et avant l'entretien.
- Ne pas utiliser à l'extérieur ou sur des surfaces humides.
- Ne pas utiliser ce produit comme jouet. Une attention particulière est nécessaire en cas d'utilisation par ou à proximité d'enfants.
- Utiliser uniquement comme décrit dans ce manuel. Utiliser uniquement les accessoires recommandés par le fabricant.
- N'utilisez pas l'appareil si son cordon ou sa fiche sont endommagés. Si l'appareil ne fonctionne pas correctement, s'il est tombé, s'il est endommagé, s'il est laissé à l'extérieur ou s'il est tombé dans l'eau, retournez-le à un centre de service.
- Ne tirez pas et ne transportez pas l'appareil par le cordon, ne l'utilisez pas comme poignée, ne fermez pas une porte sur le cordon et ne tirez pas le cordon sur des bords ou des coins tranchants. Ne faites pas passer l'appareil sur le cordon. Gardez le cordon éloigné des surfaces chaudes.
- Ne débranchez pas l'appareil en tirant sur le cordon. Pour débrancher, saisissez la fiche et non le cordon.
- Ne manipulez pas la fiche ou l’appareil avec les mains mouillées.
- N'introduisez aucun objet dans les ouvertures. N'utilisez pas l'appareil si une ouverture est obstruée. Gardez-le exempt de poussière, de peluches, de cheveux et de tout ce qui pourrait réduire le flux d'air.
- Gardez les cheveux, les vêtements amples, les doigts et toutes les parties du corps éloignés des ouvertures et des pièces mobiles.
- Ne ramassez rien qui brûle ou qui fume, comme des cigarettes, des allumettes ou des cendres chaudes.
- Ne pas utiliser pour aspirer des liquides inflammables ou combustibles, tels que de l’essence, ni dans des zones où ils peuvent être présents.
- Ne pas utiliser sans filtres en place.
- Éteignez toutes les commandes avant de débrancher.
- Soyez particulièrement prudent lorsque vous nettoyez les escaliers.
- Ne pas utiliser pour ramasser des matières toxiques, cancérigènes, combustibles ou autres matières dangereuses comme l'amiante, l'arsenic, le baryum, le béryllium, le plomb, les pesticides ou autres substances nocives pour la santé.
- Do not use to pick up soot, cement, plaster or drywall dust without a cartridge filter and filter bag in place. These are very fine particles that may affect the performance of the motor or be exhausted back into the air.
- Pour réduire le risque de décharge électrique, cet appareil est équipé d'une fiche polarisée (une lame est plus large que l'autre). Cette fiche ne peut être insérée dans une prise polarisée que d'une seule manière. Si la fiche ne s'insère pas complètement dans la prise, inversez-la. Si elle ne s'insère toujours pas, contactez un électricien qualifié pour installer la prise appropriée. Ne modifiez en aucun cas la fiche.
3. Contenu du colis
Veuillez vérifier que tous les composants énumérés ci-dessous sont inclus dans votre colis. Si des pièces sont manquantes ou endommagées, veuillez contacter le service client.
- Vacmaster Wet/Dry Vacuum Unit (10 Gallon Tank, Motor Head)
- Detachable Blower Unit
- Tuyau flexible (7 m)
- Baguettes d'extension (2 pièces)
- Buse de sol
- Outil pour crevasses
- Buse utilitaire
- Filtre à cartouche (pour aspiration à sec)
- Foam Filter (for wet pickup)
- Manuel de l'utilisateur (ce document)
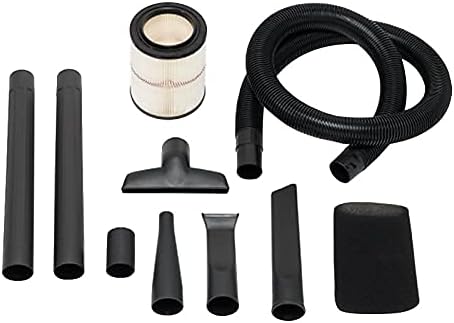
Image: Various accessories for the Vacmaster Wet/Dry Vacuum, including the flexible hose, two extension wands, a floor nozzle, a crevice tool, a utility nozzle, and both cartridge and foam filters.
4. Instructions de configuration
4.1 Déballage
- Retirez tout le contenu de l'emballage.
- Assurez-vous que toutes les pièces sont présentes et en bon état.
4.2 Fixation des roulettes
- Invert the tank.
- Insert the four caster feet into the slots on the bottom of the tank.
- Press firmly until each caster foot clicks securely into place.
4.3 Installation du filtre
The correct filter must be installed for the type of cleaning you are performing.
For Dry Vacuuming: Cartridge Filter
- Ensure the foam filter is removed.
- Slide the cartridge filter over the filter cage on the motor head.
- Secure the filter with the filter cap by twisting it clockwise until tight.
For Wet Vacuuming: Foam Filter
- Remove the cartridge filter and filter cap.
- Slide the foam filter over the filter cage on the motor head.
- Ensure the foam filter completely covers the filter cage.
4.4 Fixation du tuyau et des accessoires
- Insert the large end of the flexible hose into the vacuum port on the tank and twist to lock.
- Attach desired accessories (extension wands, floor nozzle, crevice tool, utility nozzle) to the other end of the hose.

Image: The Vacmaster Wet/Dry Vacuum fully assembled, showing the main unit, flexible hose, and floor nozzle ready for use.
5. Mode d'emploi
5.1 Fonctionnement général
- Ensure the vacuum is properly assembled with the correct filter for your task.
- Plug the power cord into a suitable 120V grounded outlet.
- Turn the power switch located on the motor head to the 'ON' position to start the vacuum.
- To stop operation, turn the power switch to the 'OFF' position.
5.2 Aspiration à sec
Use the cartridge filter for dry debris pickup.
- Ensure the cartridge filter is securely installed.
- Use appropriate accessories for the type of dry debris (e.g., floor nozzle for large areas, crevice tool for tight spaces).
- Regularly check and clean the cartridge filter to maintain optimal suction.
5.3 Aspiration humide
Use the foam filter for liquid pickup.
- Ensure the foam filter is securely installed and the cartridge filter is removed.
- Do not overfill the tank. The vacuum is equipped with an automatic shut-off float mechanism that will stop suction when the tank is full. If suction stops, turn off the vacuum, unplug it, and empty the tank.
- After wet pickup, always empty and clean the tank thoroughly to prevent mold and odors.
5.4 Detachable Blower Function
Your Vacmaster unit features a detachable blower for versatile use.
- Detaching the Blower: Locate the release latches on the motor head. Unlatch them and lift the motor head from the tank. The motor head itself functions as the blower unit.
- Attaching Blower Nozzle: Attach the desired blower nozzle to the air outlet port on the motor head.
- Opération: Plug the blower unit into a 120V grounded outlet. Turn the power switch to 'ON' to operate the blower.
- Reattaching to Vacuum: To convert back to a vacuum, place the blower unit (motor head) back onto the tank, aligning the latches, and secure them.

Image: A person demonstrating the detachment of the blue blower unit from the main vacuum tank, highlighting the versatility of the product.
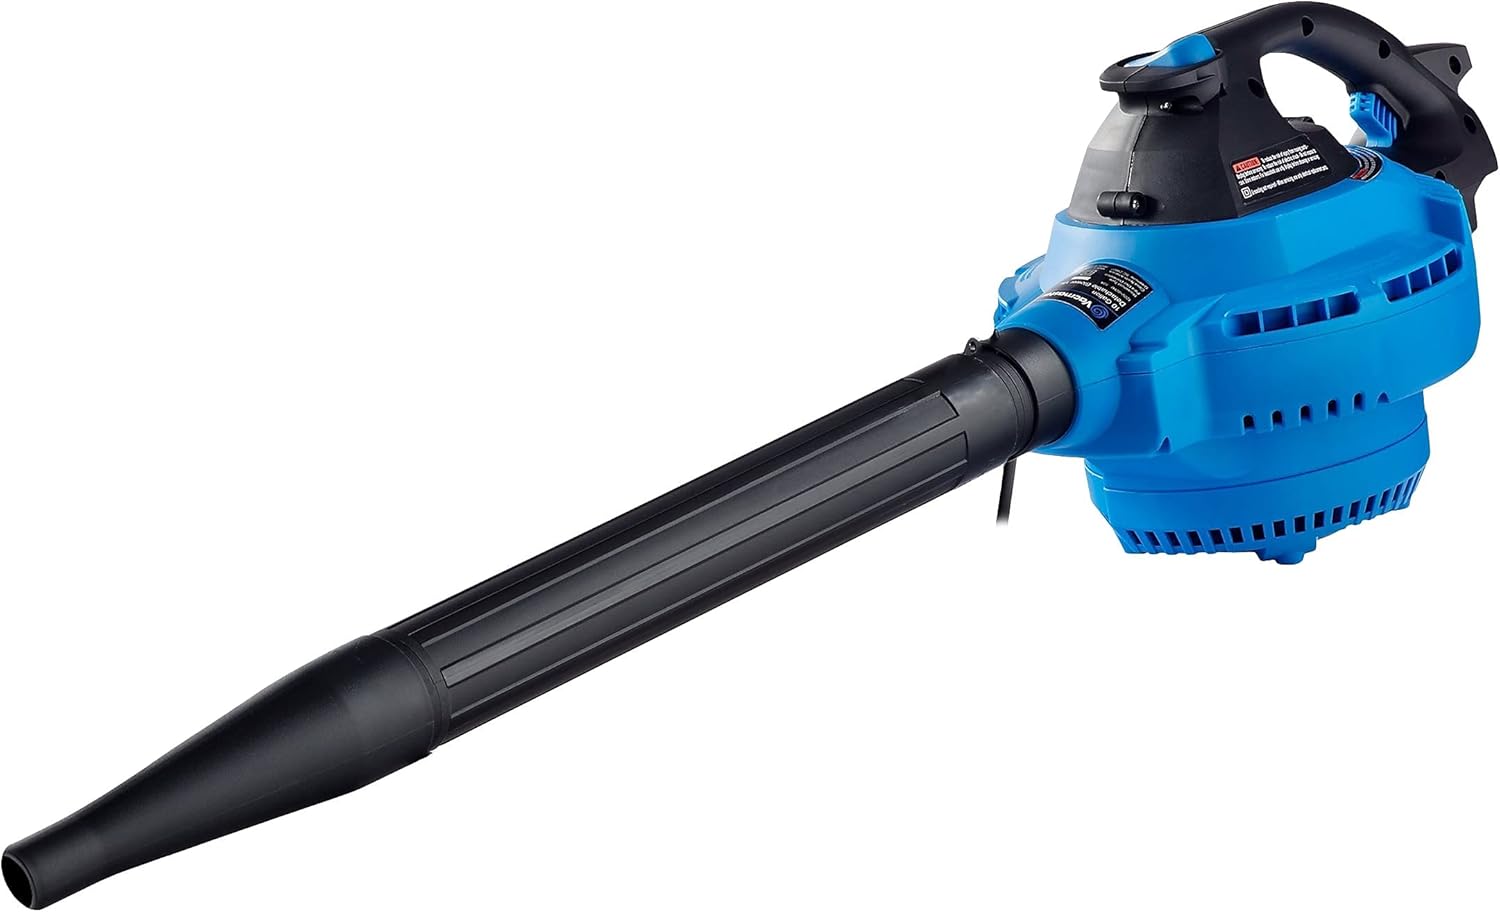
Image: The detached blower unit, a compact blue device with a black handle and a long black nozzle, ready for use as a standalone blower.
6. Entretien
Regular maintenance ensures optimal performance and extends the life of your Vacmaster wet/dry vacuum.
6.1 Nettoyage et remplacement du filtre
Always unplug the vacuum before performing any maintenance.
Cartridge Filter (Dry Pickup)
- Remove the filter cap and cartridge filter from the filter cage.
- Gently tap the filter against the inside of a trash can to remove loose dirt.
- For thorough cleaning, rinse the filter under running water. Allow it to air dry completely before reinstallation. Do not use the filter if it is still wet.
- Replace the cartridge filter if it is damaged or if suction performance significantly decreases after cleaning.
Foam Filter (Wet Pickup)
- Remove the foam filter from the filter cage.
- Rinse the foam filter under running water to remove debris.
- Squeeze out excess water and allow it to air dry completely before storage or reinstallation.
6.2 Nettoyage du réservoir
- After each use, especially wet pickup, empty the tank of all debris and liquids.
- Rincez l'intérieur du réservoir à l'eau et, si nécessaire, avec un détergent doux.
- Wipe the tank dry or allow it to air dry completely before storing to prevent odors and mildew.
6.3 Entretien des tuyaux et accessoires
- Avant et après chaque utilisation, inspectez le tuyau et ses accessoires afin de déceler tout blocage ou dommage.
- Clean accessories with water and mild detergent as needed.
- Store the hose and accessories neatly to prevent kinking or damage. The vacuum unit has integrated storage for the hose and some accessories.

Image: The Vacmaster Wet/Dry Vacuum with its hose wrapped around the top and accessories stored in designated slots, demonstrating compact storage.
7. Dépannage
If you encounter issues with your Vacmaster wet/dry vacuum, refer to the following common problems and solutions:
| Problème | Cause possible | Solution |
|---|---|---|
| L'aspirateur ne démarre pas. | Pas de courant à la prise. Le cordon d'alimentation n'est pas branché. Interrupteur d'alimentation défectueux. | Vérifier le disjoncteur/fusible. Ensure cord is firmly plugged into a working outlet. Contactez le support client. |
| Perte d'aspiration. | Hose or accessory clogged. Le filtre est sale ou obstrué. Tank is full (wet pickup). Couvercle mal fermé. | Clear any blockages from hose or accessories. Nettoyez ou remplacez le filtre. Vider le réservoir. Ensure motor head latches are securely fastened. |
| Le moteur tourne mais pas d'aspiration. | Hose not connected to inlet. Hose or accessory clogged. Tank is full (wet pickup). | Ensure hose is securely attached to the vacuum port. Clear any blockages. Vider le réservoir. |
| De la poussière s'échappe du pot d'échappement. | Le filtre est manquant ou endommagé. Le filtre n'est pas installé correctement. | Install or replace the correct filter. Ensure filter is properly seated and secured. |
8. Spécifications
| Fonctionnalité | Détail |
|---|---|
| Marque | Vacmaster |
| Modèle | VBVA1010PF |
| Capacité | 10 gallons |
| Moteur | 4 Peak HP, 120V |
| Quoitage | 270 watts |
| Amprage | 10 Amps |
| Longueur du tuyau | 7 pieds |
| Longueur du cordon | 10 pieds |
| Dimensions du produit (L x l x H) | 18 x 18 x 24 pouces |
| Poids de l'article | 26.2 livres |
| Type de filtre | Cartridge (Dry), Foam (Wet) |
| Caractéristiques spéciales | Wet/Dry Functionality, Detachable Blower |
| Numéro d'identification commercial mondial (GTIN) | 00814953015406 |
| Code universel des produits (CUP) | 814953015406 |
9. Informations sur la garantie
This Vacmaster product is covered by a Garantie constructeur d'un an from the date of purchase. This warranty covers defects in materials and workmanship under normal use. It does not cover damage resulting from misuse, abuse, accident, commercial use, or unauthorized repairs. Please retain your proof of purchase for warranty claims.
10. Assistance clientèle
For technical assistance, replacement parts, or warranty inquiries, please contact Vacmaster customer support. Refer to the official Vacmaster webPour obtenir les coordonnées les plus récentes, veuillez consulter le site web ou l'emballage de votre produit.
When contacting support, please have your model number (VBVA1010PF) and proof of purchase readily available.


