Produit terminéview
The Crestron TSW-760-TTK provides a stylish and convenient tabletop enclosure specifically designed for the TSW-760 Touch Screen. This kit allows the touch screen to be angled when installed, optimizing viewing and interaction. The complete assembly is designed for stable placement on any flat, level surface, enhancing the usability and aesthetics of your touch screen installation.
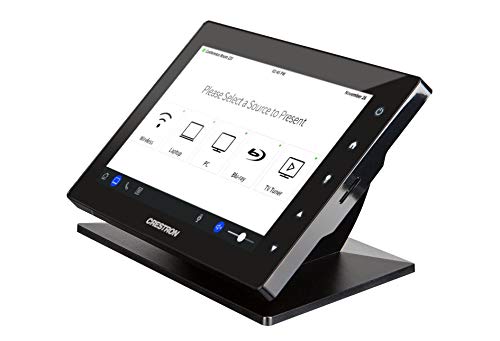
This image displays the Crestron TSW-760 Touch Screen mounted within the white smooth tabletop kit. The touch screen is angled for optimal viewing and interaction, showing a 'Please Select a Source to Present' interface.
Instructions d'installation
Follow these steps to properly set up your Crestron TSW-760 Tabletop Kit:
- Déballer les composants : Carefully remove all components from the packaging. Verify that you have the tabletop enclosure and any included mounting hardware.
- Prepare Touch Screen: Ensure your TSW-760 Touch Screen is ready for installation. Disconnect any power or network cables if it is currently in use.
- Install Touch Screen: Align the TSW-760 Touch Screen with the opening in the tabletop enclosure. Gently slide the touch screen into place, ensuring it seats securely within the kit. Refer to the touch screen's own manual for specific mounting points if necessary.
- Secure Touch Screen (if applicable): If the kit includes screws or clips for securing the touch screen, use them now to firmly attach the touch screen to the enclosure. Do not overtighten.
- Gestion des câbles: Route any necessary cables (power, network) through the designated openings in the tabletop kit. Ensure cables are not pinched and allow for proper ventilation.
- Position the Assembly: Place the assembled tabletop kit with the touch screen on a flat, stable, and level surface. Ensure there is adequate space around the unit for ventilation and access.
Opération
The TSW-760-TTK is a passive enclosure designed to house the TSW-760 Touch Screen. Its operation is primarily dependent on the functionality of the touch screen itself. Once the touch screen is installed and powered, interact with it as you normally would:
- Marche/Arrêt : Use the power button on the TSW-760 Touch Screen to turn the device on or off. The tabletop kit does not control power.
- Interface tactile: Interact with the touch screen by tapping, swiping, and gesturing as required by the application running on the TSW-760.
- Connectivité : Ensure all necessary network and power cables are securely connected to the TSW-760 Touch Screen through the kit's cable routing.
Entretien et soins
Proper maintenance ensures the longevity and appearance of your tabletop kit:
- Nettoyage: Use a soft, dry, lint-free cloth to wipe the exterior of the tabletop kit. For stubborn marks, a slightly damp cloth with mild, non-abrasive cleaner can be used, but avoid direct spraying onto the unit or touch screen.
- Évitez les liquides : Do not spill liquids directly onto the kit or the touch screen. If liquid enters the enclosure, immediately disconnect power to the touch screen and allow it to dry completely before re-powering.
- Manutention: Always lift the assembled unit from its base. Avoid applying excessive force or pressure to the touch screen or the enclosure.
- Ventilation: Ensure that the ventilation openings (if any) on the touch screen or kit are not obstructed to prevent overheating.
Dépannage
This section addresses common issues related to the tabletop kit. For issues with the TSW-760 Touch Screen itself, refer to its dedicated manual.
| Problème | Cause possible | Solution |
|---|---|---|
| Touch screen does not fit into the kit. | Incorrect model of touch screen or kit. | Verify that you have a TSW-760 Touch Screen and the TSW-760-TTK Tabletop Kit. This kit is specifically designed for the TSW-760. |
| Assembled unit is unstable. | Uneven surface or improper installation. | Ensure the tabletop kit is placed on a flat, level, and stable surface. Re-check that the touch screen is fully seated and secured within the enclosure. |
| Cables are difficult to route. | Cables are too thick or not routed correctly. | Ensure you are using standard cables. Carefully route cables through the designated channels to avoid pinching or obstruction. |
Spécifications du produit
| Spécification | Détail |
|---|---|
| Marque | Crétron |
| Numéro de modèle | TSW-760-TTK-W-S |
| Dimensions du colis | 13 x 8 x 4 pouces |
| Poids de l'article | 5 livres |
| ASIN | B07HP6B7BF |
| Date de première disponibilité | 13 février 2024 |
| Fabricant | Crétron |
| Nombre d'unités | 1 Nombre |
Garantie et assistance
This Crestron product is covered by a manufacturer's warranty. For specific warranty terms and conditions, please refer to the documentation provided with your original purchase or visit the official Crestron website. For technical support, product inquiries, or service requests, please contact Crestron customer support directly through their official channels.
Note: Warranty and support details are subject to change by the manufacturer. Always refer to the most current information provided by Crestron.


