1. Introduction
The Audio-Technica PRO24CM is a lightweight, compact stereo condenser microphone designed for digital recording with high-fidelity stereo sound. It is optimized for use with camcorders that feature an accessory shoe and a stereo microphone input. The microphone utilizes a pair of cardioid elements in an X-Y configuration to capture the spatial impact and realism of a live sound field.
This manual provides essential information for the proper setup, operation, and maintenance of your PRO24CM microphone.
2. Contenu du colis
Veuillez vérifier que tous les éléments suivants sont inclus dans votre colis :
- PRO24CM Stereo Condenser Microphone with permanently attached 6-12 inch coiled cable and right-angle 3.5 mm stereo mini plug
- Video-camera shoe mount
- LR44 battery (1.5V)
- Pare-brise
- Pochette de protection souple

Image: Included accessories for the PRO24CM microphone.
3. Installation
3.1 Installation de la batterie
The PRO24CM can operate on a 1.5V LR44 battery or via plug-in power from your camcorder. If your camcorder does not provide plug-in power, battery installation is required.
- Locate the battery compartment on the microphone body.
- Ouvrez soigneusement le compartiment.
- Insérez une pile LR44 en veillant à respecter la polarité (+/-).
- Fermez soigneusement le compartiment à piles.
Image: The LR44 battery for microphone power.
3.2 Montage du microphone
The PRO24CM is designed to attach to a camcorder's accessory shoe.
- Slide the video-camera shoe mount onto your camcorder's accessory shoe.
- Secure the mount by tightening its locking mechanism.
- Insert the microphone into the shoe mount.
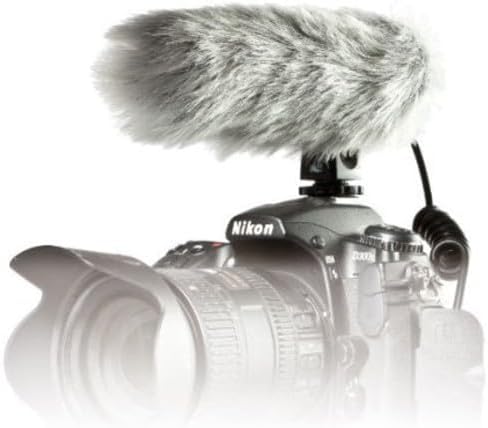
Image: PRO24CM microphone attached to a camcorder.
3.3 Connecting to a Camcorder
Connect the microphone to your camcorder's stereo microphone input.
- Locate the 3.5 mm stereo mini plug on the microphone's coiled cable.
- Insert the plug firmly into the microphone input jack on your camcorder.

Image: The PRO24CM microphone showing its coiled cable and 3.5mm connector.
3.4 Utilisation du pare-brise
For outdoor recording or in windy conditions, attach the included windscreen to reduce wind noise and plosives.
- Gently slide the foam windscreen over the microphone's capsule.
- Ensure it fits snugly without obstructing the microphone elements.
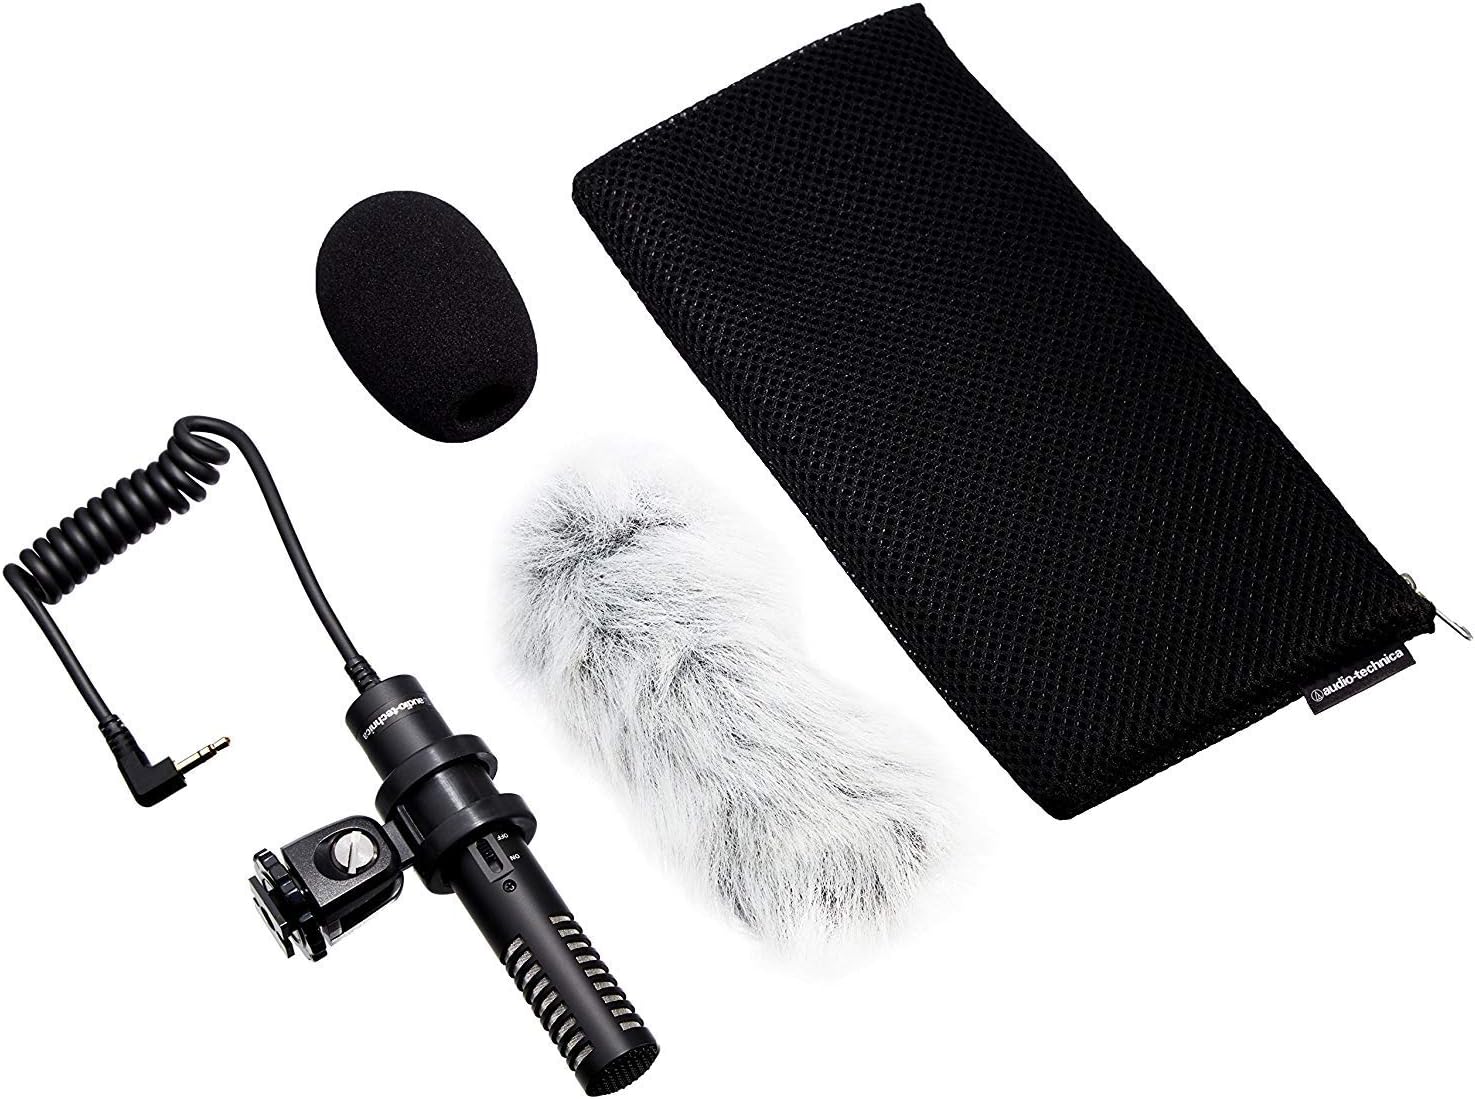
Image: PRO24CM microphone with windscreen and other accessories.
4. Fonctionnement
4.1 Mise sous/hors tension
The PRO24CM features an on/off switch for convenient operation.
- To turn the microphone ON, slide the switch to the "ON" position.
- To turn the microphone DÉSACTIVÉ, faites glisser l'interrupteur sur la position « ARRÊT ».
When using plug-in power from your camcorder, the microphone will draw power directly from the camcorder, and battery operation is not required. However, it is still recommended to turn the microphone off when not in use to conserve battery life if a battery is installed.
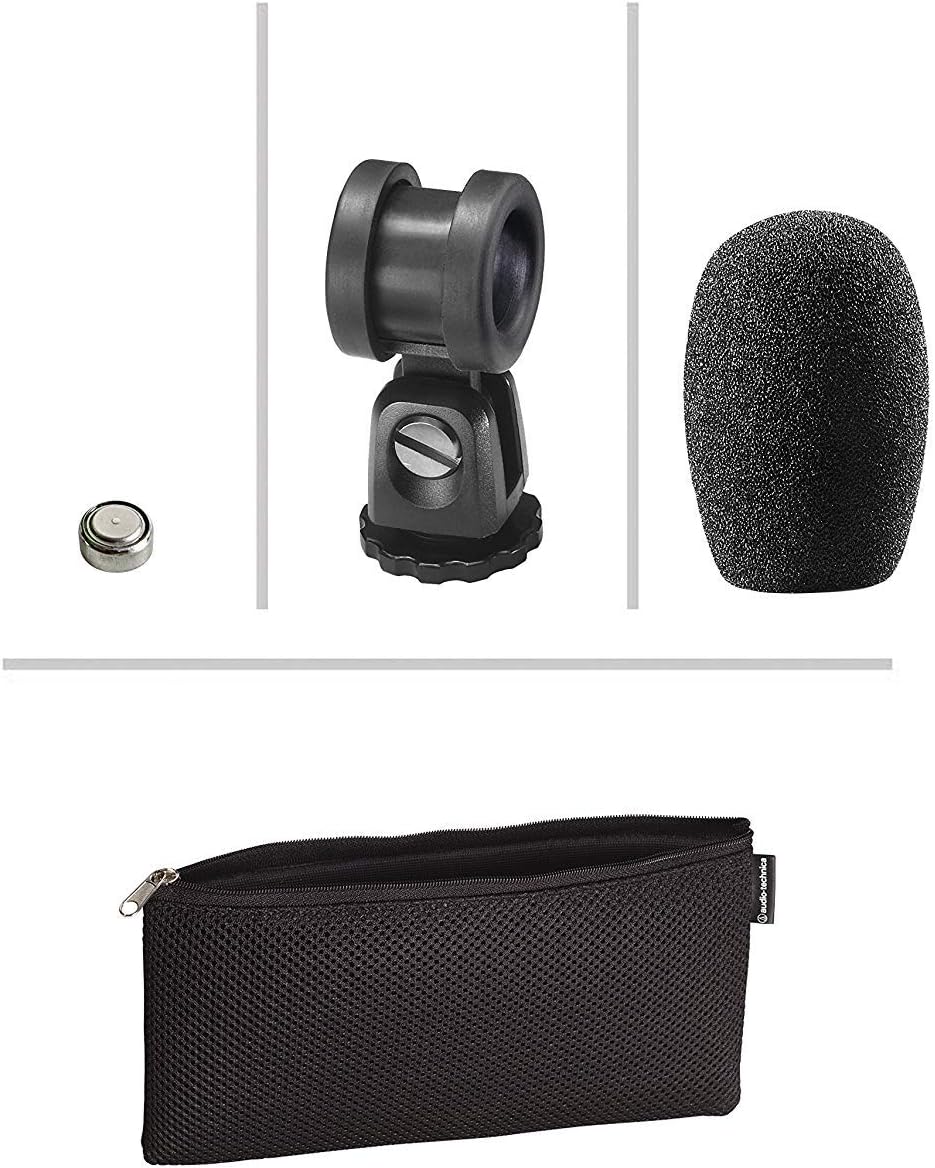
Image: The PRO24CM microphone with its on/off switch visible.
4.2 Recording Considerations
- Placement: Position the microphone to capture the desired sound source. The X-Y stereo configuration is designed to provide a natural stereo image.
- Surveillance: Always monitor your audio through headphones connected to your camcorder to ensure optimal sound quality and to detect any unwanted noise.
- Gagner des niveaux : Adjust the input gain on your camcorder to prevent clipping (distortion) while ensuring a strong signal.
5. Entretien
- Nettoyage: Utilisez un chiffon doux et sec pour nettoyer le corps du microphone. Évitez d'utiliser des produits chimiques agressifs ou des matériaux abrasifs.
- Stockage: When not in use, store the microphone in its protective pouch to prevent dust and damage. Remove the battery if storing for extended periods to prevent leakage.
- Entretien des câbles : Avoid sharp bends or kinks in the microphone cable.
6. Dépannage
- Pas de son :
- Ensure the microphone's on/off switch is in the "ON" position.
- Vérifiez que la batterie est correctement installée et suffisamment chargée. Remplacez-la si nécessaire.
- Verify the 3.5 mm plug is fully inserted into the camcorder's microphone input.
- Confirm the camcorder's audio input settings are correct and the input gain is not set to zero.
- Son déformé :
- Reduce the input gain on your camcorder.
- Veillez à ce que le microphone ne soit pas trop près de la source sonore, afin d'éviter toute saturation.
- Bruit excessif du vent :
- Vérifiez que le pare-brise est correctement installé.
- Consider using an additional furry wind muff for extreme conditions (not included).
7. Spécifications
| Fonctionnalité | Spécification |
|---|---|
| Élément | Condenseur à polarisation permanente à plaque arrière à charge fixe |
| Diagramme polaire | X/Y Stereo |
| Réponse en fréquence | 100-17,000 Hz |
| Sensibilité en circuit ouvert | -50 dB (3.1 mV) re 1V à 1 Pa |
| Impédance | 600 ohms |
| Niveau sonore maximum d'entrée | 119 dB SPL, 1 kHz à 1% THD |
| Plage dynamique (typique) | 82 dB, 1 kHz à SPL max. |
| Signal-to-Noise Ratio | 57 dB, 1 kHz à 1 Pa |
| Exigences en matière d'alimentation | 2-10V DC plug-in power or 1.5V LR44 battery |
| Type de batterie | LR1.5 44 V |
| Courant / Durée de vie de la batterie | 0.6 mA / 200 hours typical |
| Changer | Marche/arrêt |
| Poids | 3.9 oz (111 g) / 120 Grams |
| Dimensions (L x Max Body Dia.) | 4.59" (116.5 mm) long, 0.83" (21.0 mm) maximum body diameter |
| Connecteur de sortie | 3.5 mm stereo mini plug on cable |
| Câble | Permanently attached 152.4 mm - 304.8 mm (6"-12") coiled cable with right-angle molded 3.5 mm stereo mini-plug |
8. Consignes de sécurité
- N’exposez pas le microphone à des températures extrêmes, à l’humidité ou à la lumière directe du soleil.
- Évitez de faire tomber le microphone ou de le soumettre à des chocs violents.
- Gardez le microphone éloigné des champs magnétiques puissants.
- Do not attempt to disassemble or modify the microphone. This will void any warranty.
- Jetez les piles usagées de manière responsable conformément aux réglementations locales.
9. Garantie et assistance
For warranty information or technical support, please contact Audio-Technica customer service or visit their official webConsultez le site. Conservez votre reçu d'achat comme preuve d'achat.
Audio-Technica Contact Information:
- Official Audio-Technica Website
- Veuillez vous référer à l'emballage de votre produit ou au site officiel. website for specific regional contact details.


