1. Introduction
This instruction manual provides essential information for the safe assembly, operation, and maintenance of your JEGS 1250 lb Capacity Engine Stand, Model 80041. Please read this manual thoroughly before using the product to ensure proper function and safety. This engine stand is designed to securely hold automotive engines for repair, rebuilding, or maintenance tasks, offering a 360-degree adjustable mounting head and easy mobility.
2. Consignes de sécurité
AVERTISSEMENT : Le non-respect de ces consignes de sécurité peut entraîner des blessures graves ou des dommages matériels.
- Always wear appropriate personal protective equipment (PPE), including safety glasses and gloves, when assembling or operating the engine stand.
- Ensure the engine stand is placed on a flat, level, and stable surface capable of supporting the combined weight of the stand and the engine.
- Ne pas dépasser la capacité de poids maximale de 1250 lb (567 kg).
- Verify all bolts, nuts, and pins are securely fastened before mounting an engine or moving the stand.
- Distribute the engine's weight evenly on the mounting head.
- Never work under an engine supported solely by the engine stand. Use additional support such as jack stands.
- Keep hands and clothing clear of moving parts, especially when rotating the engine.
- Do not modify the engine stand in any way. Use only original replacement parts.
- Tenez les enfants et les passants éloignés de la zone de travail.
3. Liste des pièces
Before assembly, ensure all components are present and undamaged. If any parts are missing or damaged, contact JEGS customer support.
- Main Vertical Post
- Assemblage de la jambe avant
- Rear Leg Assembly
- Support Bar(s)
- Mounting Head Assembly (with adjustable arms)
- Caster Wheels (4x ball-bearing swivel casters)
- Handle for Rotation
- Assorted Bolts, Washers, and Nuts
- Lock Pin(s)
4. Configuration et assemblage
Follow these steps for assembling your JEGS Engine Stand. Refer to the images and video for visual guidance.
- Attach Caster Wheels to Legs: Secure the universal caster wheels to the hind leg and front leg sections using the provided bolts, washers, and nuts. Ensure all fasteners are tightened securely.
- Assembler les sections de jambe : Attach the hind leg section to the front leg section using the appropriate bolt and nut.
- Connect Legs to Main Post: Attach the assembled leg frame to the main vertical post using the designated bolt and nut.
- Attach Support Bar: Secure the support bar(s) to the base of the stand using the provided bolts and nuts.
- Assemble Mounting Head: Attach the mounting arms to the head assembly using bolts, washers, and nuts. Ensure they are securely fastened.
- Install Mounting Head to Main Post: Insert the assembled mounting head into the top hole of the main post. Align the holes and secure it by inserting the lock pin.
- Insert Rotation Handle: Insert the rotation handle into the designated hole on the head assembly.

Figure 4.1: Caster wheel attachment to the leg.

Figure 4.2: Main frame connection detail.
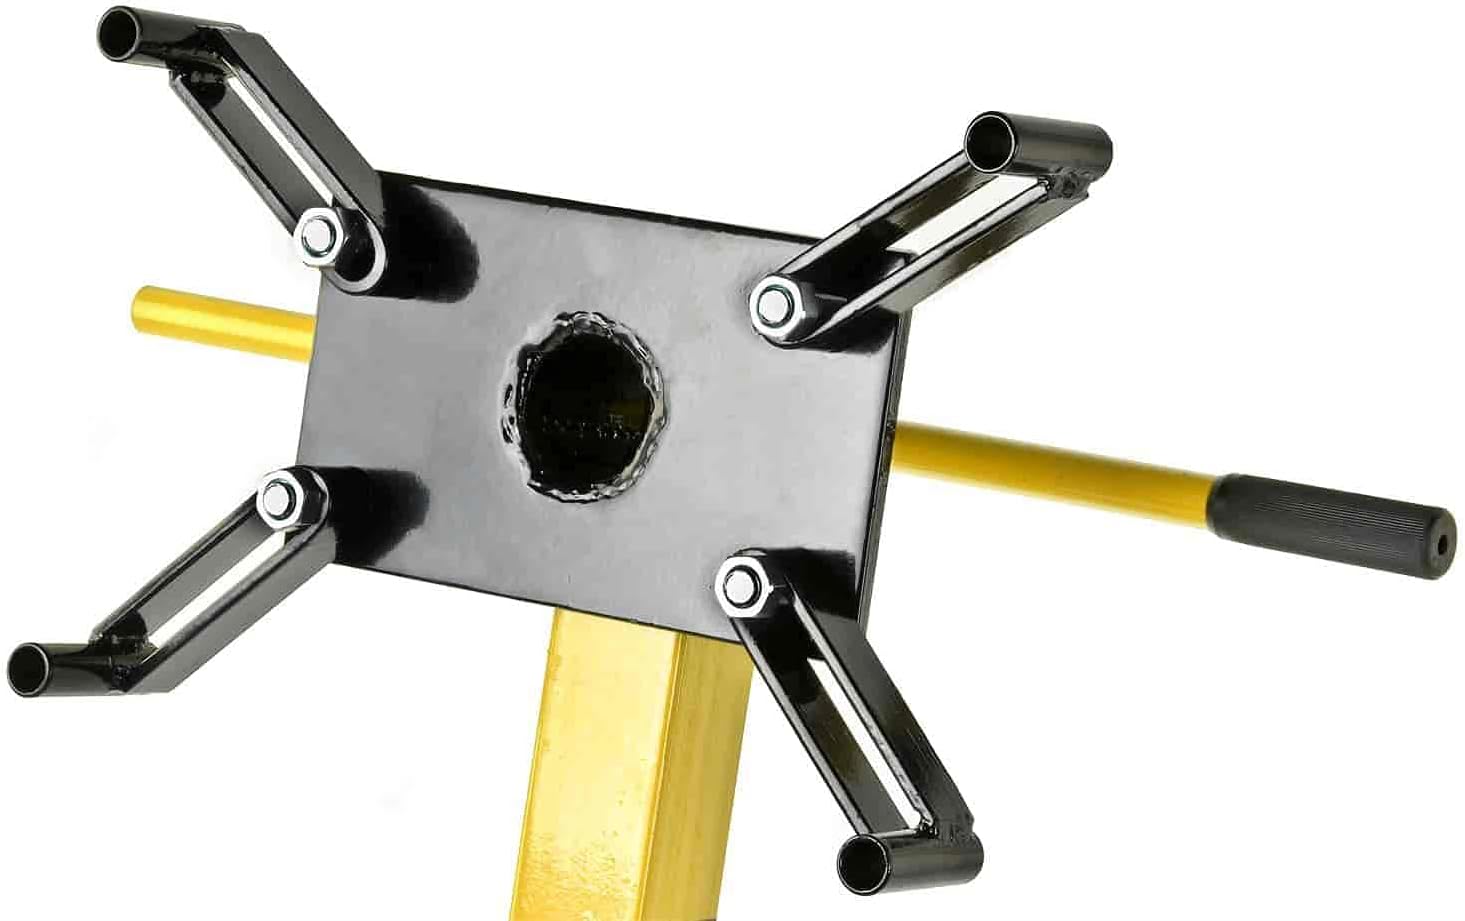
Figure 4.3: Mounting arms assembly.

Figure 4.4: Mounting head and rotation handle.
Guide vidéo d'assemblage
Video 4.1: Step-by-step assembly instructions for an engine stand. This video demonstrates the process of attaching wheels, assembling the frame, and installing the mounting head and handle.
5. Mode d'emploi
Proper operation ensures safety and extends the life of your engine stand.
- Préparer le moteur : Remove any components from the engine that may interfere with mounting or rotation. Ensure the engine is clean and free of excessive oil or grease.
- Mount the Engine: Carefully lift the engine using an appropriate engine hoist or crane. Align the engine's mounting points with the adjustable arms on the engine stand's head. Secure the engine to the mounting arms using suitable bolts and washers. Ensure the engine is balanced and all fasteners are tightened to the manufacturer's specifications.
- Adjust and Rotate: To rotate the engine, remove the lock pin from the mounting head. Use the rotation handle to turn the engine to the desired position. Once in position, re-insert the lock pin to secure the engine.
- Move the Stand: The four ball-bearing swivel caster wheels allow for easy movement. Ensure the path is clear of obstructions and the floor is level before moving the stand with an engine mounted. Move slowly and carefully.
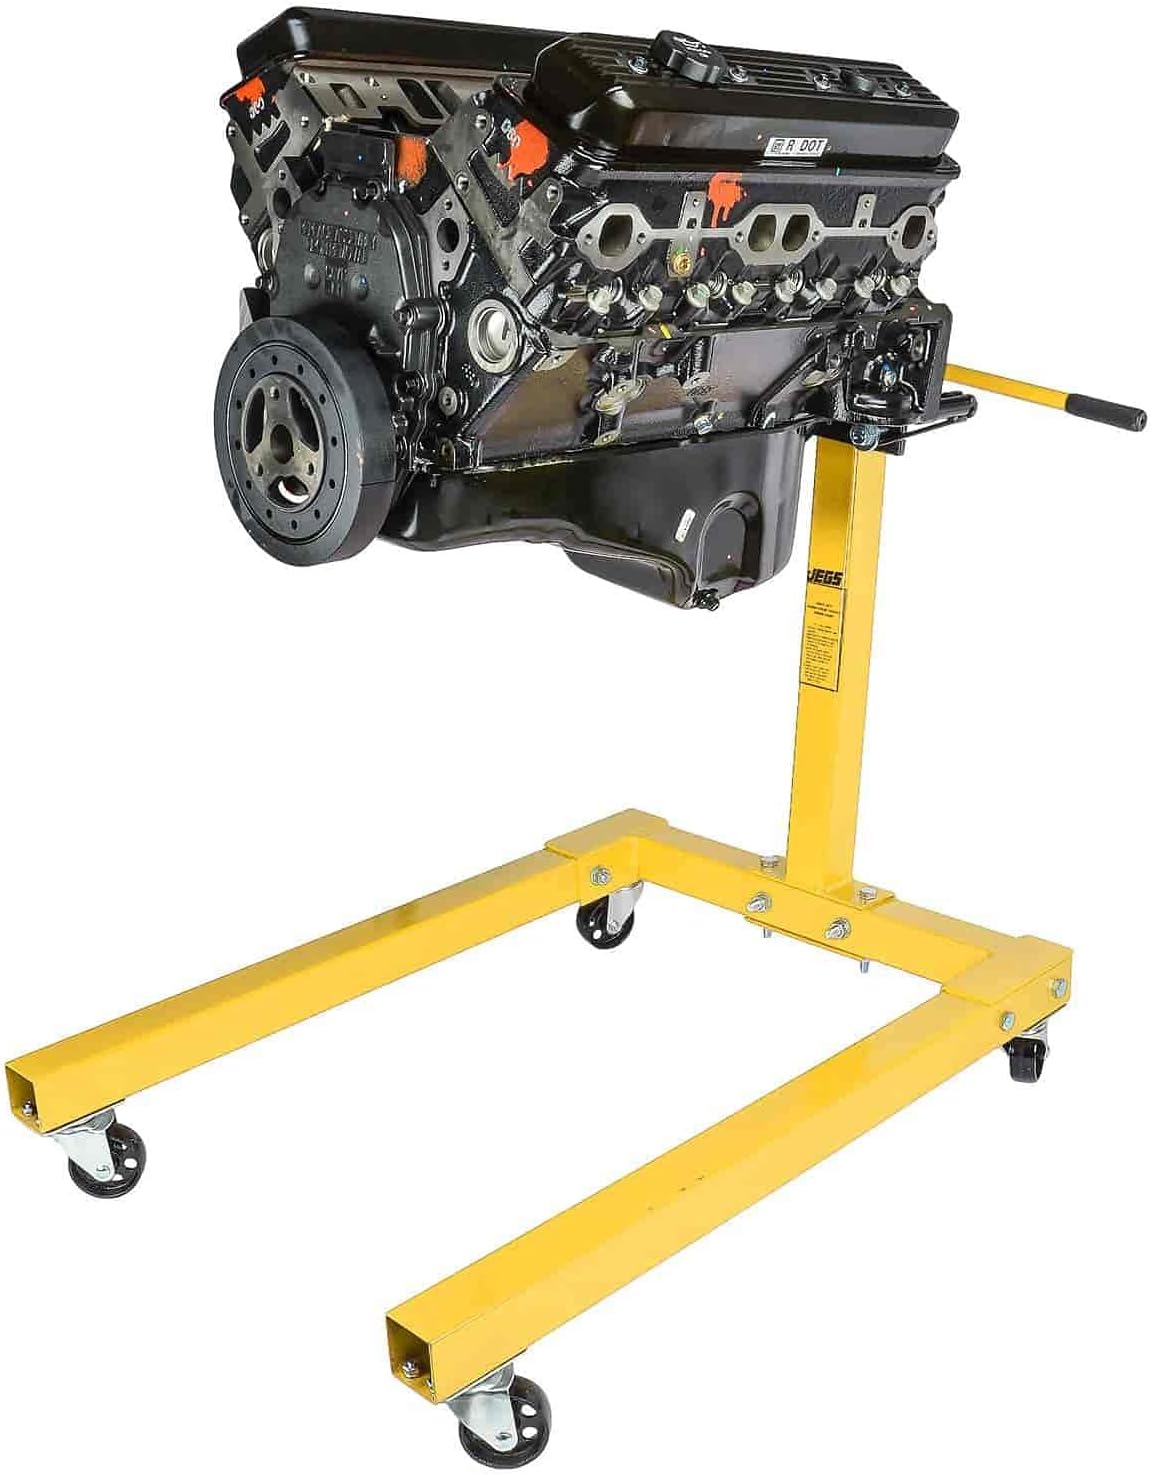
Figure 5.1: Engine mounted on the stand.
6. Entretien
Regular maintenance will ensure the longevity and safe operation of your engine stand.
- Inspection: Before each use, inspect the engine stand for any signs of damage, wear, or loose fasteners. Pay close attention to welds, bolts, and caster wheels.
- Nettoyage: Keep the stand clean and free of oil, grease, and debris. Wipe down surfaces with a mild cleaner as needed.
- Lubrification: Periodically lubricate the swivel mechanisms of the caster wheels and the rotation mechanism of the mounting head to ensure smooth operation.
- Stockage: When not in use, store the engine stand in a dry, clean area. The stand can be disassembled for more compact storage if needed.
7. Dépannage
Voici des solutions aux problèmes courants que vous pourriez rencontrer :
- Difficulty Rotating Engine: Check if the lock pin is fully disengaged. Ensure the rotation mechanism is clean and lubricated. If the engine is very heavy, ensure it is balanced correctly on the mounting head.
- Stand Wobbles or is Unstable: Verify that the stand is on a level surface. Check all assembly bolts and nuts for tightness. Ensure the engine is securely mounted and its weight is evenly distributed.
- Caster Wheels Not Swiveling Smoothly: Clean any debris from the caster wheels and their swivel mechanisms. Apply a suitable lubricant to the swivel bearings.
8. Spécifications
| Fonctionnalité | Spécification |
|---|---|
| Marque | JEG |
| Numéro de modèle | 80041 |
| Capacité de poids | 1250 livres |
| Mounting Head | Réglable à 360 degrés |
| Construction du cadre | Heavy-Gauge Square Steel |
| Roulettes | 4 Ball-Bearing Swivel |
| Dimensions du produit | 37.2 x 14 x 7.7 pouces |
| Poids de l'article | 64 livres |
9. Garantie et assistance
For warranty information or technical support, please refer to the product packaging or contact JEGS customer service directly. Keep your purchase receipt as proof of purchase.


