Introduction
This manual provides detailed instructions for the setup, operation, and maintenance of your Digoo DG-C3 Wireless Weather Station. This device integrates a hygrometer, thermometer, weather forecast station, and alarm clock functions, offering comprehensive environmental monitoring and timekeeping capabilities. Please read this manual thoroughly before using the product to ensure correct operation and to maximize its features.
Contenu du colis
- Digoo DG-C3 Wireless Weather Station Unit
- Câble d'alimentation USB
- Manuel de l'utilisateur (ce document)
Remarque : Les piles (3 x AAA) ne sont pas incluses et doivent être achetées séparément.
Produit terminéview
Familiarize yourself with the various components of your Digoo DG-C3 weather station.
Affichage avant
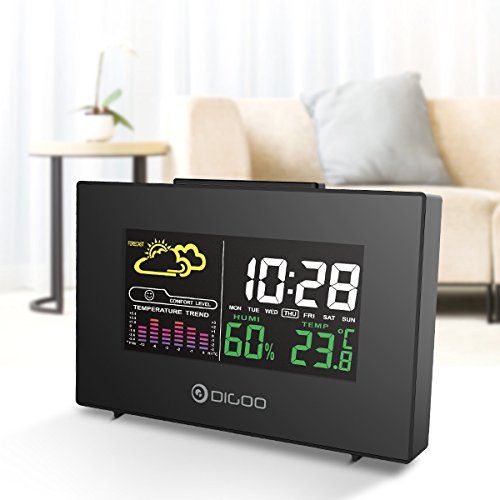
The front display features a color backlit screen showing the current time, day of the week, indoor humidity, indoor temperature, and a weather forecast icon. It also includes a comfort level indicator and a temperature trend graph.
- Heure Date: Digital display of current time and day.
- Prévisions météorologiques: Icônes indiquant les conditions météorologiques prévues (par exemple, ensoleillé, nuageux, pluvieux).
- Niveau de confort : Indique le confort intérieur en fonction de la température et de l'humidité.
- Tendance des températures : Bar graph showing recent temperature changes.
- Humidité: Pourcentagetage display of indoor humidity.
- Température: Digital display of indoor temperature (Celsius or Fahrenheit).
Panneau arrière
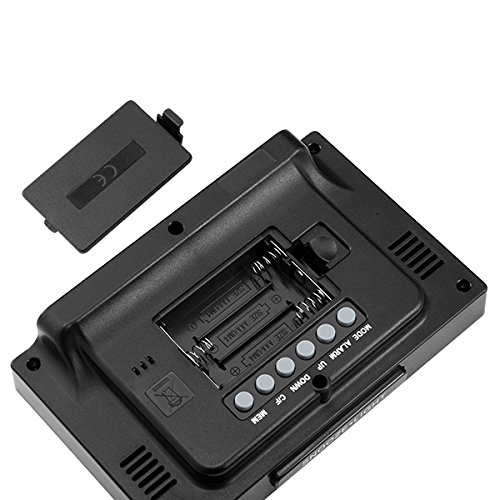
The back of the unit houses the battery compartment and various control buttons for setting the device.
- Compartiment à piles : Holds 3x AAA batteries for power backup.
- Bouton MODE : Used to switch between display modes and enter setting mode.
- Bouton d'alarme: Permet de régler et d'activer/désactiver l'alarme.
- Bouton HAUT : Used to increase values during settings or view maximum records.
- Bouton BAS : Used to decrease values during settings or view minimum records.
- Touche °C/°F : Permet de basculer entre les unités de température Celsius et Fahrenheit.
- Bouton MEM : Habitué view memory records for temperature and humidity.
Panneau supérieur
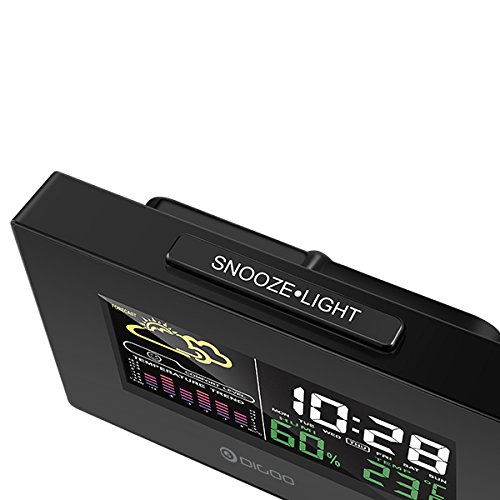
The top of the unit features a single button for snooze and backlight functions.
- SNOOZE·LIGHT Button: Press to activate the backlight or snooze the alarm.
Installation
1. Mise sous tension
- Installation de la batterie : Open the battery compartment cover on the back of the unit. Insert 3x AAA batteries, ensuring correct polarity (+/-). Close the cover. Batteries provide backup power and allow for portability.
- Connexion d'alimentation USB : For continuous power and backlight, connect the provided USB cable to the USB port on the unit and to a compatible USB power adapter (not included) or a computer USB port.
- The display will light up and show default settings.
2. Initial Settings (Time, Date, Unit)
- Réglage de l'heure :
- Appuyez et maintenez enfoncé le MODE button for approximately 3 seconds to enter time setting mode. The hour digit will flash.
- Utilisez le UP or VERS LE BAS boutons pour régler l'heure.
- Presse MODE again to confirm the hour and move to minute setting. The minute digit will flash.
- Utilisez le UP or VERS LE BAS boutons pour régler les minutes.
- Presse MODE again to confirm and move to 12/24 hour format selection.
- Utilisez le UP or VERS LE BAS buttons to select 12-hour or 24-hour format.
- Presse MODE pour confirmer et quitter le réglage de l'heure.
- Réglage de la date:
- Après avoir réglé l'heure, appuyez sur MODE again to enter date setting mode. The year will flash.
- Utilisez le UP or VERS LE BAS boutons pour régler l'année.
- Presse MODE to confirm and move to month setting.
- Utilisez le UP or VERS LE BAS boutons pour régler le mois.
- Presse MODE to confirm and move to day setting.
- Utilisez le UP or VERS LE BAS boutons pour régler le jour.
- Presse MODE pour confirmer et quitter le réglage de la date.
- Sélection de l'unité de température :
- Appuyez sur le ° C / ° F button on the back of the unit to switch between Celsius (°C) and Fahrenheit (°F) temperature display.
Mode d'emploi
1. Fonction réveil
- Réglage de l'alarme :
- Appuyez sur le ALARME Appuyez une fois sur le bouton pour afficher l'heure actuelle de l'alarme.
- Appuyez et maintenez enfoncé le ALARME button for approximately 3 seconds. The hour digit will flash.
- Utilisez le UP or VERS LE BAS boutons pour régler l'heure de l'alarme.
- Presse ALARME again to confirm the hour and move to minute setting. The minute digit will flash.
- Utilisez le UP or VERS LE BAS boutons pour régler les minutes de l'alarme.
- Presse ALARME pour confirmer et quitter le réglage de l'alarme.
- Activation/Désactivation de l'alarme :
- En mode d'affichage de l'heure normal, appuyez sur ALARME button repeatedly to toggle the alarm ON or OFF. An alarm icon will appear on the display when the alarm is active.
- Fonction de répétition:
- Lorsque l'alarme sonne, appuyez sur la SNOOZE · LUMIÈRE button on the top of the unit to activate the snooze function. The alarm will temporarily stop and sound again after a few minutes (typically 5-10 minutes).
- To stop the alarm completely, press any other button on the back panel.
2. Prévisions météorologiques
The weather station provides a weather forecast based on internal atmospheric pressure changes. The forecast icons (e.g., sunny, cloudy, rainy) are predictions for the next 12-24 hours and may not always match local weather services, which use more comprehensive data.
- The forecast icon is displayed on the upper left of the screen.
- The device requires a period of stable operation (typically 24 hours) to calibrate and provide accurate forecasts.
3. Affichage de la température et de l'humidité
- The current indoor temperature and humidity are continuously displayed on the screen.
- Viewing Min/Max Records:
- Appuyez sur le MEM Appuyez une fois sur le bouton pour afficher la température et l'humidité maximales enregistrées.
- Presse MEM again to display the minimum recorded temperature and humidity.
- Presse MEM a third time to return to current readings.
- To clear the min/max records, press and hold the MEM bouton pendant 3 secondes pendant que viewles enregistrements.
4. Contrôle du rétroéclairage
- When powered by USB, the backlight will remain on.
- Lorsqu'il fonctionne uniquement sur piles, appuyez sur SNOOZE · LUMIÈRE button to temporarily activate the backlight for a few seconds.
Entretien
- Nettoyage: Wipe the unit with a soft, dry cloth. Do not use abrasive cleaners or solvents. Avoid getting moisture into the unit.
- Remplacement de la batterie : When the display becomes dim or functions irregularly, replace the 3x AAA batteries in the back compartment. Ensure correct polarity.
- Stockage: If not using the device for an extended period, remove the batteries to prevent leakage. Store in a cool, dry place.
Dépannage
| Problème | Cause possible | Solution |
|---|---|---|
| L'écran est vide ou sombre. | Batterie faible ou absence de connexion électrique. | Replace batteries or connect the USB power cable. |
| Date/heure incorrecte. | Time/date not set correctly after power loss or initial setup. | Follow the "Initial Settings" section to reset time and date. |
| Les prévisions météorologiques semblent inexactes. | Device needs calibration time; local conditions may differ from pressure-based forecast. | Allow 24 hours for calibration. Understand that the forecast is based on internal pressure changes. |
| L'alarme ne sonne pas. | Alarm is not activated or volume is too low (if adjustable). | Ensure the alarm icon is displayed. Check alarm settings. |
Caractéristiques
| Modèle: | DG-C3 |
| Connectivité : | USB (pour l'alimentation) |
| Source d'alimentation : | 3x AAA Batteries (not included) or USB Power |
| Caractéristiques spéciales : | Hygrometer, Thermometer, Weather Forecast, Alarm Clock, Color Backlight, Portable |
| Afficher: | Color Backlit LCD |
| Unité de température: | °C / °F sélectionnable |
Garantie et assistance
Pour toute information relative à la garantie ou pour obtenir une assistance technique, veuillez consulter la documentation fournie lors de votre achat ou contacter votre revendeur. Conservez votre reçu d'achat comme preuve d'achat.


