Introduction
The Ikan Lyra Bi-Color LBx30 LED Soft Panel is designed for professional studio and field lighting applications. It features high CRI chip LEDs and a soft diffusion panel to provide a smooth, wrapping light. This manual provides essential information for the safe and effective setup, operation, and maintenance of your LBx30 LED light.
Qu'y a-t-il dans la boîte
- Lyra Bi-Color DMX Studio Light (LBx30)
- Cordon d'alimentation
- Alimentation électrique
- Monture de joug
Caractéristiques du produit
- 95+ CRI Chip LEDs with 1/2 stop soft diffusion panel for high-quality light.
- Bi-Color adjustable from 3200K (warm tungsten) to 5600K (daylight).
- Consistent brightness across all color temperatures.
- Wide beam angle of 110 degrees for broad coverage.
- Produces a clean, single shadow.
- Integrated DMX control for remote operation.
- Heavy-duty yoke with baby 5/8" / junior 1 1/8" combo pin for versatile mounting.
- Quick set disk locking system for secure positioning.
- Large yellow control knob and LED readout for precise adjustments.
Installation
1. Montage de la lumière
The LBx30 comes with a heavy-duty yoke mount and a baby 5/8" / junior 1 1/8" combo pin. Attach the light securely to a compatible light stand or rigging system using the combo pin. Ensure all locking mechanisms are tightened to prevent accidental movement.

Image: Detail of the yoke mount and quick set disk locking system, showing how to secure the light's position on a stand.
2. Connexion de l'alimentation
Connect the provided power supply to the DC input port on the back of the light panel. Then, connect the power cord from the power supply to a suitable electrical outlet. Ensure the power switch on the light is in the 'OFF' position before connecting to power.
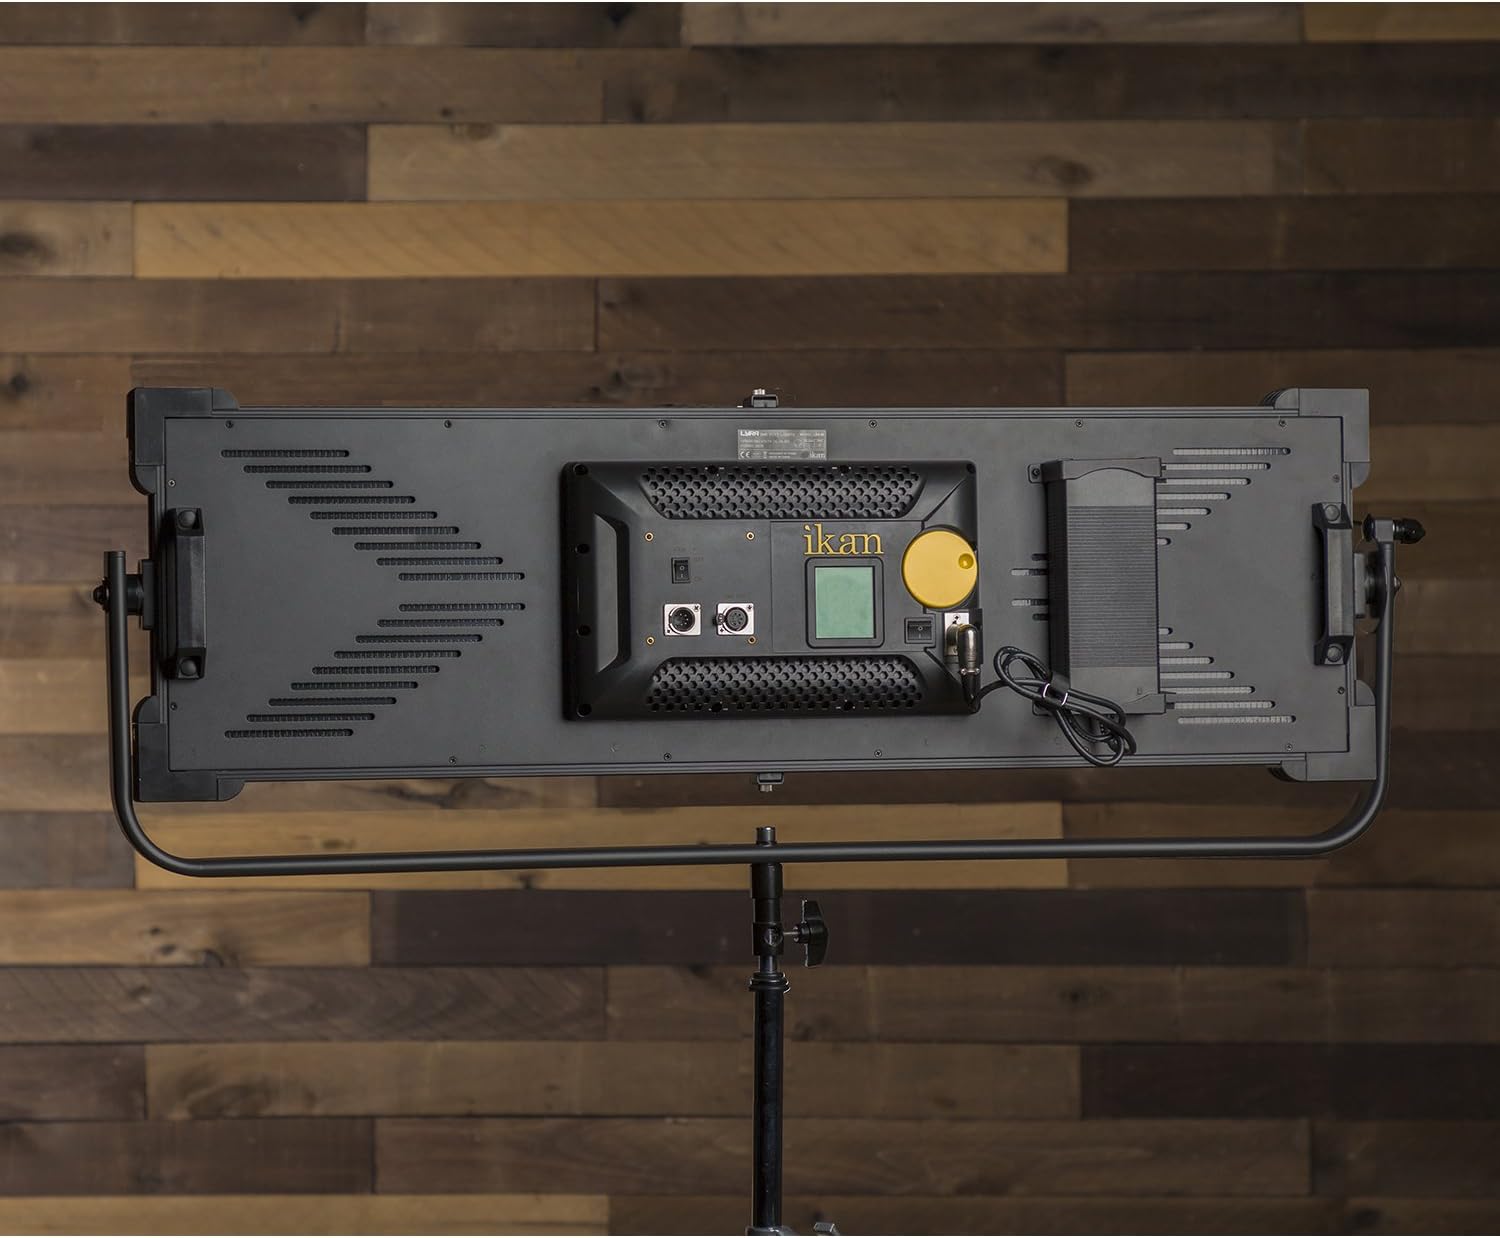
Image: The back panel of the LBx30, highlighting the power input port, DMX IN/OUT ports, fan switch, and the main control knob with LED display.
3. Connexion DMX (en option)
For DMX control, connect a DMX cable from your DMX controller to the 'DMX IN' port on the back of the light. If daisy-chaining multiple lights, connect a DMX cable from the 'DMX OUT' port of the first light to the 'DMX IN' port of the next light.
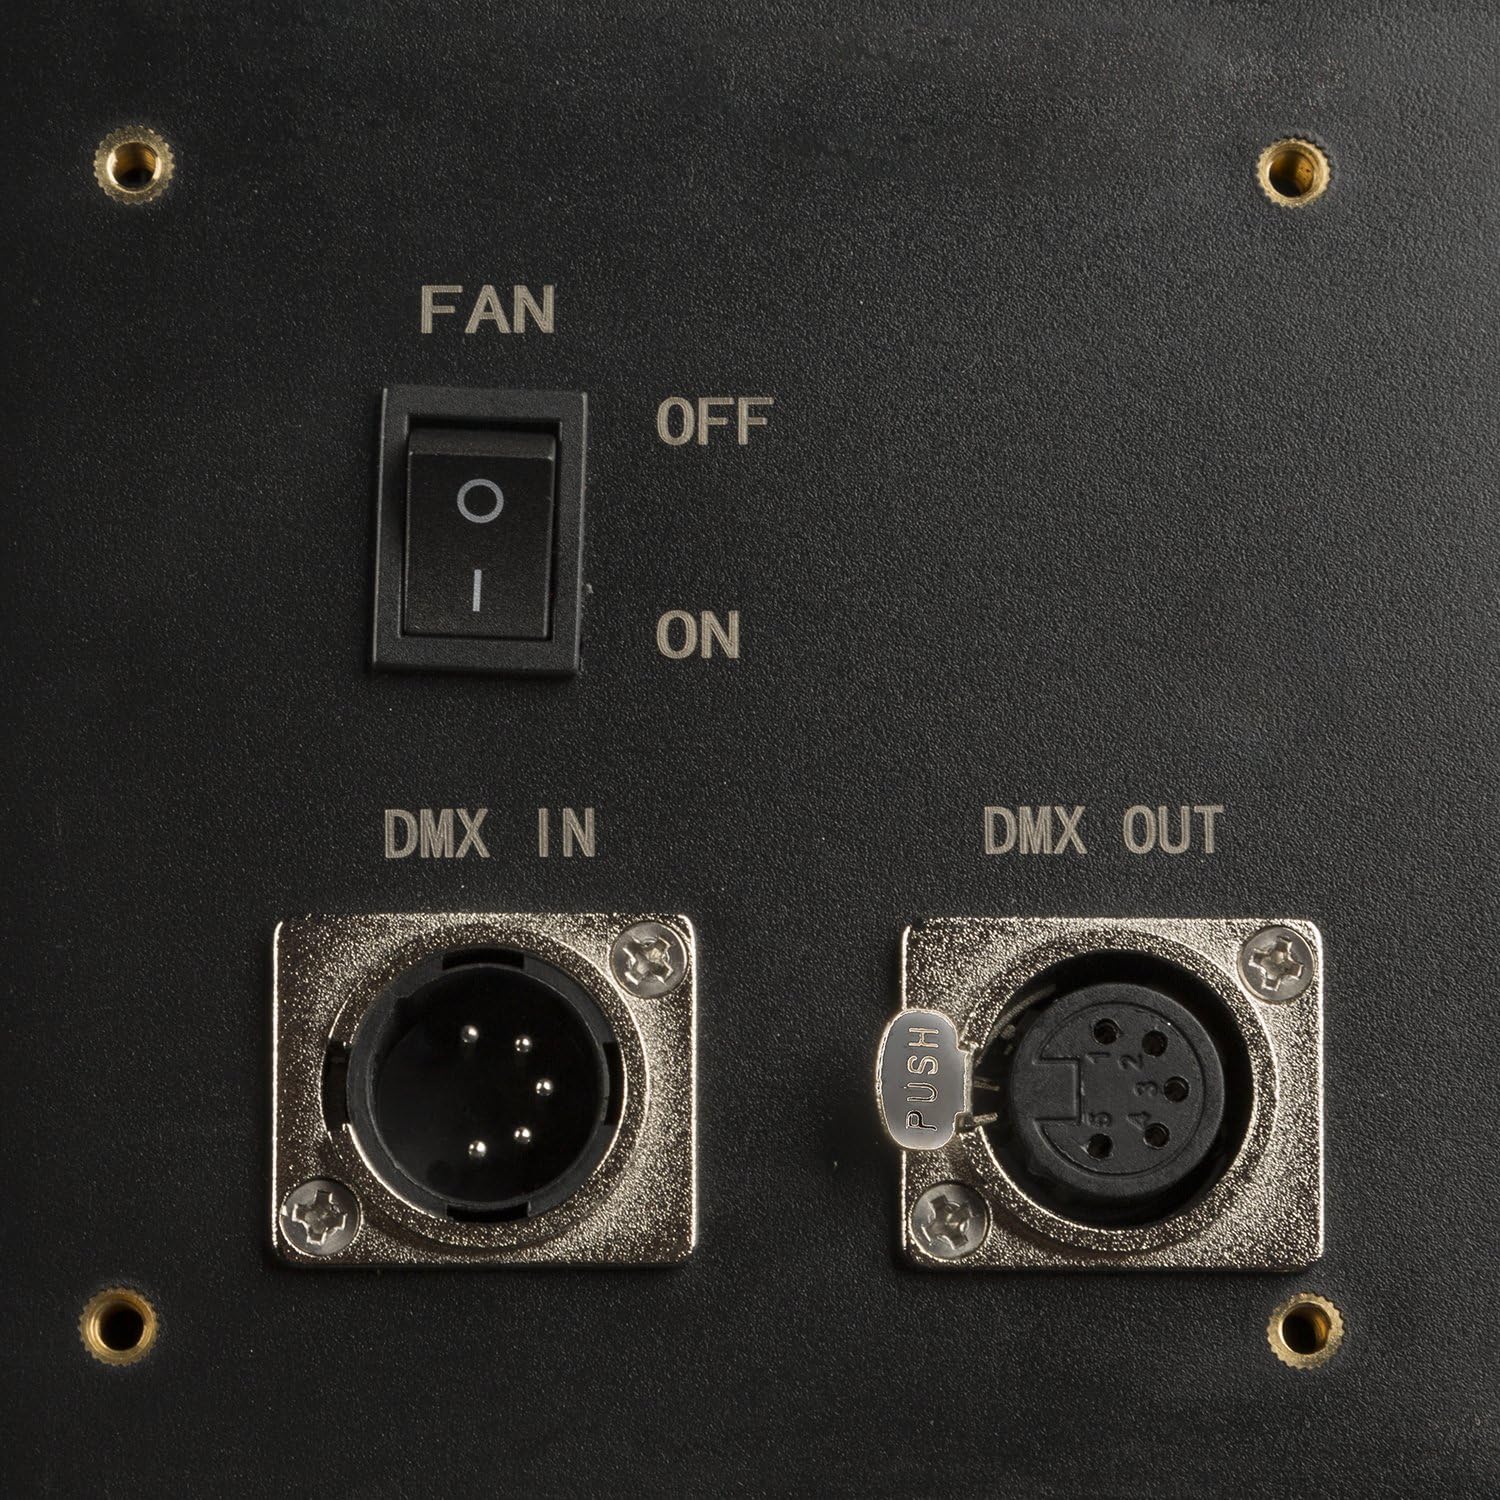
Image : Une image détaillée view of the DMX IN and DMX OUT ports, along with the fan ON/OFF switch.
Opérationnel
1. Mise sous/hors tension
Once power is connected, flip the main power switch on the back of the unit to the 'ON' position. The LED display will illuminate.
2. Réglage de la luminosité et de la température de couleur
The large yellow knob on the back panel controls both brightness and color temperature. Press the knob to toggle between brightness (DIM) and color temperature (CCT) adjustment modes. Rotate the knob to increase or decrease the selected value. The LED readout provides precise measurements.

Image: The control knob and LED display, showing current brightness percentage et réglages de température de couleur.
3. Contrôle DMX
If using DMX, ensure your DMX controller is properly configured. The LBx30 allows you to set the DMX channel via the control knob and LED display. Refer to your DMX controller's manual for specific channel assignment and control instructions.
4. Fonctionnement du ventilateur
The LBx30 includes a fan for cooling. The fan switch is located near the DMX ports. Ensure the fan is 'ON' during operation to prevent overheating and maintain optimal performance.
Entretien
Nettoyage
Regularly clean the exterior of the light panel with a soft, dry cloth. For the diffusion panel, use a soft, lint-free cloth slightly dampened with water or a mild, non-abrasive cleaning solution. Avoid harsh chemicals or abrasive materials that could damage the surface.
Stockage
When not in use, store the LBx30 in a cool, dry place, away from direct sunlight and extreme temperatures. It is recommended to use the original packaging or a padded case for transport and storage to protect the unit.
Dépannage
- Light does not power on: Check all power connections, including the power cord, power supply, and wall outlet. Ensure the main power switch is in the 'ON' position.
- L'éclairage est irrégulier ou vacillant : Verify that the power supply is securely connected and providing stable power. If using DMX, check DMX cable connections and controller settings.
- Cannot adjust brightness or color temperature: Ensure the control knob is functioning correctly. Press the knob to cycle between adjustment modes. If the issue persists, power cycle the unit.
- Fan is not running: Check the fan switch position. Ensure it is set to 'ON'. If the fan still does not operate, discontinue use and contact support.
If you encounter issues not listed here or if troubleshooting steps do not resolve the problem, please contact Ikan customer support.
Caractéristiques
| Numéro de modèle | LBx30 |
| Dimensions du produit | 22 x 48 x 8 pouces |
| Poids de l'article | 30 livres |
| Plage de température de couleur | 3200K - 5600K (Bicolore) |
| CRI | 95+ |
| Angle du faisceau | 110 degrés |
| Contrôle | On-board knob, DMX512 |
| Montage | Baby 5/8" / Junior 1 1/8" Combo Pin |
Photometrics (LBx30)

Image: A table detailing the light output in foot-candles (fc) and lux at different distances (2ft to 20ft) for both 5600K and 3200K color temperatures.
Garantie et assistance
Informations sur la garantie
Ikan products are typically covered by a limited manufacturer's warranty. Please refer to the warranty card included with your product or visit the official Ikan webConsultez le site pour connaître les conditions générales de garantie détaillées.
Assistance clientèle
For technical assistance, service, or replacement parts, please contact Ikan customer support. Contact information can usually be found on the official Ikan website ou dans l'emballage de votre produit.


