Introduction
This manual provides comprehensive instructions for the setup, operation, and maintenance of your GPX Digital AM/FM Clock Radio, model C224B. Please read this manual thoroughly before using the device to ensure proper functionality and to maximize your user experience. Keep this manual for future reference.
Produit terminéview
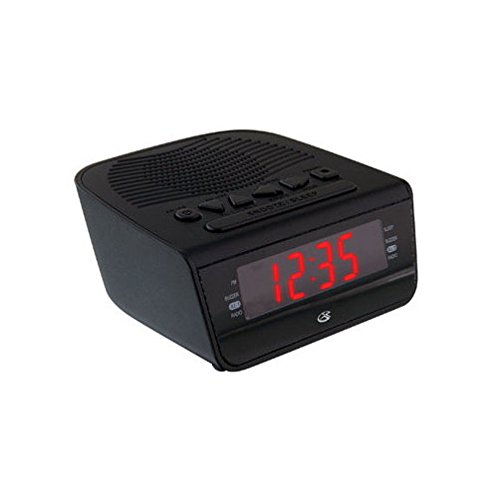
Figure 1 : Devant view of the GPX Digital AM/FM Clock Radio. This image shows the compact black unit with its digital display and control buttons.
The GPX Digital AM/FM Clock Radio (C224B) is designed for reliable timekeeping and audio entertainment. Key features include a clear multi-display clock, AM/FM radio tuner, dual alarm functionality, and a battery backup option to ensure continuous operation during power interruptions. Its compact and modern design makes it suitable for various indoor settings.
Installation
1. Déballage
Carefully remove the clock radio from its packaging. Ensure all components are present: the clock radio unit and the power adapter.
2. Connexion électrique
- Plug the power adapter into the DC input jack located on the back of the clock radio.
- Plug the other end of the power adapter into a standard wall outlet (AC 120V, 60Hz).
- The display will illuminate, indicating the unit is receiving power.
3. Installation d'une batterie de secours (en option)
Pour l'alimentation de secours pendant votre absencetages, install batteries (not included).
- Repérez le compartiment à piles sur la partie inférieure de l'appareil.
- Ouvrez le couvercle du compartiment à piles.
- Insert the required batteries (e.g., 2 x AAA, check unit for specific type) according to the polarity markings (+ and -).
- Fermez soigneusement le couvercle du compartiment à piles.
Note: Batteries are for backup only and will not power the display or radio functions continuously. They preserve time and alarm settings during a power interruption.
Mode d'emploi
1. Réglage de l'heure
- Appuyez et maintenez enfoncé le RÉGLAGE DE L'HEURE appuyez sur le bouton jusqu'à ce que l'écran clignote.
- Utilisez le HEURE et MINUTE boutons pour régler l'heure.
- Presse RÉGLAGE DE L'HEURE à nouveau pour confirmer et quitter le mode de réglage de l'heure.
2. Réglage des alarmes (Alarme 1 et Alarme 2)
This unit features dual alarms, allowing you to set two independent wake-up times.
- Appuyez et maintenez enfoncé le ALARME 1 ENSEMBLE (ou ALARME 2 ENSEMBLE) appuyez sur le bouton jusqu'à ce que l'heure de l'alarme clignote.
- Utilisez le HEURE et MINUTE boutons permettant de régler l'heure de l'alarme souhaitée.
- Presse ALARME 1 ENSEMBLE (ou ALARME 2 ENSEMBLE) à nouveau pour confirmer l'heure.
- Immediately after confirming the time, use the MODE D'ALARME button to select the alarm source: AVERTISSEUR SONORE or RADIO.
- The alarm icon (e.g., AL1 or AL2) will appear on the display, indicating the alarm is active.
To turn off an alarm, press the corresponding ALARME 1 MARCHE/ARRÊT (ou ALARME 2 MARCHE/ARRÊT) button. The alarm icon will disappear.
3. Fonctionnement de la radio AM/FM
- Appuyez sur le RADIO MARCHE/ARRÊT bouton pour allumer la radio.
- Appuyez sur le GROUPE bouton permettant de basculer entre les bandes AM et FM.
- Utilisez le RÉGLER + or MÉLODIE - boutons permettant de régler manuellement la station souhaitée.
- To automatically scan for the next available station, press and hold RÉGLER + or MÉLODIE - pendant quelques secondes.
- Réglez le volume à l'aide de la VOLUME + or LE VOLUME - boutons.
- Pour éteindre la radio, appuyez sur la RADIO MARCHE/ARRÊT Appuyez à nouveau sur le bouton.
4. Fonction Snooze
Lorsqu'une alarme retentit, appuyez sur le ROUPILLON Appuyez sur le bouton pour couper temporairement l'alarme pendant environ 9 minutes. L'alarme sonnera de nouveau après cette période.
5. Fonction sommeil
The sleep function allows the radio to play for a set duration before automatically turning off.
- Pendant que la radio est allumée, appuyez sur DORMIR appuyez plusieurs fois sur le bouton pour faire défiler les durées de sommeil disponibles (par exemple, 90, 60, 30, 15 minutes, OFF).
- La radio s'éteindra automatiquement après la durée sélectionnée.
Entretien
1. Nettoyage
To clean the unit, wipe the exterior with a soft, slightly damp cloth. Do not use abrasive cleaners or solvents, as these may damage the finish. Ensure the unit is unplugged before cleaning.
2. Remplacement de la batterie
If the battery backup function is not working, or if the unit loses time during a power outage, the backup batteries may need replacement. Follow the "Battery Backup Installation" steps in the Setup section to replace them.
Dépannage
| Problème | Cause possible | Solution |
|---|---|---|
| L'unité ne s'allume pas. | Adaptateur secteur non connecté ou prise défectueuse. | Vérifiez que l'adaptateur secteur est bien branché à l'appareil et à une prise murale fonctionnelle. Essayez une autre prise. |
| L'alarme ne sonne pas. | Alarme non réglée, volume trop faible ou alarme désactivée. | Verify alarm time and source (buzzer/radio) are set correctly. Ensure alarm is activated (icon visible). Increase radio volume if alarm source is radio. |
| Mauvaise réception radio. | Signal faible ou interférences. | Adjust the position of the unit or the antenna (if external). Move away from other electronic devices that may cause interference. |
| Perte de l'heure et des paramètres suite à une coupure de couranttage. | Les batteries de secours sont déchargées ou non installées. | Install fresh backup batteries or replace existing ones. |
Caractéristiques
- Modèle: C224B
- Source d'alimentation : AC 120V, 60Hz (main); Battery Powered (backup)
- Type d'affichage : Affichage numérique à LED
- Bandes radio : AM/FM
- Dimensions (environ): 5.12 po L x 5.12 po H
- Poids (environ): 3 livres
- Couleur: Noir
- Matériel: Plastique
Garantie et assistance
For warranty information or technical support, please refer to the warranty card included with your product or visit the official GPX website. Do not attempt to repair this unit yourself, as this may void your warranty.
GPX Officiel Website: www.gpx.com


