1. Introduction
This manual provides essential information for the safe and efficient operation of your ANSMANN Future 3in1 LED Flashlight. Please read these instructions carefully before using the product and retain them for future reference.
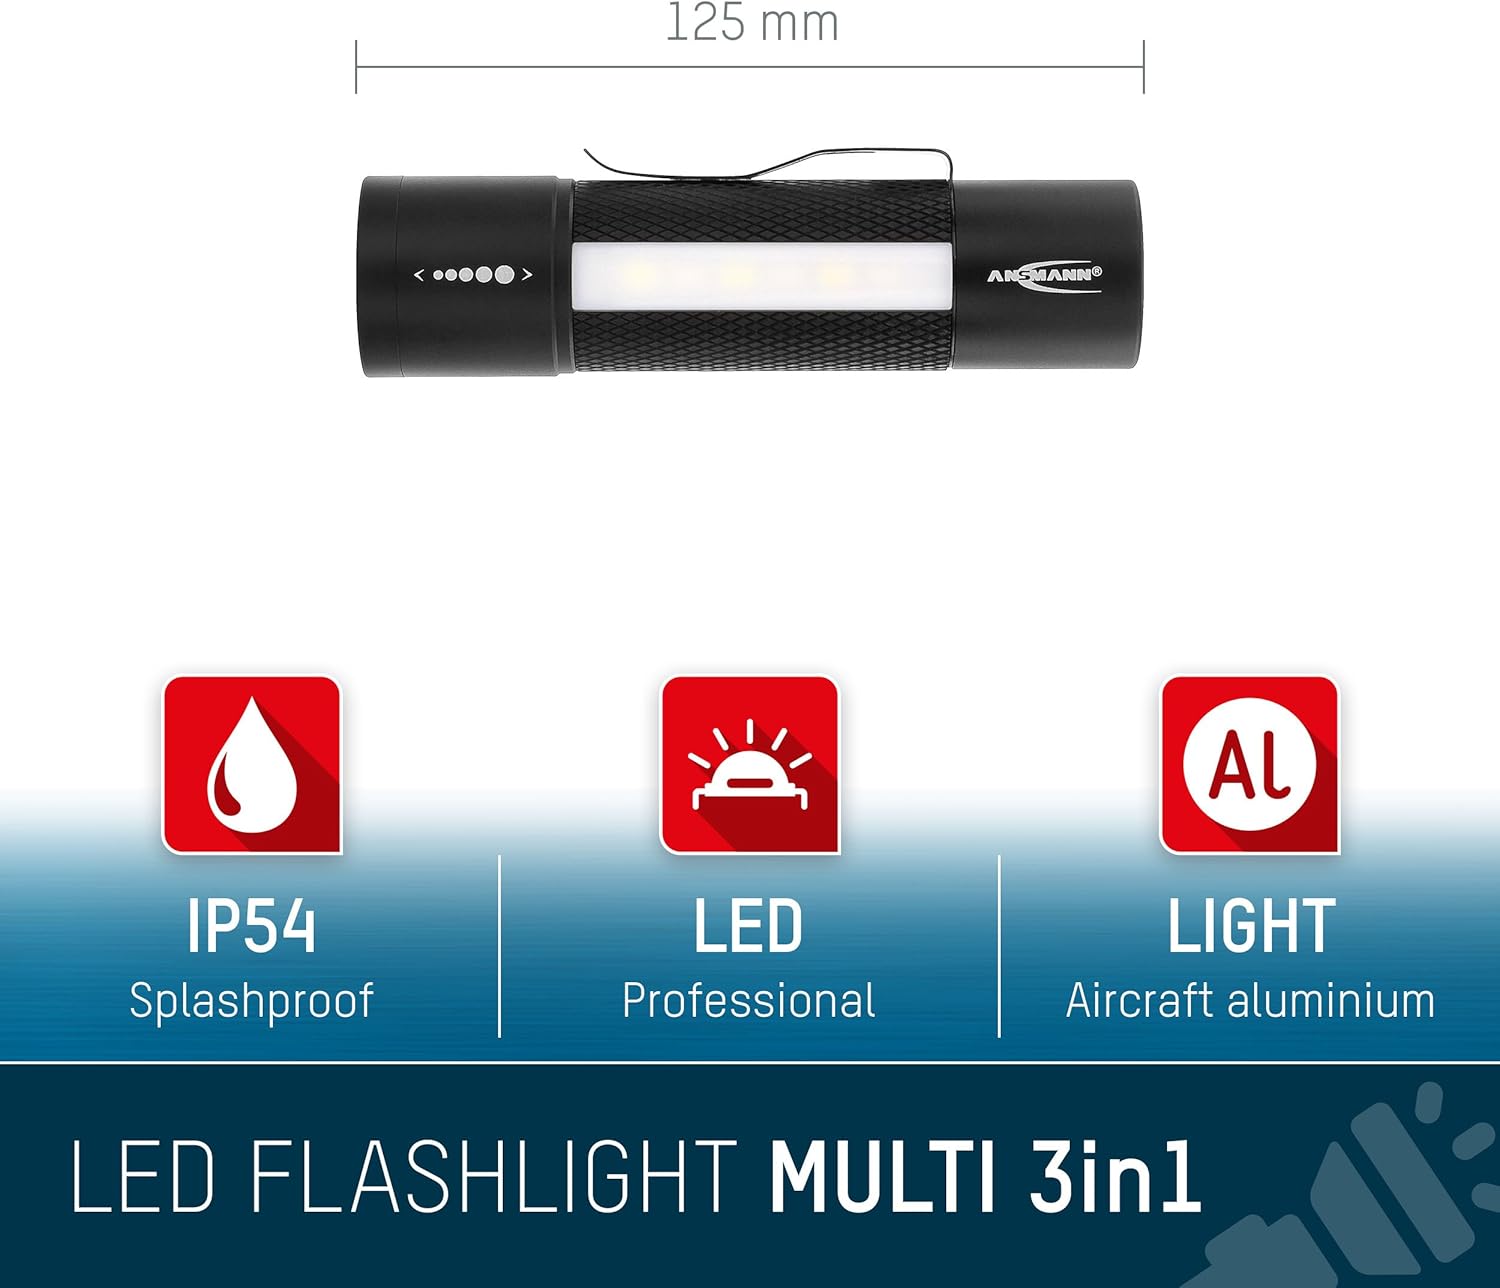
Figure 1: ANSMANN Future 3in1 LED Flashlight overview, highlighting its compact size, IP54 splashproof rating, professional LED, and aircraft-grade aluminum construction.
2. Consignes de sécurité
Respectez les consignes de sécurité suivantes afin d'éviter toute blessure ou tout dommage au produit :
- Do not look directly into the LED beam. The intense light can cause temporary vision impairment or eye damage.
- Ensure batteries are inserted with correct polarity (+/-). Incorrect insertion can damage the device.
- Ne mélangez pas des piles anciennes et neuves, ou différents types de piles.
- Retirez les piles si la lampe torche n'est pas utilisée pendant une période prolongée afin d'éviter les fuites.
- This flashlight is IP54 rated, meaning it is protected against dust ingress and splashing water. It is not designed for submersion in water.
- Tenir hors de portée des enfants.
3. Produit terminéview
The ANSMANN Future 3in1 LED Flashlight features a robust aluminum housing and offers three distinct lighting functions:
- Main LED Beam: Located at the front, with adjustable focus.
- Side Work Light: A bright white LED panel on the side for area illumination.
- Side Signal Light: A red LED panel on the side for warning or signaling purposes.
Additional features include a powerful magnetic base for hands-free operation and a sturdy pocket clip.

Figure 2: The seamless optic focusing system allows for quick adjustment of the light beam.
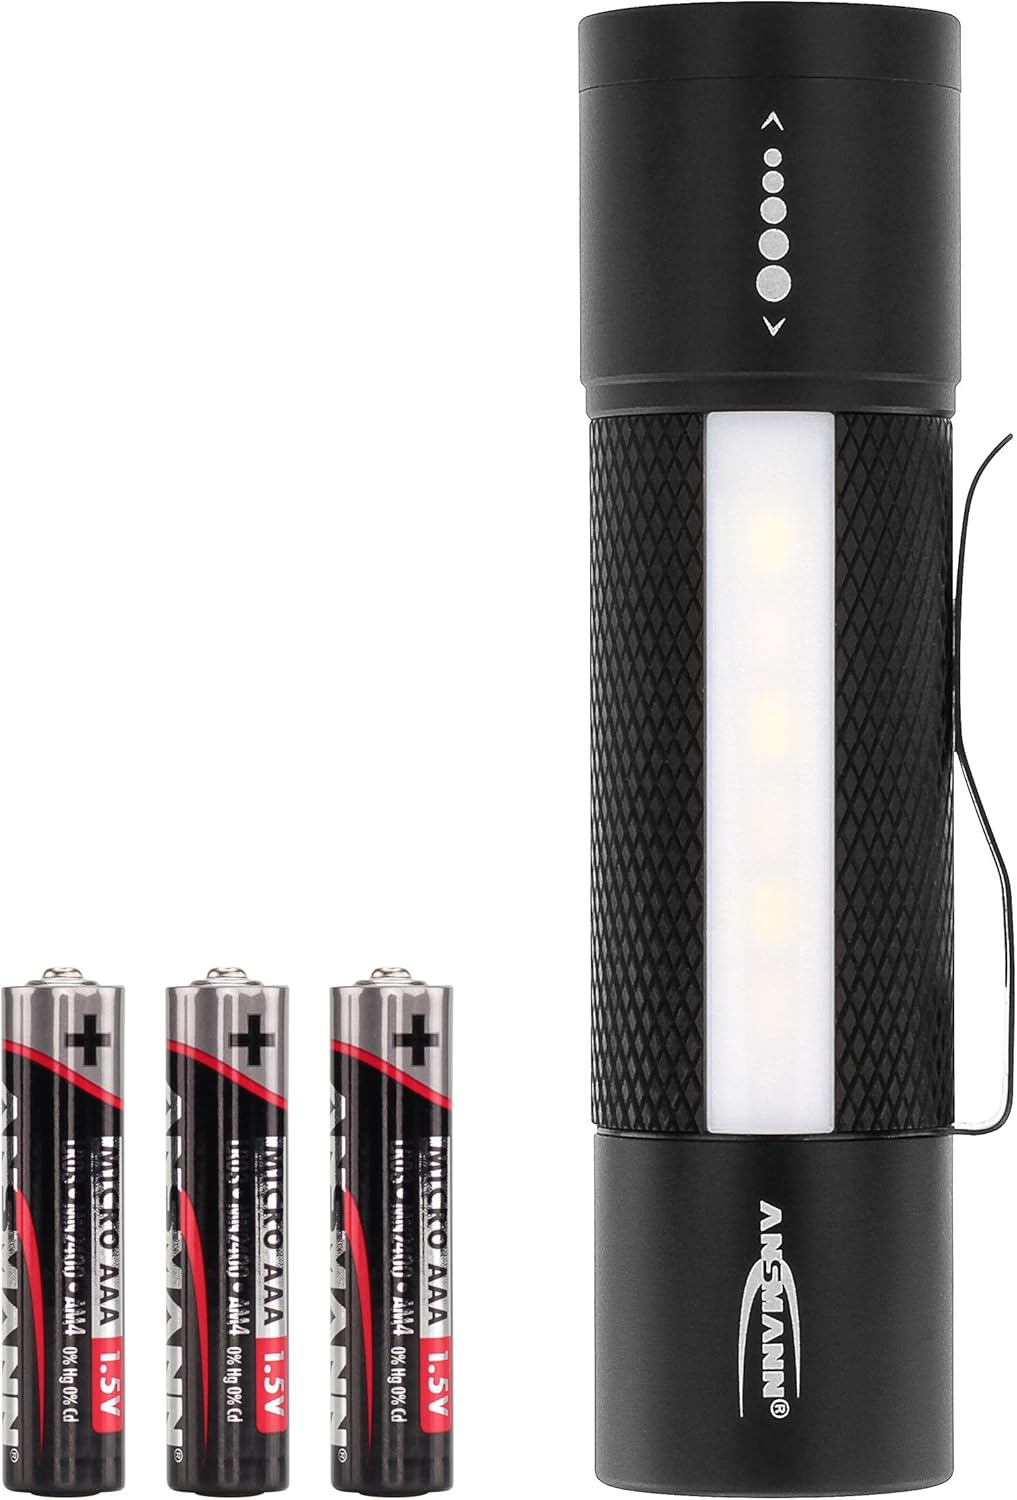
Figure 3: The powerful magnetic base enables convenient hands-free operation by attaching to metal surfaces.
4. Installation
4.1. Installation de la batterie
- Unscrew the end cap of the flashlight by turning it counter-clockwise.
- Insert three (3) AAA 1.5V alkaline batteries into the battery holder, ensuring correct polarity (+ and -) as indicated inside the holder.
- Carefully reinsert the battery holder into the flashlight body.
- Screw the end cap back on clockwise until it is securely tightened.

Figure 4: Battery compartment with the end cap removed, showing the battery holder for three AAA batteries.
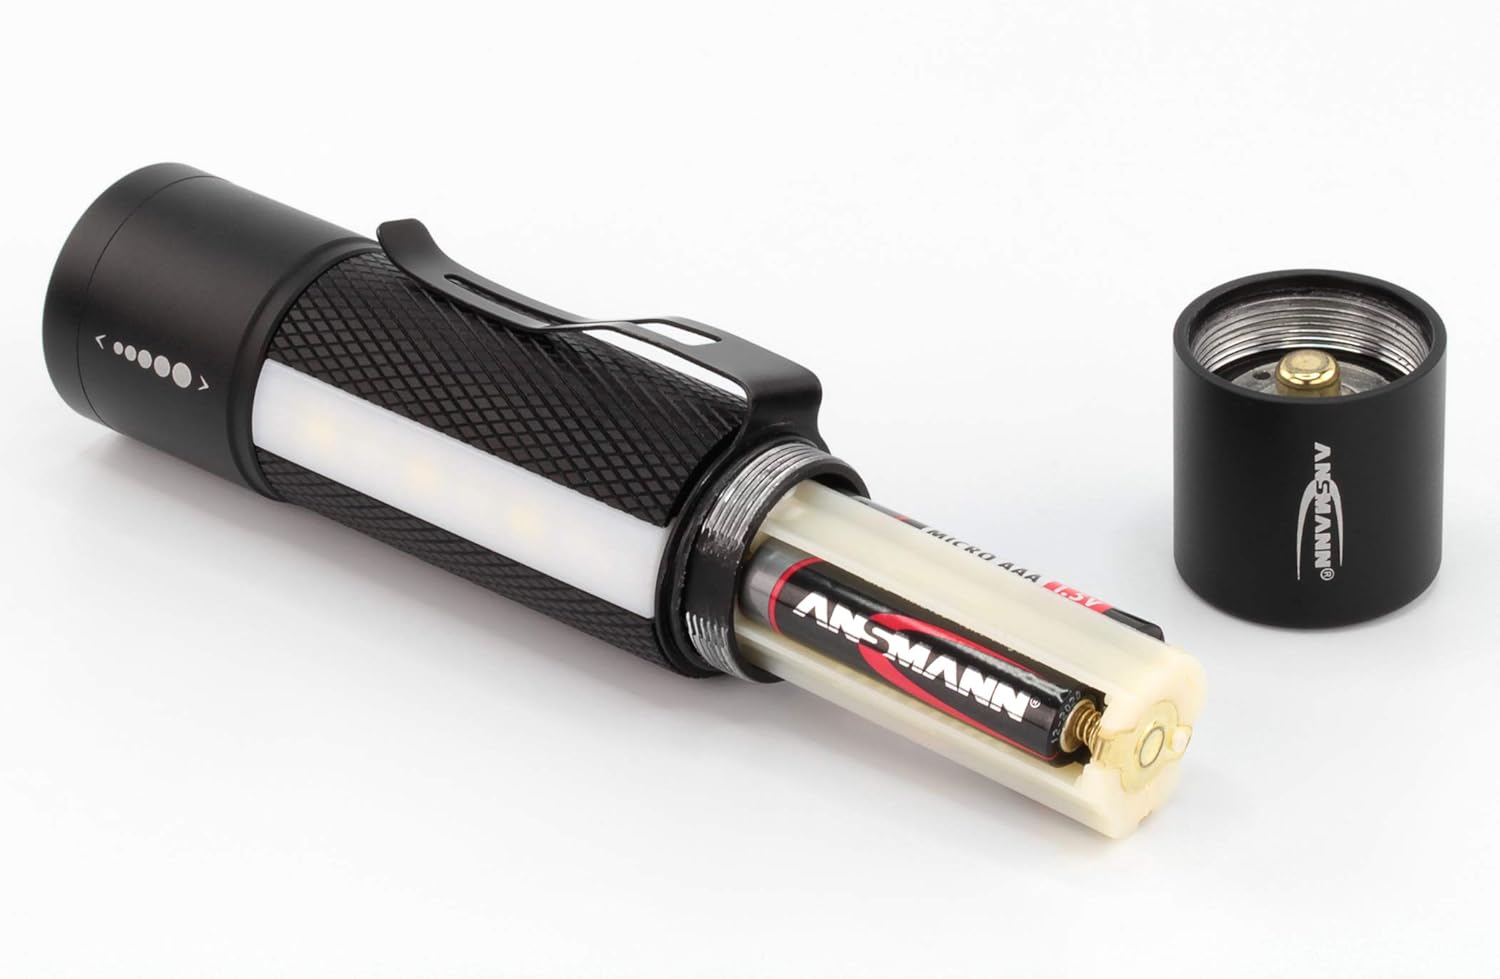
Figure 5: The flashlight requires three AAA batteries for operation.
5. Mode d'emploi
5.1. Marche/Arrêt et sélection du mode
The flashlight features a single button located on the end cap to cycle through its functions:
- Première presse : Activates the main LED beam.
- Deuxième pression : Switches to the white side work light.
- Troisième pression : Switches to the red side signal light.
- Quatrième presse : Éteint la lampe torche.
- Départ rapide : To turn off the flashlight from any mode, press and hold the button for approximately 2 seconds.

Figure 6: The main LED beam provides powerful illumination for various tasks.

Figure 7: The white side work light is ideal for close-range illumination and hands-free tasks.

Figure 8: The red side signal light can be used for emergencies or to maintain night vision.
5.2. Réglage de la mise au point
To adjust the focus of the main LED beam, simply slide the head of the flashlight forward or backward. Sliding it forward narrows the beam for a focused spot, while sliding it backward widens the beam for a broad floodlight.
6. Entretien
- Nettoyage: Essuyez le corps de la lampe de poche avec un chiffon doux et sec.amp chiffon. N'utilisez pas de nettoyants abrasifs ou de solvants.
- Entretien de la batterie: Always replace all three AAA batteries simultaneously with new, identical batteries. Do not attempt to recharge non-rechargeable batteries.
- Stockage: If the flashlight will not be used for an extended period, remove the batteries to prevent potential leakage and damage. Store in a cool, dry place.
7. Dépannage
| Problème | Cause possible | Solution |
|---|---|---|
| La lampe de poche ne s'allume pas. | Les piles sont déchargées ou mal insérées. | Remplacez les piles par des neuves en respectant la polarité. |
| La lumière est faible ou vacille. | Les piles sont faibles. | Remplacez toutes les piles par des neuves. |
| Mode switching is inconsistent. | Button not pressed firmly or quickly enough. | Ensure firm and distinct presses of the power button. |
8. Spécifications
| Marque | ANSMANN |
| Numéro de modèle | 1600-0137 |
| Dimensions (L x l x H) | 12.55 x 3.3 x 3.3 cm |
| Poids | 183 g |
| Source d'énergie | 3 piles alcalines AAA 1.5 V (incluses) |
| Source de lumière | DIRIGÉ |
| Luminous Flux (Main Beam) | 180 lumens |
| Distance du faisceau | Jusqu'à 130 mètres |
| Durée d'exécution | Jusqu'à 11 XNUMX heures |
| Pouvoir | 3 watts |
| Indice de protection IP | IP54 (résistant aux éclaboussures) |
| Matériel | Aluminium de qualité aéronautique |
| Caractéristiques spéciales | Stepless focus, White side work light, Red side signal light, Magnetic base, Pocket clip |

Figure 9: Product packaging illustrating key features and the 3-year warranty.
9. Garantie et assistance
9.1. Informations sur la garantie
The ANSMANN Future 3in1 LED Flashlight is covered by a Garantie constructeur d'un an À compter de la date d'achat. Cette garantie couvre les défauts de matériaux et de fabrication dans des conditions normales d'utilisation. Veuillez conserver votre preuve d'achat pour toute réclamation au titre de la garantie.
9.2. Assistance clientèle
For technical support, warranty claims, or any questions regarding your ANSMANN Future 3in1 LED Flashlight, please contact ANSMANN customer service:
- E-mail: info@ansmann.de
- EPREL Product Information: https://eprel.ec.europa.eu/qr/721168


