1. Produit terminéview
The Hecht Jardin 256 is a universal spreader designed for precise and efficient distribution of various granular materials. Its robust construction and user-friendly design make it suitable for year-round use in gardens and outdoor areas.
Utilisation prévue : This spreader is designed for the controlled application of:
- Engrais
- Graines
- Winter Salt
- Winter Gravel

Figure 1 : Face avant view of the Hecht Jardin 256 Universal Spreader, showing the hopper, wheels, and handle.
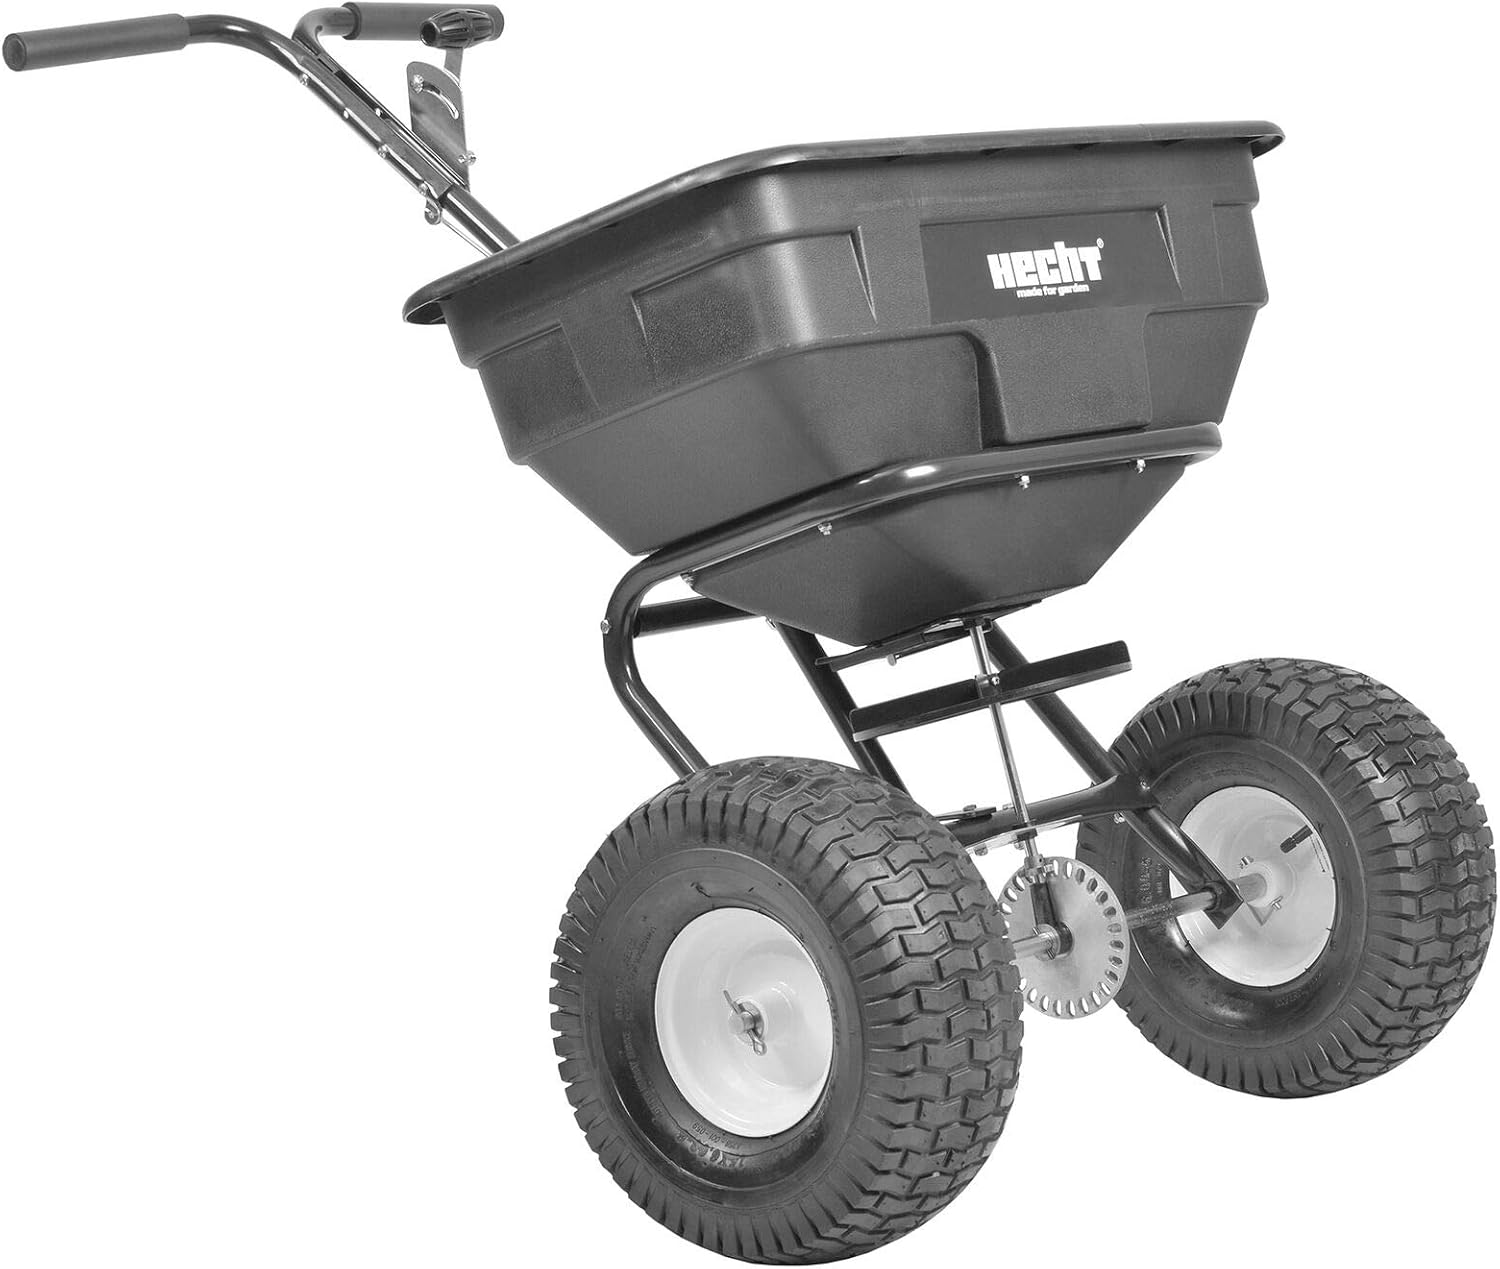
Figure 2 : Côté view of the Hecht Jardin 256 Universal Spreader, highlighting its overall structure and large pneumatic tires.
2. Consignes de sécurité
- Lire l'intégralité du manuel avant l'assemblage et l'utilisation.
- Portez un équipement de protection individuelle (EPI) approprié, tel que des gants et une protection oculaire.
- Ensure the spreader is stable on level ground before filling or adjusting.
- Gardez les enfants et les animaux domestiques éloignés de la zone d’opération.
- Do not overload the hopper beyond its specified capacity.
- Clean the spreader thoroughly after each use, especially when using corrosive materials like salt.
3. Assemblage
The Hecht Jardin 256 spreader requires some assembly. Follow these steps carefully:
- Déballer les composants : Retirez soigneusement toutes les pièces de l'emballage. Vérifiez que tous les composants mentionnés dans la liste de colisage sont présents.
- Fixez les roues : Secure the pneumatic wheels to the axle using the provided hardware. Ensure they are firmly attached and rotate freely.
- Assemblage du cadre : Connect the handle assembly to the main frame. Use the bolts and nuts provided, tightening them securely.
- Mount Hopper: Place the 60-liter plastic hopper onto the frame and secure it with the designated fasteners. Ensure the agitator mechanism aligns correctly with the spreading plate.
- Install Control Lever: Attach the control lever to the handle assembly. Connect the control cable to the spreading mechanism, ensuring smooth operation of the flow regulation.
- Insert Sieve and Cover: Place the sieve inside the hopper to prevent clumping of materials. Position the cover over the hopper to protect contents from moisture and debris.

Figure 3 : Dessous view illustrating the axle, wheels, and the spreading mechanism assembly. Ensure all connections are secure.
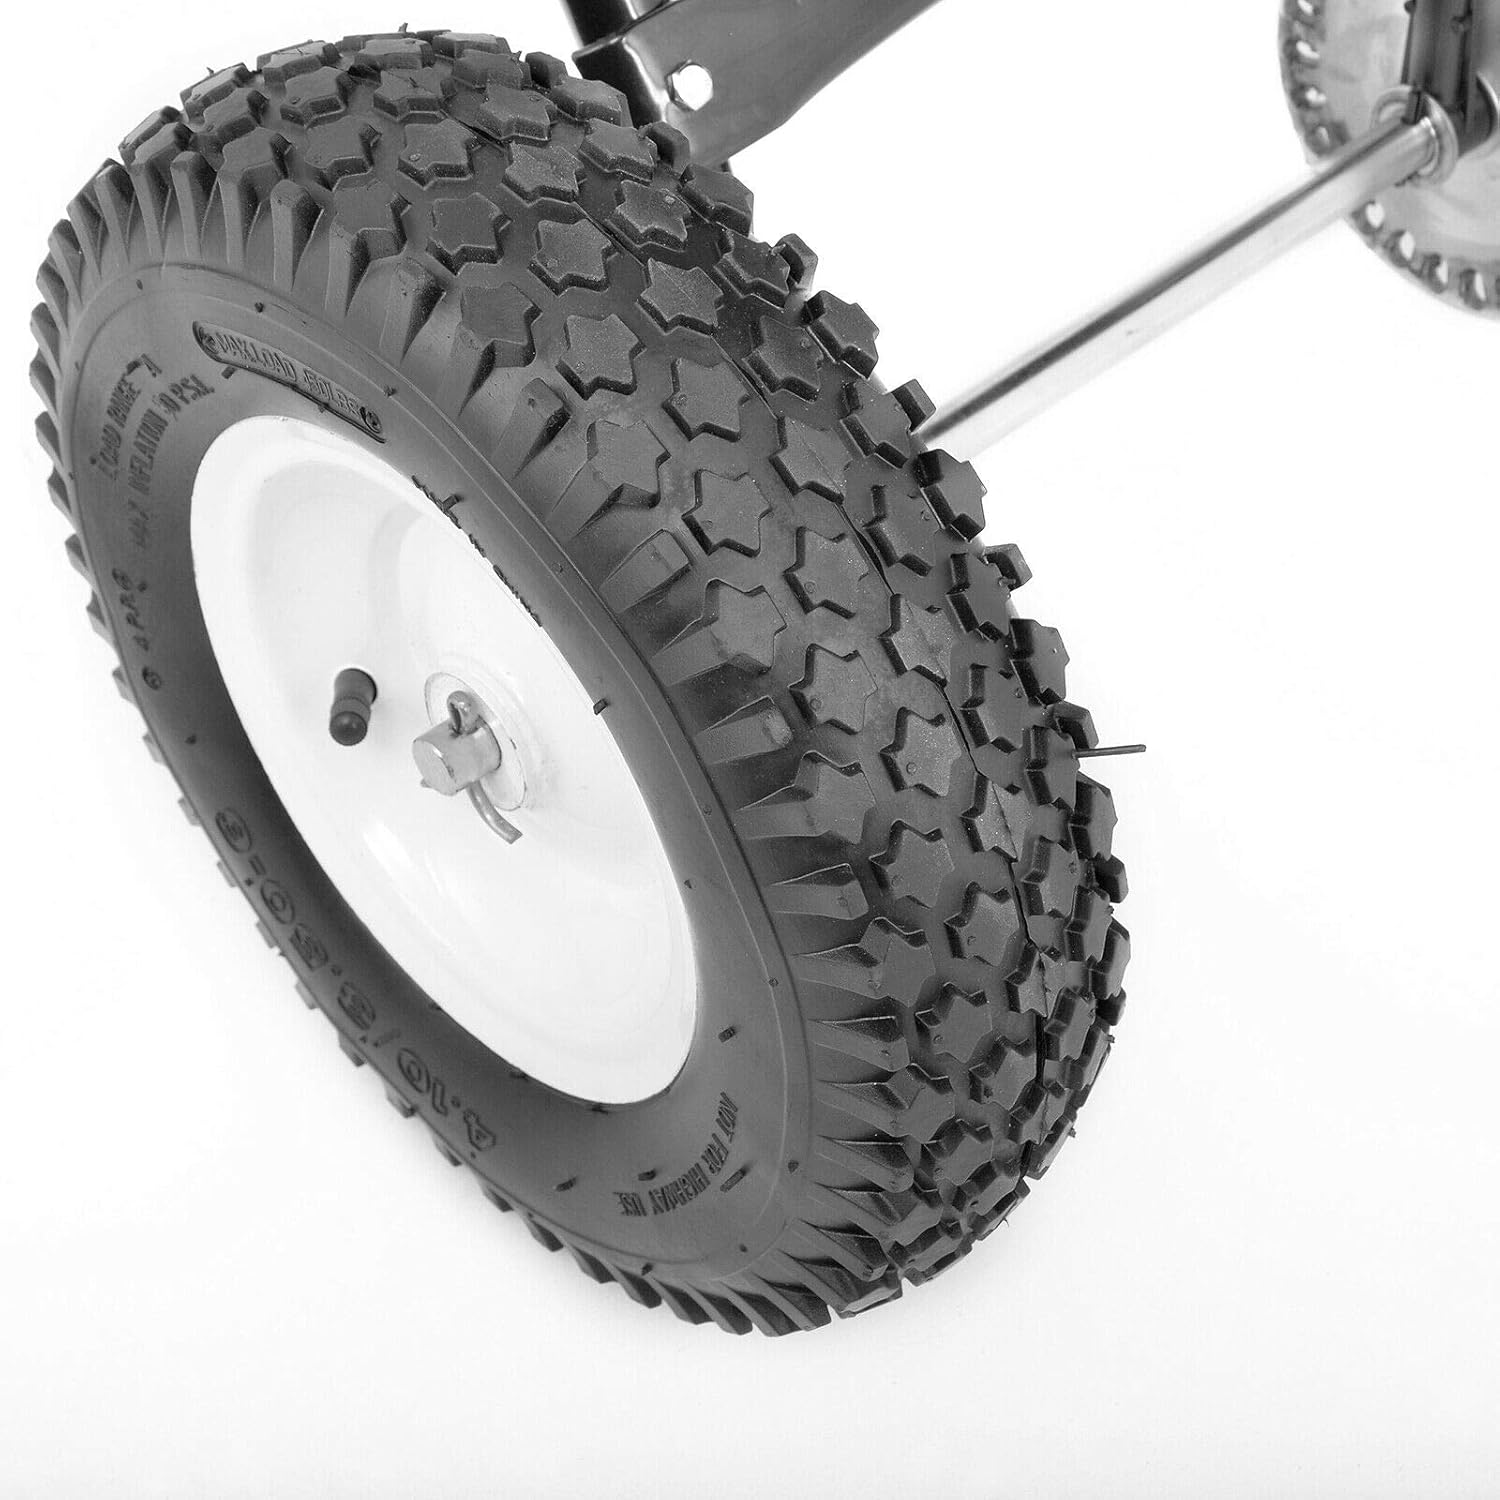
Figure 4: Close-up of one of the large pneumatic tires, which contribute to smooth operation.
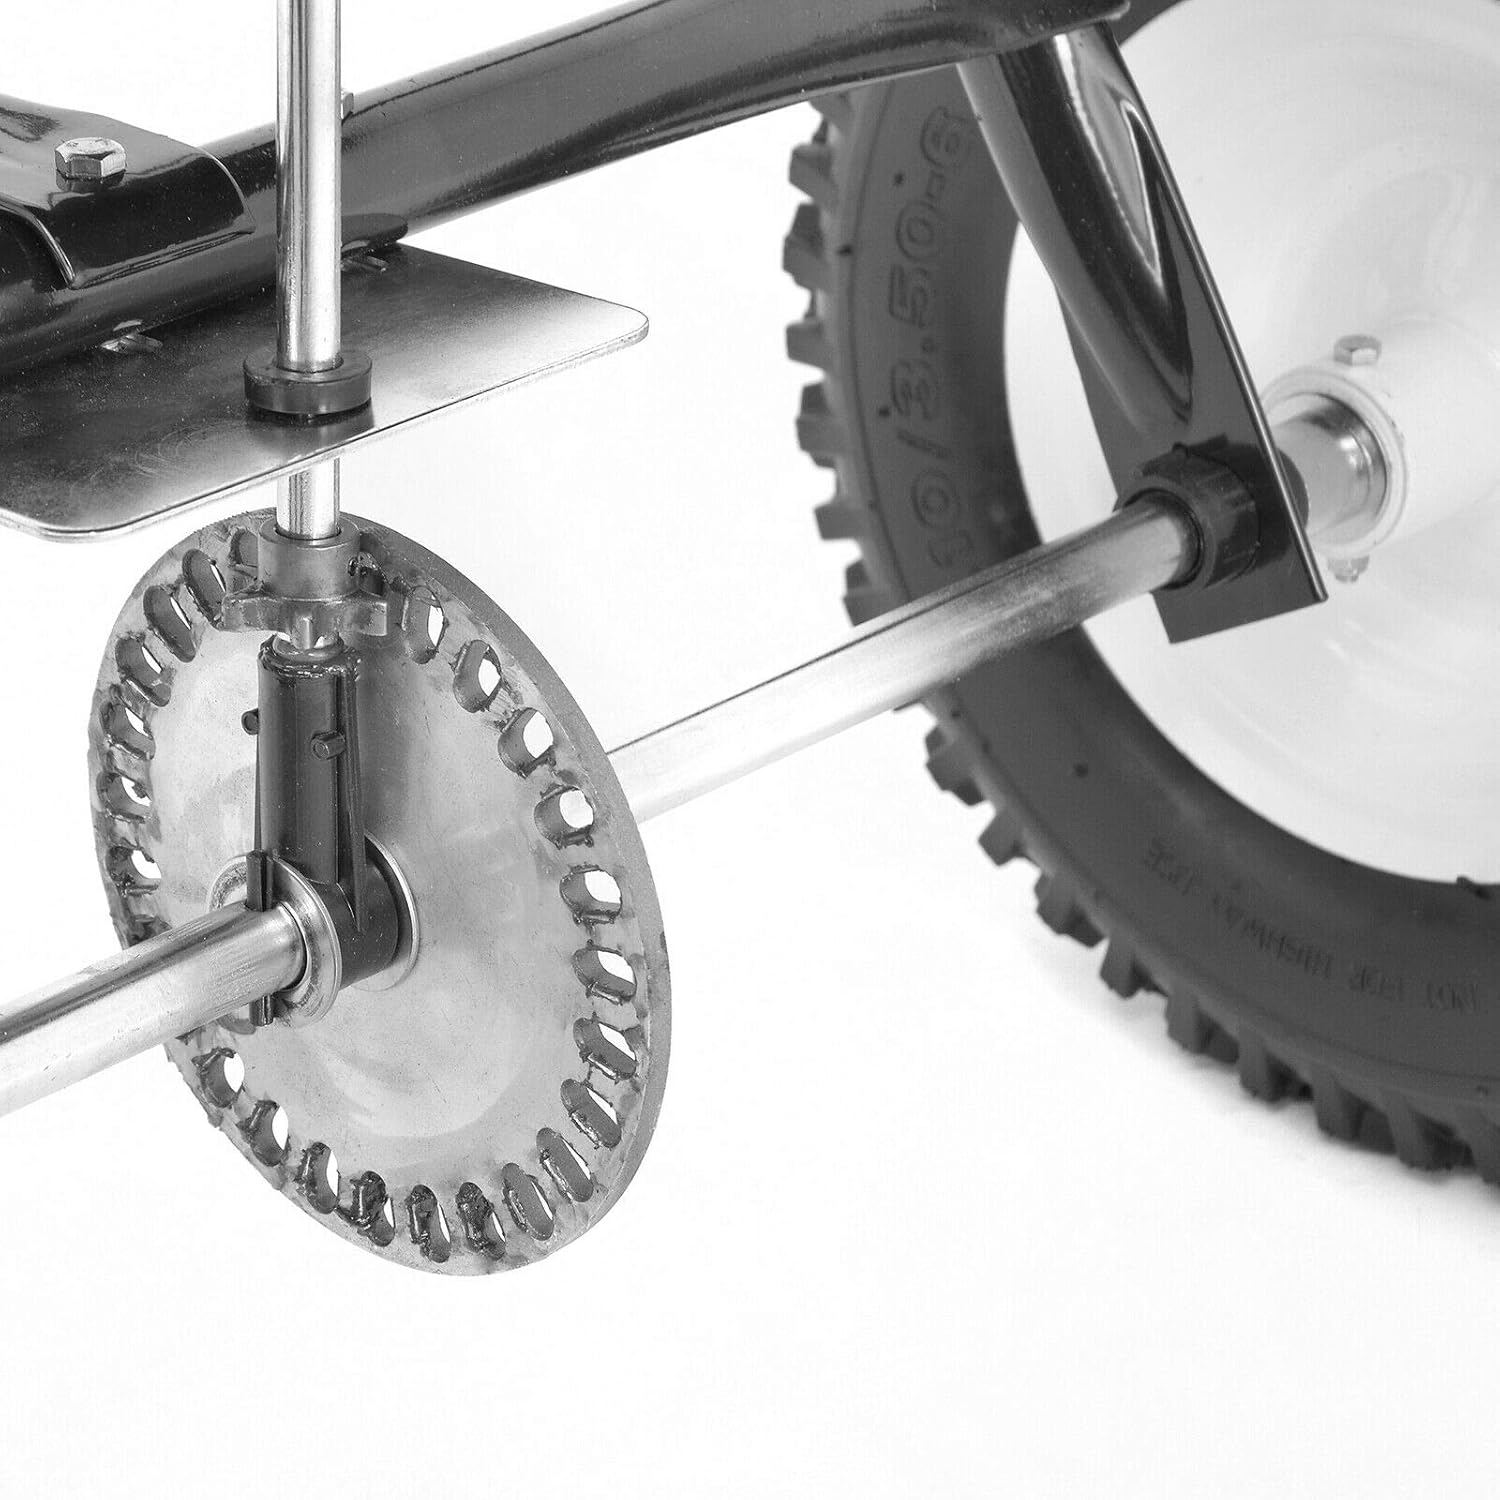
Figure 5 : Détaillé view of the gear and spreading plate mechanism. Verify that the agitator rod is properly seated.
4. Mode d'emploi
Follow these steps for effective operation of your Hecht Jardin 256 spreader:
- Préparer le matériel : Ensure the material (fertilizer, seeds, salt, gravel) is dry and free of large clumps. Use the included sieve to break up any aggregates before filling.
- Trémie de remplissage : Open the hopper cover and carefully pour the material into the 60-liter hopper. Do not overfill.
- Adjust Spreading Rate: Use the control lever on the handle to set the desired spreading quantity. Refer to the markings on the lever for guidance. A lower setting will result in a finer, more controlled spread.
- Commencez à répandre : Start walking at a consistent pace. As you push the spreader, the wheels will turn, activating the spreading mechanism. The agitator ensures a continuous flow of material.
- Maintenir une vitesse constante : A steady walking speed is crucial for uniform distribution.
- Stop Spreading: To stop the flow of material, pull the control lever to the closed position. This should be done before turning or stopping to prevent uneven application.

Figure 6: Close-up of the ergonomic handle, designed for comfortable pushing and control.

Figure 7 : Détaillé view of the control lever for adjusting the spreading rate. The lever includes an adjustable stop for precise flow limitation.
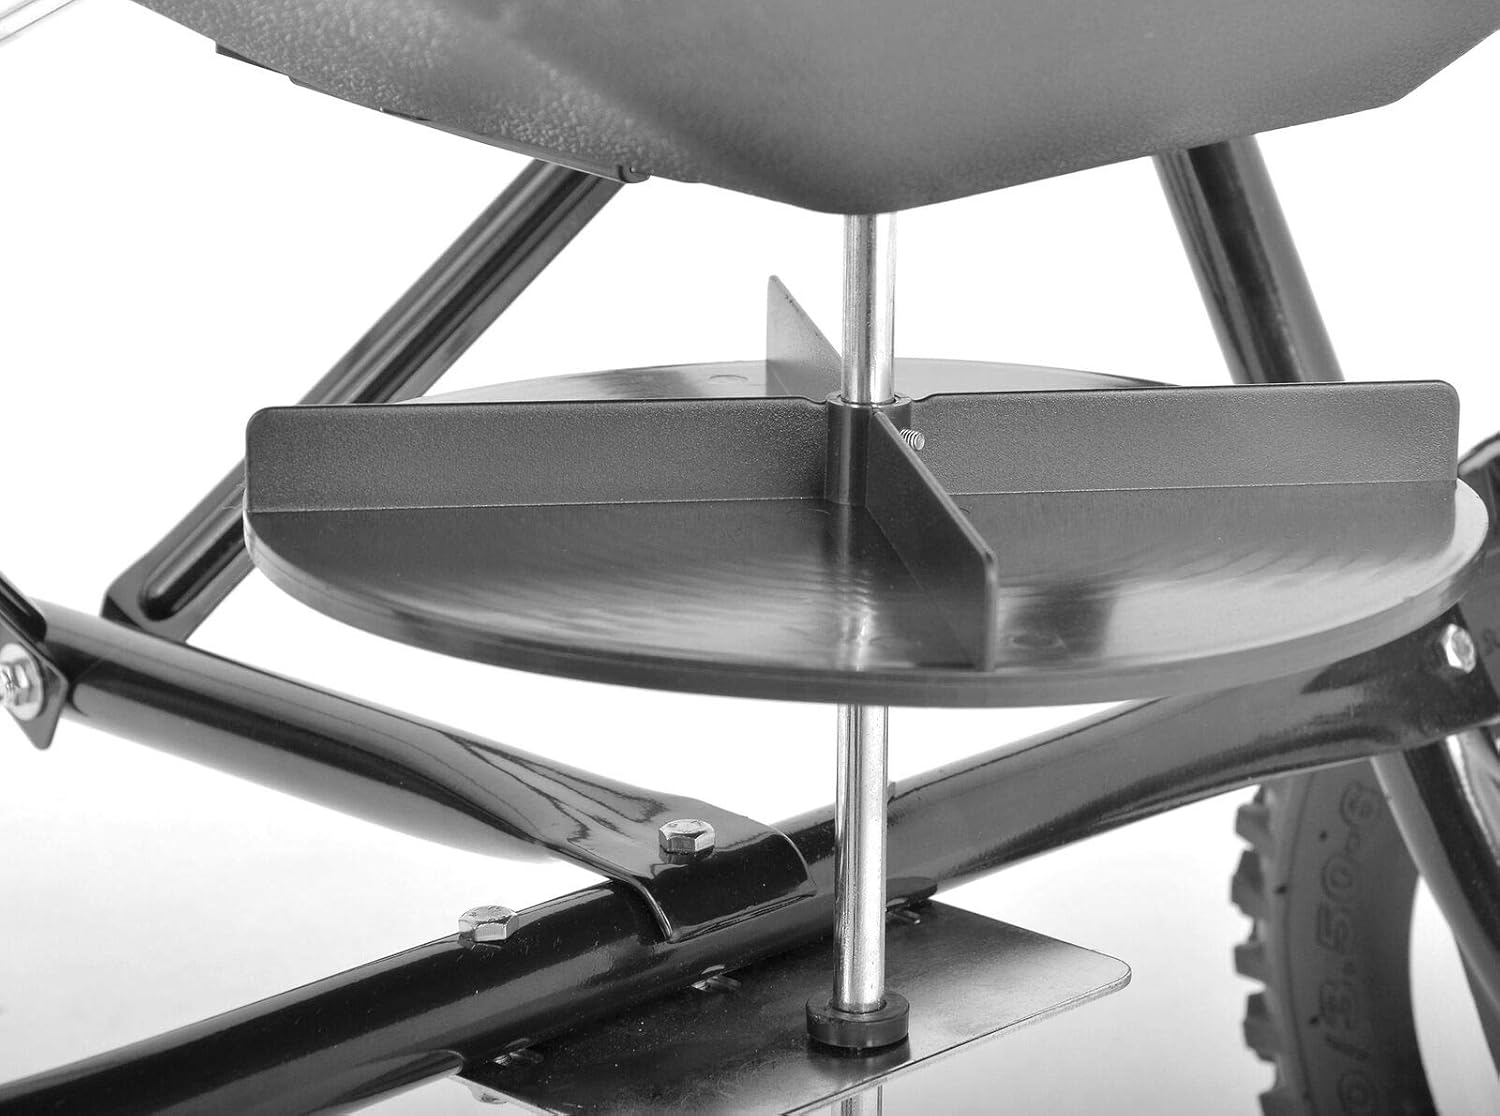
Figure 8 : View of the agitator mechanism above the spreading plate, ensuring consistent material flow and preventing clumping.

Figure 9 : Haut view of the hopper, showing the integrated sieve designed to filter out large particles and prevent blockages.
5. Entretien
Un entretien régulier garantit la longévité et les performances optimales de votre épandeur.
- Nettoyage: After each use, especially with corrosive materials like salt, thoroughly clean the hopper, spreading mechanism, and wheels with water. Dry all metal parts to prevent rust.
- Lubrification: Periodically lubricate moving parts such as the axle and gear mechanism with a suitable lubricant to ensure smooth operation.
- Stockage: Store the spreader in a dry, covered area to protect it from weather elements.
- Inspection: Regularly inspect all bolts, nuts, and connections for tightness. Tighten any loose fasteners. Check tires for proper inflation and wear.
6. Dépannage
| Problème | Cause possible | Solution |
|---|---|---|
| Material not spreading |
|
|
| Étendue inégale |
|
|
| Les roues ne tournent pas correctement |
|
|
7. Spécifications
- Modèle: Hecht 256
- Hopper Volume: 60 litres
- Poids de l'article : 17.3 kg
- Capacité de charge maximale: Approximately 60 kg (based on 60L volume and typical material density)
- Diamètre du pneu: 360 mm
- Largeur du pneu : 130 mm
- Fabricant: Hecht
8. Assistance et garantie
For technical assistance, spare parts, or warranty inquiries, please contact your local Hecht service center or the retailer where the product was purchased.
Note: Information regarding specific spare parts availability may vary by region. Please refer to your purchase documentation for warranty terms and conditions.


