1. Introduction
Merci d'avoir choisi le KOLINK Refractor Midi-Tower computer case. This manual provides essential information for the proper installation, operation, and maintenance of your new PC chassis. Please read this manual carefully before beginning the assembly process to ensure a smooth and safe build.
1.1 Consignes de sécurité
- Débranchez toujours l'alimentation électrique de la prise murale avant d'installer ou de retirer un composant.
- Portez un bracelet antistatique pour éviter les dommages causés par les décharges électrostatiques (ESD) aux composants sensibles.
- Handle components with care. Avoid touching pins or circuit boards directly.
- Gardez les petites pièces et outils hors de portée des enfants.
- Assurez une ventilation adéquate autour du boîtier pour éviter toute surchauffe.
2. Contenu du colis
Veuillez vérifier que tous les éléments suivants sont présents dans votre colis :
- KOLINK Refractor Midi-Tower Chassis
- Boîte d'accessoires (contenant des vis, des entretoises, des serre-câbles, etc.)
- Manuel de l'utilisateur (ce document)
If any items are missing or damaged, please contact your retailer or KOLINK support.
3. Produit terminéview
Familiarize yourself with the key features and components of your KOLINK Refractor Midi-Tower.
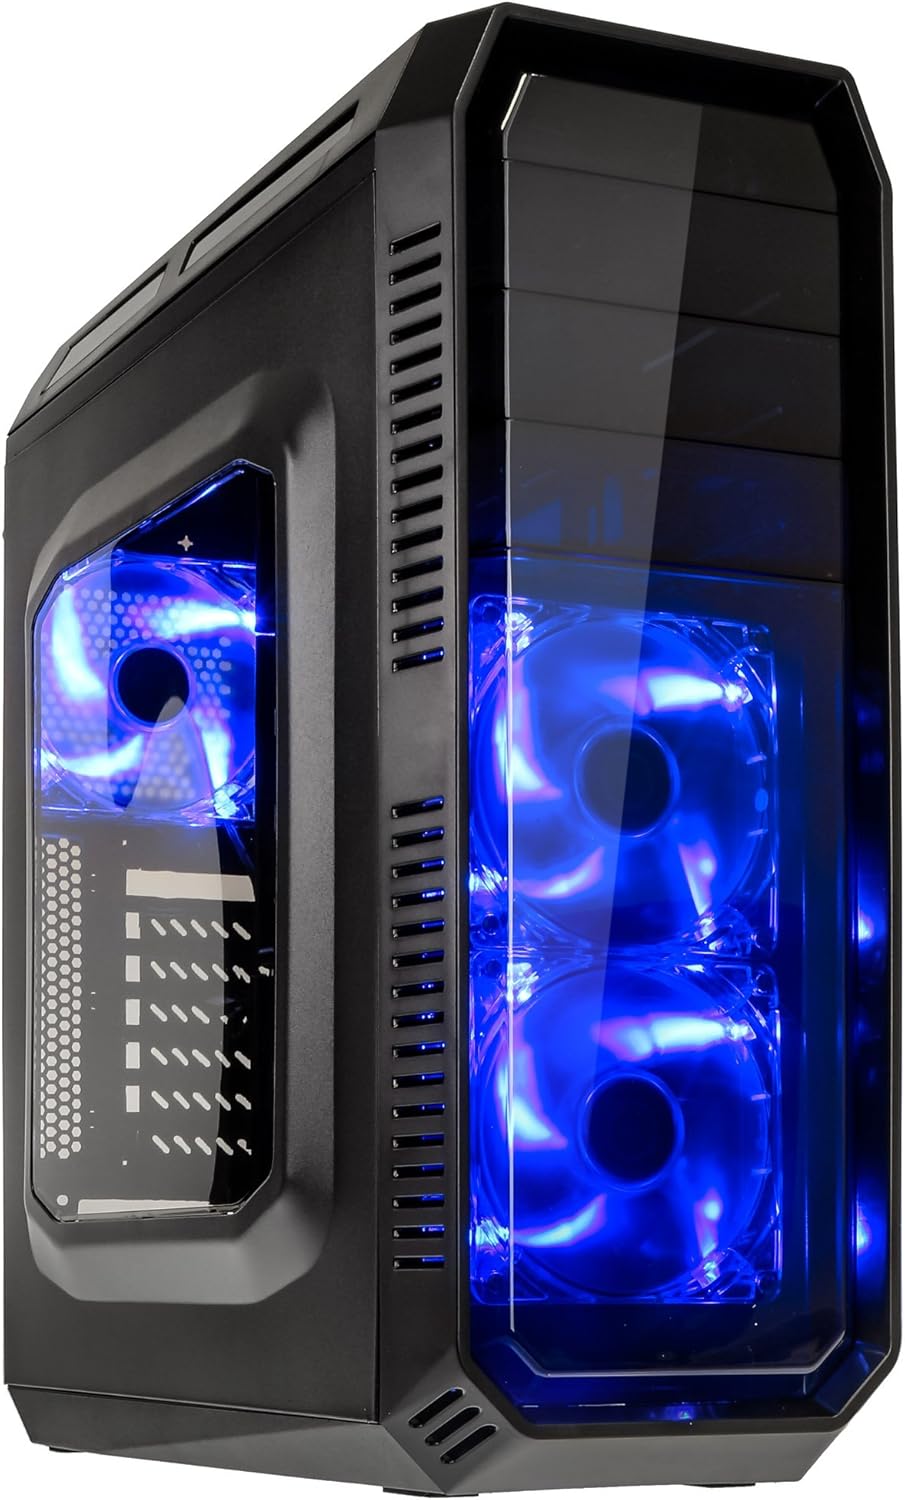
This image displays the KOLINK Refractor Midi-Tower from a front-left perspective, highlighting its sleek black design. The front panel features two pre-installed 120mm blue LED fans, visible through a transparent section, providing both cooling and aesthetic appeal. The left side panel includes a window, allowing visibility of internal components.

Un haut-devant view of the case, illustrating the conveniently located I/O panel on the top. This panel includes two USB 3.0 ports, two USB 2.0 ports, and audio input/output jacks. The top surface also features a mesh area for additional ventilation, contributing to optimal airflow.

This image shows the right side panel of the KOLINK Refractor Midi-Tower. It is a solid black panel, designed for cable management behind the motherboard tray, ensuring a clean and organized interior.

This composite image provides three distinct views of the case. The left panel shows the front with its blue LED fans. The middle panel displays the rear of the case, featuring the motherboard I/O cutout, seven expansion slots, and a 120mm fan mount. The right panel offers a close-up of the top I/O ports, including USB 3.0, USB 2.0, and audio jacks.

A detailed close-up of the top I/O panel. It clearly shows the power and reset buttons, two USB 3.0 ports, two USB 2.0 ports, and the microphone and headphone jacks, providing easy access for peripherals.
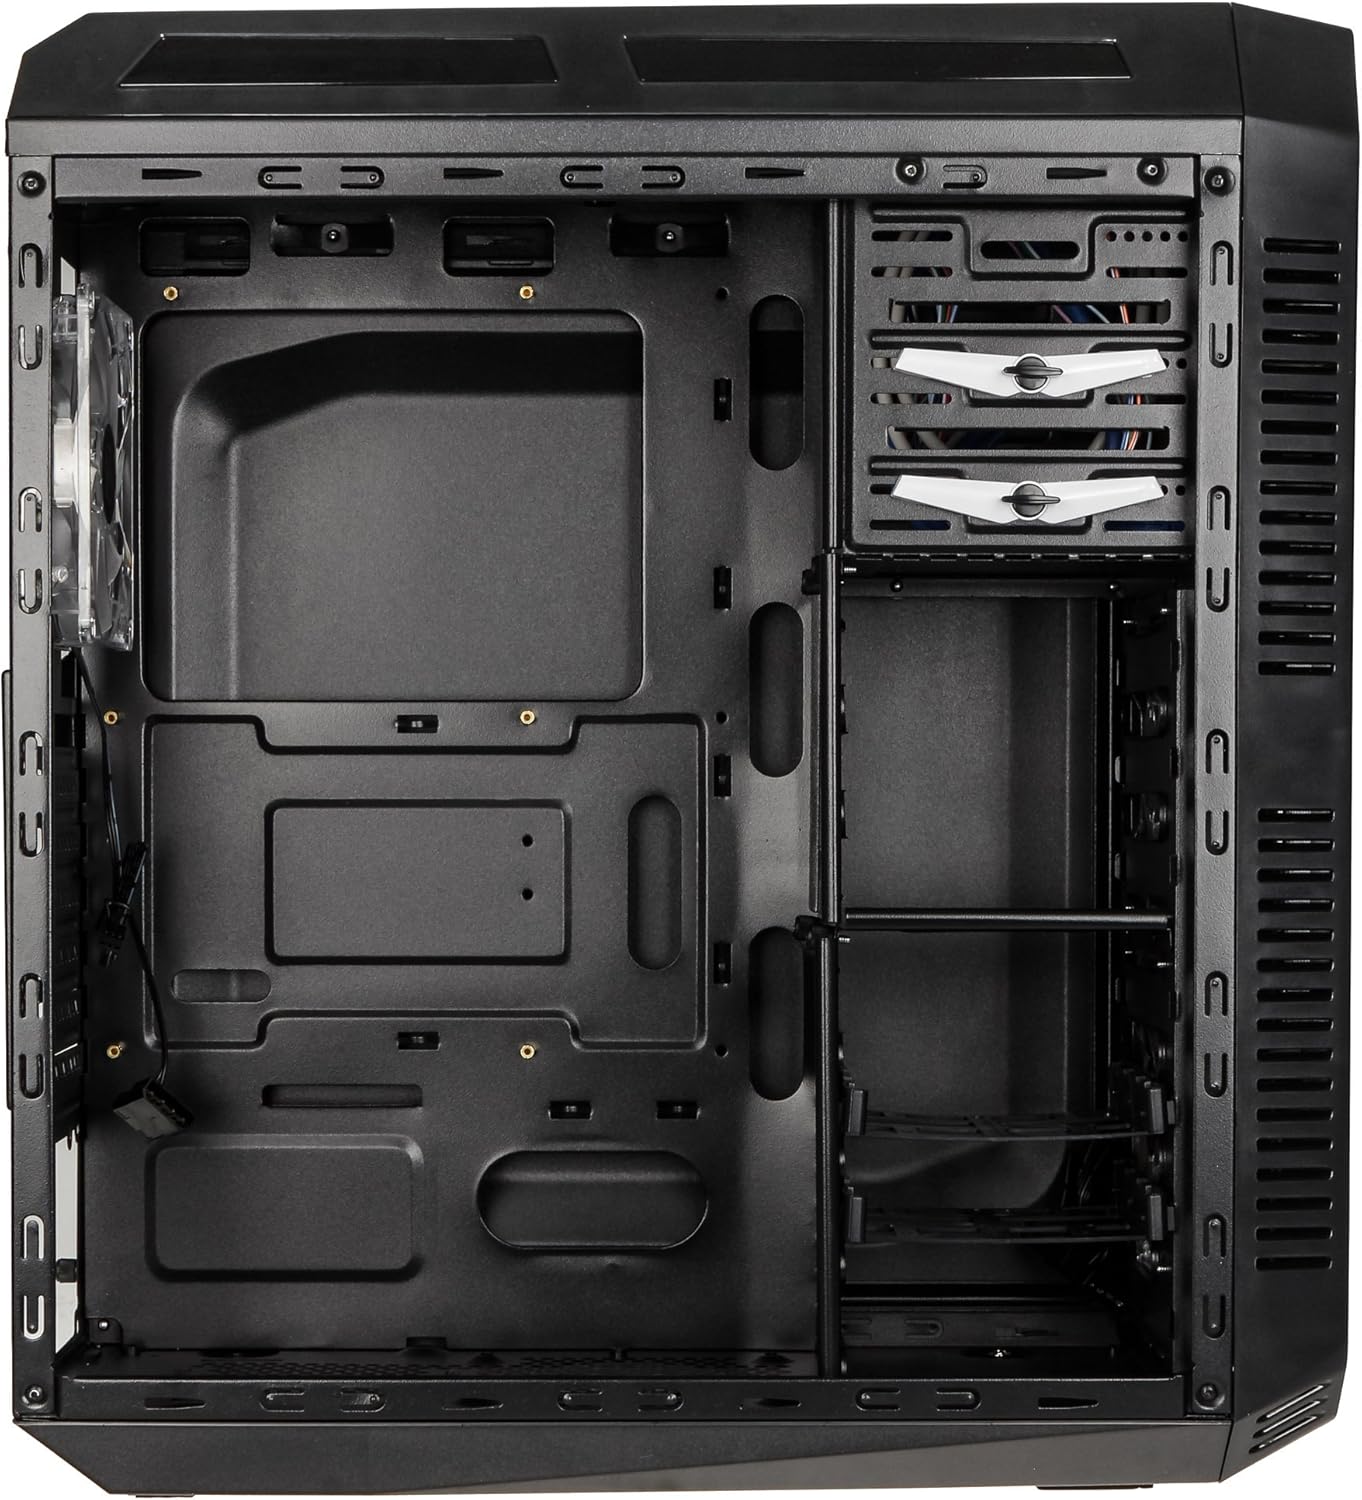
This image presents the interior of the case from the left side, revealing the spacious motherboard tray compatible with ATX motherboards. It features a large cutout behind the CPU area for easy cooler installation and multiple grommeted holes for efficient cable routing.

Un interne view from the right side, focusing on the drive bay configuration. The case offers three external 5.25-inch bays and seven internal 2.5/3.5-inch drive bays, providing ample storage expansion options.

A closer look at the internal drive bays, illustrating the design for mounting 2.5-inch or 3.5-inch storage drives. These bays are designed for easy installation and removal of hard drives and SSDs.

Cette image fournit une vue interne view looking down from the top, showcasing the pre-installed 120mm blue LED fan at the rear for exhaust. The top panel's mesh area for additional fan mounting is also visible, contributing to overall system cooling.
4. Configuration et installation
Follow these steps to install your computer components into the KOLINK Refractor Midi-Tower.
4.1 Préparation du dossier
- Placez l'étui sur une surface plane et stable.
- Remove the left and right side panels by unscrewing the thumbscrews at the rear of the case and sliding the panels backward.
4.2 Installation de la carte mère
- Installez la plaque d'E/S fournie avec votre carte mère dans l'ouverture prévue à l'arrière du boîtier.
- Ensure the correct motherboard standoffs are installed for your ATX motherboard. Adjust or add standoffs as necessary using the provided accessory kit.
- Placez soigneusement votre carte mère sur les entretoises en alignant les trous de vis.
- Fixez la carte mère à l'aide des vis appropriées du kit d'accessoires.
4.3 Installation de l'alimentation électrique
- Position your ATX power supply unit (PSU) in the designated compartment at the bottom rear of the case.
- Alignez le bloc d'alimentation avec les trous de vis situés à l'arrière du boîtier.
- Secure the PSU using the screws provided with your power supply.
4.4 Installation du lecteur
5.25-inch External Drives:
- Remove the desired 5.25-inch bay cover from the front panel.
- Slide your optical drive or other 5.25-inch device into the bay from the front.
- Secure the drive using the tool-less clips or screws.
2.5/3.5-inch Internal Drives:
- Locate the internal drive bays.
- Mount your 2.5-inch SSD or 3.5-inch HDD into the drive trays.
- Slide the populated drive trays back into the drive cage until they click into place.
4.5 Installation de la carte d'extension
- Retirez les caches des emplacements d'extension nécessaires à l'arrière du boîtier.
- Insert your graphics card or other PCIe expansion card into the corresponding slot on the motherboard.
- Secure the card with the provided screws.
4.6 Gestion des câbles
Utilize the cable routing holes and tie-down points behind the motherboard tray to organize cables. This improves airflow and gives your build a cleaner appearance.
4.7 Fan Installation (Optional)
The case comes with two 120mm blue LED fans pre-installed at the front and one 120mm blue LED fan at the rear. Additional fan mounting locations include:
- Top: 1x 120/140mm fan
- Bottom: 1x 120mm fan (under the PSU)
Install additional fans as needed for optimal cooling, ensuring proper airflow direction.
5. Mode d'emploi
5.1 Mise sous tension initiale
- Once all components are installed and cables are connected, replace both side panels.
- Connectez votre moniteur, votre clavier, votre souris et vos autres périphériques.
- Branchez le câble d'alimentation au bloc d'alimentation, puis à une prise murale.
- Press the power button on the top I/O panel to start your system.
5.2 Front Panel I/O Usage
Le panneau d'E/S supérieur offre un accès pratique à :
- Ports USB 3.0 (x2) : Pour un transfert de données à haut débit avec les appareils compatibles.
- Ports USB 2.0 (x2) : Pour connecter des périphériques USB standard.
- Prises audio (casque/microphone) : Pour connecter des casques ou des périphériques audio externes.
- Bouton d'alimentation : Pour allumer/éteindre le système.
- Bouton de réinitialisation : Pour redémarrer le système.
5.3 éclairage LED
The pre-installed front and rear fans feature blue LED lighting, which illuminates when the system is powered on, adding an aesthetic element to your build.
6. Entretien
Regular maintenance helps ensure optimal performance and longevity of your computer system.
6.1 Nettoyage
- Filtres à poussière : The case includes a removable dust filter under the PSU. Regularly remove and clean this filter to prevent dust buildup and maintain airflow.
- Extérieur: Essuyez les surfaces extérieures avec un chiffon doux, damp chiffon. Évitez les nettoyants abrasifs.
- Intérieur: Periodically use compressed air to remove dust from internal components and fan blades. Ensure the system is powered off and unplugged before cleaning the interior.
6.2 Optimisation du flux d'air
Ensure that the case's ventilation areas (front, top, rear, bottom) are not obstructed. Proper cable management also contributes significantly to unrestricted airflow within the case.
7. Dépannage
Cette section aborde les problèmes courants que vous pourriez rencontrer.
7.1 Problèmes courants
- Le système ne s'allume pas :
- Vérifiez que le câble d'alimentation est bien connecté à la fois au bloc d'alimentation et à la prise murale.
- Assurez-vous que l'interrupteur du bloc d'alimentation est en position « MARCHE ».
- Vérifiez que le câble du bouton d'alimentation du panneau avant est correctement connecté à la carte mère.
- Confirm all internal power cables (24-pin ATX, CPU, GPU) are properly seated.
- Ventilateurs non fonctionnels :
- Check if the fan power cables are correctly connected to the motherboard or fan controller.
- Vérifiez que le système est alimenté.
- Les ports USB ne fonctionnent pas :
- Verify that the front panel USB 3.0 and USB 2.0 headers are correctly connected to the motherboard.
- Ensure the device you are connecting is functioning correctly.
- Audio Ports Not Working:
- Check that the front panel audio header (HD Audio) is correctly connected to the motherboard.
- Confirm your audio drivers are installed and up to date.
For further assistance, please refer to your motherboard manual or contact KOLINK support.
8. Spécifications
Spécifications techniques détaillées pour le KOLINK Refractor Midi-Tower.
| Fonctionnalité | Spécification |
|---|---|
| Nom du modèle | Refractor Midi-Tower |
| Dimensions (L x H x P) | 190 x 475 x 445 mm (7.5 x 18.7 x 17.5 pouces) |
| Matériel | Steel (body), Plastic (front) |
| Poids | Environ 4.8 kg (10.6 lb) |
| Couleur | Noir |
| Facteur de forme | Tour Midi |
| Compatibilité de la carte mère | ATX |
| Baies de disques externes | 3x 5.25 pouces |
| Baies de disques internes | 7x 2.5/3.5-inch |
| Emplacements d'extension | 7 |
| Ventilateurs préinstallés | 2x 120mm (front, blue LED), 1x 120mm (rear, blue LED) |
| Fan Support (Total Possible) | Front: 2x 120mm, Top: 1x 120/140mm, Bottom: 1x 120mm, Rear: 1x 120mm |
| Panneau d'E/S | 2x USB 3.0, 2x USB 2.0, 1x Audio In/Out |
| Longueur maximale de la carte graphique | 360 mm |
| Hauteur maximale du refroidisseur de processeur | 174 mm |
| PSU Compatibility | Standard ATX (optional) |
| Filtres à poussière | Floor (under PSU, removable) |
9. Garantie et assistance
KOLINK products are manufactured to high-quality standards. This product is covered by a manufacturer's warranty against defects in materials and workmanship. The specific terms and duration of the warranty may vary by region and retailer.
Please retain your proof of purchase for warranty claims. For technical support, warranty inquiries, or to report missing/damaged parts, please contact your point of purchase or visit the official KOLINK website de ressources d'assistance.
KOLINK Official Website: www.kolink.eu (Please note: This is a general link and may not lead directly to a support page for this specific model.)


