1. Introduction
The COUGAR Evolution Galaxy is a full tower computer case designed for enthusiasts, offering a spacious interior and advanced cooling capabilities. This manual provides detailed instructions for the assembly, operation, and maintenance of your computer case, ensuring optimal performance and longevity.
2. Principales caractéristiques
- Intérieur spacieux : Accommodates up to 8 PCI cards, providing flexibility for multiple graphics solutions.
- Refroidissement avancé : Supports up to 7 fans, including dual 12cm COUGAR TURBINE HYPER-SPIN Bearing Silent Fans, with a unique dual-fan-set management system for excellent ventilation.
- Compatibilité de la carte mère : Supports Extended ATX and ATX motherboards.
- Construction durable : Made from SECC Alloy Steel for robust protection.
- Connectivité du panneau avant : Features 4 USB 3.0 ports for high-speed data transfer.
- Bottom Mount PSU: Power supply mounts at the bottom for improved thermal management.
3. Configuration et installation
3.1 Déballage et inspection
Carefully remove the computer case from its packaging. Inspect for any signs of damage during transit. Retain all packaging materials for future transport or warranty claims.
3.2 Installation de la carte mère
- Remove the side panel by unscrewing the thumbscrews at the rear of the case.
- Installez la plaque d'E/S fournie avec votre carte mère dans l'ouverture arrière du boîtier.
- Align the motherboard with the pre-installed standoffs. If necessary, install additional standoffs according to your motherboard's form factor.
- Gently place the motherboard onto the standoffs and secure it with screws.
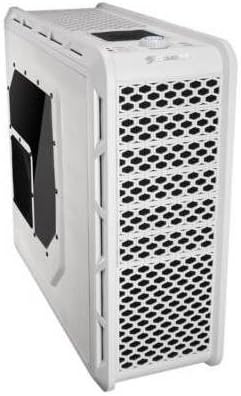
Figure 1 : Intérieur view of the COUGAR Evolution Galaxy case, highlighting the motherboard tray and tool-less drive bays.
3.3 Installation du lecteur
The COUGAR Evolution Galaxy features tool-less drive bays for easy installation.
- 5.25" Devices (Optical Drives): Remove the front panel bay cover. Slide the 5.25" device into the bay until it clicks into place.
- Disques durs 3.5 pouces : Slide the hard drive into the designated 3.5" drive tray until it secures.
- Disques SSD/HDD 2.5 pouces : These can be mounted in the 3.5" trays using adapter screws or dedicated 2.5" mounts if available.

Figure 2 : Intérieur détaillé view showing the orange tool-less drive bay mechanisms for easy installation of storage devices.
3.4 Installation de l'alimentation électrique
The power supply unit (PSU) mounts at the bottom rear of the case.
- Position the PSU into the designated compartment at the bottom rear.
- Fixez le bloc d'alimentation au boîtier à l'aide des vis situées à l'arrière.
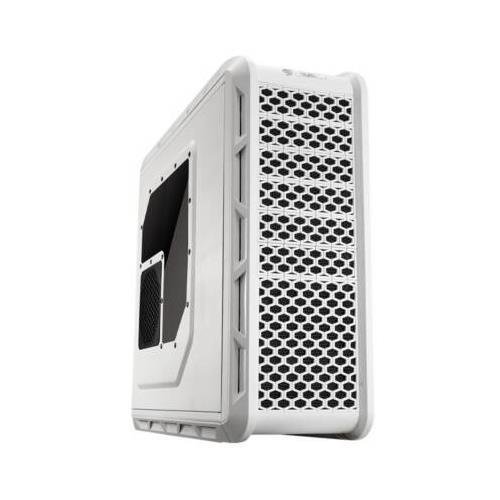
Figure 3 : Arrière view of the COUGAR Evolution Galaxy case, illustrating the bottom-mounted power supply area, multiple PCI expansion slots, and the rear exhaust fan.
3.5 Gestion des câbles
Utilize the cutouts and tie-down points behind the motherboard tray to route cables. This improves airflow and maintains a clean interior aesthetic.
3.6 Fan and Front Panel Connections
Connect all case fans to the motherboard or the integrated fan controller. Connect the front panel headers (USB 3.0, audio, power switch, reset switch, HDD LED, Power LED) to the corresponding pins on your motherboard. Refer to your motherboard manual for pin assignments.
4. Mode d'emploi
4.1 Mise sous tension
Once all components are installed and connected, ensure the power supply switch is in the 'ON' position. Press the power button on the front panel of the case to start your system.
Contrôleur de ventilateur 4.2
The COUGAR Evolution Galaxy includes an integrated fan controller. Use the controls on the top panel to adjust fan speeds for optimal balance between cooling performance and noise levels. Connect your case fans to this controller for centralized management.
4.3 Ports du panneau avant
The front panel provides convenient access to USB 3.0 ports and audio jacks for headphones and microphones. Ensure these are correctly connected to your motherboard's internal headers during setup.

Figure 4 : Face avant inclinée view of the COUGAR Evolution Galaxy case, showcasing the mesh front panel for airflow and the top-mounted controls and ports.
5. Entretien
5.1 Nettoyage du filtre à poussière
The case is equipped with dust filters to prevent dust accumulation inside. Regularly clean these filters (e.g., monthly) by removing them and washing with water or using a vacuum cleaner. Ensure filters are completely dry before reinstallation.
5.2 Nettoyage général
Utilisez un chiffon doux et sec.amp cloth to clean the exterior surfaces of the case. Avoid abrasive cleaners or solvents that may damage the finish. For interior cleaning, use compressed air to remove dust from components and fans.
5.3 Inspection du ventilateur
Periodically check all fans for proper operation. Ensure they are spinning freely and quietly. Replace any fans that are noisy or not functioning correctly to maintain optimal cooling.

Figure 5 : Côté view of the COUGAR Evolution Galaxy case, featuring a clear side panel window and a dedicated fan mount for additional cooling.
6. Dépannage
- Le système ne s'allume pas :
- Check all power connections, including the PSU to the wall outlet, PSU to motherboard, and front panel power switch header.
- Assurez-vous que l'interrupteur du bloc d'alimentation est en position « MARCHE ».
- Ventilateurs non fonctionnels :
- Verify fan cables are securely connected to the motherboard or fan controller.
- Check fan controller settings if applicable.
- Front Panel USB Ports Not Working:
- Ensure the USB 3.0 header cable from the case is correctly connected to the motherboard.
- Check motherboard BIOS settings for USB port enablement.
7. Spécifications
| Fonctionnalité | Spécification |
|---|---|
| Type de cas | Tour complète |
| Compatibilité de la carte mère | Extended ATX, ATX |
| Matériel | Alloy Steel (SECC) |
| Couleur | Blanc |
| Poids de l'article | 29.8 livres |
| Taille du ventilateur | 12 Centimeters (Dual COUGAR TURBINE HYPER-SPIN Bearing Silent Fans included) |
| Méthode de refroidissement | Air |
| Type de montage de l'alimentation | Montage par le bas |
| Nombre de ports USB 3.0 | 4 |
8. Garantie et assistance
Pour obtenir des informations sur la garantie et une assistance technique, veuillez consulter le site officiel de COUGAR. webConsultez le site web ou contactez votre revendeur local. Conservez votre preuve d'achat pour toute réclamation au titre de la garantie.


