1. Introduction et plusview
The VISION Grills Professional C-Series Ceramic Kamado is designed to provide precise temperature control for both smoking and grilling. Featuring separate calibrated control systems on the top vent and the bottom Pro Zone™, this grill offers comprehensive command over the cooking temperature, from low slow-smoking to high-heat searing.
Its robust ceramic construction ensures excellent heat retention and even cooking. The large 604 square inch cooking surface, equipped with 2-tiered stainless steel dual flip grates, provides ample space and versatility for various cooking methods.

Figure 1 : Face avant view of the VISION Grills Ceramic Kamado.
2. Configuration et assemblage
Assembly of your VISION Grills Ceramic Kamado is required. Please follow the detailed instructions provided in the separate assembly guide included with your product. Ensure all components are securely fastened before initial use.
Composants clés :
- 2-Tiered Cooking Grates: The grill includes 604 square inch stainless steel dual flip grates, designed for easy addition of charcoal and smoking wood chunks.
- Dual Purpose Lava Stone: This component is essential for indirect cooking and heat deflection.
- Démarreur électrique : For convenient charcoal ignition.
- Removable Ash Drawer: Facilitates easy cleaning and ash disposal.
- Slatted Side Shelves: Provide convenient workspace and include hooks for tools.

Figure 2: The 2-tiered stainless steel dual flip cooking grates.

Figure 3: The dual purpose lava stone, used for indirect heat.

Figure 4 : Dimensions du produit pour la planification de son placement.
3. Mode d'emploi
3.1. Charcoal Loading and Ignition
Load lump charcoal into the firebox at the bottom of the grill. For quick and efficient ignition, utilize the included electric starter. Insert the electric starter into the designated port on the front of the grill, ensuring it makes contact with the charcoal. Once the charcoal is lit and glowing, remove the starter.

Figure 5: The electric starter for quick charcoal ignition.

Figure 6: Location of the electric starter port on the grill body.
3.2. Temperature Control (Pro Zone™)
The VISION Grills Kamado features a unique Pro Zone™ control system, allowing precise temperature management. Adjust the top vent and the bottom control knobs to achieve desired temperatures for smoking, grilling, or searing. The built-in thermometer on the lid provides real-time temperature readings.
- Fumeur: Use lower settings on both the top vent and bottom Pro Zone™ controls for slow cooking and smoking.
- Griller/Saisir : Open the vents and adjust the Pro Zone™ controls to higher settings for direct grilling and searing at high temperatures.

Figure 7: The Pro Zone™ control system for precise temperature adjustments.
3.3. Cooking with Dual Racks and Side Shelves
The 2-tiered cooking grates allow for cooking at different heat levels or for increased capacity. The slatted side shelves provide a convenient surface for food preparation, holding utensils, or resting cooked items. These shelves can be folded down when not in use.

Figure 8: Slatted side shelves with integrated tool hooks.

Figure 9 : Example of food being cooked on the grill.
4. Entretien
Regular maintenance ensures the longevity and optimal performance of your Kamado grill.
4.1. Enlèvement des cendres
After each use, once the grill has completely cooled, remove the removable ash drawer located at the bottom of the grill. Dispose of ashes safely. This prevents airflow obstruction and maintains grill efficiency.
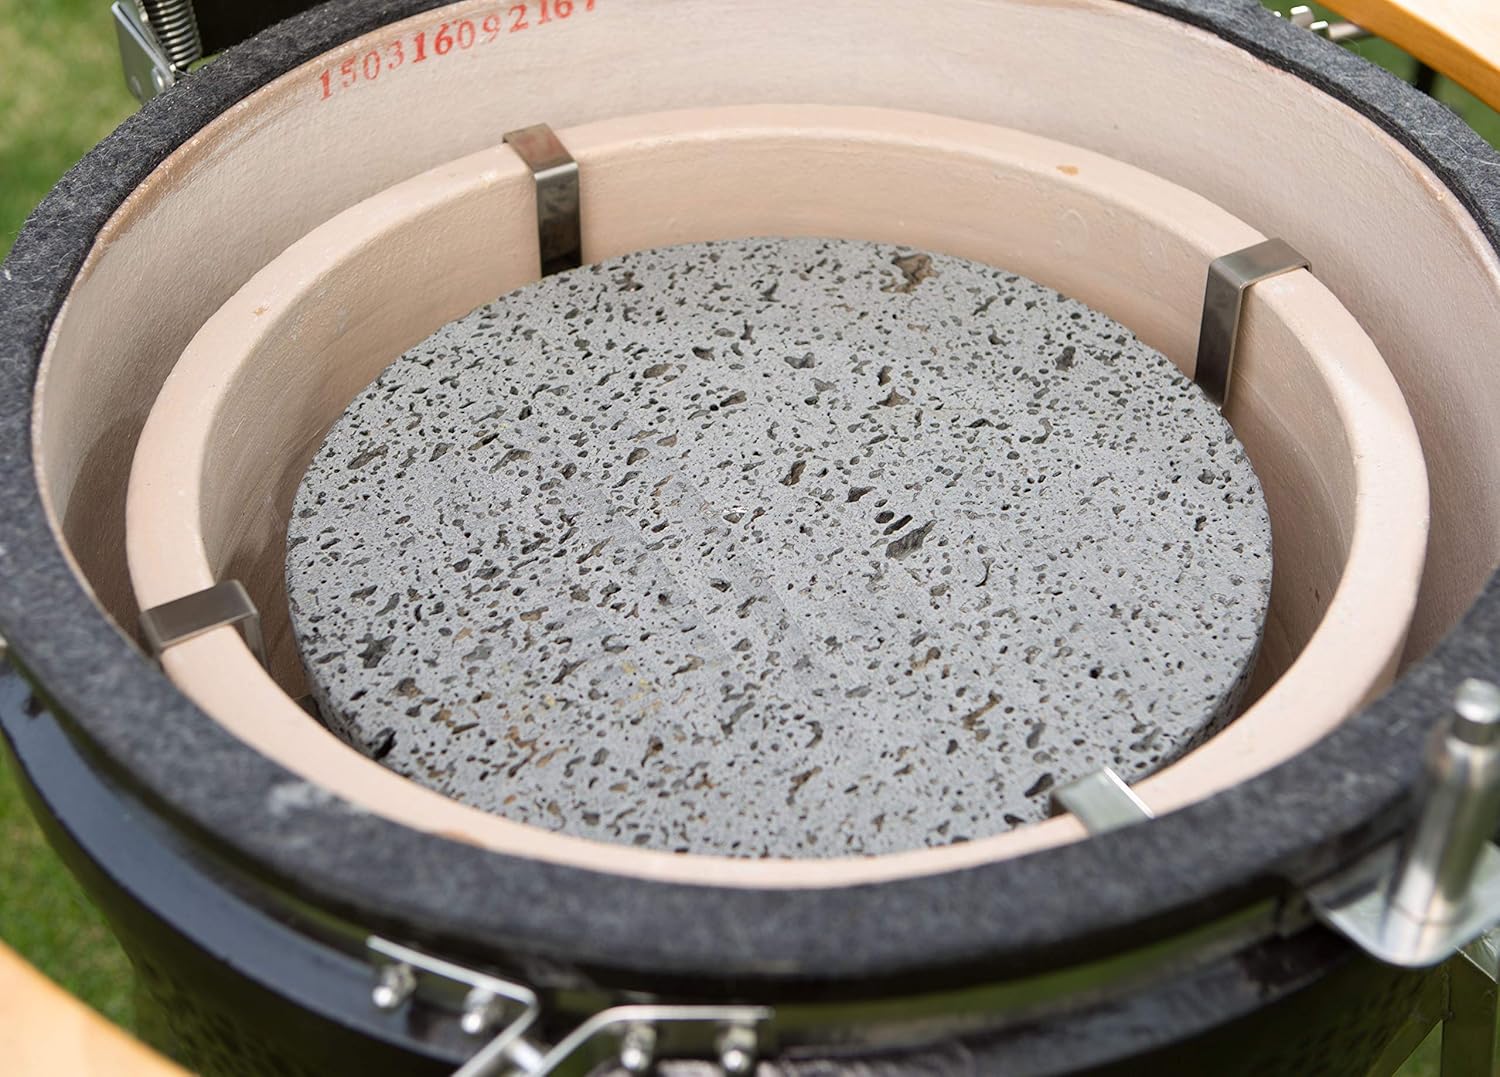
Figure 10: The removable ash drawer for convenient cleaning.
4.2. Nettoyage de la grille
Clean the stainless steel cooking grates after each use. A grill brush is recommended to remove food residue. For deeper cleaning, grates can be washed with warm, soapy water.
4.3. Entretien extérieur
Wipe down the exterior ceramic surface with a damp cloth. For long-term protection against the elements, especially when stored outdoors, use a fitted grill cover.

Figure 11: A cape-style grill cover provides protection from weather.
5. Dépannage
This section addresses common issues you might encounter with your Kamado grill.
5.1. Fluctuations de température
- Problème: Grill temperature is difficult to maintain or fluctuates widely.
- Solution: Ensure both the top vent and bottom Pro Zone™ controls are properly adjusted for the desired temperature. Check for sufficient charcoal and clear ash buildup in the ash drawer. Ceramic grills are highly efficient; small adjustments can lead to significant temperature changes.
5.2. Difficulté à allumer le charbon de bois
- Problème: Charcoal does not ignite easily or quickly.
- Solution: Ensure the electric starter is fully inserted and making good contact with the charcoal. Use dry, high-quality lump charcoal. Ensure adequate airflow by opening vents during ignition.
5.3. Smoke Leakage
- Problème: Smoke is escaping from areas other than the top vent.
- Solution: Check the gasket seal around the lid and the main body. Over time, gaskets may wear and require replacement to maintain a tight seal. Ensure all clamps sont bien serrés.
6. Spécifications
| Fonctionnalité | Détail |
|---|---|
| Marque | VISION |
| Nom du modèle | C-Series Ceramic Kamado Grill, Black |
| Dimensions du produit | 32.5"P x 28.8"L x 47"H |
| Poids de l'article | 206 livres |
| Matériel | Stainless Steel, Cast Iron, Ceramic |
| Type de carburant | Charbon de bois |
| Surface de cuisson | 604 pouces carrés |
| Nombre de racks | 2 |
| Composants inclus | Démarreur électrique |
| Assemblage requis | Oui |
| Dossier spécial | Commandes manuelles |
7. Garantie et assistance
For information regarding product warranty, please refer to the warranty card included with your purchase or visit the official VISION Grills webLes conditions de garantie peuvent varier.
For customer support, technical assistance, or inquiries about replacement parts, please contact VISION Grills directly through their official channels. Contact information can typically be found on their websur votre site ou dans la documentation de votre produit.


