1. Introduction
This manual provides essential information for the safe and efficient operation of your Hitachi CP-DX300 DLP Projector. Please read this manual thoroughly before using the projector and retain it for future reference. The Hitachi CP-DX300 is designed to deliver bright, clear, and detailed images for various applications, including business presentations and home entertainment.
3. Contenu du colis
Vérifiez que tous les éléments énumérés ci-dessous sont inclus dans votre colis :
- Hitachi CP-DX300 DLP Projector
- Câble d'alimentation
- Télécommande
- Câble HDMI
- VGA Cable (if included with specific models)
- Manuel de l'utilisateur (ce document)
Note: Additional accessories may vary by region or retailer.
4. Produit terminéview
The Hitachi CP-DX300 is a compact and powerful DLP projector designed for versatility. Below are key physical features and connection ports.
Devant View
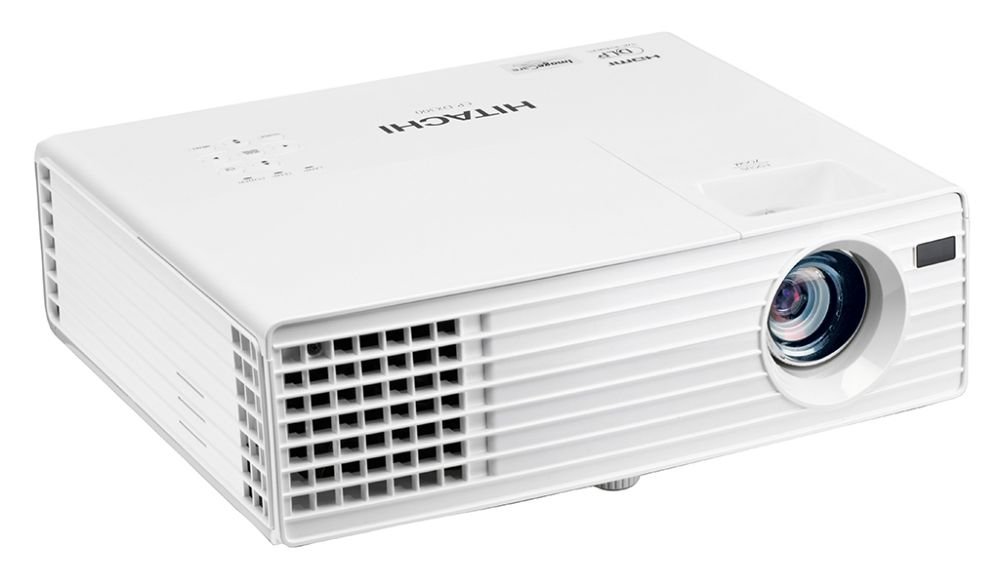
This image displays the front of the Hitachi CP-DX300 projector, highlighting the main projection lens and the front ventilation grille. The lens is centrally located, and the Hitachi brand logo is visible on the right side of the front panel.
Côté View (Ports)

This image shows the side panel of the Hitachi CP-DX300 projector, detailing the various input and output ports. These include HDMI, VGA, S-Video, Composite Video, Component Video, and audio input/output jacks, providing comprehensive connectivity options.
Caractéristiques principales :
- Technologie de projection : 0.55" single chip DLP
- Résolution: XGA - 1024 x 768
- Rendement lumineux : 3,000 ANSI lumens
- Couleurs: 1.07 milliards de couleurs
- Rapport hauteur/largeur : Native 4:3 / 16:9 compatible
- Rapport de contraste : 2500 : 1
- Lamp Vie: Approximately 4,500 hours (standard mode), 6,000 hours (Eco mode)
- Sortie haut-parleur : 2W x 1
- Connectivité : HDMI x 1 (HDCP compliant), Computer Input (15-pin mini D-sub) x 2, Computer Monitor Output (15-pin mini D-sub) x 1, S-Video Mini DIN 4-pin x 1, Composite Video RCA jack x 1, Component Video (shared with computer inputs), Audio Input (3.5 mm stereo mini jack) x 1, Audio Output (3.5 mm stereo mini jack) x 1.
6. Mode d'emploi
6.1 Mise sous/hors tension
- Mise sous tension : Press the Power button on the projector or the remote control. The lamp will warm up, and the image will appear shortly.
- Éteindre: Press the Power button again. A confirmation message may appear; press Power again to confirm shutdown. The projector will enter a cooling cycle before completely powering off.
6.2 Réglage de la mise au point et de la correction trapézoïdale
- Se concentrer: Tournez la bague de mise au point de l'objectif du projecteur jusqu'à ce que l'image apparaisse nette et claire sur l'écran.
- Correction trapézoïdale : Use the keystone adjustment feature (typically found in the projector's menu or via dedicated buttons on the remote) to correct trapezoidal distortion, ensuring a rectangular image. The CP-DX300 supports +/- 30 Degree vertical keystone correction.
6.3 Sélection des sources
Press the "Source" button on the projector or remote control to cycle through available input sources (HDMI, VGA, S-Video, Composite, etc.) until your desired source is displayed.
6.4 Sortie audio
The projector has a built-in 2W speaker. For enhanced audio, connect external speakers or a sound system to the 3.5 mm stereo mini Audio Output jack.
6.5 3D Viewing
The Hitachi CP-DX300 is 3D capable. To enjoy 3D content, you will need compatible 3D glasses and a special graphic card (sold separately) connected to a 3D-enabled source device.
6.6 Wall Color Correction
This feature allows the projector to automatically adjust color output when projecting onto colored walls, ensuring accurate color reproduction without needing a white screen.
7. Entretien
7.1 Nettoyage du projecteur
- Extérieur: Essuyez l'extérieur du projecteur avec un chiffon doux et sec. N'utilisez pas de nettoyants abrasifs ni de solvants.
- Lentille: Gently clean the lens with a lens cleaning cloth or lens paper. Avoid touching the lens directly with your fingers.
- Ventilation: Regularly check and clean the ventilation grilles to ensure proper airflow and prevent dust buildup.
7.2 Lamp Remplacement
Le lamp door is conveniently located on top of the model for easy maintenance. Refer to the detailed instructions in the full user manual for safe lamp replacement procedures. Always use genuine Hitachi replacement lamps.
L attenduamp Vie: Approximately 4,500 hours (standard mode), 6,000 hours (Eco mode).
7.3 Power Saving Standby Mode
The projector features a power-saving standby mode that reduces power consumption to less than 0.5W, contributing to energy efficiency.
7.4 Image Care Technology
Image Care is a lamp power control function that optimizes picture performance with maximum energy savings by decreasing energy usage, improving contrast ratio, and lengthening lamp life. This results in a lower total cost of ownership and decreased maintenance cost.
7.5 Intelligent Eco Mode
This mode automatically adjusts the lamp's brightness according to the screen's brightness level, further enhancing energy efficiency and lamp longévité.
8. Dépannage
Si vous rencontrez des problèmes avec votre projecteur, consultez les problèmes et solutions courants suivants :
- Pas d'image:
- Vérifiez que le câble d'alimentation est correctement branché et que le projecteur est allumé.
- Vérifiez que la source d'entrée est correctement sélectionnée et que le périphérique source est actif.
- Check the connection cable (HDMI, VGA) for damage or loose connections.
- Image floue :
- Réglez la bague de mise au point de l'objectif.
- Assurez-vous que la surface de projection est plane et que le projecteur est stable.
- L'image est trapézoïdale :
- Utilisez la fonction de correction trapézoïdale pour ajuster la forme de l'image.
- Pas d'audio :
- Check the projector's volume settings.
- Ensure external audio devices are properly connected and powered on if used.
- Verify the audio source is playing.
- Avertissement de surchauffe :
- Assurez-vous que les grilles de ventilation ne sont pas obstruées.
- Clean any dust from the grilles.
- Utilisez le projecteur dans un endroit bien ventilé.
For more complex issues, please contact Hitachi customer support.
10. Garantie et assistance
For warranty information and customer support, please refer to the documentation included with your product or visit the official Hitachi website. Conservez votre reçu d’achat pour les réclamations au titre de la garantie.
Note: Returns may be subject to specific terms and conditions, especially for brand new items, as indicated by the seller. Technical issues are typically covered.


