HAND Precision Automatic Numbering Machine ZS209 User Manual
Modèle : ZS209
1. Introduction
The HAND Precision Automatic Numbering Machine ZS209 is a heavy-duty, self-inking device designed for efficient sequential numbering operations. Crafted with a one-piece hardened steel frame and finished in high-polish chrome, this machine features all-metal interior construction for reliable, long-term use. It is ideal for document identification, date and number stamping, serial number stamping, inspection stamping, and ticket stamping.
This machine includes 9 die-cast metal wheels with 5mm digit size and offers 8 movement settings for versatile numbering patterns. Each unit comes with two dry inking pads and a bottle of black ink.
2. Produit terminéview
Familiarize yourself with the components of your numbering machine.
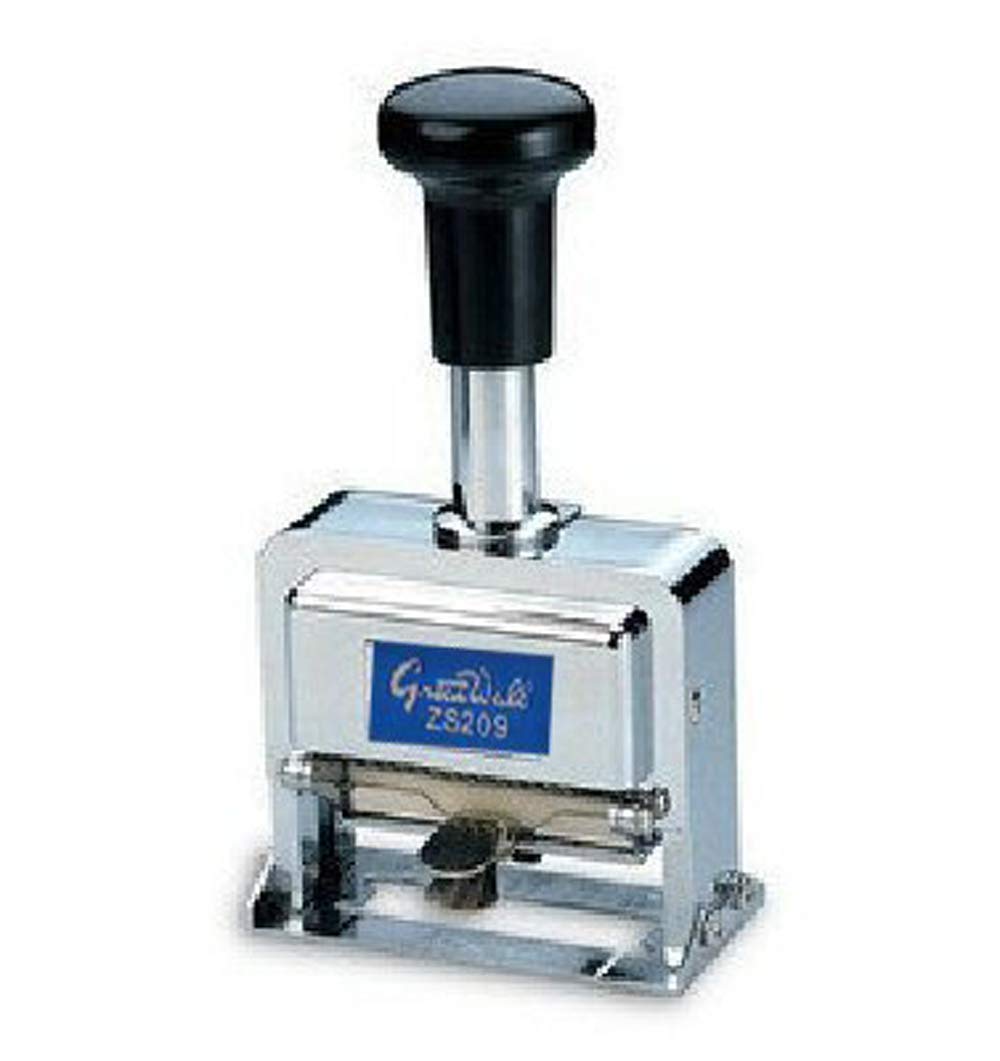
Illustration 2.1 : Avant view of the HAND Precision Automatic Numbering Machine ZS209, showing the handle, chrome body, and numbering wheels.
The machine features a sturdy handle for operation, a robust metal housing, and visible numbering wheels for setting the desired sequence. The ink pad is located internally, accessible for replacement.
3. Installation
Before first use, ensure the ink pad is properly installed and inked.
- Déballez la machine : Carefully remove the numbering machine and accessories (ink, stylus, extra pads) from the packaging.
- Install/Ink the Pad: The machine typically comes with a dry ink pad. To ink it, apply a small amount of the provided black ink evenly onto the dry pad. Do not over-saturate. Allow a few minutes for the ink to absorb.
- Insérer le tampon : Open the machine's base or side compartment (refer to specific model design if different) and insert the inked pad. Ensure it sits securely.
- Test Impression: Make a few test impressions on scrap paper to ensure even ink distribution and clear numbering.
4. Mode d'emploi
This numbering machine offers various settings for different numbering requirements.
4.1 Setting the Number
Use the included stylus to adjust the numbering wheels. Each wheel can be rotated to display the desired digit. Ensure all wheels are aligned correctly for a clear impression.

Image 4.1 : Détail view of the numbering machine, highlighting the wheels and adjustment area.
4.2 Movement Settings
The machine features 8 movement settings, controlled by a small lever or dial (location may vary slightly by unit, typically on the side or base). These settings determine how the number advances after each impression.
- Consécutif: Advances the number by one digit with each impression (e.g., 001, 002, 003...).
- Répéter: Stamps the same number repeatedly without advancing.
- 2 x Repeat: Stamps the same number twice, then advances (e.g., 001, 001, 002, 002...).
- 3 x Repeat: Stamps the same number three times, then advances.
- 4 x Repeat: Stamps the same number four times, then advances.
- 5 x Repeat: Stamps the same number five times, then advances.
- 6 x Repeat: Stamps the same number six times, then advances.
- 12 x Repeat: Stamps the same number twelve times, then advances.
To change the setting, locate the movement lever/dial and slide or rotate it to the desired position. Test the setting on scrap paper before use on important documents.
4.3 Making an Impression
- Place the document on a flat, stable surface.
- Positionnez la numéroteuse sur la position souhaitée.ampzone de travail.
- Press down firmly and evenly on the handle until the impression is made.
- Lift the machine straight up to avoid smudging.
5. Entretien
Proper maintenance ensures the longevity and performance of your numbering machine.
- Ink Pad Replacement: When impressions become faint, replace the ink pad with a new one or re-ink the existing dry pad. Ensure you use ink specifically designed for numbering machines to prevent damage to the rubber components.
- Nettoyage: Periodically clean the numbering wheels with a soft, lint-free cloth to remove any accumulated ink or dust. A small brush can be used for hard-to-reach areas. Avoid using harsh chemicals or solvents.
- Stockage: Rangez la machine dans un endroit propre et sec, à l'abri de la lumière directe du soleil et des températures extrêmes.
6. Dépannage
Voici des solutions aux problèmes courants que vous pourriez rencontrer :
- Faint Impressions:
- Check if the ink pad is dry. Re-ink or replace the pad.
- Ensure you are pressing down firmly and evenly.
- Smudged Impressions:
- Lift the machine straight up after making an impression.
- Avoid over-inking the pad.
- Number Not Advancing:
- Check the movement setting. Ensure it is set to 'Consecutive' or a 'Repeat' setting that allows advancement.
- Clean the internal mechanism if debris is obstructing movement.
- Digits Not Clear/Misaligned:
- Ensure the numbering wheels are properly aligned using the stylus.
- Clean any ink buildup on the numbering wheels.
7. Spécifications
| Fonctionnalité | Détail |
|---|---|
| Modèle | ZS209 |
| Nombre de roues | 9 (die-cast metal) |
| Taille des chiffres | 5 mm |
| Movement Settings | Consecutive, Repeat, 2x Repeat, 3x Repeat, 4x Repeat, 5x Repeat, 6x Repeat, 12x Repeat |
| Matériel | Hardened Steel Frame, All-metal interior |
| Poids de l'article | 1.05 livre (environ 0.48 kg) |
| Dimensions du produit | 2.76 x 1.46 x 5.51 pouces (7 x 3.7 x 14 cm) |
| Accessoires inclus | 2 Dry Ink Pads, Black Ink Bottle, Stylus |
8. Garantie et assistance
Pour toute information relative à la garantie ou pour obtenir une assistance technique, veuillez consulter la documentation fournie lors de votre achat ou contacter votre revendeur. Conservez votre preuve d'achat pour toute réclamation au titre de la garantie.


