1. Introduction
Merci pour votre achatasing the Sharp XL-HF201P Micro Hi-Fi System. This system is designed to provide high-quality audio playback from various sources, including CDs, USB devices, and iPods. This manual provides essential information for the safe and efficient operation of your new audio system. Please read it thoroughly before use and retain it for future reference.
2. Informations importantes sur la sécurité
- Source d'alimentation : Branchez l'appareil uniquement à une prise secteur du volume indiqué.tage spécifié sur le panneau arrière de l'appareil.
- Ventilation: Assurez une ventilation adéquate. Ne bloquez pas les ouvertures de ventilation. Évitez de placer l'appareil sur des surfaces molles susceptibles d'obstruer les aérations.
- Eau et humidité : N’exposez pas l’appareil à la pluie, à l’humidité ou aux projections de liquides. Ne placez pas d’objets remplis de liquide, tels que des vases, sur l’appareil.
- Chaleur: Tenez l'appareil éloigné des sources de chaleur telles que les radiateurs, les bouches de chauffage, les poêles ou autres appareils (y compris amp(échangeurs thermiques) qui produisent de la chaleur.
- Nettoyage: Débranchez l'appareil de la prise murale avant de le nettoyer. Utilisez uniquement un chiffon sec.
- Entretien: N'essayez pas de réparer vous-même ce produit. Confiez tous les travaux d'entretien à du personnel de service qualifié.
3. Contenu du colis
Veuillez vérifier que tous les articles énumérés ci-dessous sont inclus dans votre colis :
- Unité principale (lecteur/récepteur CD)
- Left Speaker (x1)
- Right Speaker (x1)
- Télécommande (avec 2 piles AA)
- Antenne FM
- Antenne boucle AM
- Cordon d'alimentation
- Manuel d'instructions (ce document)
4. Installation
4.1 Déballage et placement
Carefully remove all components from the packaging. Place the main unit and speakers on a stable, flat surface. Ensure there is sufficient space around the unit for proper ventilation.
4.2 Connexion des haut-parleurs
Connect the speaker wires to the corresponding terminals on the main unit and speakers. Match the positive (+) and negative (-) terminals. For optimal sound, ensure the wires are securely connected. If the speaker wires do not insert directly into the screw-knobs, wrap the bare wire ends around the terminal posts and then tighten the screw-knobs to secure them.
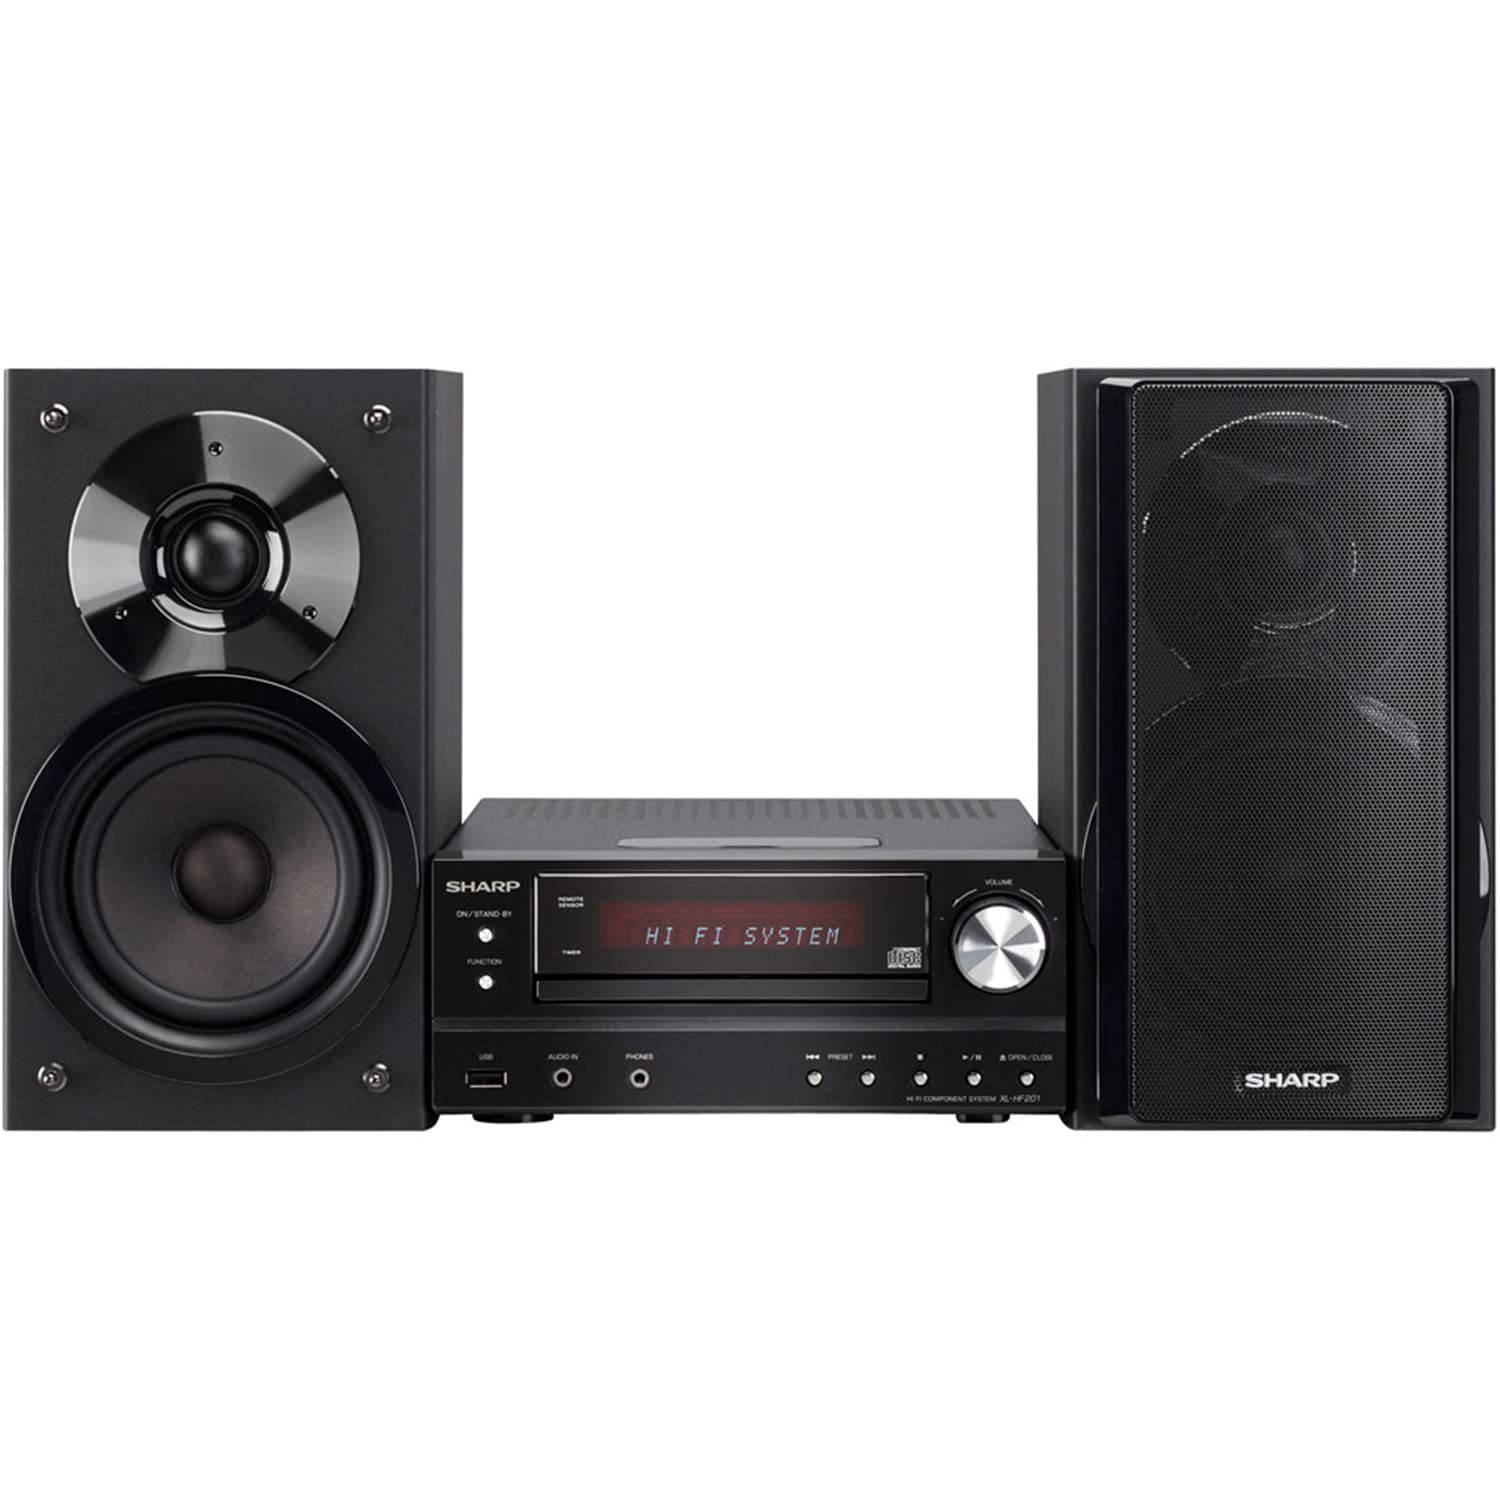
Image 4.2.1: The Sharp XL-HF201P Micro Hi-Fi System, showing the main unit and two speakers. This image illustrates the overall appearance of the system, which includes a central receiver with a CD tray and an iPod dock on top, flanked by two dark-colored speakers.
4.3 Connexion des antennes
- Antenne FM : Connect the supplied FM wire antenna to the FM antenna terminal on the rear of the main unit. Extend the wire for better reception.
- Antenne AM : Assemble the AM loop antenna and connect it to the AM antenna terminals. Position the antenna for optimal AM reception.
4.4 Connexion d'alimentation
After all other connections are made, plug the power cord into the AC inlet on the rear of the main unit, then plug the other end into a wall outlet.
5. Mode d'emploi
5.1 Mise sous/hors tension
Appuyez sur le POUVOIR button on the front panel or the remote control to turn the unit on or off (standby mode).
5.2 Sélection des sources
Appuyez sur le FONCTION button on the front panel or the remote control repeatedly to cycle through available sources: CD, USB, iPod, FM, AM, AUX.
5.3 Lecture de CD
- Sélectionnez le CD fonction.
- Appuyez sur le OUVRIR/FERMER bouton pour ouvrir le plateau du CD.
- Place a CD (CD-DA, MP3, WMA) with the label side up on the tray.
- Presse OUVRIR/FERMER Appuyez de nouveau pour fermer le tiroir. La lecture démarrera automatiquement.
- Utiliser LECTURE/PAUSE, ARRÊT, SAUTER (forward/backward) buttons for control.
5.4 Lecture USB
- Insert a USB device (containing MP3 or WMA files) into the USB port on the front panel.
- Sélectionnez le USB fonction.
- Playback will begin automatically or you may need to select a track.
- Utiliser LECTURE/PAUSE, ARRÊT, SAUTER boutons de contrôle.
5.5 Station d'accueil iPod/iPhone
- Carefully place your compatible iPod or iPhone onto the dock connector on top of the main unit.
- Sélectionnez le iPod fonction.
- Your device will begin charging and you can control playback using the system's remote or your device's controls.
5.6 Réglage radio
- Sélectionnez le FM or AM fonction.
- Utilisez le RÉGLAGE buttons (or knob on the unit) to manually tune to a station.
- Appuyez et maintenez enfoncé le RÉGLAGE boutons pour la numérisation automatique des stations.
- Pour mémoriser des stations, syntonisez la station souhaitée, puis appuyez sur MÉMOIRE suivi d'un bouton numérique prédéfini.
5.7 Contrôle du volume
Réglez le volume à l'aide de la VOLUME +/- buttons on the remote control or the volume knob on the main unit.
6. Entretien
6.1 Nettoyage de l'appareil
Wipe the exterior of the unit with a soft, dry cloth. Do not use abrasive cleaners, waxes, or solvents as they may damage the finish. For stubborn stains, lightly dampNettoyez le chiffon avec de l'eau et un détergent doux, puis essuyez-le.
6.2 Soins des lentilles CD
Avoid touching the CD lens. If the lens becomes dirty, use a commercially available CD lens cleaner. Do not use compressed air or liquid cleaners directly on the lens.
7. Dépannage
| Problème | Cause possible | Solution |
|---|---|---|
| Pas de courant | Le cordon d'alimentation n'est pas correctement branché. | Vérifiez le branchement du cordon d'alimentation à l'appareil et à la prise murale. |
| Pas de son | Le volume est trop faible ou inaudible. Les câbles des haut-parleurs ne sont pas correctement branchés. | Increase volume. Check speaker wire connections, ensuring correct polarity (+/-). |
| Le CD ne joue pas | CD is dirty, scratched, or inserted incorrectly. Incorrect function selected. | Clean or replace CD. Insert CD with label side up. Select CD function. |
| Périphérique USB non reconnu | USB device is not formatted correctly or contains unsupported files. | Ensure USB device is FAT16/FAT32 formatted and contains MP3/WMA files. Try another USB device. |
| Mauvaise réception radio | Antenna not properly positioned or connected. Interference. | Ajustez la position de l'antenne. Éloignez l'appareil des autres appareils électroniques. |
| La télécommande ne fonctionne pas | Les piles sont déchargées ou mal insérées. Obstruction entre la télécommande et l'appareil. | Replace batteries (2 AA). Ensure clear line of sight to the unit's remote sensor. |
8. Spécifications
- Marque: Pointu
- Modèle: XL-HF201P
- Puissance de sortie : 100 Watts RMS
- Médias pris en charge : CD-DA, MP3, WMA (CD, USB)
- Connectivité : USB, iPod Dock, AUX Input, FM/AM Tuner
- Type de haut-parleur : Subwoofers (integrated into speaker design)
- Source d'alimentation : Électrique avec fil
- Dimensions du produit (unité principale) : Environ 13 x 15.09 x 20.15 pouces
- Poids de l'article : Environ 20.3 livres
- Piles (télécommande) : 2 piles AA (incluses)
9. Garantie et assistance
Pour obtenir des informations sur la garantie et l'assistance clientèle, veuillez consulter la carte de garantie fournie avec votre produit ou visiter le site officiel de Sharp. website. You may also contact Sharp customer service directly for assistance with product registration, technical support, or service inquiries.
Support en ligne: www.sharpusa.com


