Introduction
This manual provides essential information for the safe and efficient installation, operation, and maintenance of your BRILLIANT Luca 4-Flame Spot Tube Light. Please read these instructions carefully before installation and retain them for future reference.
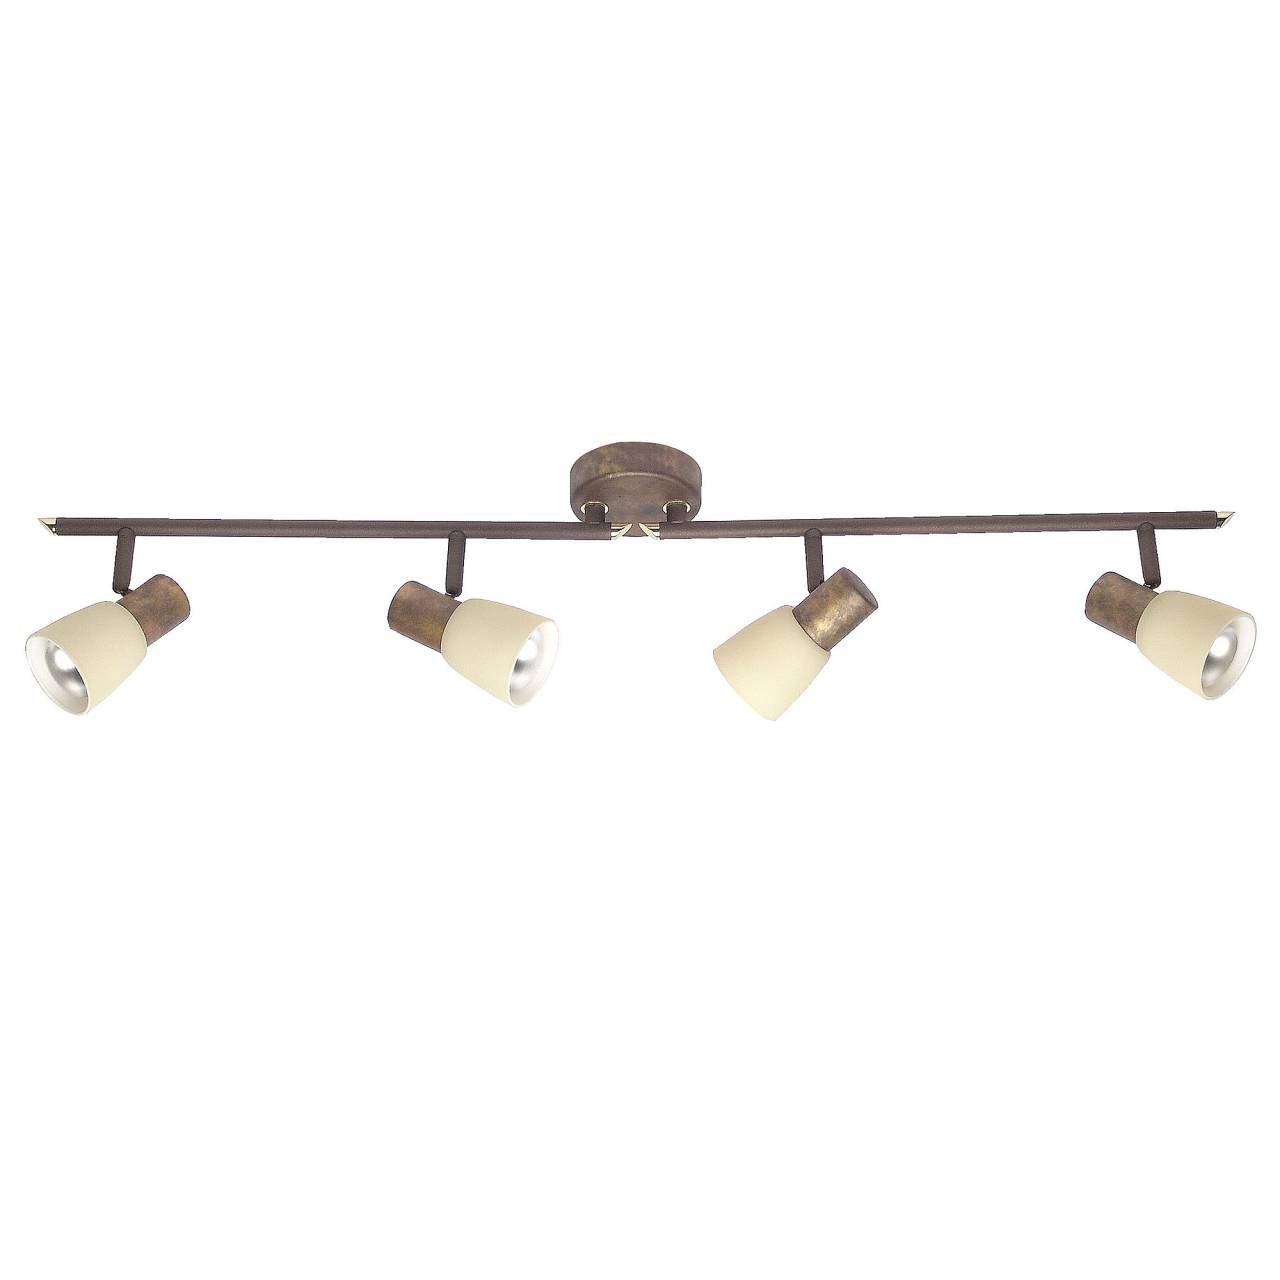
Image 1: The BRILLIANT Luca 4-Flame Spot Tube Light. This image displays the complete light fixture, featuring a long, brown metal bar with four individual spot heads. Each spot head is adjustable and includes a beige glass shade, designed to direct light. The central mounting plate is also visible.
Consignes de sécurité
- Always disconnect power at the main fuse or circuit breaker before installation, maintenance, or bulb replacement.
- L'installation doit être effectuée par un électricien qualifié ou une personne compétente.
- Vérifiez que la surface de montage peut supporter le poids du dispositif.
- Ne pas dépasser la puissance maximaletage specified for the bulbs (40W per bulb).
- Ce produit est conçu pour une utilisation en intérieur uniquement (indice de protection IP20). Ne pas exposer à l'humidité ni aux températures extrêmes.
- Allow bulbs to cool before touching or replacing them.
- Gardez les matériaux d'emballage hors de portée des enfants.
Contenu du colis
Vérifiez que tous les composants sont présents avant de commencer l'installation :
- 1x BRILLIANT Luca 4-Flame Spot Tube Light fixture
- Mounting material (screws, wall plugs, etc.)
- Manuel d'instructions
Note: Light bulbs (E14, R50 reflector type, max 40W) are not included and must be purchased separately. LED bulbs are compatible.
Caractéristiques
| Marque | Brillant |
| Numéro de modèle | 35832/56 |
| Dimensions (L x l x H) | 85 x 23.2 x 23.2 cm |
| Poids | 1.22 kg |
| Matériel | Métal, verre |
| Couleur | Brown (fixture), Beige (shade) |
| Nombre d'ampoules | 4 |
| Type de douille d'ampoule | E14 |
| Max Vattage par ampoule | 40 watts |
| Voltage | 240 volts |
| Indice de protection IP | IP20 (utilisation en intérieur uniquement) |
| Caractéristiques spéciales | Dimmable (with appropriate bulbs and external dimmer), Adjustable Spot Heads |
| Type d'installation | Montage au plafond |
Configuration et installation
Important: Before starting installation, ensure the power supply is switched off at the main circuit breaker to prevent electric shock.
- Préparez la surface de montage : Choose a suitable location on your ceiling or wall. Ensure the surface is clean, dry, and structurally sound to support the light fixture.
- Points de forage marqués : Hold the mounting bracket of the fixture against the desired installation spot. Use a pencil to mark the positions for drilling holes.
- Trous de forage : Drill holes at the marked positions using an appropriate drill bit for your ceiling/wall material. Insert the provided wall plugs into the drilled holes.
- Support de montage sécurisé : Attach the mounting bracket to the ceiling/wall using the provided screws. Ensure it is firmly secured.
- Connexion électrique : Connect the household electrical wires to the terminal block on the fixture. Follow standard wiring color codes (e.g., Live to Live, Neutral to Neutral, Earth to Earth). Ensure all connections are secure.
- Fixer le luminaire au support : Carefully align the light fixture with the secured mounting bracket and attach it using the remaining screws or fastening mechanism.
- Installez les ampoules : Insert four E14 R50 reflector bulbs (not included) into the lamp holders. Do not exceed 40 Watts per bulb. LED bulbs are recommended for energy efficiency.
- Restaurer l'alimentation : Une fois l'installation terminée et toutes les connexions sécurisées, rétablissez le courant au niveau du disjoncteur principal.
Consultez un électricien qualifié si vous avez des doutes concernant une quelconque étape du processus d'installation.
Mode d'emploi
- Allumer/éteindre : Actionnez la lampe à l'aide de votre interrupteur mural standard.
- Adjusting Spot Heads: The individual spot heads are pivotable and the arms are rotatable. Gently adjust each spot head and arm to direct the light to your desired area.
- Fonction de gradation: If you are using dimmable E14 bulbs and have an external dimmer switch installed, you can adjust the light intensity by operating the dimmer. Ensure your bulbs are compatible with your dimmer type.
Entretien
- Nettoyage: Disconnect power before cleaning. Wipe the fixture with a soft, dry cloth. Do not use abrasive cleaners or solvents, as these can damage the finish.
- Remplacement de l'ampoule :
- Ensure the light is switched off and has cooled down completely.
- Carefully unscrew the old E14 bulb from its socket.
- Screw in a new E14 R50 reflector bulb, ensuring it is no more than 40 Watts.
- Rétablissez le courant et testez la lumière.
- Contrôles réguliers : Vérifiez régulièrement tous les raccords et les vis de fixation pour vous assurer qu'ils restent bien serrés et sécurisés.
Dépannage
| Problème | Cause possible | Solution |
|---|---|---|
| La lumière ne s'allume pas. |
|
|
| La lumière clignote. |
|
|
| La variation d'intensité lumineuse ne fonctionne pas. |
|
|
Si les problèmes persistent, contactez le service client ou un électricien qualifié.
Garantie et assistance
Information regarding warranty and spare parts availability is not provided in the product details. For support, please refer to the retailer or manufacturer's official website.
Fabricant: Brillant