Introduction
This manual provides comprehensive instructions for the safe and effective use of your Vanguard Alta Pro 263AGH Aluminum Tripod, equipped with the GH-100 Grip Head. Please read this manual thoroughly before operating the equipment to ensure proper setup, optimal performance, and to prevent damage.
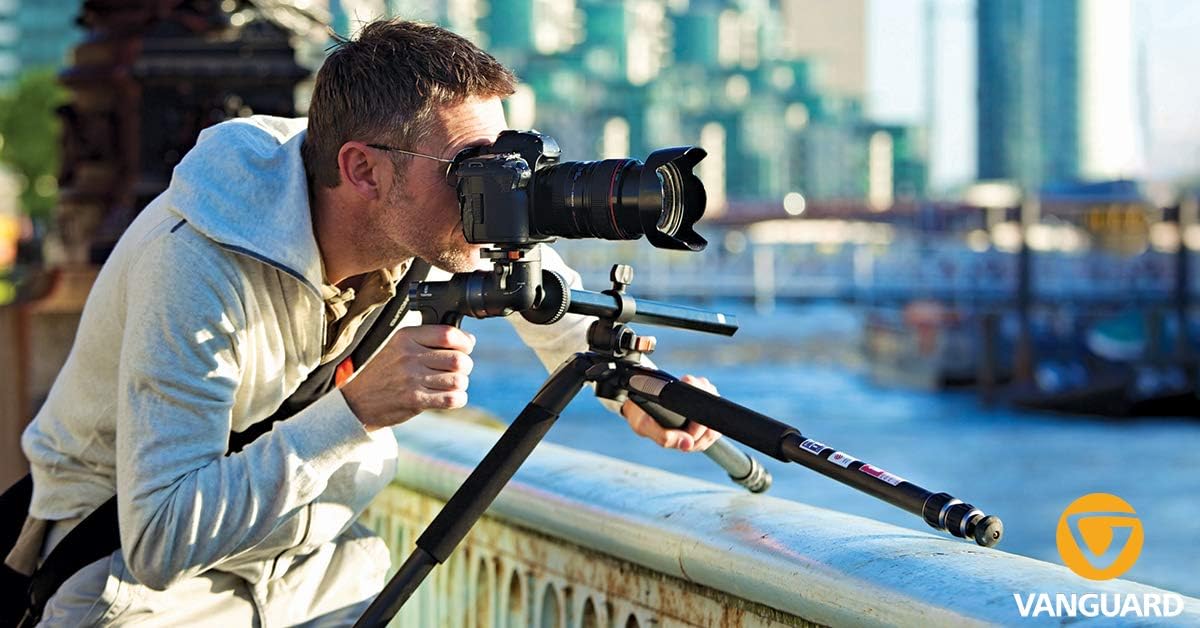
The Alta Pro 263AGH is designed for photographers seeking versatility and stability, offering unique angle possibilities for various photographic styles, including macro and wide-angle shots. The GH-100 Grip Head provides precise and ergonomic control over camera positioning.
Caractéristiques principales
- Multi-Angle Central Column (MACC) System: Allows the central column to pivot from 0 to 180 degrees, enabling vertical and horizontal positioning for diverse shooting angles.
- Instant Swivel Stop-n-Lock (ISSL) System: Securely repositions the central column quickly while maintaining tripod stability.
- Angles de pieds réglables : Aluminum alloy legs can be independently set to 25, 50, and 80-degree angles for stability on uneven terrain and creative low-angle shots.
- GH-100 Pistol Grip-Style Ball Head: Offers 360-degree panning movements, -32 to +90 degrees of side-to-side tilt, and -8 to +0 degrees back-to-front tilt.
- Friction Control System: Easily modifies ball head friction for precise control.
- Quick-Flip Leg Locks: For rapid and secure leg extension and retraction.
- Hexagon-Shaped Central Column: Améliore la stabilité.
- Non-Slip, Spiked Rubber Feet: Provides secure footing on various terrains.
- Crochet amovible : For hanging camera accessories or adding weight for increased stability.
Instructions d'installation
1. Déplier les pieds du trépied
- Placez le trépied sur une surface plane et stable.
- Déverrouillez les jambes de chaque jambe.
- Extend each leg section to the desired length. Ensure all quick-flip leg locks are securely fastened after extension.
- Adjust the leg angles by pressing the angle adjustment buttons located at the top of each leg. You can select 25, 50, or 80-degree angles. Ensure the legs click into place.

2. Attaching the GH-100 Grip Head
- Ensure the central column is securely tightened.
- Mount the GH-100 Grip Head onto the central column's mounting screw. Rotate clockwise until firmly attached.
- Tighten the base locking knob on the grip head to prevent rotation.
3. Montage de votre caméra
- Locate the quick release plate on the GH-100 Grip Head.
- Attach the quick release plate to the bottom of your camera by screwing it into the camera's tripod mount. Ensure it is tight.
- Align the quick release plate with the receiver on the grip head and slide it in until it locks securely. A safety pin or lever may need to be engaged.
Mode d'emploi
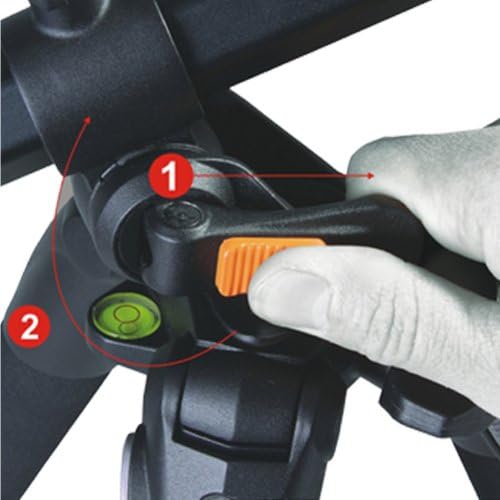
1. Adjusting the Multi-Angle Central Column (MACC)
The MACC system allows for extreme flexibility in camera positioning:
- Loosen the central column locking knob.
- Press the Instant Swivel Stop-n-Lock (ISSL) button to release the column's angle lock.
- Pivot the central column from 0 to 180 degrees to achieve vertical or horizontal positions.
- Once the desired angle is reached, release the ISSL button and tighten the central column locking knob to secure it.


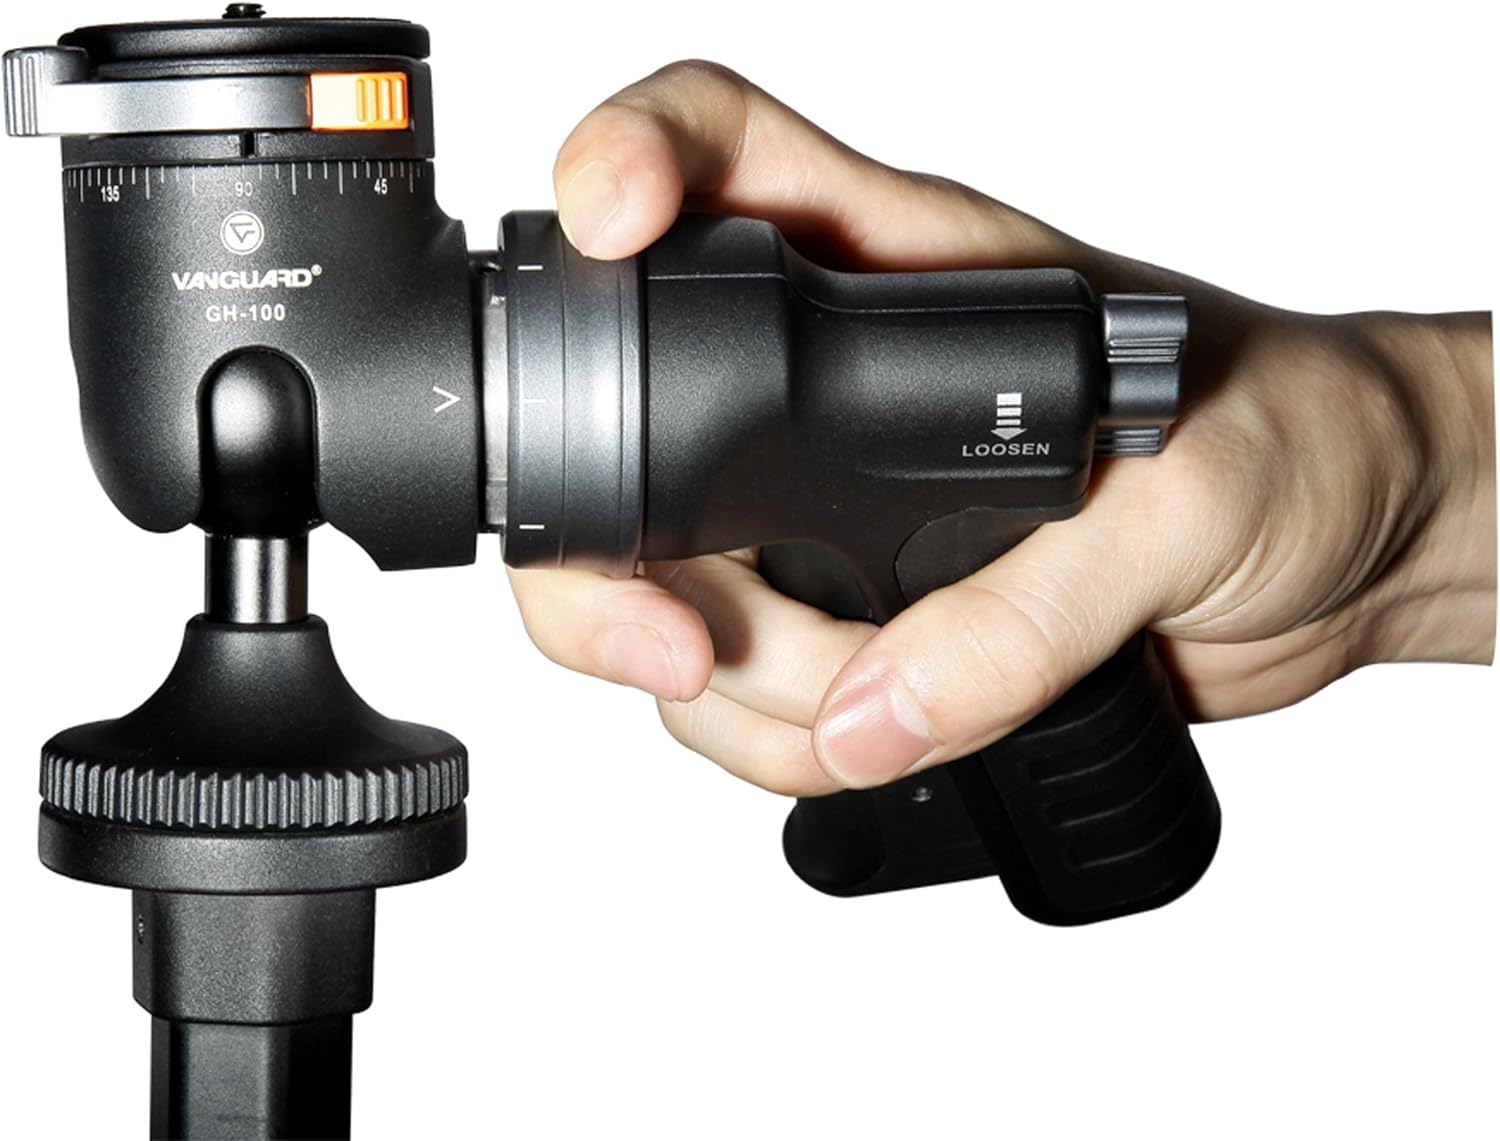
2. Using the GH-100 Grip Head
The GH-100 Grip Head provides intuitive control over your camera's position:
- Positionnement : Squeeze the trigger on the grip handle to release the ball head mechanism. This allows for free movement of your camera in all directions (360-degree pan, -32 to +90-degree side tilt, -8 to +0-degree front tilt).
- Verrouillage: Release the trigger to lock the camera firmly in position.
- Contrôle du frottement : Use the friction control knob to adjust the resistance of the ball head movement. This helps prevent sudden drops and provides smoother adjustments, especially with heavier camera setups.
- Déplacement panoramique : The grip head features a 72-point click system for 360-degree panoramic positioning in 5-degree increments. Use the dedicated panning lock knob for this function.
- Handle Rotation: The grip handle itself can be rotated to any of eight positions for optimal comfort and control.


Entretien
- Nettoyage: Regularly wipe down the tripod and grip head with a soft, dry cloth. For stubborn dirt, use a slightly damp chiffon et du savon doux, puis séchez soigneusement.
- Sand and Dust: If used in sandy or dusty environments, carefully clean the leg sections and locking mechanisms to prevent grit from interfering with operation. Extend all leg sections and wipe them clean. If sand enters the leg tubes, it may require disassembly for thorough cleaning to prevent wear.
- Lubrification: Avoid over-lubricating moving parts unless specifically instructed by Vanguard. Excessive lubrication can attract dirt.
- Stockage: Store the tripod in a dry, cool place, preferably in its included carrying bag, to protect it from dust and moisture.
- Inspection: Periodically check all screws, knobs, and levers to ensure they are tight and functioning correctly.
Dépannage
| Problème | Cause possible | Solution |
|---|---|---|
| Les pieds du trépied ne se déploient ni ne se rétractent correctement. | Dirt or sand inside leg sections; leg locks are too tight or loose. | Clean leg sections thoroughly. Adjust leg lock tension if applicable (refer to manufacturer guidelines). |
| Central column does not pivot or lock securely. | ISSL button not fully pressed/released; central column locking knob not tightened. | Ensure the ISSL button is fully engaged or disengaged. Tighten the central column locking knob firmly. |
| GH-100 Grip Head movement is too stiff or too loose. | Friction control knob incorrectly set. | Adjust the friction control knob on the grip head to achieve desired resistance. |
| Camera not securely held by grip head. | Quick release plate not properly attached or locked; grip head trigger not released. | Ensure the quick release plate is firmly screwed to the camera and fully engaged in the grip head. Release the grip head trigger to lock the position. |
Caractéristiques
- Hauteur étendue : 68.5 pouces
- Minimum Extended Height: 56.125 pouces
- Macro Height: 10.375 pouces
- Hauteur pliée : 28.5 pouces
- Poids: 5.84 livres
- Capacité de chargement maximale: 13.2 livres
- Nombre de sections: 3
- Diameter of Leg: 26 mm
- Matériel: Aluminum Alloy (legs), Magnesium (canopy)
- Type de tête de trépied : Pistol Grip Heads (GH-100)
Garantie et assistance
For detailed warranty information, product registration, or technical support, please visit the official Vanguard webConsultez leur site web ou contactez leur service client. Conservez votre reçu d'achat comme preuve d'achat pour toute réclamation au titre de la garantie.
Vanguard Official Website: www.vanguardworld.com


