Introduction
This manual provides detailed instructions for the setup, operation, and maintenance of your Supersonic SC371 Digital Projection Alarm Clock with AM/FM Radio. Please read this manual thoroughly before using the device to ensure proper function and to maximize your user experience.
Consignes de sécurité
- N'exposez pas l'appareil à des températures extrêmes, à la lumière directe du soleil, à la poussière ou à l'humidité.
- Ensure the power adapter is compatible with your local power supply (AC 120V, 60Hz).
- Ne tentez pas de démonter ni de modifier l'appareil. Confiez toute réparation à un personnel qualifié.
- Tenez l'appareil éloigné de l'eau ou de tout autre liquide.
- Use only the specified battery type for backup (9V, not included).
Contenu du colis
Veuillez vérifier que tous les articles sont présents dans le colis :
- Supersonic SC371 Digital Projection Alarm Clock with Radio
- Adaptateur secteur
- Manuel de l'utilisateur (ce document)
Produit terminéview
The Supersonic SC371 is a versatile digital alarm clock featuring a clear LED display, built-in time projection, and an integrated AM/FM radio. It includes an alarm with sleep/snooze timers and a 3.5mm audio input for external devices.
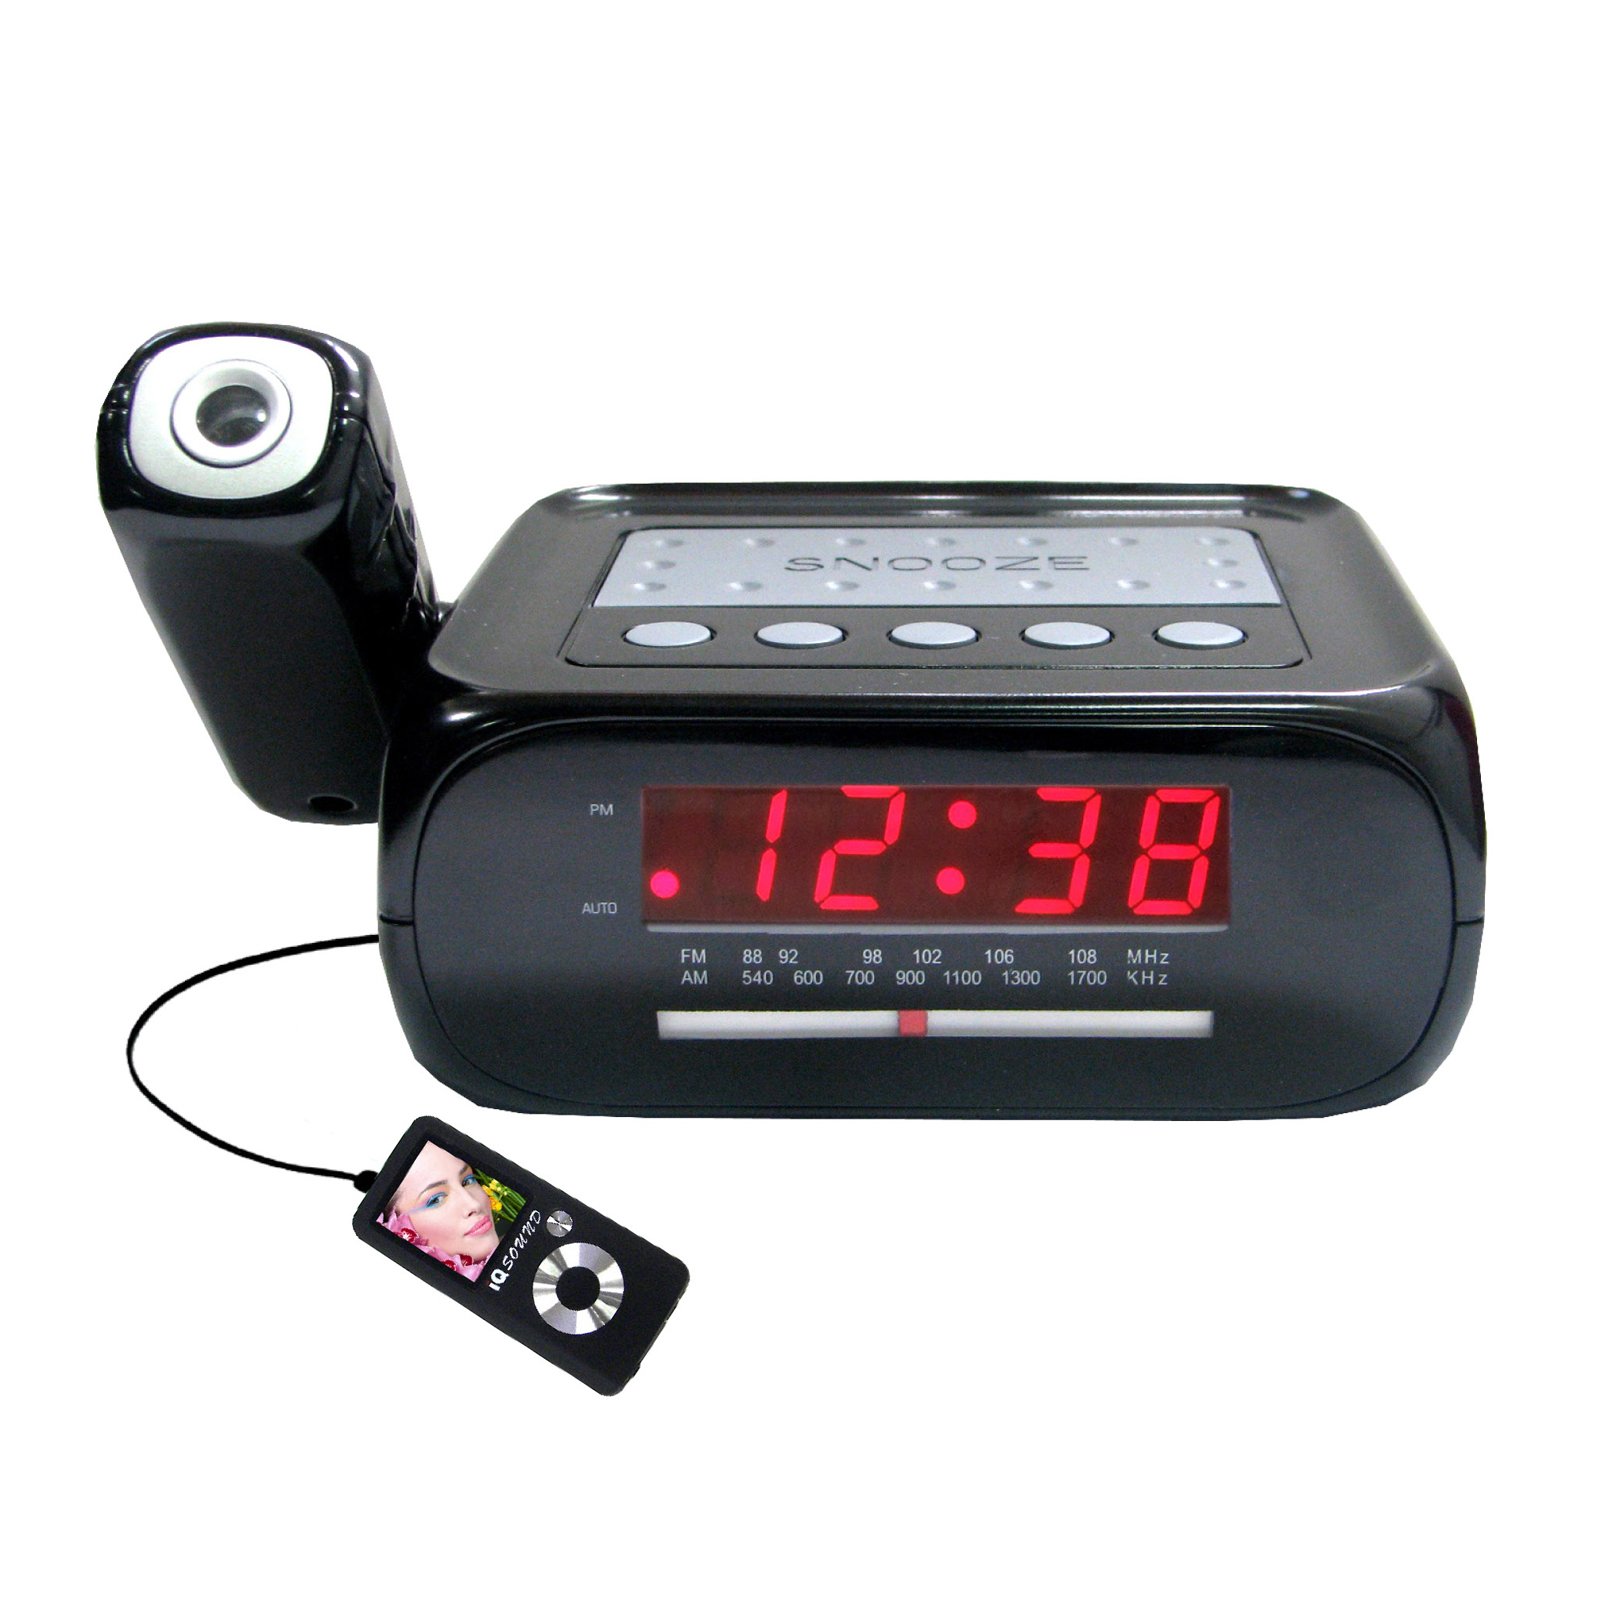
Image : Avant view of the Supersonic SC371 Digital Projection Alarm Clock, showing the LED display and control buttons.
Caractéristiques principales :
- Digital Clock with LED Display
- Built-in Time Projection
- Tuner radio AM/FM
- Alarm Clock with Sleep/Snooze Timers
- Wake Up to Music or Buzzer
- 3.5mm Audio Input Jack for Portable Audio Players
Installation
1. Connexion électrique
Connect the AC power adapter to the DC IN jack on the back of the unit, then plug the adapter into a standard AC 120V, 60Hz wall outlet. The unit will power on and the LED display will illuminate.
2. Batterie de secours (en option)
For battery backup functionality, insert one 9V battery (not included) into the battery compartment located on the bottom of the unit. This battery will preserve time and alarm settings during a power outage, but the display and projection will not operate.
Mode d'emploi
Réglage de l'heure
- Appuyez et maintenez enfoncé le RÉGLAGE DE L'HEURE Appuyez sur le bouton. Les chiffres de l'heure se mettront à clignoter.
- Utilisez le HEURE bouton pour régler l'heure.
- Utilisez le MINUTE bouton pour régler les minutes.
- Presse RÉGLAGE DE L'HEURE à nouveau pour confirmer et quitter le mode de réglage de l'heure.
Réglage de l'alarme
- Appuyez et maintenez enfoncé le ENSEMBLE D'ALARME bouton. Les chiffres de l'heure de l'alarme clignoteront.
- Utilisez le HEURE bouton permettant de régler l'heure de l'alarme souhaitée.
- Utilisez le MINUTE pour régler la minute d'alarme souhaitée.
- Presse ENSEMBLE D'ALARME encore une fois pour confirmer l'heure du réveil.
- Appuyez sur le ALARME ON / OFF button to activate or deactivate the alarm. An indicator will appear on the display when the alarm is active.
Fonction de répétition
Lorsque l'alarme sonne, appuyez sur la ROUPILLON Appuyez sur le bouton pour couper temporairement l'alarme pendant environ 9 minutes. L'alarme sonnera de nouveau après cette période.
Fonctionnement radio (AM/FM)
- Appuyez sur le RADIO MARCHE/ARRÊT bouton pour allumer la radio.
- Appuyez sur le GROUPE bouton permettant de basculer entre les bandes AM et FM.
- Utilisez le RÉGLAGE knob or buttons (if available) to select your desired station.
- Réglez le volume à l'aide de la VOLUME bouton.
- Pour éteindre la radio, appuyez sur la RADIO MARCHE/ARRÊT Appuyez à nouveau sur le bouton.
Projection temporelle
The unit features a built-in projector to display the time on a wall or ceiling. Locate the PROJECTION button or switch. Press or slide it to activate the projection. You may be able to adjust the focus and angle of the projection using dedicated controls on the unit.
Utilisation de l'entrée Aux
Connect an external audio device (e.g., MP3 player, smartphone) to the 3.5mm Audio Input Jack using a standard 3.5mm audio cable (not included). The unit will automatically switch to AUX mode, allowing you to play audio from your connected device through the clock's speaker.
Entretien
Nettoyage
To clean the unit, gently wipe the surfaces with a soft, dry cloth. Do not use abrasive cleaners, waxes, or solvents, as these can damage the finish. Ensure the unit is unplugged before cleaning.
Remplacement de la batterie
If the battery backup feature is used, replace the 9V battery annually or when the unit fails to retain settings during a power interruption.
Dépannage
| Problème | Cause possible | Solution |
|---|---|---|
| L'unité ne s'allume pas. | Adaptateur secteur non connecté ou défectueux. | Assurez-vous que l'adaptateur secteur est correctement branché à l'appareil et à une prise murale fonctionnelle. |
| Projection does not work or is dim. | Projection feature not activated; unit too far from surface; projector lens obstructed. | Activate the projection feature. Adjust the unit's distance from the projection surface. Clean the projector lens if necessary. |
| Parasites radio ou mauvaise réception. | Signal faible ; antenne non déployée. | Déployez complètement l'antenne filaire FM. Repositionnez l'appareil pour une meilleure réception. |
| L'alarme ne sonne pas. | Alarme non réglée ou désactivée ; volume trop faible. | Ensure the alarm is set and activated (check display indicator). Increase the volume. |
Caractéristiques
| Fonctionnalité | Spécification |
|---|---|
| Numéro de modèle | SC371 |
| Type d'affichage | LED numérique |
| Source d'énergie | AC 120V, 60Hz (Corded Electric) |
| Batterie de secours | 1 pile 9V (non incluse) |
| Caractéristiques spéciales | Alarm, Audio Input, Projection Clock, Radio, Snooze |
| Dimensions (L x l x H) | 18.52 x 9.42 x 8.71 cm (7.29 x 3.71 x 3.43 pouces) |
| Poids de l'article | 517 g (1.14 lb) |
| Type de montage | Dessus de table |
Garantie et assistance
Supersonic products are designed for reliability and performance. For warranty information or technical support, please refer to the warranty card included with your purchase or visit the official Supersonic webConsultez le site. Conservez votre reçu d'achat comme preuve d'achat pour toute réclamation au titre de la garantie.


