1. Introduction
Thank you for choosing the VOKSUN Digital Wireless Weather Station. This device provides comprehensive weather information, including indoor and outdoor temperature and humidity, weather forecasts, moon phases, and barometric pressure. It also features an alarm clock with snooze function and an adjustable backlight for optimal readability. Please read this manual carefully before use to ensure proper operation and to maximize the lifespan of your device.
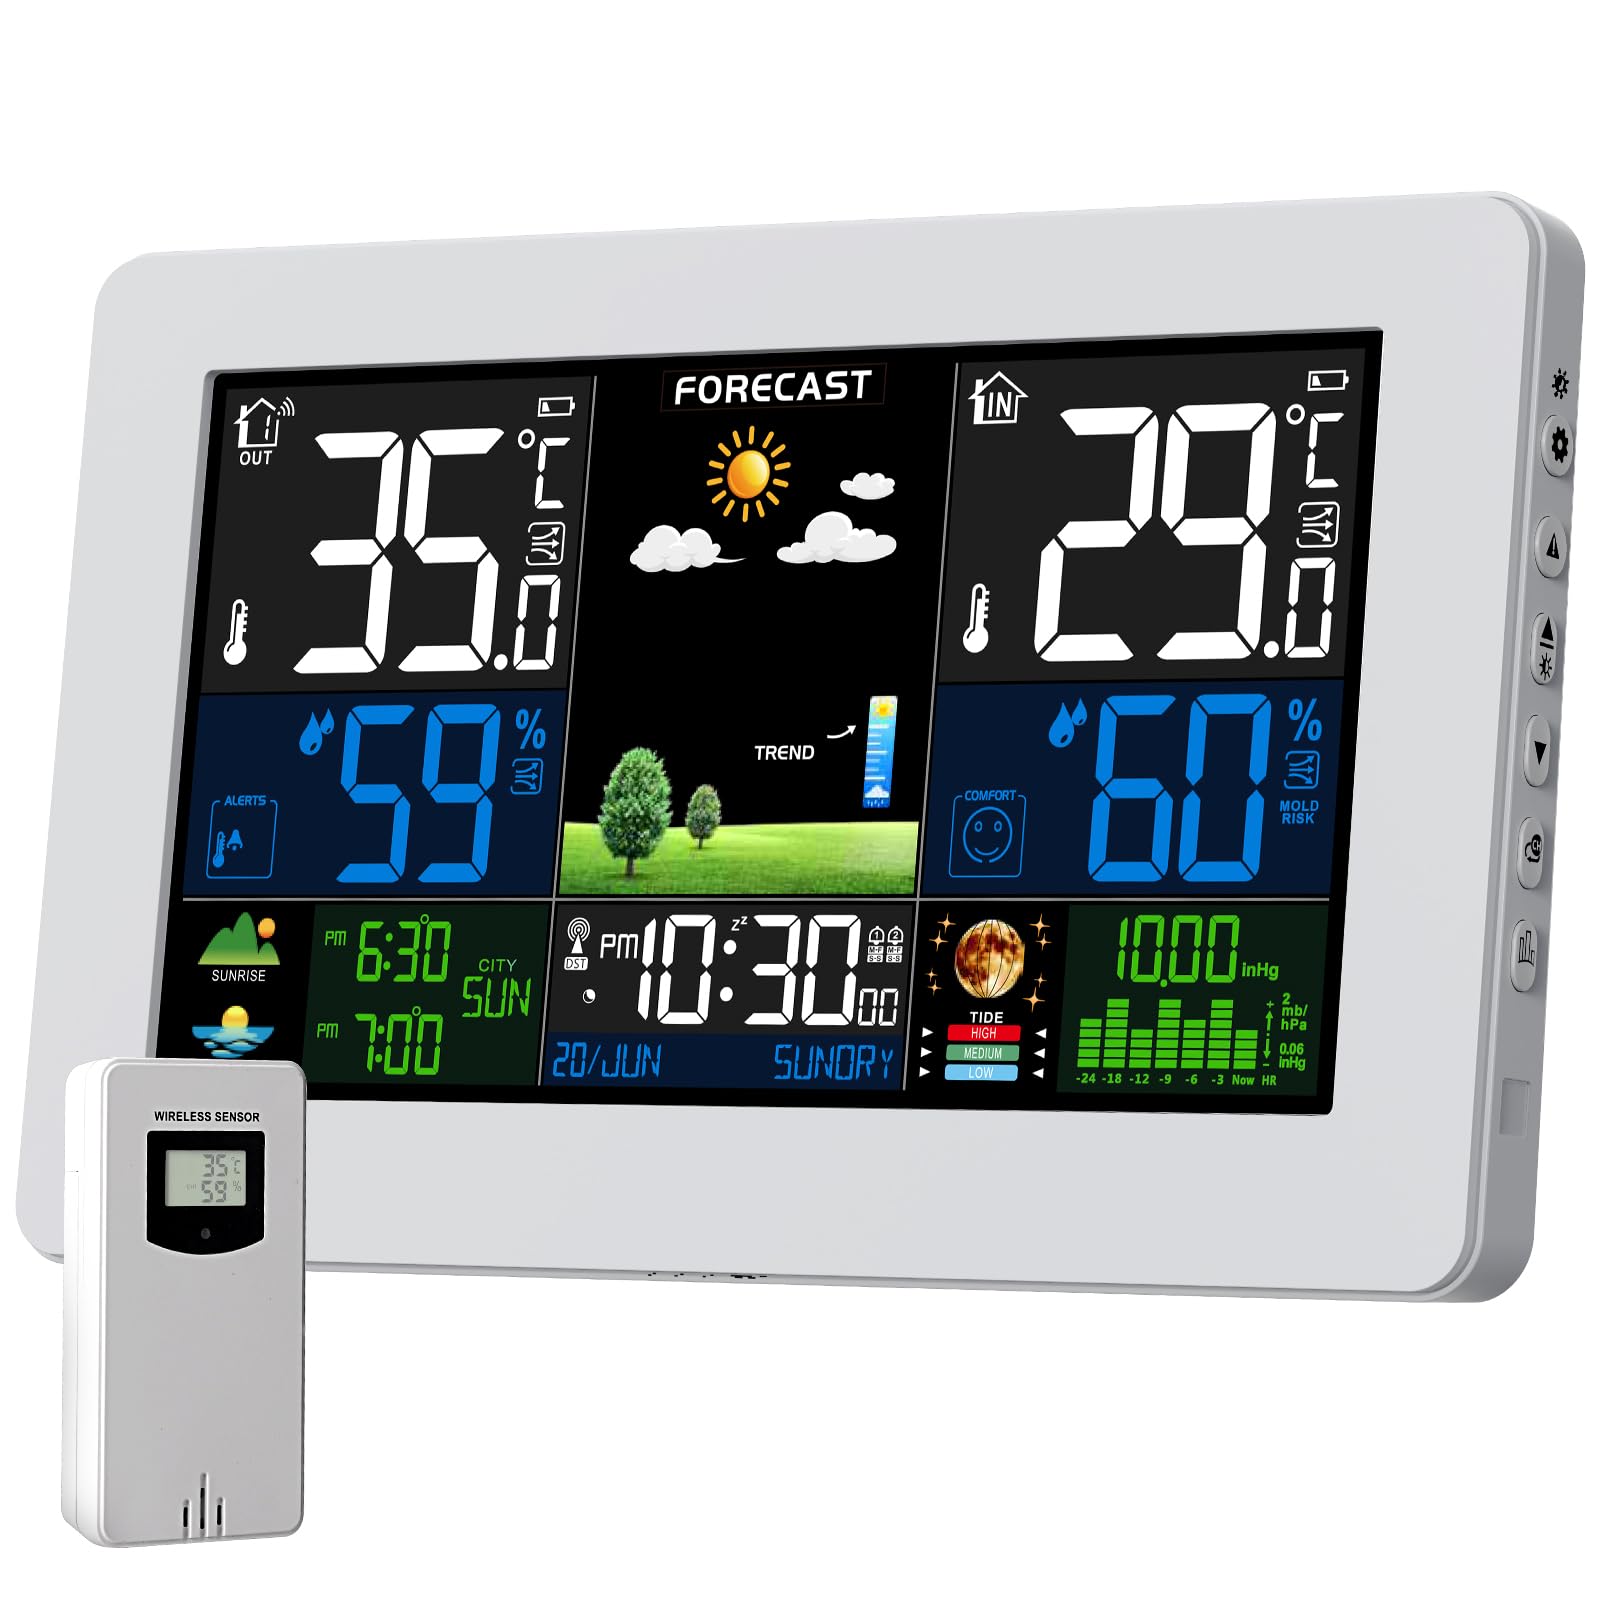
Image: The VOKSUN Digital Wireless Weather Station main unit (white) and its accompanying outdoor sensor.
2. Contenu du colis
Vérifiez que tous les articles sont présents et en bon état lors du déballage :
- 1 x VOKSUN Digital Wireless Weather Station (Main Unit)
- 1 x capteur extérieur sans fil
- 1 x Power Adapter (DC5V)
- 1 x Manuel d'utilisation (ce document)
Note: Batteries (AA) for both the main unit and the outdoor sensor are not included and must be purchased separately.
3. Guide de configuration
3.1 Alimentation de l'appareil
La station météo propose deux modes d'alimentation : adaptateur 5 V CC ou piles. Le capteur extérieur fonctionne exclusivement sur piles.
- Capteur extérieur : Open the battery compartment on the back of the wireless outdoor sensor. Insert 2 x AA batteries, ensuring correct polarity (+/-). Close the compartment.
- Main Unit (Battery Power): Open the battery compartment on the back of the main unit. Insert 2 x AA batteries, ensuring correct polarity (+/-). Close the compartment. When powered by batteries, the screen will light up for approximately 15 seconds after touching the light button and then turn off to conserve energy.
- Main Unit (Adapter Power): Connect the DC5V power adapter to the main unit's power input port and then plug it into a wall outlet. The display will remain constantly lit. It is recommended to use the power adapter for continuous display and insert batteries as a backup to retain settings during power outaget.

Image: Illustration of the two power supply methods for the main unit (adapter and batteries) and battery installation for the outdoor sensor.
3.2 Placement et synchronisation des capteurs
For accurate readings, proper placement of the outdoor sensor is crucial.
- Place the outdoor sensor in a shaded area, protected from direct sunlight and rain, to avoid inaccurate temperature and humidity readings.
- Ensure the sensor is within the wireless transmission range (up to 60 meters / 200 feet in an open area) of the main unit. Obstacles like thick walls can reduce this range.
- The main unit will automatically attempt to connect with the outdoor sensor(s) upon power-up. Allow a few minutes for the initial synchronization.
- The weather station supports up to three wireless outdoor sensors. If using multiple sensors, ensure each is set to a different channel (CH1, CH2, CH3) using the switch inside the sensor's battery compartment. The main unit will cycle through the readings of all connected sensors.

Image: The weather station and outdoor sensor, demonstrating various suitable locations for sensor placement, such as a courtyard, bedroom, and basement, highlighting its multi-sensor capability.
4. Mode d'emploi
4.1 Affichage terminéview
The large color LCD screen displays various information clearly. Familiarize yourself with the different sections:
- En haut à gauche: Température et humidité intérieures
- En haut à droite: Outdoor Temperature and Humidity (from current sensor channel)
- Middle Top: Icônes de prévisions météorologiques
- Middle Bottom: Time, Date, Day of the week, Sunrise/Sunset times
- En bas à droite : Barometric Pressure trend and Moon Phase
- Indicateur de confort : Displayed near humidity readings.

Image: The weather station's display, illustrating the layout of temperature, humidity, forecast, time, date, moon phase, and barometric pressure information.
4.2 Time and Date Setting (DCF Synchronization)
The weather station automatically synchronizes its time and date via DCF radio signal. This ensures accurate timekeeping, including automatic adjustment for daylight saving time.
- Upon initial setup or after a reset, the device will search for the DCF signal. This process may take several minutes.
- Ensure the weather station is placed away from electronic devices that might interfere with the signal reception.
- You may need to manually set your time zone. Refer to the detailed instructions in the full manual for specific button presses.

Image: The weather station demonstrating its automatic time synchronization feature via DCF radio signal, with a map indicating the signal's reach across Europe.
4.3 Fonctions du réveil
The weather station includes two independent alarm clocks with a snooze function.
- Réglage des alarmes : Access the alarm settings menu (refer to the full manual for button navigation). You can set two separate alarms, configure them for weekdays (M-F), weekends (S-S), or daily.
- Fonction de répétition: When an alarm sounds, press the snooze button to temporarily silence it. The alarm will sound again after 5 to 60 minutes, depending on your setting.

Image: The weather station positioned on a bedside table, depicting a person sleeping and another stretching, to illustrate the convenience of its dual alarm and snooze features.
4.4 Prévisions météorologiques
The weather station calculates a forecast for the next 12-24 hours based on barometric pressure trends. It displays various icons representing sunny, slightly cloudy, cloudy, rainy, stormy, and snowy conditions.
- Étalonnage: For accurate local forecasts, the station requires 7 to 10 days of barometric pressure data for self-calibration.
- Interprétation: The forecast icons represent predicted weather, not current conditions.

Image: The weather station's display showing a range of weather forecast icons, including sunny, slightly cloudy, cloudy, rainy, stormy, and snowy conditions.
4.5 Pression barométrique
The station displays barometric pressure, which is used for weather forecasting. You can view it in either absolute (ABS) or relative (REL) pressure modes.
- Relative Pressure (REL): This mode allows you to adjust the pressure reading to match local altitude, providing a more accurate local forecast.
- Absolute Pressure (ABS): This displays the raw barometric pressure measured by the sensor.
- Refer to the full manual for instructions on how to switch between modes and calibrate relative pressure.

Image: The weather station's display illustrating both relative and absolute barometric pressure readings, set against a scenic mountain and coastal backdrop.
4.6 Comfort Indicator and Mold Risk
The comfort indicator provides a quick visual reference of the indoor environment's comfort level based on temperature and humidity. It also alerts to potential mold risk.
- Niveaux de confort : The display uses icons (e.g., smiling face for comfortable, neutral for acceptable, frowning for uncomfortable) to indicate comfort.
- Risque de moisissure : An icon will appear if humidity levels are conducive to mold growth, prompting you to adjust ventilation.

Image: The weather station's display showing temperature, humidity, and a comfort indicator with a smiling face, placed on a bedside table.
Rétroéclairage réglable de 4.7 pouces
The main unit features an adjustable backlight for improved visibility in various lighting conditions.
- When powered by the adapter, the backlight remains on and its brightness can be adjusted through multiple levels.
- When powered by batteries, the backlight activates for 15 seconds when a button is pressed, then turns off to save power.
Alerte au gel 4.8
The weather station includes a frost warning feature to alert you when outdoor temperatures approach freezing.
- When the outdoor sensor temperature is between -1°C (+30°F) and +3°C (+37°F), the anti-freeze alarm is activated, and a frost alert icon will flash on the display.

Image: The weather station's display showing a frost warning icon, juxtaposed with an indoor scene of people celebrating and an outdoor winter landscape, indicating the activation of the anti-freeze alarm.
5. Entretien
- Nettoyage: Essuyez l'unité principale et le capteur avec un chiffon doux et sec.amp chiffon. N'utilisez pas de nettoyants abrasifs ou de solvants.
- Remplacement de la batterie : Remplacez les piles de l'unité principale (si elle est utilisée comme source d'alimentation principale) et du capteur extérieur lorsque l'indicateur de batterie faible apparaît sur l'écran.
- Stockage: Si vous devez stocker l'appareil pendant une période prolongée, retirez toutes les piles afin d'éviter les fuites.
- Conditions environnementales : Évitez d'exposer l'unité principale à des températures extrêmes, à la lumière directe du soleil ou à une forte humidité. Le capteur extérieur est conçu pour une utilisation en extérieur, mais doit être protégé des fortes pluies et de la neige pour une durée de vie optimale.
6. Dépannage
| Problème | Cause possible | Solution |
|---|---|---|
| Aucun affichage sur l'unité principale | No power; batteries inserted incorrectly or depleted; adapter not connected. | Check power adapter connection. Ensure batteries are correctly inserted and not depleted. Replace batteries if necessary. |
| Température/humidité extérieure non affichée ou inexacte | Sensor out of range; sensor batteries depleted; interference; incorrect sensor channel. | Move sensor closer to the main unit. Replace sensor batteries. Relocate away from other electronics. Ensure sensor channel matches main unit's selected channel. Re-synchronize manually if needed (refer to full manual). |
| Échec de la synchronisation temporelle DCF | Signal faible ; interférences ; fuseau horaire incorrect. | Move the main unit to a location with better signal reception (e.g., near a window, away from electronics). Manually set the time zone. Allow up to 24 hours for automatic synchronization. |
| Prévisions météorologiques inexactes | Station not yet calibrated; local weather conditions vary rapidly. | Allow 7-10 days for the station to self-calibrate its barometric pressure. Understand that forecasts are predictions and may not always match current conditions perfectly. |
7. Spécifications
| Fonctionnalité | Détail |
|---|---|
| Marque | VOKSU |
| Modèle | 3378QX |
| Type d'affichage | Écran LCD (couleur) |
| Source d'alimentation (unité principale) | Adaptateur 5 V CC ou 2 piles AA (non incluses) |
| Source d'alimentation (capteur extérieur) | 2 piles AA (non incluses) |
| Plage de température intérieure | -9.9°C à +50°C (14°F à 122°F) |
| Plage de température extérieure | -40°C à +70°C (-40°F à 158°F) |
| Précision de la température | ±1°C |
| Taux d'humidité | 20% RH à 95% RH |
| Portée de transmission sans fil | Jusqu'à 60 mètres (200 pieds) en espace ouvert |
| Capteurs pris en charge | Up to 3 wireless outdoor sensors |
| Caractéristiques spéciales | Large Screen, Clock, Adjustable Brightness, Portable, Pre-calibrated, Moon Phase, Barometer, Alarm, Weather Forecast, Frost Warning |
| Matériel | Polycarbonate (PC) |
| GTIN / UPC | 774300029749 |
8. Garantie et assistance
VOKSUN products are designed for reliability and performance. For warranty information, technical support, or service inquiries, please refer to the contact details provided with your purchase or visit the official VOKSUN webConsultez le site. Conservez votre reçu d'achat comme preuve d'achat pour toute réclamation au titre de la garantie.
For further assistance, please contact VOKSUN customer service.