
1. Introduction
Thank you for choosing the ORIA Projection Alarm Clock. This manual provides detailed instructions for setting up, operating, and maintaining your new alarm clock. Please read this manual thoroughly before use to ensure proper function and to maximize your user experience.
2. Produit terminéview
The ORIA Projection Alarm Clock features an 8.5-inch LED display, a 180° rotatable projector, 17 RGB night light modes, and multiple alarm settings. It is designed for use in bedrooms, offering clear time display and ambient lighting.

Illustration 2.1 : Avant view of the ORIA Projection Alarm Clock, highlighting its 8.5-inch display and overall dimensions (approximately 9.1 inches wide and 3.7 inches high).
3. Installation
3.1 Connexion d'alimentation
Connect the provided 1.5m Type-C cable to the clock and a compatible USB power adapter (not included). The clock will power on automatically.
3.2 Memory Backup
The clock includes a built-in battery backup to preserve your settings during a power outage. No additional batteries are required for memory function, but the clock requires continuous USB-C power for display and projection.

Image 3.1: Illustration of the clock's power input (Type-C), memory function (internal battery backup), and options for 12/24-hour time format and Celsius/Fahrenheit temperature display.
4. Mode d'emploi
4.1 Réglage de l'heure et de la date
- Appuyez et maintenez enfoncé le MODE pour accéder au mode de réglage de l'heure.
- Utilisez le UP et VERS LE BAS appuyez sur les boutons pour régler l'heure, puis appuyez sur MODE pour confirmer.
- Répétez l'opération pour les minutes, l'année, le mois et le jour.
- Presse MODE à nouveau pour quitter le mode de réglage.
4.2 12/24 Hour Format Switching
En mode d'affichage normal de l'heure, appuyez sur la touche UP bouton permettant de basculer entre les formats d'affichage de l'heure 12 heures et 24 heures.
4.3 Commutation d'unité de température
En mode d'affichage normal de l'heure, appuyez sur la touche VERS LE BAS bouton permettant de basculer entre les unités de température Celsius (°C) et Fahrenheit (°F).
4.4 Réglage de l'alarme
The clock supports three alarm modes: Monday-Friday, Monday-Saturday, and Everyday.
- Appuyez sur le ALARME pour accéder au mode de réglage de l'alarme.
- Utilisez le UP et VERS LE BAS appuyez sur les boutons pour régler l'heure de l'alarme, puis appuyez sur ALARME pour confirmer.
- Répétez l'opération pendant les minutes de l'alarme.
- Utiliser UP/VERS LE BAS to select the alarm mode (1-5, 1-6, 1-7), then press ALARME pour confirmer.
- Presse ALARME à nouveau pour quitter le mode de réglage.
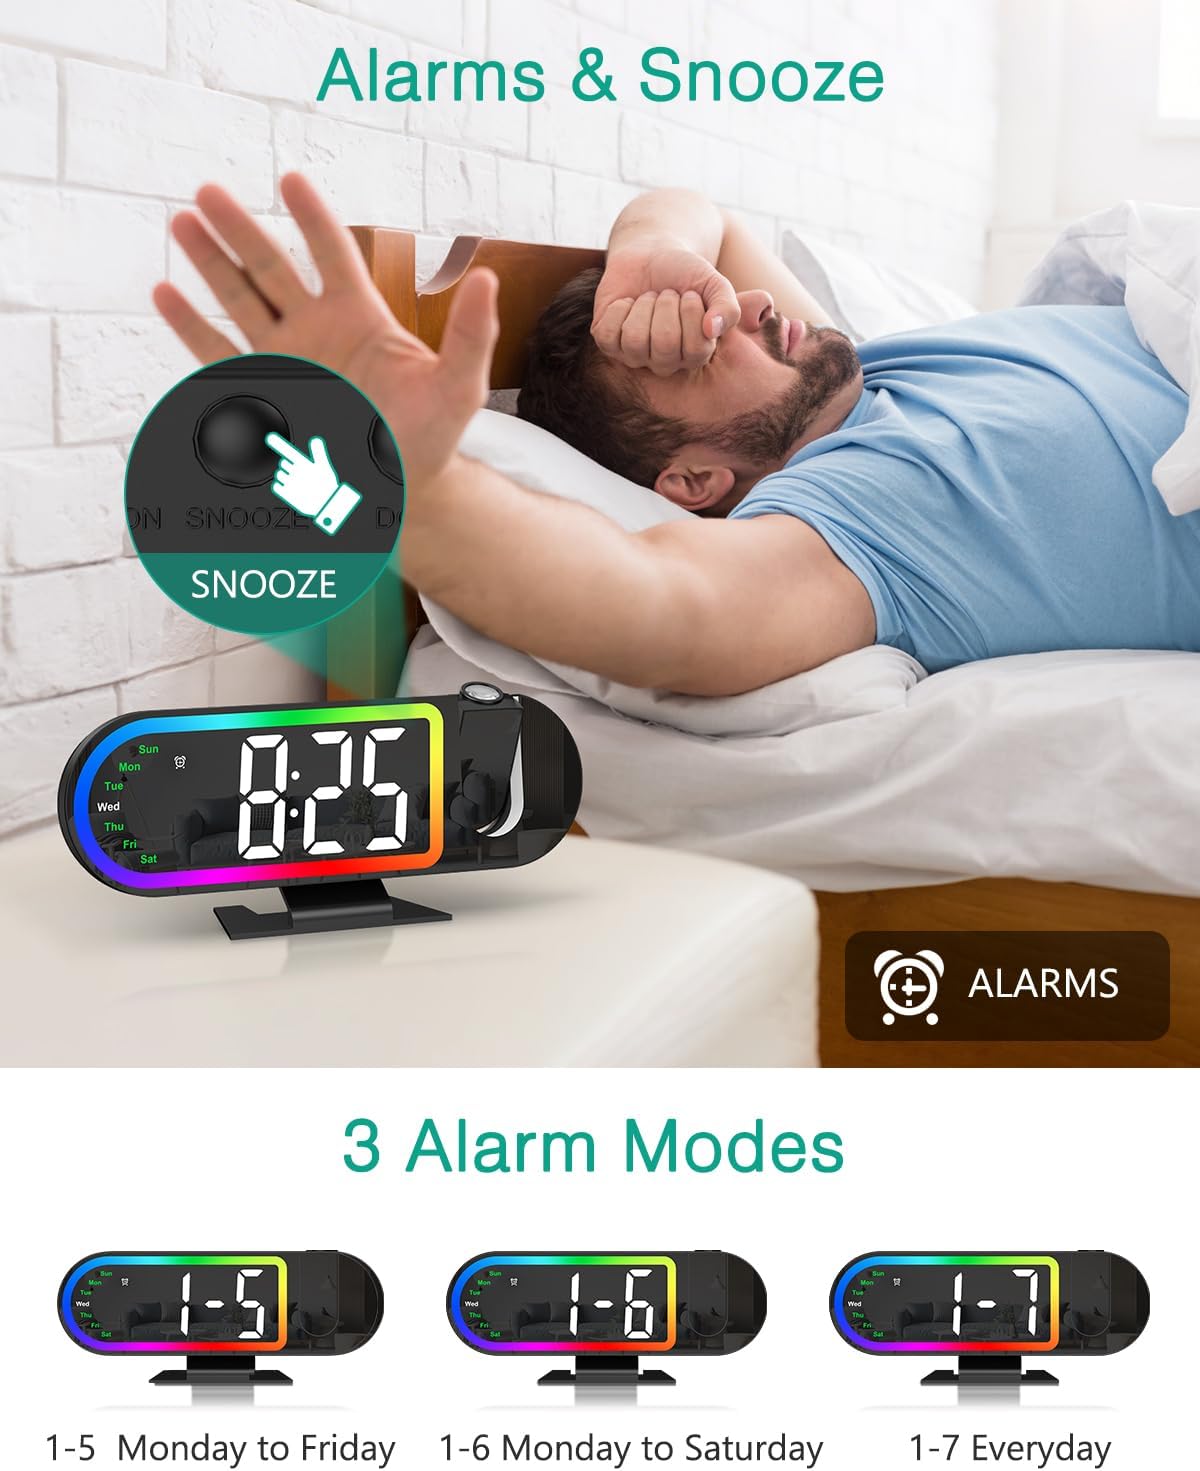
Image 4.1: The alarm clock displaying the time with an illustration of the snooze button and the three available alarm modes (Monday-Friday, Monday-Saturday, Everyday).
4.5 Fonction de répétition
Lorsque l'alarme sonne, appuyez sur le grand bouton. ROUPILLON button on the back of the clock to activate snooze. The default snooze duration is 5 minutes. You can customize the snooze duration from 1 to 60 minutes in the alarm settings.
4.6 Fonctionnalités de projection
The clock features a 180° rotatable HD projector that displays the time on your ceiling or wall. The projection distance ranges from 1.6ft to 16ft.
- Projection On/Off: Appuyez sur le PROJECTION bouton pour allumer ou éteindre la projection.
- Ajuster la luminosité de la projection : While projection is on, short press the PROJECTION button to cycle through High, Low, and Off brightness levels.
- Faire pivoter la projection : Appuyez et maintenez enfoncé le PROJECTION button for 3 seconds to switch the projection orientation by 180°. This allows you to adjust the display for optimal viewing.
Note: The projection is available only in red color.
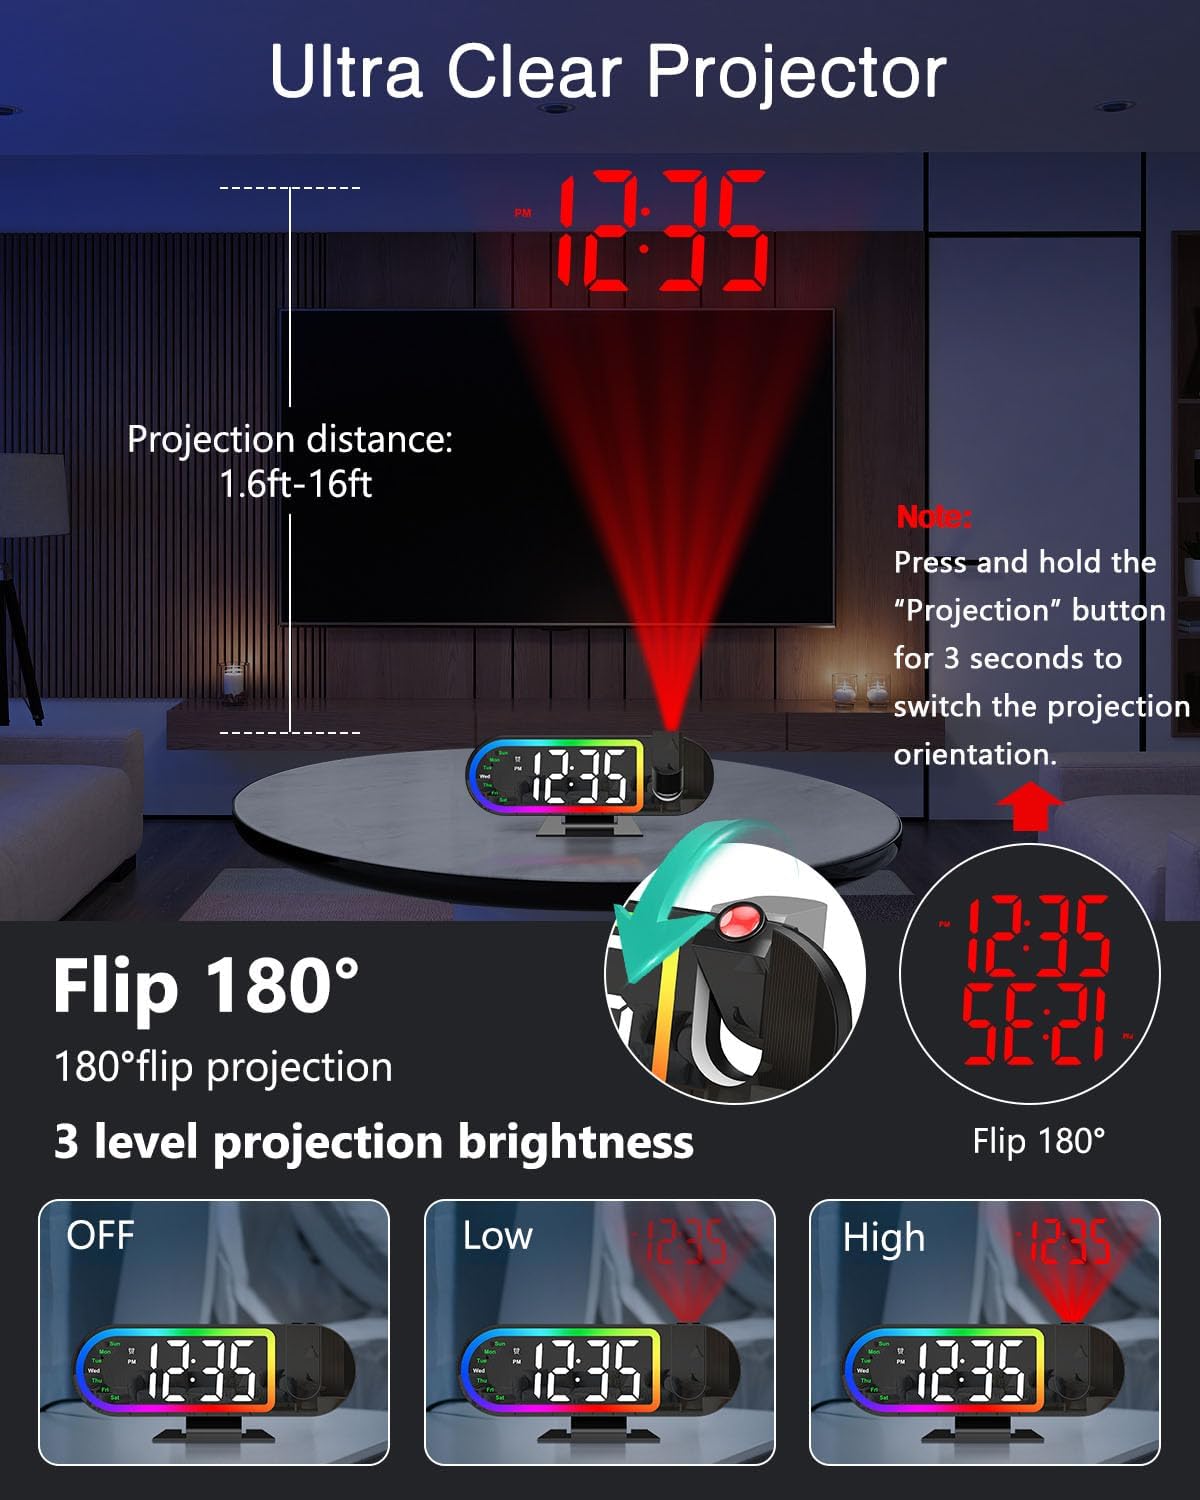
Image 4.2: Demonstrates the projection distance range (1.6ft-16ft), the 180° flip feature for projection orientation, and the three projection brightness levels (Off, Low, High).
4.7 Display Brightness and Auto-Night Mode
The 8.5-inch LED display has 4 brightness levels (High/Medium/Low/Off).
- Ajuster la luminosité de l'affichage : Appuyez brièvement sur le VARIATEUR button to cycle through High, Medium, Low, and Off brightness levels for the main display.
- Auto-Night Mode: Enable Night Mode to automatically dim the screen from 6:00 PM to 6:00 AM. This time range is customizable. Refer to the full manual for detailed customization steps.

Image 4.3: Illustrates the four screen brightness levels (High, Medium, Low, Off) and the automatic night mode function, which dims the display during specified hours.
4.8 17 RGB Night Light Modes
The clock features 17 vibrant RGB lighting options to enhance your room's ambiance.
- Change Night Light Mode: Appuyez sur le RVB button to cycle through the 17 different RGB lighting modes, including various monochrome colors, gradients, flowing effects, and breathing patterns.

Image 4.4: Displays the alarm clock with its RGB border light, showcasing various color options and dynamic lighting effects available.
4.9 Guide vidéo du produit
Video 4.1: An official product video demonstrating the ORIA Projection Alarm Clock's features, including its projection capabilities and display. This video is 16 seconds long.
5. Entretien
- Nettoyez l'horloge avec un chiffon doux et sec. N'utilisez pas de produits nettoyants abrasifs ni de solvants.
- Tenir la pendule à l'écart de l'eau et d'une forte humidité.
- Évitez de placer l'horloge en plein soleil ou près de sources de chaleur.
6. Dépannage
| Problème | Cause possible | Solution |
|---|---|---|
| L'affichage de l'horloge est éteint. | Pas de courant ni de couranttage. | Ensure the Type-C cable is securely connected to a power source. If there was a power outage, the display will return when power is restored (settings are saved by backup battery). |
| La projection est faible ou floue. | Incorrect brightness setting or projection distance. | Adjust projection brightness (High/Low). Ensure the clock is within the 1.6ft-16ft projection range. |
| L'alarme ne sonne pas. | Alarm is not set or turned off. | Verify alarm settings and ensure the alarm is enabled for the desired days. |
| L'heure/la date est incorrecte. | Initial setup error or time zone issue. | Re-enter time and date settings as per section 4.1. |
7. Spécifications
- Marque: ORIA
- Numéro de modèle : OUS-WA183
- Type d'affichage : LED numérique
- Taille de l'écran : 8.5 pouces
- Projection: 180° Rotatable, Red Color, Adjustable Brightness (High/Low/Off)
- Distance de projection : 1.6 pi - 16 pi
- Veilleuse: 17 modes RVB
- Luminosité de l'écran : 4 Levels (High/Medium/Low/Off) + Auto-Night Mode
- Modes d'alarme : Mon-Fri, Mon-Sat, Everyday
- Durée de répétition : 1 à 60 minutes (personnalisable)
- Source d'alimentation : USB-C (adaptateur non inclus)
- Sauvegarde de la mémoire : Built-in battery (retains settings during power outage)
- Dimensions: 3.74 po L x 9.13 po H (environ)
8. Garantie et assistance
ORIA is committed to providing high-quality products and customer satisfaction. Your ORIA Projection Alarm Clock comes with the following support:
- Garantie de 1 ans : Couvre les défauts de fabrication et les dysfonctionnements en conditions normales d'utilisation.
- Remplacements gratuits sous 90 jours : Pour les numéros éligibles dans les 90 jours suivant l'achat.
- Retours gratuits sous 30 jours : Pour les retours admissibles dans les 30 jours suivant l'achat.
- Assistance clientèle 24h/7 et XNUMXj/XNUMX : Assistance available around the clock for any inquiries or issues.
- Assistance technique à vie : Assistance technique continue pendant toute la durée de vie de votre produit.
Pour obtenir de l'aide, veuillez consulter le site officiel d'ORIA. website or contact our customer service team through your purchase platform.