1. Introduction
This manual provides detailed instructions for the assembly, installation, and use of your KDD Wall Organizer Peg Board. This multi-functional storage solution is designed to help organize various items, including gaming accessories, office supplies, and personal belongings.

Image 1: KDD Wall Organizer Peg Board fully assembled with accessories and RGB lighting.
2. Consignes de sécurité
- Always follow the installation instructions provided in this manual.
- Do not overload the pegboard or its accessories. The shelf is designed to hold up to 10 kg (22 lbs) when evenly distributed.
- Ensure the installation surface is clean, dry, and suitable for adhesive mounting.
3. Contenu du colis
Your KDD Wall Organizer Peg Board package includes the following components:
- Modular Pegboard Panels
- Support de téléphone
- 5 Headphone & Controller Hangers
- 2 Storage Boxes (different sizes)
- 5 crochets
- RGB USB LED Light Strip
- Connection Buckles and Small Fill-in Pieces
- Wall Mount Stickers

Image 2 : Détail view of the KDD Wall Organizer Peg Board components and accessories.
4. Assemblage et installation
4.1. Assembling the Pegboard Panels
The pegboard features a detachable design, allowing you to customize its layout. Use the larger connection buckles to join the main pegboard panels where you intend them to connect. For any unused holes or gaps, insert the smaller fill-in pieces to achieve a neat appearance.
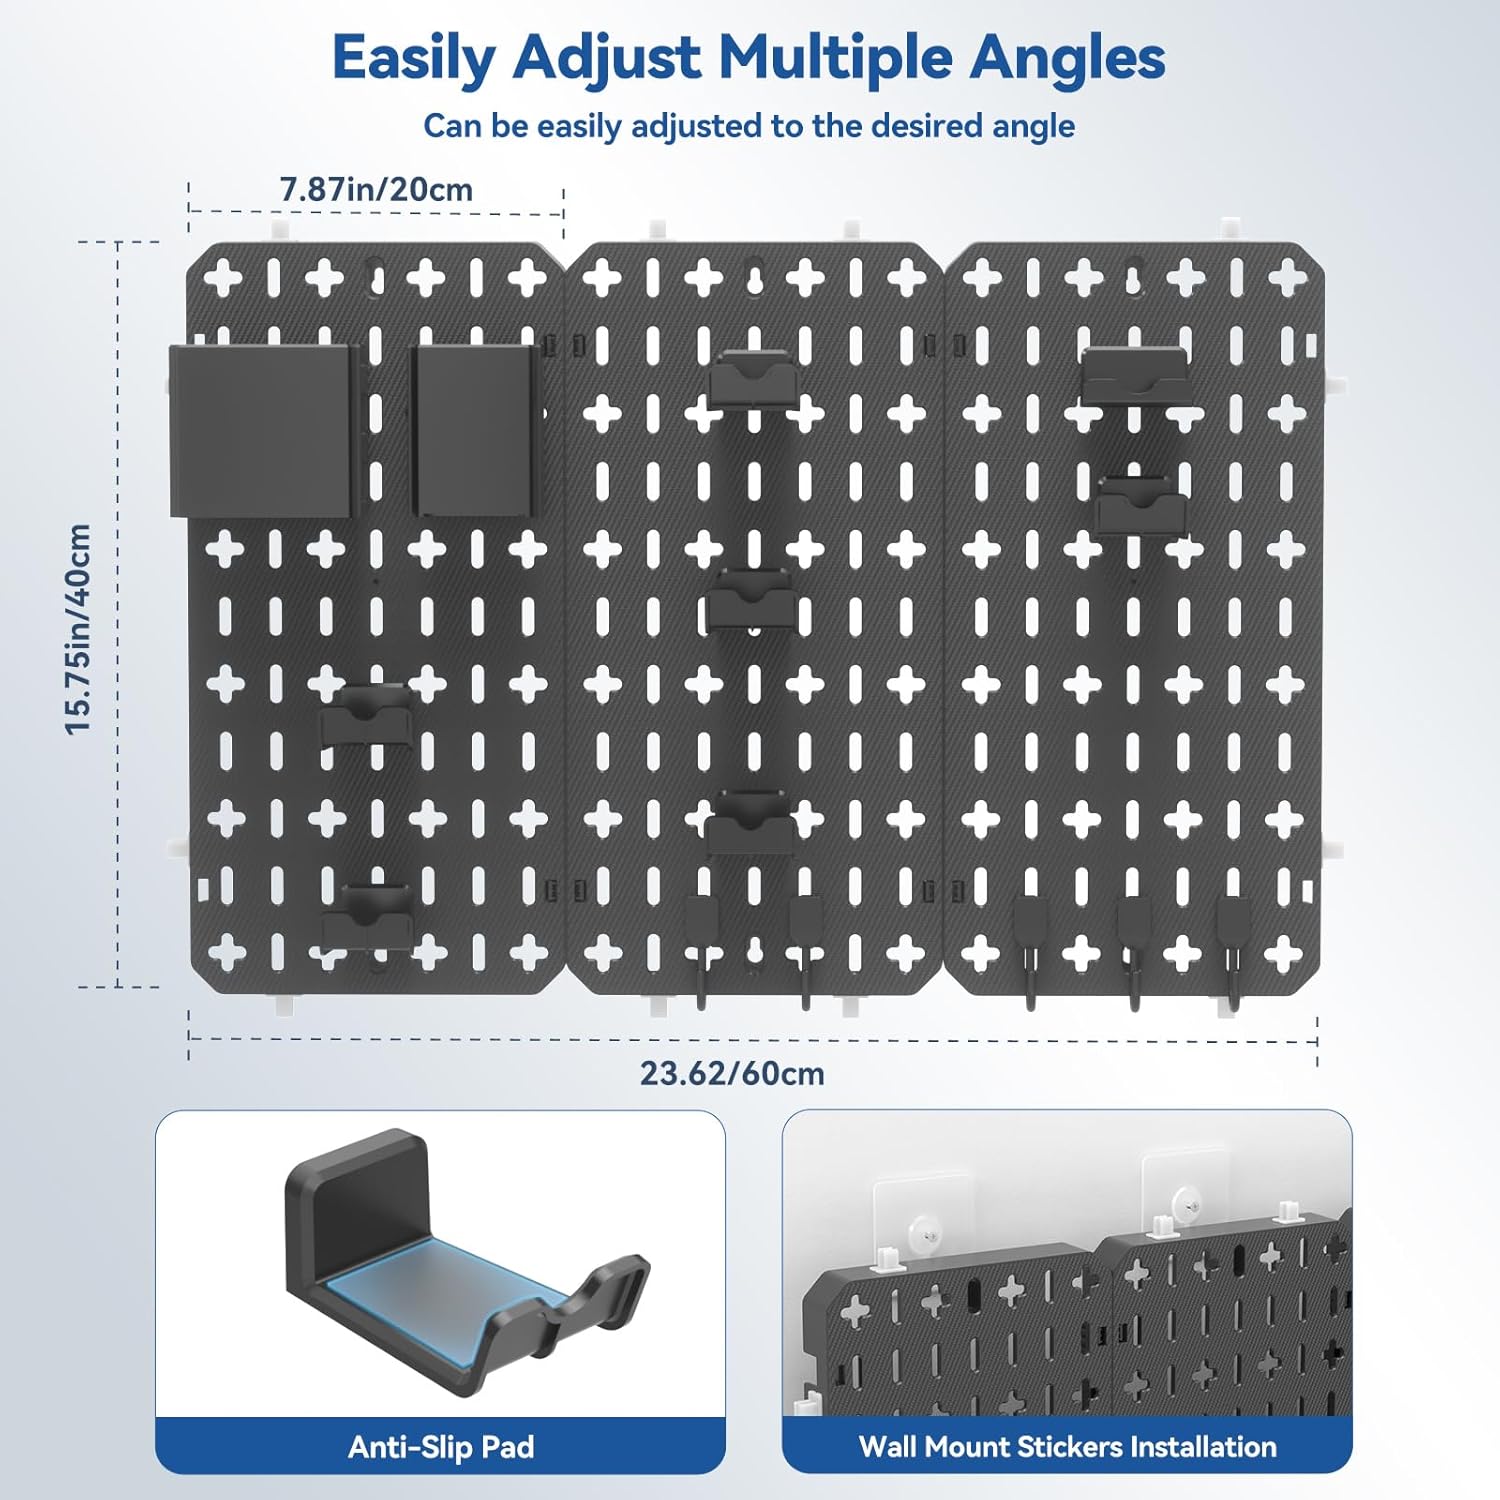
Image 3: Pegboard dimensions and illustration of the wall mount sticker installation.
4.2. No-Drilling Wall Installation
The KDD gaming pegboard is designed for easy, no-drilling installation using wall mount stickers. Ensure the wall surface is clean and dry before application.
- Nettoyez et séchez soigneusement la zone murale souhaitée.
- Peel off the protective film from the adhesive side of the wall mount stickers. Ensure the side with the upward-pointing arrow is oriented correctly.
- Press the adhesive stickers firmly onto the wall for at least one minute to ensure strong adhesion.
- Remove the pegboard from the installation frame (if applicable) and smooth out any air bubbles in the adhesive stickers by pressing down on the frame.
- Align the edge of the pegboard with the adhesive strip and press it closed and locked.
- For optimal adhesion, allow 24 hours before hanging items on the pegboard.
Pour un guide visuel du processus d'installation, veuillez consulter la vidéo ci-dessous :
Video 1: Peg Board Installation Guide (Seller: MULSAME). This video demonstrates the nail-free installation steps for the pegboard.
Video 2: How to install the Keepo pegboard set system (Seller: KreativeXYZ). This video provides a step-by-step guide on assembling and mounting the pegboard system.
5. Using the Pegboard & Accessories
The 7-in-1 design allows for versatile organization of various items. Utilize the included accessories to customize your storage space.
- Support de téléphone : Securely hold your smartphone for easy access.
- Headset & Controller Hangers: Keep your gaming peripherals neatly stored and within reach.
- Boîtes de rangement : Use the two different sized boxes for pens, keys, cables, or other small items.
- Crochets Hang additional items such as scissors, keychains, or other small tools.

Image 4 : Examples of the pegboard in use in a game room, study, and office.

Image 5: Before and after comparison illustrating desk organization with the pegboard.
5.1. Gestion des câbles
To further enhance organization and maintain a tidy setup, consider utilizing cable management solutions. The pegboard can help route and secure cables, preventing clutter.
Video 3: Cable Management Kit (Seller: Lekke). This video demonstrates various cable management techniques and accessories that can complement your pegboard setup.
6. RGB LED Strip Lights Operation
The integrated RGB LED strip lights allow for customization of your environment. The lights feature three popular modes that can be switched with a single click:
- Mode d'éclairage monochrome
- 7-Color Fast Flashing Mode
- 7-Color Breathing Light Mode
Customize the color and speed to match your preference and enhance the aesthetic of your space.
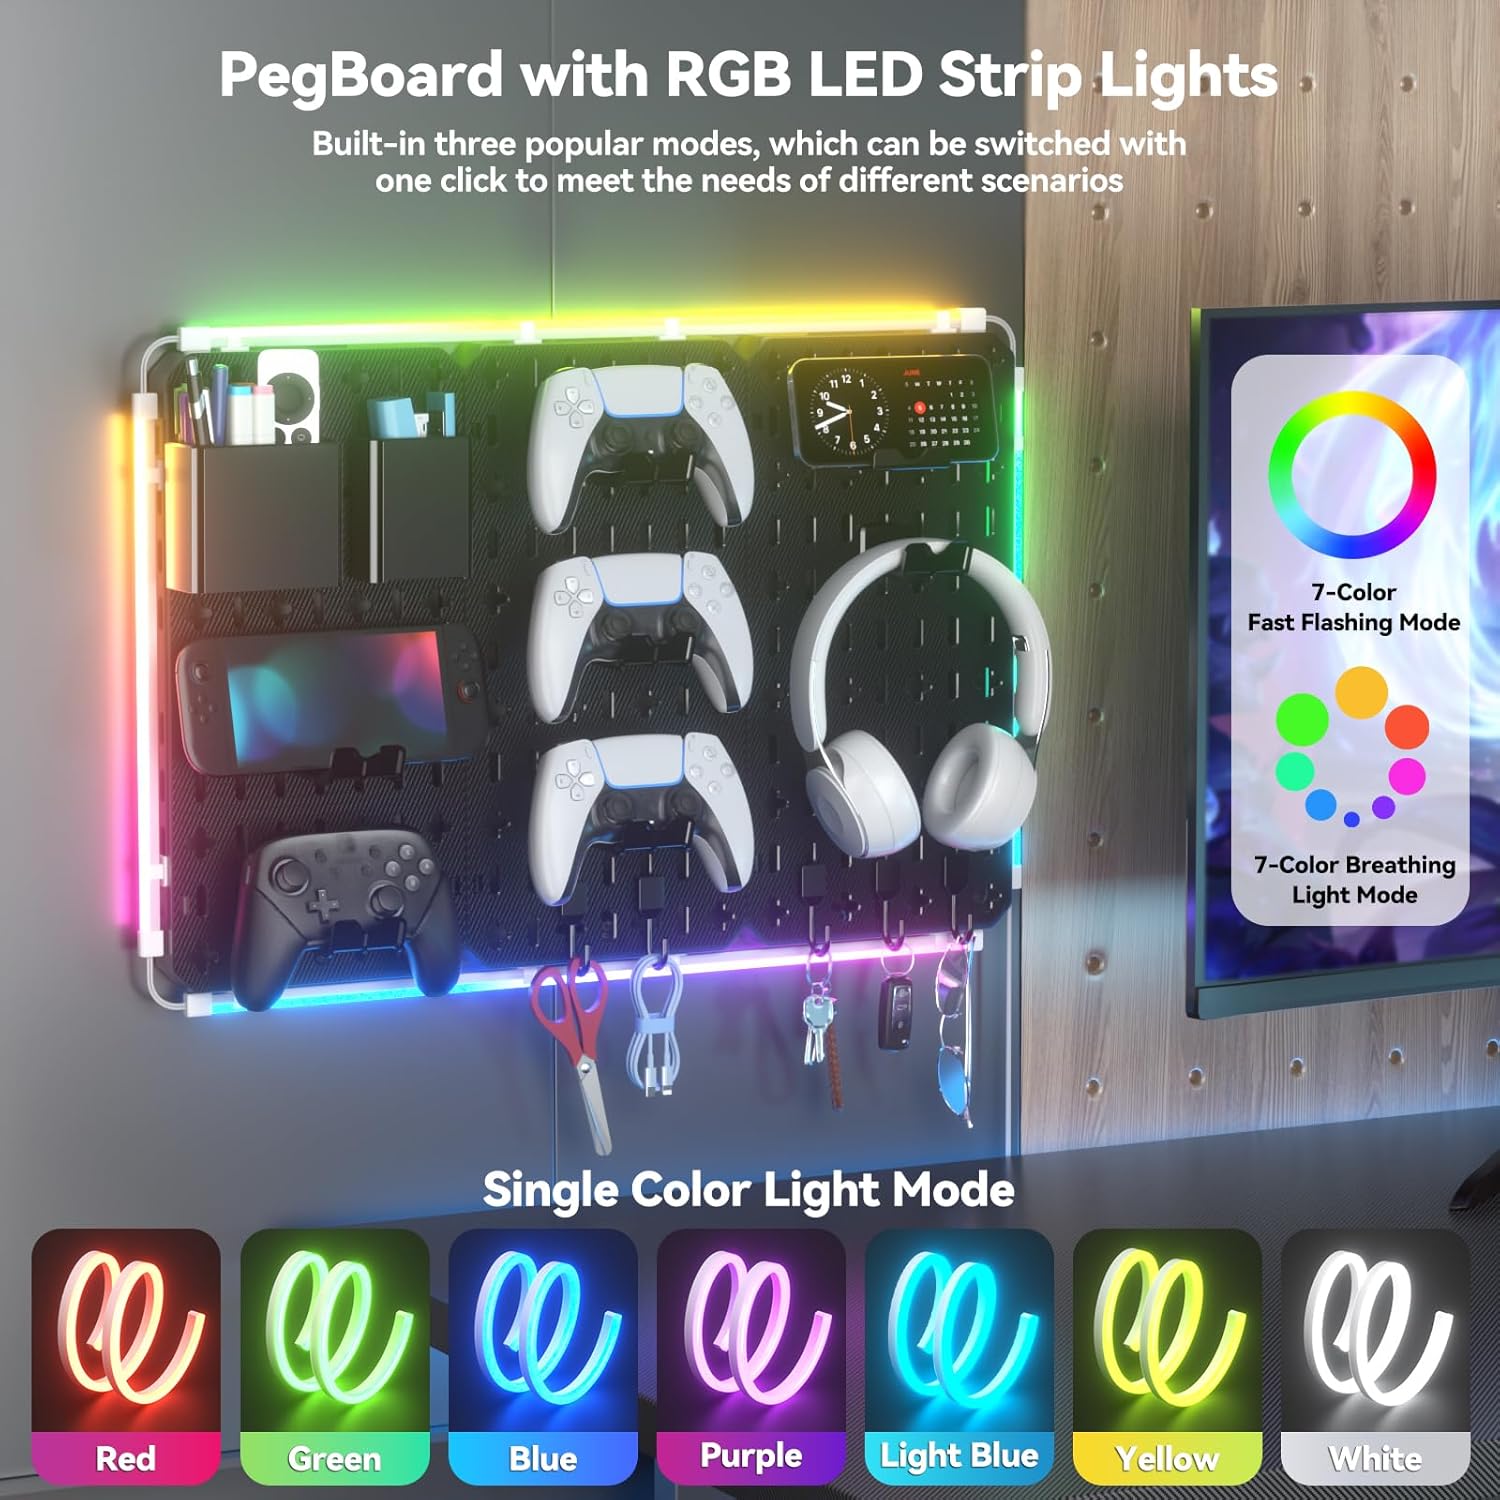
Image 6: Illustration of the RGB LED strip lights and their various modes.
7. Entretien et maintenance
- To clean the pegboard and accessories, wipe with a soft, damp Chiffon. Évitez les nettoyants abrasifs ou les solvants.
- Regularly check the wall mount stickers for secure adhesion.
- Ensure all accessories are properly seated in the pegboard holes to prevent items from falling.
8. Dépannage
- Pegboard not adhering securely: Ensure the wall surface was thoroughly cleaned and dried before applying the adhesive stickers. Press firmly for the recommended time and allow 24 hours for maximum adhesion before loading.
- Accessories not fitting: Ensure you are using the correct type of accessories for the pegboard's slot design. Some accessories may require a specific orientation.
- Les lumières RGB ne fonctionnent pas : Check the USB connection to ensure it is properly plugged into a power source. Verify that the light strip is not damaged.
9. Spécifications
| Fonctionnalité | Détail |
|---|---|
| Marque | KDD |
| Numéro de modèle | KDD-815 |
| Couleur | Noir |
| Dimensions du produit | 3 x 60 x 40 cm |
| Matériel | Acrylonitrile butadiène styrène |
| Poids de l'article | 1.75 kg |
| Type de montage | Support mural |
| Nombre d'étagères | 7 (referring to the 7-in-1 accessory types) |
| Dossier spécial | Durable, RGB LED Lights |
10. Garantie et assistance
For warranty information or technical support, please refer to the contact details provided with your product packaging or visit the official KDD website. Conservez votre reçu d’achat pour les réclamations au titre de la garantie.