
1. Introduction
This manual provides essential instructions for the installation, operation, and maintenance of your Aninerel 3000W Hybrid Solar Inverter, model ANJ-3KW-LV-WIFI. This device is designed to convert 24V DC power to 110V AC pure sine wave power, suitable for various off-grid and backup power applications. Please read this manual thoroughly before installation and use to ensure safe and efficient operation.
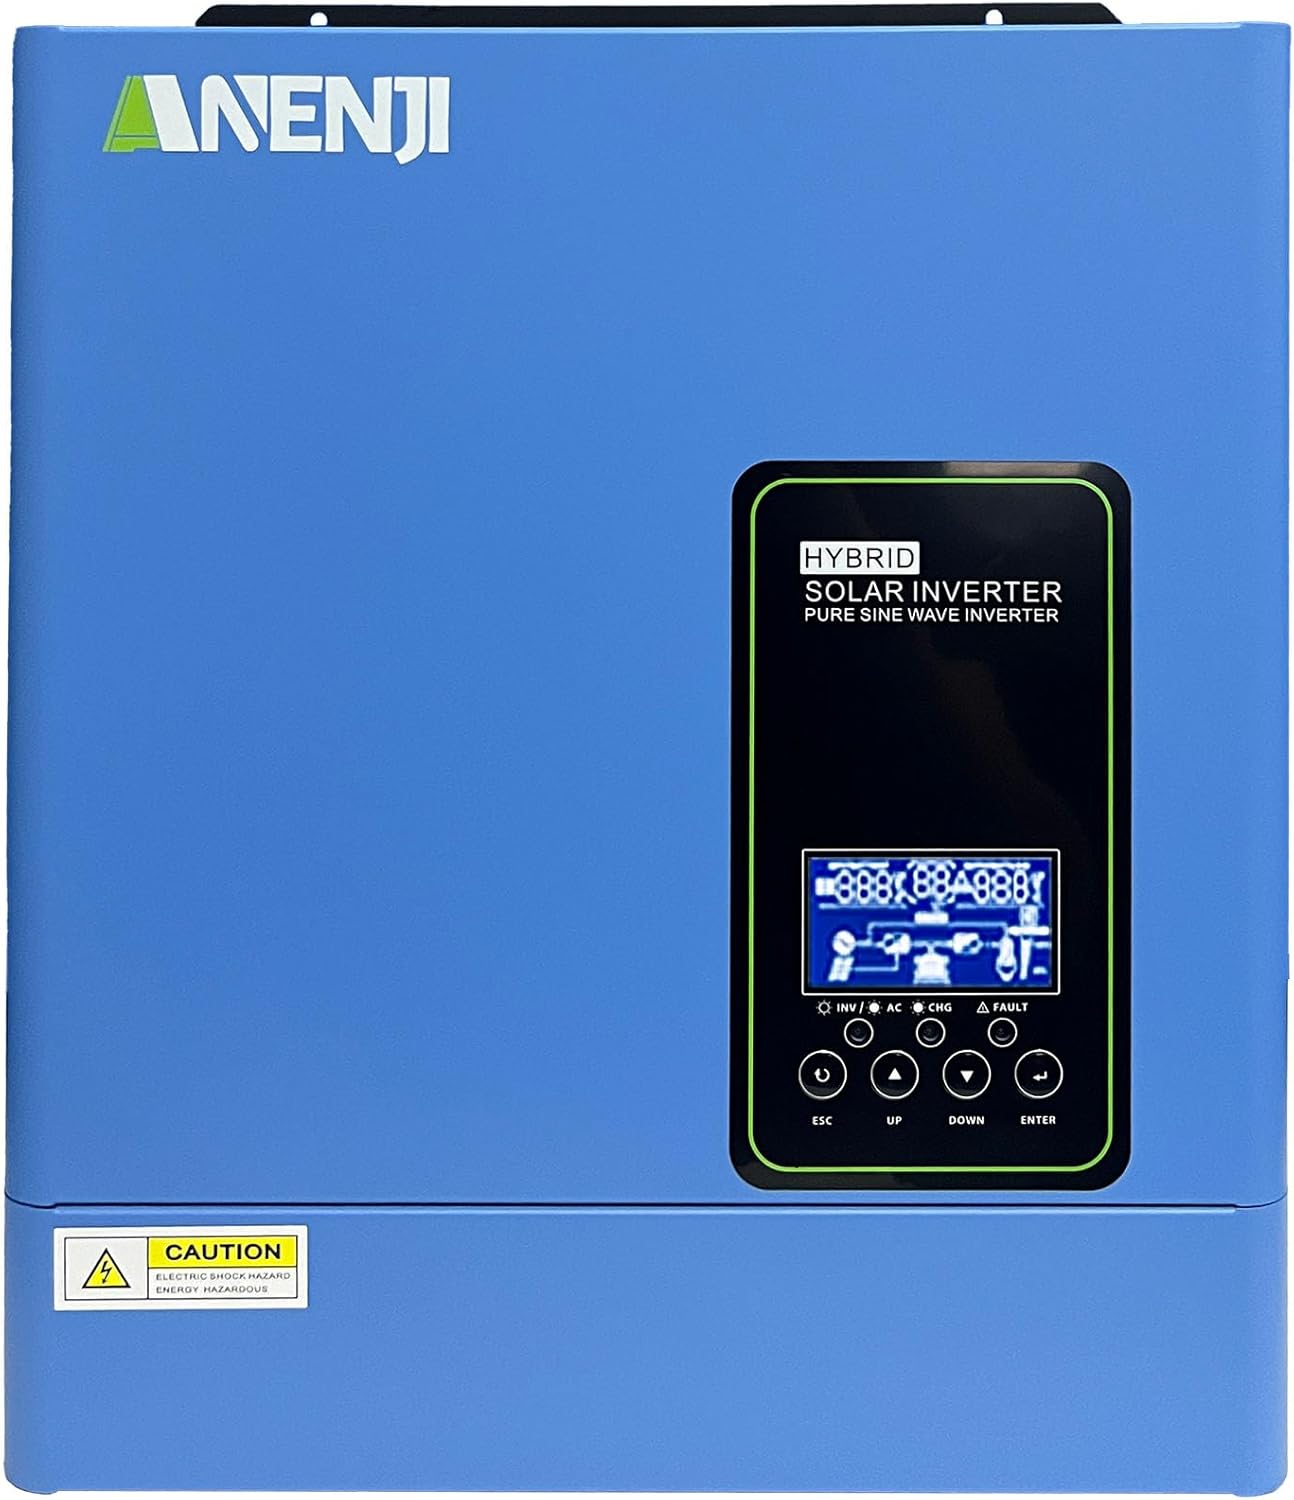
Figure 1.1 : Face avant view of the Aninerel 3000W Hybrid Solar Inverter. The inverter features a blue casing with the Aninerel logo and a central LCD display panel with control buttons.
2. Consignes de sécurité
Respectez toujours les consignes de sécurité suivantes afin de réduire les risques d'électrocution, d'incendie ou de blessure :
- Read all instructions and cautionary markings on the unit and in this manual before installation or operation.
- Do not disassemble the inverter. Refer servicing to qualified personnel. Incorrect reassembly may result in electric shock or fire.
- Pour réduire le risque de choc électrique, débranchez tout le câblage avant de tenter toute opération d’entretien ou de nettoyage.
- This inverter is designed for indoor or semi-outdoor use with an IP65 rating. Avoid direct exposure to rain or snow.
- Assurez une ventilation adéquate autour de l'onduleur pour éviter toute surchauffe. Ne bloquez pas les ouvertures de ventilation.
- Utilisez les outils appropriés et les équipements de protection individuelle lors de l'installation.
- Ensure all wiring connections are tight and secure to prevent loose connections that can cause overheating.
- Ne branchez pas l'onduleur au réseau électrique public sans autorisation et sans mesures de sécurité appropriées.
3. Produit terminéview
The Aninerel 3000W Hybrid Solar Inverter integrates a pure sine wave inverter, an MPPT solar charge controller, and a battery charger into one compact unit. It is designed to provide uninterrupted power support.
3.1 Principales caractéristiques
- Puissance de sortie en onde sinusoïdale pure de 3000 W : Converts 24V DC to 110V AC, providing stable power for sensitive electronics.
- Integrated 100A MPPT Solar Charge Controller: Maximizes solar energy harvesting with up to 500VDC PV input.
- Flexible Charging and Output Modes: Offers multiple modes (Solar Only, AC Priority, Hybrid Charging; Mains Priority, PV Priority, Hybrid Output) for diverse power management.
- Compatibilité étendue avec les batteries : Supports AGM, GEL, Lead-acid, Li-ion, and LiFePO4 24V batteries.
- Écran LCD intelligent : Provides real-time monitoring and allows for easy configuration of system settings.
- Wi-Fi intégré: Enables remote monitoring of the inverter status (registration required).
- Conception robuste : IP65-rated enclosure for durability in various environments, with intelligent cooling.
- Protections complètes : Inclut le survoltage, sous-voltage, reverse polarity, and short circuit protection.

Figure 3.1 : Panneau avant et arrièreview. This diagram labels the LCD display, indicators, function buttons, RS485 communication port, grounding terminal, battery input, dry contact port, built-in Wi-Fi, AC input, AC output, PV input, and power on/off switch.
3.2 Panneau avant et indicateurs
- Écran LCD : Shows system status, operational data, and configuration settings.
- Indicateur de charge : Illuminates to indicate battery charging status.
- Indicateur d'état : Provides general operational status of the inverter.
- Indicateur de défaut : Lights up to signal system errors or warnings.
- Touches de fonction (ÉCHAP, HAUT, BAS, ENTRÉE) : Utilisé pour naviguer dans les menus et ajuster les paramètres sur l'écran LCD.
3.3 Connexions du panneau arrière
- Port de communication RS485 : For external communication and monitoring.
- Borne de mise à la terre: Essentiel pour la mise à la terre de sécurité.
- Entrée de la batterie : Se connecte à la batterie 24V.
- Port de contact sec : Pour la commande ou la signalisation externe.
- Built-in Wi-Fi Module: For wireless monitoring.
- Entrée CA : Connects to grid utility or generator AC power.
- Sortie CA: Se raccorde aux appareils ménagers.
- Entrée photovoltaïque : Se connecte aux panneaux solaires.
- Interrupteur Marche/Arrêt : Contrôle l'alimentation principale de l'onduleur.
4. Installation et configuration
Proper installation is crucial for the safe and efficient operation of your hybrid solar inverter. Ensure all connections are made by a qualified electrician and adhere to local electrical codes.
4.1 Montage de l'onduleur
- Choisissez un emplacement approprié, sec, bien ventilé et protégé de la lumière directe du soleil et de l'humidité.
- Ensure sufficient clearance around the inverter for proper airflow and cooling.
- Montez l'onduleur verticalement sur une surface robuste à l'aide des fixations appropriées.
4.2 Connexions de câblage
Follow the wiring diagram carefully. All wiring should be performed with the inverter and all power sources disconnected.
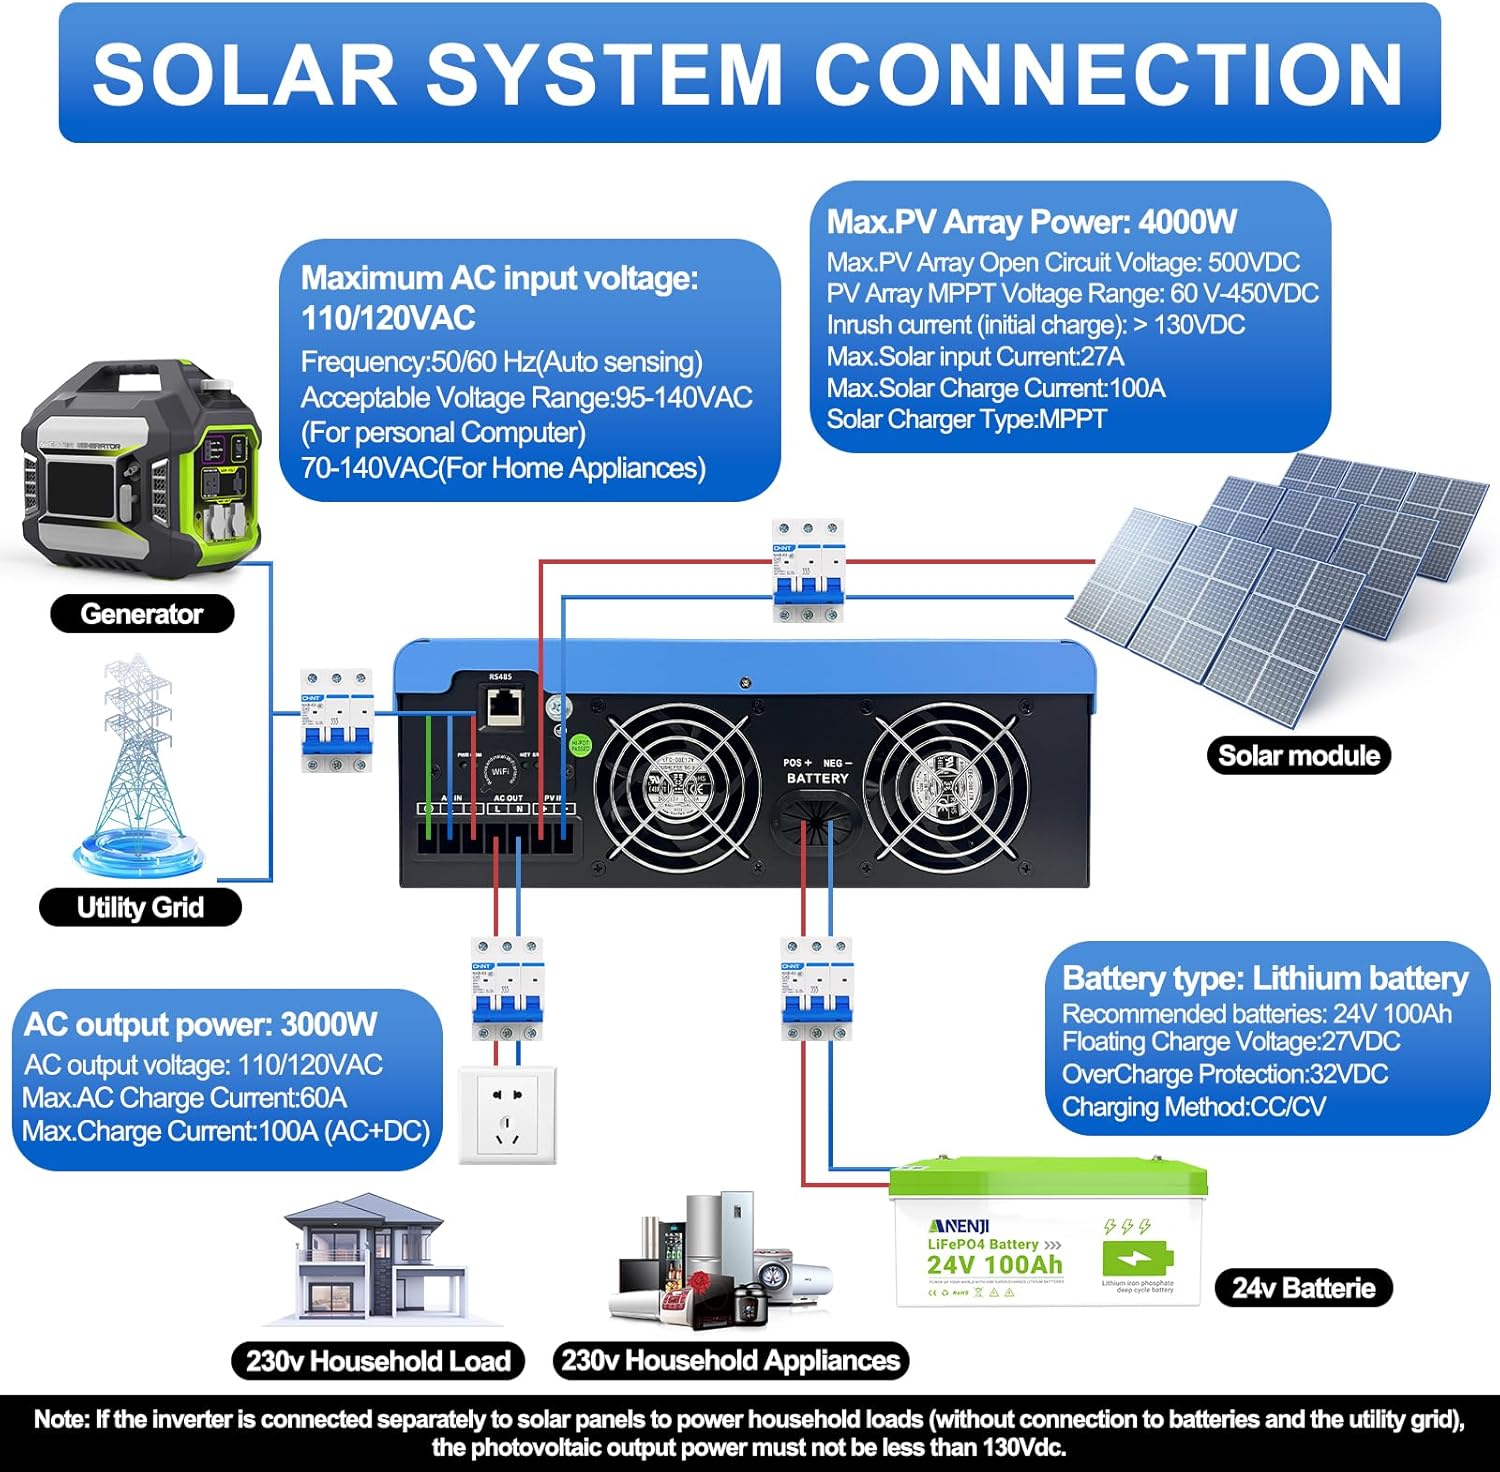
Figure 4.1: Solar System Connection Diagram. This diagram illustrates the connections for solar panels, generator, utility grid, 24V battery, and household loads to the inverter. It shows the PV input, battery input, AC input, and AC output terminals.
4.2.1 Connexion de la batterie
- Connect the 24V battery bank to the battery input terminals on the inverter. Ensure correct polarity (+ to + and - to -).
- Use appropriate cable gauges for the battery connections to handle the expected current.
- The ANJ-3KW-LV-WIFI model supports a 24-volt DC system and is recommended for use with batteries of at least 100 ampere-hours capacity.

Figure 4.2: Inverter Battery Connection. This diagram shows wiring configurations for both 12-volt and 24-volt battery systems, emphasizing correct series/parallel connections for the desired voltage.
4.2.2 Raccordement PV (panneau solaire)
- Raccordez le panneau solaire aux bornes d'entrée PV. Respectez la polarité.
- Assurez-vous que le volume total du circuit ouverttage of the PV array does not exceed 500VDC.
- The MPPT voltage range is 60-450VDC. Ensure your PV array voltage falls within this range for optimal charging.
4.2.3 Connexion d'entrée CA
- Connect the utility grid or generator AC power to the AC input terminals.
- The inverter supports 110/120VAC input with auto-sensing frequency (50/60Hz).
4.2.4 Connexion de sortie CA
- Connect your household loads or appliances to the AC output terminals.
- The inverter provides 3000W continuous AC output at 110/120VAC.
4.3 Mise sous tension initiale
- Une fois toutes les connexions sécurisées, mettez d'abord le disjoncteur de la batterie en marche.
- Then, switch on the PV array breaker (if applicable).
- Finally, switch on the AC input breaker (if applicable) and the inverter's main power switch.
- Observe the LCD display for initial boot-up and status indicators.
5. Fonctionnement
The inverter offers various configurable settings to optimize power management based on your specific needs.
5.1 Écran LCD et paramètres
The LCD display provides real-time information and allows you to configure operational parameters using the function buttons.
- Utilisez le UP et VERS LE BAS boutons pour naviguer dans les options du menu.
- Presse ENTRER pour sélectionner une option ou confirmer un paramètre.
- Presse ÉCHAP to exit a menu or cancel an action.
5.2 Charging Priority Modes
These settings determine how the battery bank is charged from available power sources.

Figure 5.1: Charger Source Priority. This diagram illustrates three charging priority options: Solar First (solar panels charge first, AC input only if solar is unavailable), Solar and AC Input Simultaneously (both solar and utility charge at the same time), and Solar Only (solar energy is the exclusive charging source).
- Le solaire d'abord : Prioritizes solar power for charging. AC input will only charge the battery when solar power is insufficient or unavailable.
- AC Priority (Utility Priority): Prioritizes AC input (utility or generator) for charging. Solar power will supplement or take over if AC input is unavailable.
- Solaire uniquement : The inverter will only charge the battery bank from solar power. AC input will not be used for charging.
5.3 Modes de priorité de sortie
These settings determine the power source for your connected loads.

Figure 5.2: Output Source Priority. This diagram shows three output priority options: Solar First (power from solar first, AC input supplements if solar is insufficient), AC First (redirects AC input to power loads, uses solar/batteries when AC is unavailable), and DC Priority (prioritizes solar first, then battery, then AC input only when voltage drops to a programmable value).
- Priorité au solaire (PV) : Prioritizes solar power to supply loads. If solar power is insufficient, the battery bank will supplement, and then AC input will be used.
- AC First (Mains Priority): Prioritizes AC input (utility or generator) to power loads. If AC input is unavailable, the inverter will switch to battery power.
- DC Priority (Battery Priority): Prioritizes solar power first, then battery power. AC input will only engage when the battery voltage drops below a programmable threshold.
5.4 Surveillance Wi-Fi
The built-in Wi-Fi module allows for remote monitoring of your inverter's performance and status via a dedicated application. Registration may be required to access this feature.

Figure 5.3: Wi-Fi Monitoring. This image depicts a user monitoring the hybrid inverter's status wirelessly via a smartphone application, highlighting the convenience of the built-in Wi-Fi feature.
6. Entretien
Regular maintenance helps ensure the longevity and optimal performance of your Aninerel Hybrid Solar Inverter.
- Nettoyage: Nettoyez régulièrement l'extérieur de l'onduleur avec un chiffon sec. Assurez-vous que les ouvertures de ventilation sont exemptes de poussière et de débris.
- Relations: Annually check all electrical connections (battery, PV, AC input/output) for tightness and corrosion. Tighten any loose connections.
- Environnement: Veillez à ce que l'environnement d'installation reste dans les plages de température et d'humidité spécifiées.
- Micrologiciel : Vérifiez le fabricant website pour toute mise à jour du micrologiciel disponible pour des performances améliorées ou de nouvelles fonctionnalités.
7. Dépannage
Cette section propose des solutions aux problèmes courants que vous pourriez rencontrer. Si le problème persiste, contactez le service client.
| Problème | Cause possible | Solution |
|---|---|---|
| L'onduleur ne s'allume pas | Aucune connexion de batterie ou volume de batterie faibletage; Power switch off; Loose wiring. | Vérifiez les connexions de la batterie et le voltage; Ensure power switch is ON; Verify all wiring is secure. |
| Pas de sortie CA | Overload; Short circuit on output; Inverter in fault mode; Output priority setting. | Reduce load; Check for short circuits; Refer to LCD fault codes; Adjust output priority settings. |
| La batterie ne se charge pas à partir de l'énergie solaire. | Vol PV faibletage; Incorrect PV connection; Solar charging disabled; Faulty solar panels. | Vérifiez le volume du générateur PVtage (must be >60VDC); Verify PV polarity; Check charging priority settings; Inspect solar panels. |
| Avertissement de surchauffe | Insufficient ventilation; Excessive ambient temperature; Overload. | Ensure clear airflow around inverter; Relocate to cooler area; Reduce connected load. |
| La surveillance Wi-Fi ne fonctionne pas | No Wi-Fi signal; Incorrect app configuration; Registration issue. | Check Wi-Fi signal strength; Reconfigure app settings; Contact support for registration issues. |
8. Spécifications
Technical specifications for the Aninerel 3000W Hybrid Solar Inverter ANJ-3KW-LV-WIFI:
| Fonctionnalité | Spécification |
|---|---|
| Numéro de modèle | ANJ-3KW-LV-WIFI |
| Puissance de sortie continue | 3000 W |
| Puissance de sortie maximale | 6000 W |
| Vol d'entrée CCtage | 24V |
| Vol de sortie CAtage | 110 V c.a. |
| Forme d'onde de sortie | Onde sinusoïdale pure |
| Puissance d'entrée PV max. | 4000 W |
| Courant du contrôleur MPPT | 100A |
| Max. Volume de circuit ouvert PVtage | 500 V CC |
| Vol MPPT du générateur photovoltaïquetaget gamme | 60-450 VCC |
| Courant d'entrée CA max. | 60A |
| Fréquence de sortie | 50/60 Hz (détection automatique) |
| Compatibilité de la batterie | AGM, GEL, Lead-acid, Li-ion, LiFePO4 (24V) |
| Indice de protection | IP65 |
| Dimensions du produit | 15 x 6.98 x 18 pouces |
| Poids de l'article | 16.5 livres |
9. Garantie et assistance
For warranty information, please refer to the warranty card included with your product or visit the official Aninerel website. For technical support, troubleshooting assistance, or service inquiries, please contact Aninerel customer service through their official channels.
Manufacturer: Shenzhen Anenji Energy Technology Co.,Ltd